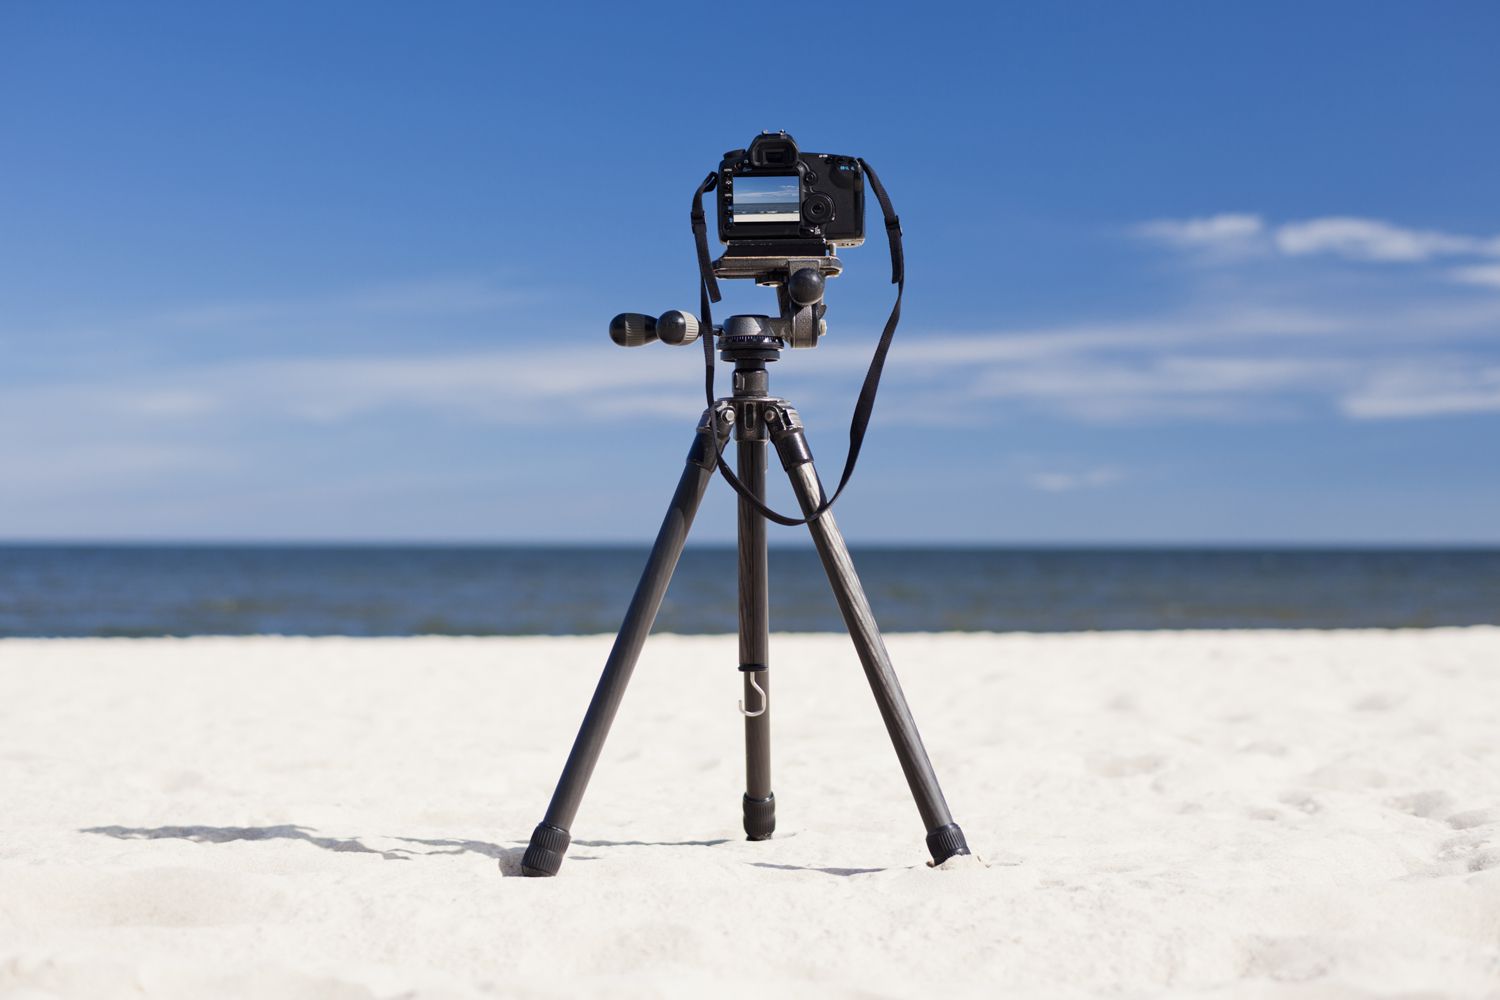
Choose the Right Camera
When it comes to blurring the background with a digital camera, the first step is to choose the right camera. While it’s true that almost any camera can achieve some level of background blur, certain cameras are better suited for this purpose. Here are a few factors to consider when selecting a camera:
- Sensor Size: Cameras with larger sensors tend to produce better background blur. Full-frame or APS-C cameras are ideal choices for creating that desirable bokeh effect.
- Interchangeable Lens System: Cameras with interchangeable lenses provide more flexibility, allowing you to select lenses optimized for shallow depth of field.
- Low Light Performance: Look for cameras that perform well in low-light conditions. They tend to have higher ISO capabilities, which can help achieve a shallower depth of field.
By considering these factors, you can find a camera that provides the necessary features and capabilities to achieve the desired background blur in your photographs.
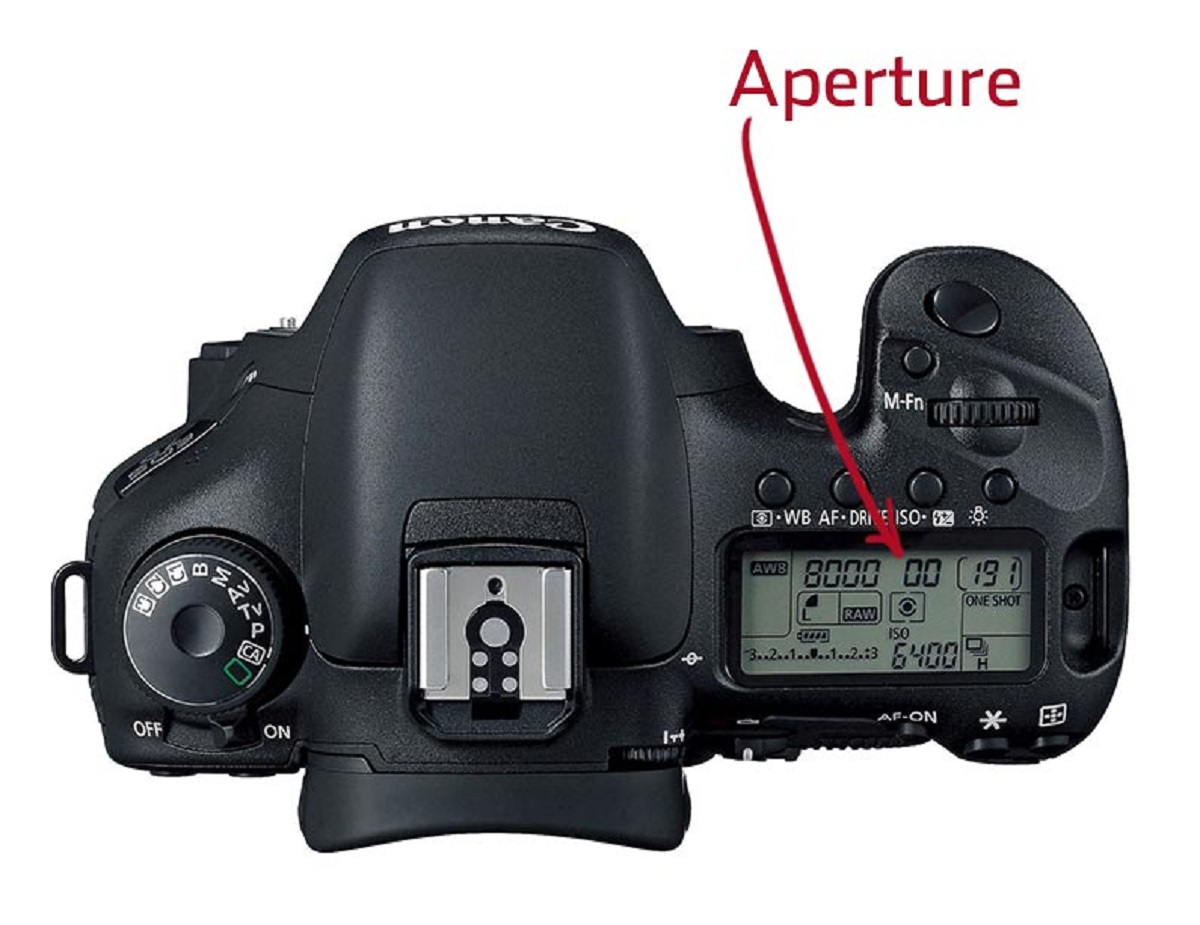
Understand Aperture
Aperture is a fundamental aspect of photography that plays a crucial role in determining the amount of background blur in your images. It refers to the opening in the lens through which light enters the camera. Understanding aperture and how it affects your photos is key to achieving a beautiful blurred background.
Aperture is represented by an “f-stop” value, such as f/2.8 or f/16. The lower the f-stop number, the wider the aperture and the shallower the depth of field. To effectively blur the background, you’ll want to use a wider aperture (lower f-stop) to create a shallow depth of field.
Keep in mind that changing the aperture not only affects the depth of field but also influences the amount of light that enters the camera. A wider aperture lets in more light, which is ideal for shooting in low-light conditions, while a narrower aperture allows less light and is useful for capturing scenes with more depth in focus.
It’s important to note that the maximum aperture setting will depend on the lens you are using. Some lenses have a fixed maximum aperture, while others offer variable apertures. A lens with a wider maximum aperture (e.g., f/1.8 or f/1.4) will grant you greater control over background blur.
Experimenting with different aperture settings will help you understand how it impacts the overall look of your photos. By mastering the concept of aperture, you can manipulate the depth of field to achieve the desired level of background blur in your images.
Use a Wide Aperture
One of the most effective ways to achieve a blurred background with a digital camera is to use a wide aperture. A wide aperture refers to a low f-stop number, such as f/1.8 or f/2.8. Here’s how you can use a wide aperture to blur the background:
1. Select Aperture Priority Mode: Switch your camera to Aperture Priority (A/Av) mode, which allows you to set the desired aperture while the camera automatically adjusts the other settings.
2. Set a Low F-stop: Dial in a low f-stop number to create a wide aperture. The wider the aperture, the shallower the depth of field, resulting in a more pronounced background blur.
3. Consider the Subject Distance: Pay attention to the distance between your camera, the subject, and the background. The closer you are to the subject, the more pronounced the background blur will appear.
4. Focus on the Subject: Ensure that your primary subject is in sharp focus. Use autofocus or manually focus to make sure the subject is crisp while the background remains blurred.
5. Adjust Composition: Frame your shot in a way that emphasizes the subject while minimizing distractions from the background. Consider using the rule of thirds or leading lines to guide the viewer’s attention to the main subject.
Using a wide aperture not only effectively blurs the background but also helps to isolate your subject, making it stand out and creating a visually pleasing image. Experiment with different aperture settings to find the right balance between sharpness and background blur for your desired effect.
Get Closer to the Subject
One technique to enhance the background blur in your photos is to get closer to your subject. By physically reducing the distance between your camera and the subject, you can increase the depth of field and create a more pronounced blur in the background. Here are some steps to follow:
1. Assess the Scene: Before capturing the shot, evaluate the surroundings to determine the best angle and composition. Take note of any potential distractions in the background that you want to minimize or eliminate with the blur effect.
2. Move Closer: Step closer to your subject while maintaining focus on the main subject. Be careful not to get too close, as you don’t want to unintentionally blur the subject itself. Experiment with different distances to find the sweet spot where the desired background blur is achieved.
3. Use a Longer Focal Length: If you have a zoom lens or a lens with different focal lengths, try using a longer focal length. Longer focal lengths naturally compress the background and create a shallower depth of field, leading to more prominent blur.
4. Adjust Camera Settings: Ensure that you’re using a wide aperture (low f-stop number) to achieve the desired level of background blur. You may need to adjust other camera settings such as ISO and shutter speed to maintain proper exposure.
5. Focus on the Subject: Pay attention to the focus point and make sure your main subject remains sharp and in focus. Use autofocus or manual focus to ensure accuracy.
By getting closer to your subject, you can create a stronger separation between the subject and the background, resulting in a more visually appealing and dramatic blurred background effect in your photographs.
Increase the Distance Between Subject and Background
Another effective technique for achieving a blurred background is to increase the distance between your subject and the background. By creating a greater distance between the two elements, you can enhance the depth of field and create a more pronounced blur. Here’s how you can do it:
1. Assess the Environment: Before taking the shot, evaluate the scene and identify elements in the background that you want to blur. Look for a clear and uncluttered area where you can position your subject and increase the separation between the subject and the background.
2. Position Your Subject: Move your subject away from the background, creating a significant distance between them. The larger the distance, the more pronounced the background blur will be.
3. Use a Telephoto Lens: If you have a telephoto lens, use it to your advantage. Telephoto lenses have a narrower angle of view and compress the background, making it appear closer to the subject. This compression enhances the background blur and creates a more visually appealing image.
4. Adjust Camera Settings: While increasing the distance between the subject and the background helps in achieving a blurred background, don’t forget to adjust other camera settings. Set your camera to use a wide aperture (low f-stop number) to further enhance the shallow depth of field. You might also need to adjust other settings like ISO and shutter speed to maintain proper exposure.
5. Focus on the Subject: Ensure that your subject remains in sharp focus while the background becomes blurred. Use autofocus or manual focus to achieve accurate and precise focusing.
By increasing the distance between your subject and the background, you can create a greater depth of field and produce a significant blur, resulting in a visually appealing and captivating effect in your photographs.
Use a Telephoto Lens
When looking to achieve a beautifully blurred background, using a telephoto lens can be a game-changer. Telephoto lenses have a longer focal length, which allows you to capture distant objects in more detail and compress the background, resulting in a more pronounced background blur. Here’s how you can maximize the potential of a telephoto lens:
1. Choose the Right Telephoto Lens: Telephoto lenses come in various focal lengths, ranging from 70mm to 200mm or even longer. The longer the focal length, the more significant the compression effect and background blur you can achieve. Consider your shooting style and subject matter to select an appropriate telephoto lens for your needs.
2. Position Yourself and the Subject: To make the most of the telephoto lens, position yourself some distance away from your subject. This will allow you to zoom in and create a shallower depth of field, resulting in a more appealing background blur. Experiment with different distances until you achieve the desired effect.
3. Use a Wide Aperture: Combine the telephoto lens with a wide aperture (low f-stop number) to further enhance the background blur. A wide aperture will decrease the depth of field and help isolate your subject from the background, making it stand out more prominently in the photo.
4. Carefully Compose Your Shot: With a telephoto lens, it’s essential to pay attention to composition. Consider the elements in the frame, the position of your subject, and how they interact with the background. Look for interesting angles, leading lines, or naturally blurred elements that can enhance the overall composition and make your subject pop.
5. Steady Your Shot: Due to the longer focal length, telephoto lenses can magnify even the slightest camera shake. To ensure sharpness in your subject while maintaining a blurred background, use a tripod or stabilize yourself by resting your camera on a solid surface or using image stabilization techniques.
By utilizing a telephoto lens effectively, you can capture stunning images with a beautifully blurred background that adds depth, separation, and visual appeal to your photographs.
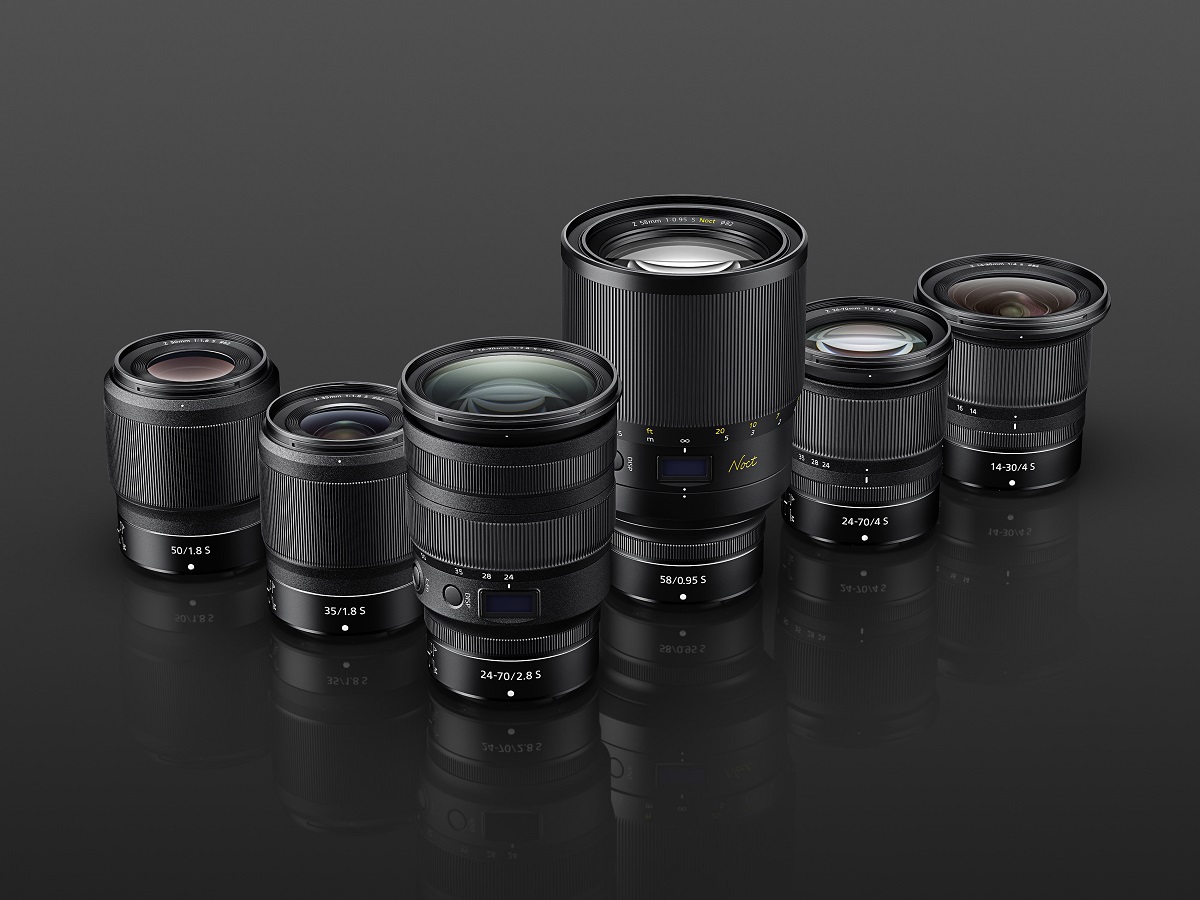
Use a Prime Lens
When it comes to creating a stunning blurred background, using a prime lens can make a significant difference. Unlike zoom lenses, which have a variable focal length, prime lenses have a fixed focal length, allowing for optimal image quality and wider maximum apertures. Here’s how you can make the most of a prime lens:
1. Benefit from Wide Aperture: Prime lenses are known for their wide maximum apertures, such as f/1.8 or even wider. These wider apertures enable a shallower depth of field, creating a more pronounced background blur. Select the widest aperture available on your prime lens to achieve the desired effect.
2. Choose the Right Focal Length: Prime lenses come in various focal lengths, from wide-angle to telephoto. To achieve a blurred background, consider using a prime lens with a slightly longer focal length, such as 50mm or 85mm. These focal lengths allow you to isolate your subject and create a greater separation between the subject and the background.
3. Focus on Your Subject: With a prime lens, you have more control over focusing. Use autofocus or manual focus to ensure your subject is sharp while the background remains blurred. Pay attention to the depth of field, especially when shooting at wide apertures, as the focus area can be quite narrow.
4. Mind Your Composition: With the fixed focal length of a prime lens, you may need to move around to adjust your composition. Be mindful of the elements in the frame, including the background. Position your subject in a way that minimizes potential distractions, and use the blurred background to create a visually appealing and engaging composition.
5. Embrace the Optimal Image Quality: Prime lenses are renowned for their exceptional image quality. Take advantage of this by capturing sharp details in your subject while enjoying the beautiful bokeh in the blurred background. The prime lens will likely produce images with superb clarity and edge-to-edge sharpness.
By utilizing a prime lens, you can capitalize on the wider aperture and fixed focal length to create stunning images with a beautifully blurred background. Experiment with different focal lengths and compositions to achieve unique and captivating results.
Use a Lens with a Longer Focal Length
If you want to achieve a pronounced blur in the background, using a lens with a longer focal length can greatly enhance your results. Longer focal length lenses, often referred to as telephoto lenses, provide a narrower angle of view, which can compress the background and create a more visually appealing background blur. Here’s how you can effectively use a lens with a longer focal length:
1. Understand Focal Length: Focal length determines the angle of view and magnification of your lens. A longer focal length, such as 200mm or higher, will allow you to tightly frame your subject and create more background separation.
2. Achieve Magnification: By utilizing a longer focal length, you can magnify the size of your subject and compress the distance between the subject and the background. This compression effect enhances the shallow depth of field and increases the background blur.
3. Increase Distance: Position yourself further away from your subject, while ensuring that the subject remains the focus of your image. Increasing the distance between your subject and the background will intensify the background blur, making your subject stand out more distinctly.
4. Select Wide Aperture: Using a wide aperture (low f-stop number) in combination with a longer focal length will further enhance the background blur. Choose the widest aperture available on your lens to achieve a shallower depth of field and beautifully blurred background.
5. Mind Your Composition: With a longer focal length, you may need to adjust your composition and framing to capture only the essential elements. Pay attention to the background and ensure it doesn’t distract from the main subject. Experiment with different angles and perspectives to find the most pleasing composition.
Using a lens with a longer focal length allows you to create stunning images with a captivating background blur. Embrace the compression effect and experiment with distance, aperture, and composition to achieve your desired aesthetic.
Shoot in Manual Mode
When it comes to capturing a blurred background with your digital camera, shooting in manual mode provides you with full control over your camera’s settings. Manual mode allows you to make intentional adjustments to aperture, shutter speed, and ISO to achieve the desired background blur. Here’s how shooting in manual mode can help you capture stunning images:
1. Adjust the Aperture: Start by setting a wide aperture (low f-stop number) to achieve a shallow depth of field. This will help create a pronounced background blur while keeping your subject in sharp focus. Experiment with different aperture settings until you achieve the desired effect.
2. Manage the Shutter Speed: In manual mode, you have control over the shutter speed. Keep in mind that a wider aperture allows more light to enter the camera, which may require faster shutter speeds to maintain proper exposure. Adjust the shutter speed accordingly, ensuring that it is fast enough to avoid camera shake and capture a sharp image.
3. Set the ISO: ISO determines the camera’s sensitivity to light. In most cases, when shooting in manual mode, it is recommended to keep the ISO as low as possible to minimize noise in the image. However, in low-light situations, you may need to increase the ISO slightly to maintain a proper exposure. Be mindful of the balance between ISO, aperture, and shutter speed to achieve the desired outcome.
4. Monitor the Exposure: Shooting in manual mode requires you to keep an eye on the exposure meter in your camera’s viewfinder or LCD screen. The exposure meter indicates whether the image is underexposed, overexposed, or properly exposed. Adjust your settings accordingly to achieve the desired exposure while still maintaining the depth of field and background blur you desire.
5. Take Test Shots and Review: After setting your exposure parameters, take a few test shots and review the results on your camera’s LCD screen. Pay attention to the sharpness of your subject and the level of background blur. If needed, make further adjustments to aperture, shutter speed, or ISO until you achieve the desired effect.
Shooting in manual mode empowers you to have full control over the camera settings, allowing you to intentionally create a beautifully blurred background. It may require some practice and experimentation, but the results will be worth it as you capture stunning and visually captivating images.
Use Manual Focus
When aiming to achieve a blurred background with your digital camera, using manual focus can be advantageous. Manual focus gives you complete control over where you want the focal point to be, ensuring that your subject remains sharp while the background becomes beautifully blurred. Here’s how you can effectively use manual focus:
1. Switch to Manual Focus Mode: Locate the switch on your camera or lens to change the focus mode from autofocus to manual focus. This allows you to take full control over focusing on your subject.
2. Zoom in for Precision: Utilize the zoom function on your camera to magnify your subject. This will allow you to see details more clearly, making it easier to achieve precise focus manually.
3. Take Your Time: Unlike autofocusing, manual focus requires patience and attentiveness. Take your time to adjust the focus ring on the lens until your subject is sharp and in focus. Make small adjustments and examine the results through the viewfinder or on the camera’s LCD screen.
4. Consider Focus Peaking: Some digital cameras offer a feature called focus peaking, which highlights areas of the image that are in focus. Enable this feature if your camera has it, as it can greatly assist in achieving accurate manual focus.
5. Focus on the Subject: Pay close attention to your subject and ensure that it remains the focal point of the image. By achieving precise manual focus, you can create a beautiful separation between the subject and the blurred background.
6. Review and Refine: After capturing the shot, review the image on your camera’s LCD screen. Zoom in to ensure that your subject is tack sharp while the background is pleasingly blurred. Evaluate the overall composition and make any necessary adjustments to achieve your desired effect.
Using manual focus allows you to have complete control over the focus point, resulting in a more intentional and visually appealing blurred background. Practice with different subjects and experiment with manual focus to master this technique and take your images to the next level.
Adjust the ISO
When trying to achieve a blurred background with your digital camera, adjusting the ISO setting can significantly impact the overall image. ISO controls the sensitivity of your camera’s sensor to light. By carefully manipulating the ISO, you can maintain the desired exposure while enhancing the depth of field and background blur. Here’s how you can effectively adjust the ISO:
1. Understand ISO Range: Familiarize yourself with the ISO range of your camera. Most cameras have a base ISO typically around 100 or 200, which provides the least amount of sensitivity to light. Higher ISO values, such as 400, 800, or 1600, increase the sensitivity, making it easier to capture properly exposed images in low-light situations.
2. Keep ISO as Low as Possible: In general, it’s best to keep the ISO as low as possible to minimize noise and maintain the highest image quality. Start by setting the ISO to the lowest value available (e.g., ISO 100 or 200) and adjust it as necessary.
3. Assess the Lighting Conditions: Evaluate the available light in your shooting environment. In situations with ample light, such as during outdoor photography in bright daylight, you can keep the ISO low to maintain optimal image quality and achieve a sharp background blur.
4. Increase ISO in Low-Light Situations: When shooting in low-light conditions or situations where using a wide aperture and faster shutter speed is necessary, you may need to increase the ISO to maintain a proper exposure. Remember that noise may be more apparent at higher ISO values, so find the balance where the background blur enhancement is worth the potential noise.
5. Test and Fine-Tune: Take test shots at different ISO settings and review the results on your camera’s LCD screen or computer. Evaluate the exposure, level of noise, and background blur in each shot. Adjust the ISO as needed until you achieve the desired balance between exposure and background blur.
By adjusting the ISO setting in your camera, you can effectively control the exposure while enhancing the background blur in your images. Remember to strike a balance between maintaining image quality and achieving the desired effect by finding the optimal ISO for each shooting situation.
Consider the Distance Between Subject and Camera
When aiming to create a blurred background with your digital camera, it’s crucial to consider the distance between your subject and the camera. The distance plays a significant role in achieving the desired depth of field and background blur. By carefully managing this distance, you can enhance the separation between the subject and the background, resulting in a more visually appealing image. Here’s how you can effectively consider the distance between the subject and the camera:
1. Evaluate the Shooting Environment: Before capturing the shot, assess the surroundings and identify a clear space where you can position your subject. Look for a background that is uncluttered, pleasing, and will enhance the overall composition.
2. Get Closer or Step Back: Adjust the distance between yourself and the subject accordingly. If you want a more pronounced background blur, get closer to your subject. By reducing the distance, you increase the depth of field and create more separation between the subject and the background. Conversely, if you want a softer background blur, step back from your subject.
3. Experiment with Different Distances: Don’t be afraid to experiment with various subject-to-camera distances to achieve different levels of background blur. Move closer or farther away as needed, keeping in mind the desired effect you wish to achieve in your image.
4. Consider the Lens and Focal Length: Different lenses and focal lengths will have varying effects on the background blur. For instance, using a telephoto lens can compress the background and increase the blur, while a wide-angle lens may result in less pronounced blur. Take into account the characteristics of your lens and adjust your subject-to-camera distance accordingly.
5. Carefully Compose Your Shot: Pay attention to the composition of your image. Use the rule of thirds, leading lines, or framing techniques to guide the viewer’s attention towards the subject. Ensure that the subject is the main focus of the image, with the background serving as a complement or supporting element.
By considering the distance between your subject and the camera, you can effectively control the depth of field and background blur in your images. Experiment with different distances and lens options to find the right balance that helps you achieve your desired artistic effect.