Introduction
Welcome to this guide on how to attach the Kitchen Aid Ice Cream Maker. If you’re a fan of homemade ice cream, this attachment is a must-have for your Kitchen Aid stand mixer. It allows you to churn delicious ice cream, sorbet, and gelato right in your own kitchen.
With this attachment, you can say goodbye to store-bought ice cream and enjoy the creative freedom of making your own unique flavors. Whether you’re hosting a summer party or simply want to indulge in a refreshing treat, the Kitchen Aid Ice Cream Maker will become your go-to appliance.
Don’t worry if you’re new to using attachments with your Kitchen Aid stand mixer – we’ll guide you through the simple steps to get started. By following this step-by-step tutorial, you’ll be well on your way to making creamy, homemade ice cream that will impress your friends and family.
Before we begin, make sure you have all the necessary equipment and ingredients. It’s important to be prepared so that you can fully enjoy the ice cream-making process without any interruptions.
Now, let’s dive into the exciting world of handcrafted frozen treats with the Kitchen Aid Ice Cream Maker!
What You Will Need
Before you get started with attaching the Kitchen Aid Ice Cream Maker, it’s important to gather all the necessary tools and ingredients. Here’s a checklist of what you’ll need:
- Kitchen Aid Stand Mixer: Make sure you have a compatible Kitchen Aid stand mixer model that can accommodate the Ice Cream Maker attachment. The attachment is designed to fit specifically on Kitchen Aid stand mixers.
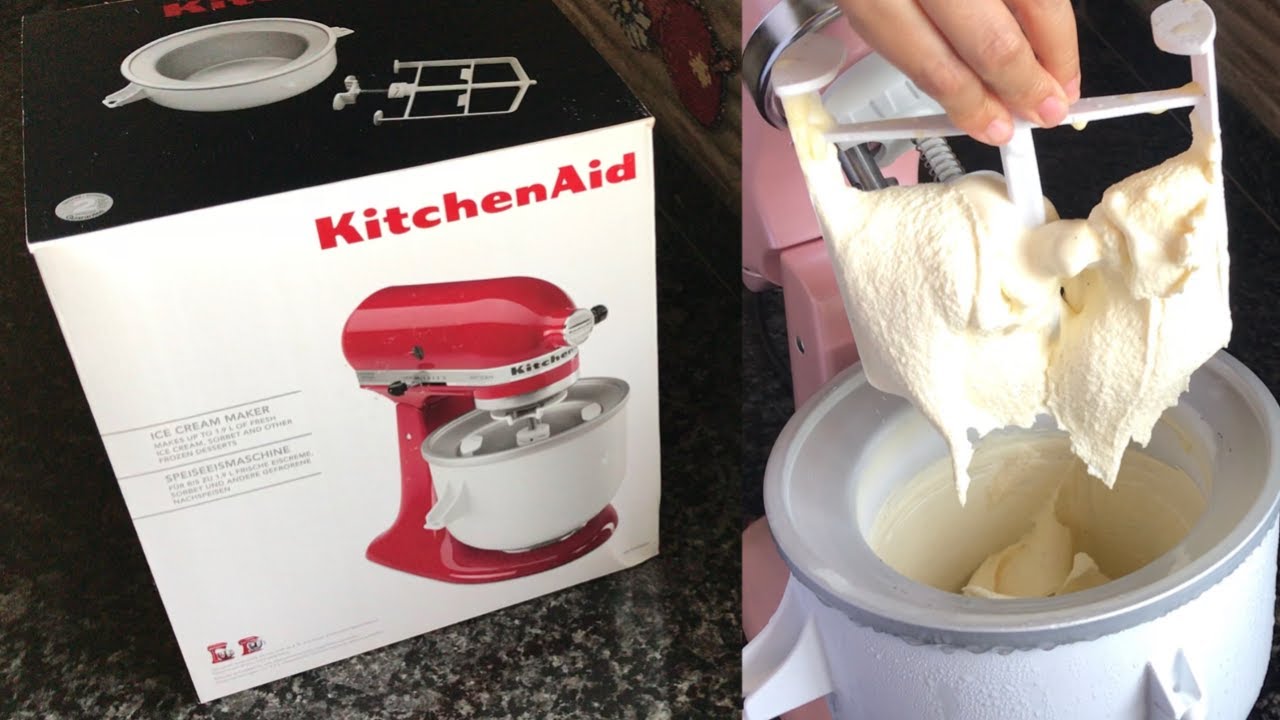
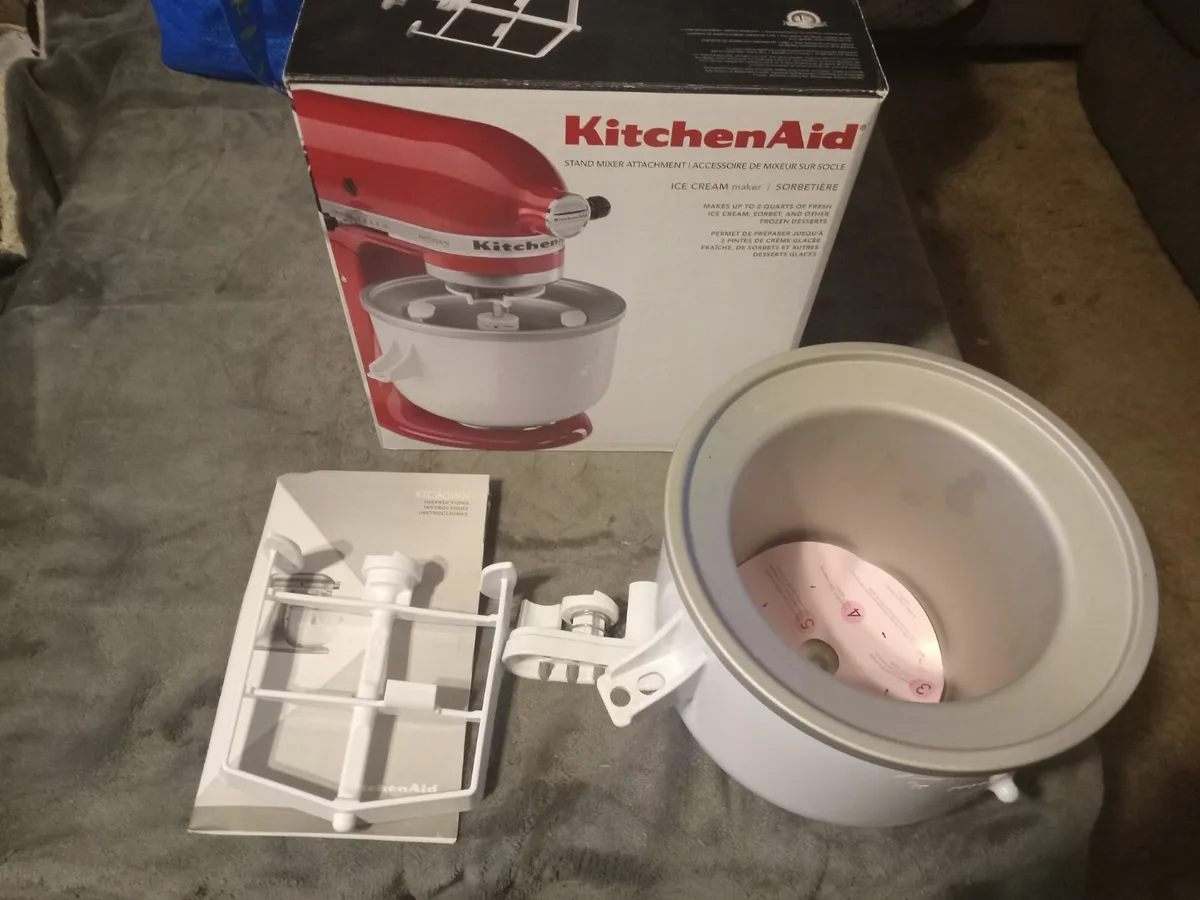
- Kitchen Aid Ice Cream Maker Attachment: This is the star of the show! You’ll need the actual Ice Cream Maker attachment, which includes the freezer bowl, dasher, and drive assembly. If you don’t already have this attachment, you can easily purchase it online or at a Kitchen Aid retailer.
- Freezer Space: You’ll need enough freezer space to accommodate the freezer bowl. Make sure there’s enough room for the bowl to freeze for a minimum of 15 hours before you begin making ice cream.
- Ice Cream Ingredients: Decide on the flavor of ice cream you’d like to make and gather the necessary ingredients. This typically includes a base mixture of cream, milk, sugar, and eggs, along with any flavorings or mix-ins you desire.
- Measuring Tools: To ensure accuracy in your ice cream recipe, have measuring cups and spoons on hand for precise ingredient measurements. A kitchen scale can also be helpful for measuring solid ingredients by weight.
- Mixing Bowls and Whisk: Depending on your ice cream recipe, you may need mixing bowls to combine and whisk together the ingredients. It’s always handy to have a variety of sizes to accommodate different recipes.
- Spatula or Wooden Spoon: A spatula or wooden spoon will come in handy for scraping down the sides of the bowl or incorporating mix-ins into the ice cream mixture.
- Ice Cream Containers: Once your ice cream is ready, you’ll need containers to store it in. Choose containers that are freezer-safe and have a tight-sealing lid to prevent freezer burn.
By gathering all these items beforehand, you’ll ensure a smooth and enjoyable experience when attaching the Kitchen Aid Ice Cream Maker and making your homemade frozen treats.
Step 1: Assemble the Ice Cream Maker Attachment
The first step to using the Kitchen Aid Ice Cream Maker is to assemble the attachment. Follow these simple instructions to ensure proper assembly:
- Freeze the Freezer Bowl: Before assembling the attachment, make sure the freezer bowl is completely frozen. Place the bowl in the freezer for a minimum of 15 hours (or as recommended by the manufacturer) to ensure it’s properly chilled.
- Prepare the Dasher: Take the dasher out of the box and ensure it’s clean. Attach the drive assembly to the dasher by aligning the tabs and twisting it until it locks securely in place.
- Attach the Dasher to the Freezer Bowl: Remove the freezer bowl from the freezer and place it on a flat, stable surface. Insert the dasher into the bowl’s opening, making sure it’s seated securely.
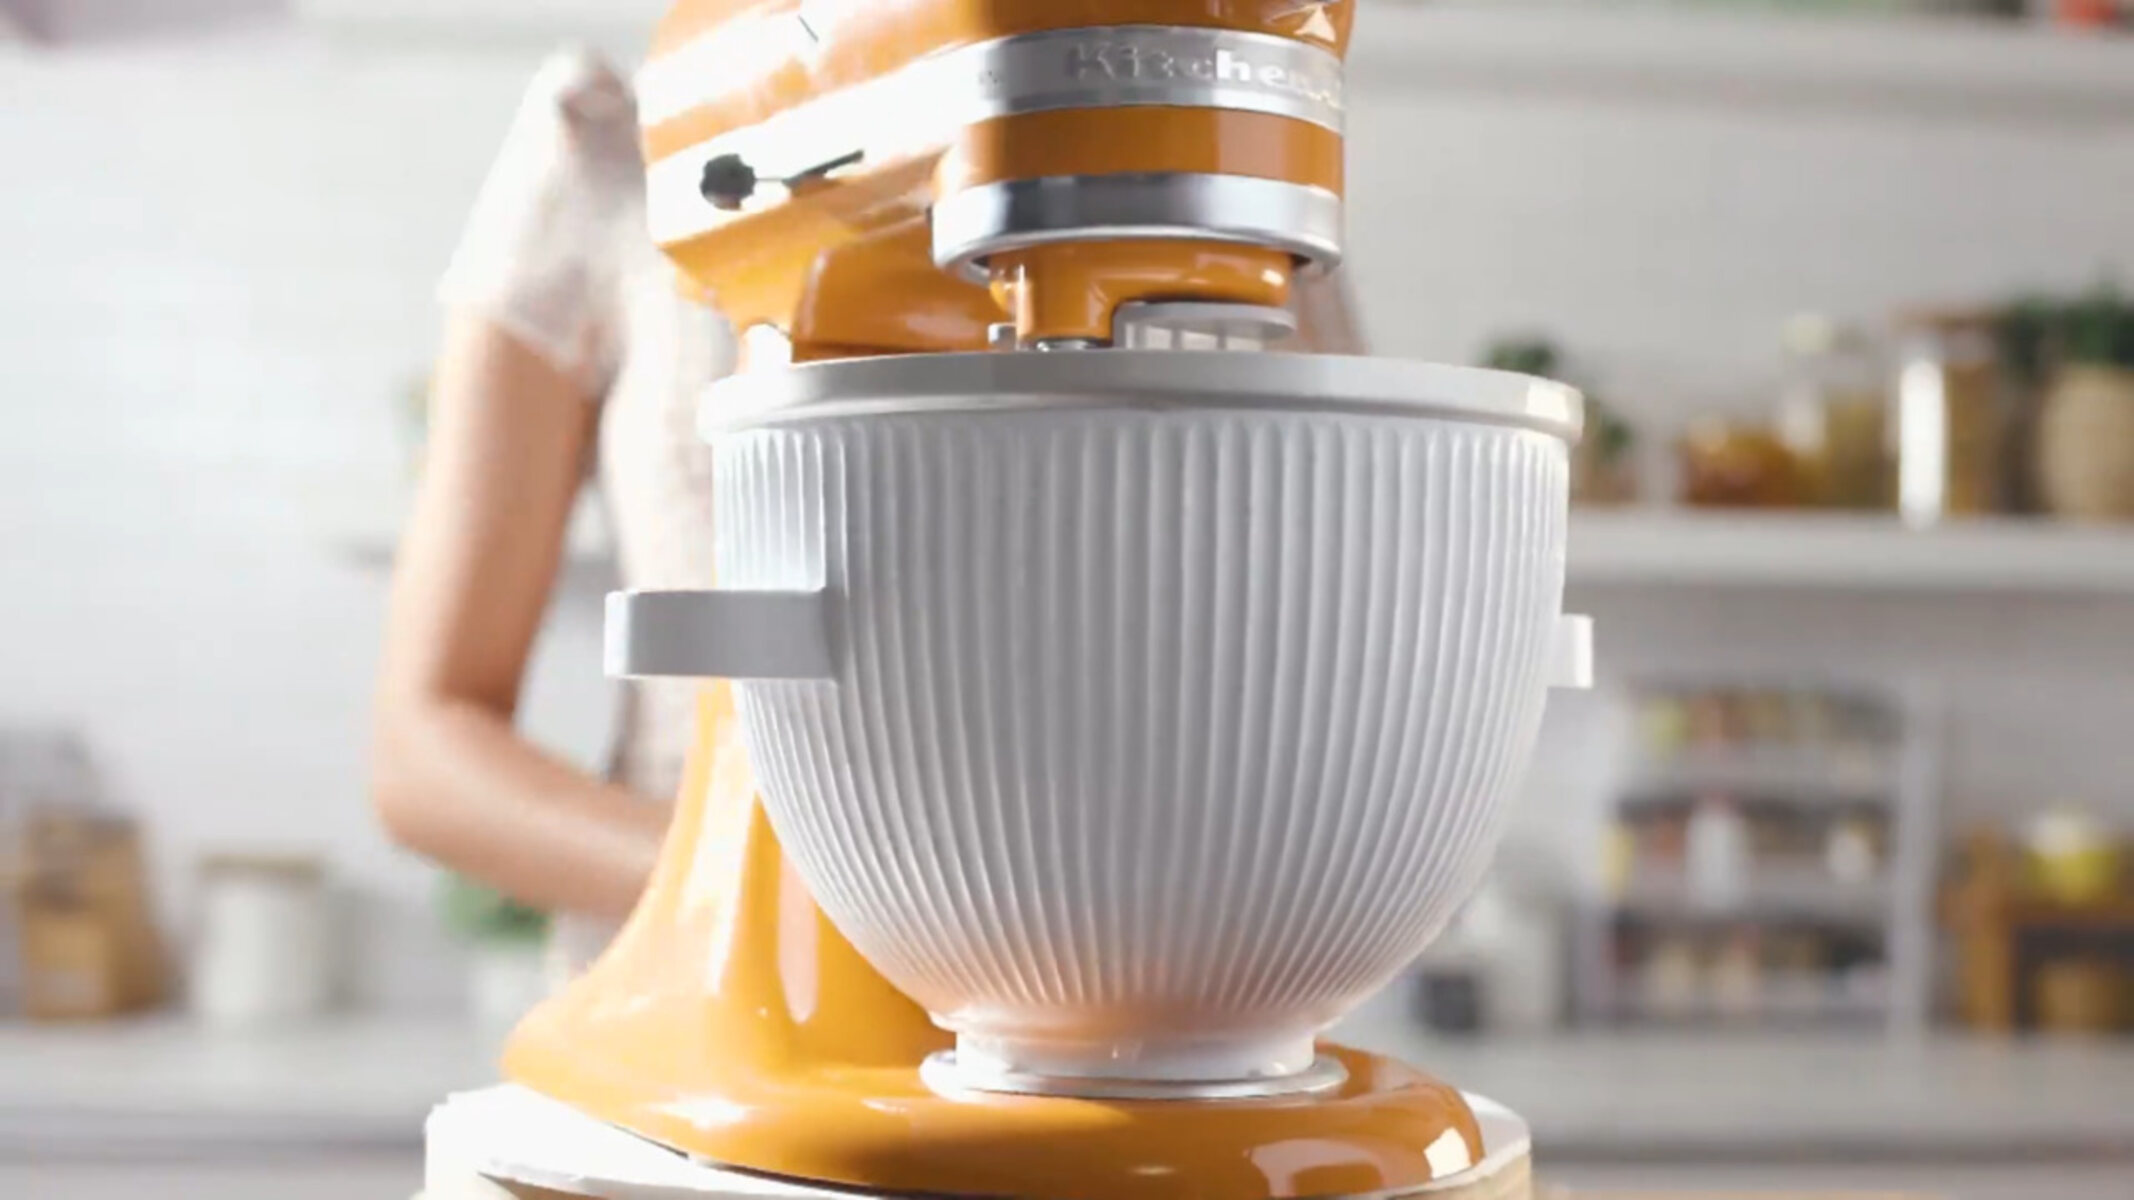
- Secure the Ice Cream Maker Attachment to the Stand Mixer: Take your Kitchen Aid stand mixer and ensure it’s turned off and unplugged. Remove any attachments that may be currently attached to the mixer. Locate the attachment hub on the front of the mixer and insert the Ice Cream Maker attachment into the hub. Turn it clockwise until it locks into place.
- Ready to Use: Once the attachment is securely attached to the stand mixer, you’re now ready to start creating delicious ice cream!
It’s important to note that the assembly process may vary slightly depending on the specific model of your Kitchen Aid stand mixer and Ice Cream Maker attachment. Always refer to the instruction manual provided with your attachment for any specific guidelines or variations.
Now that you’ve successfully assembled the Ice Cream Maker attachment, it’s time to move on to the exciting step of preparing your ice cream mixture!
Step 2: Prepare the Ice Cream Mixture
Now that you have your Kitchen Aid Ice Cream Maker attachment assembled and ready to go, it’s time to prepare the ice cream mixture. Follow these steps to create a delicious base for your frozen treat:
- Gather Your Ingredients: Take out all the ingredients needed for your ice cream recipe. This typically includes cream, milk, sugar, eggs, and any additional flavorings or mix-ins you desire. Make sure you have the correct measurements of each ingredient.
- Combine the Cream and Milk: In a mixing bowl, whisk together the cream and milk until they are well combined. The ratio of cream to milk can vary depending on your preferred richness and texture.
- Add Sugar: Gradually add the sugar to the cream and milk mixture, stirring continuously until the sugar is completely dissolved. This will help sweeten the ice cream and give it a smooth texture.
- Optional: Add Flavorings or Extracts: If you want to infuse your ice cream with additional flavors, such as vanilla extract, cocoa powder, or fruit puree, now is the time to do so. Add the desired amount and thoroughly incorporate it into the mixture.
- Temper the Eggs: If your recipe calls for eggs, separate the yolks from the whites. Gradually pour a small amount of the creamy mixture into the yolks, whisking continuously to temper the eggs and prevent them from curdling. Once tempered, pour the egg mixture back into the main bowl and mix well.
- Chill the Mixture: Cover the ice cream mixture with plastic wrap or a lid and refrigerate it for at least 2-4 hours, or overnight. Chilling it will help the flavors meld together and ensure a creamy texture.
Remember, the preparation process can vary depending on the ice cream recipe you follow. Always refer to the specific instructions and measurements provided in your chosen recipe.
Now that your ice cream mixture is prepared, it’s time to move on to the exciting step of attaching the Ice Cream Maker to your Kitchen Aid stand mixer!
Step 3: Attach the Ice Cream Maker to the Stand Mixer
With your ice cream mixture prepared and ready to go, it’s time to attach the Kitchen Aid Ice Cream Maker to your stand mixer. Follow these simple steps to securely attach the Ice Cream Maker:
- Ensure the Stand Mixer is Turned Off: Before attaching any accessory, make sure your Kitchen Aid stand mixer is turned off and unplugged. This ensures safety during the attachment process.
- Remove Previous Attachments: If you have any other attachments connected to the stand mixer, detach them before proceeding. This includes the mixing bowl and any other accessories.
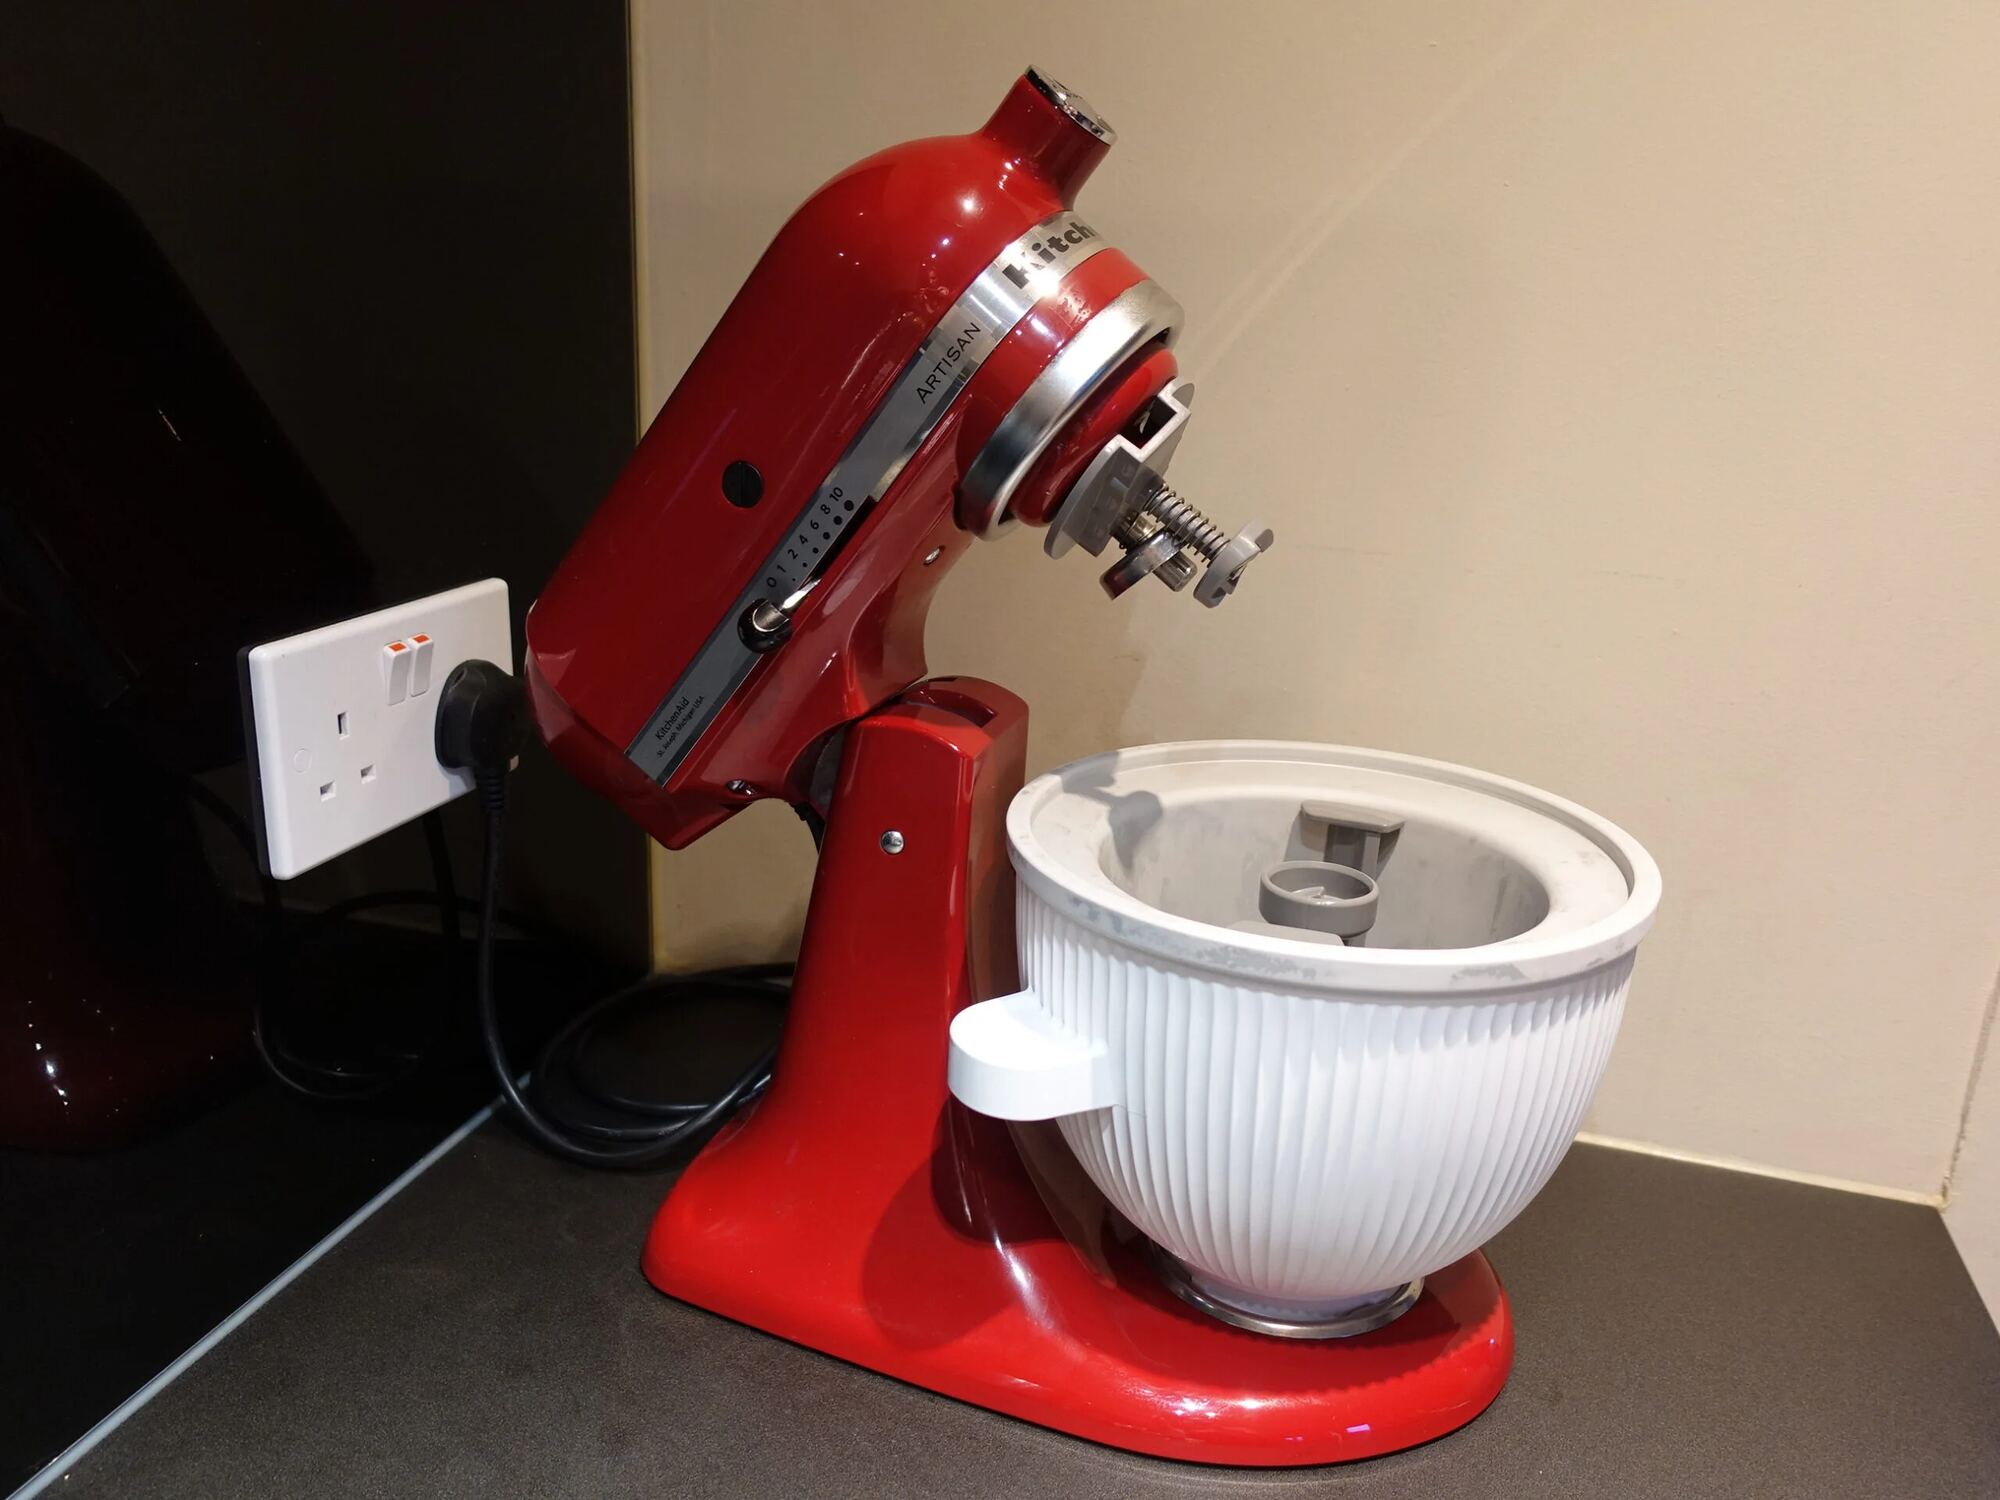
- Locate the Attachment Hub: Look for the attachment hub on the front of the stand mixer. It is usually a metal socket with a hinged cover. Lift the cover to expose the attachment point.
- Insert the Ice Cream Maker Attachment: Take the assembled Ice Cream Maker attachment and insert it into the attachment hub. Align the attachment’s square drive pin with the socket inside the attachment hub.
- Secure the Attachment: Once the attachment is inserted, turn it clockwise until you hear a click or feel resistance. This indicates that the attachment is securely locked into place.
- Gently Test the Attachment: Give the attachment a gentle tug to ensure it is firmly attached to the stand mixer. It should not detach or wobble when you pull on it.
- Verify Attachment Fit: Check that the attachment is aligned properly with the mixer head. Ensure that it does not interfere with the movement of the mixer’s planetary action or any other parts.
It’s important to note that the attachment process may vary slightly depending on the specific model of your Kitchen Aid stand mixer. Always consult the instruction manual provided by Kitchen Aid for any specific guidelines or variations.
Now that you have successfully attached the Ice Cream Maker to your Kitchen Aid stand mixer, you’re ready to move on to the next step: churning the ice cream!
Step 4: Begin Churning the Ice Cream
Now that you have the Kitchen Aid Ice Cream Maker attached to your stand mixer, it’s time to start churning the ice cream mixture. Follow these easy steps to begin the churning process:
- Ensure the Ice Cream Mixture is Chilled: Before starting the churning process, make sure that your prepared ice cream mixture is thoroughly chilled. This will help achieve the best consistency and texture.
- Turn on the Stand Mixer: Plug in and turn on your Kitchen Aid stand mixer. Select the appropriate speed setting for the Ice Cream Maker attachment. Most recipes recommend using the lowest speed setting, but always refer to your specific recipe for guidance.
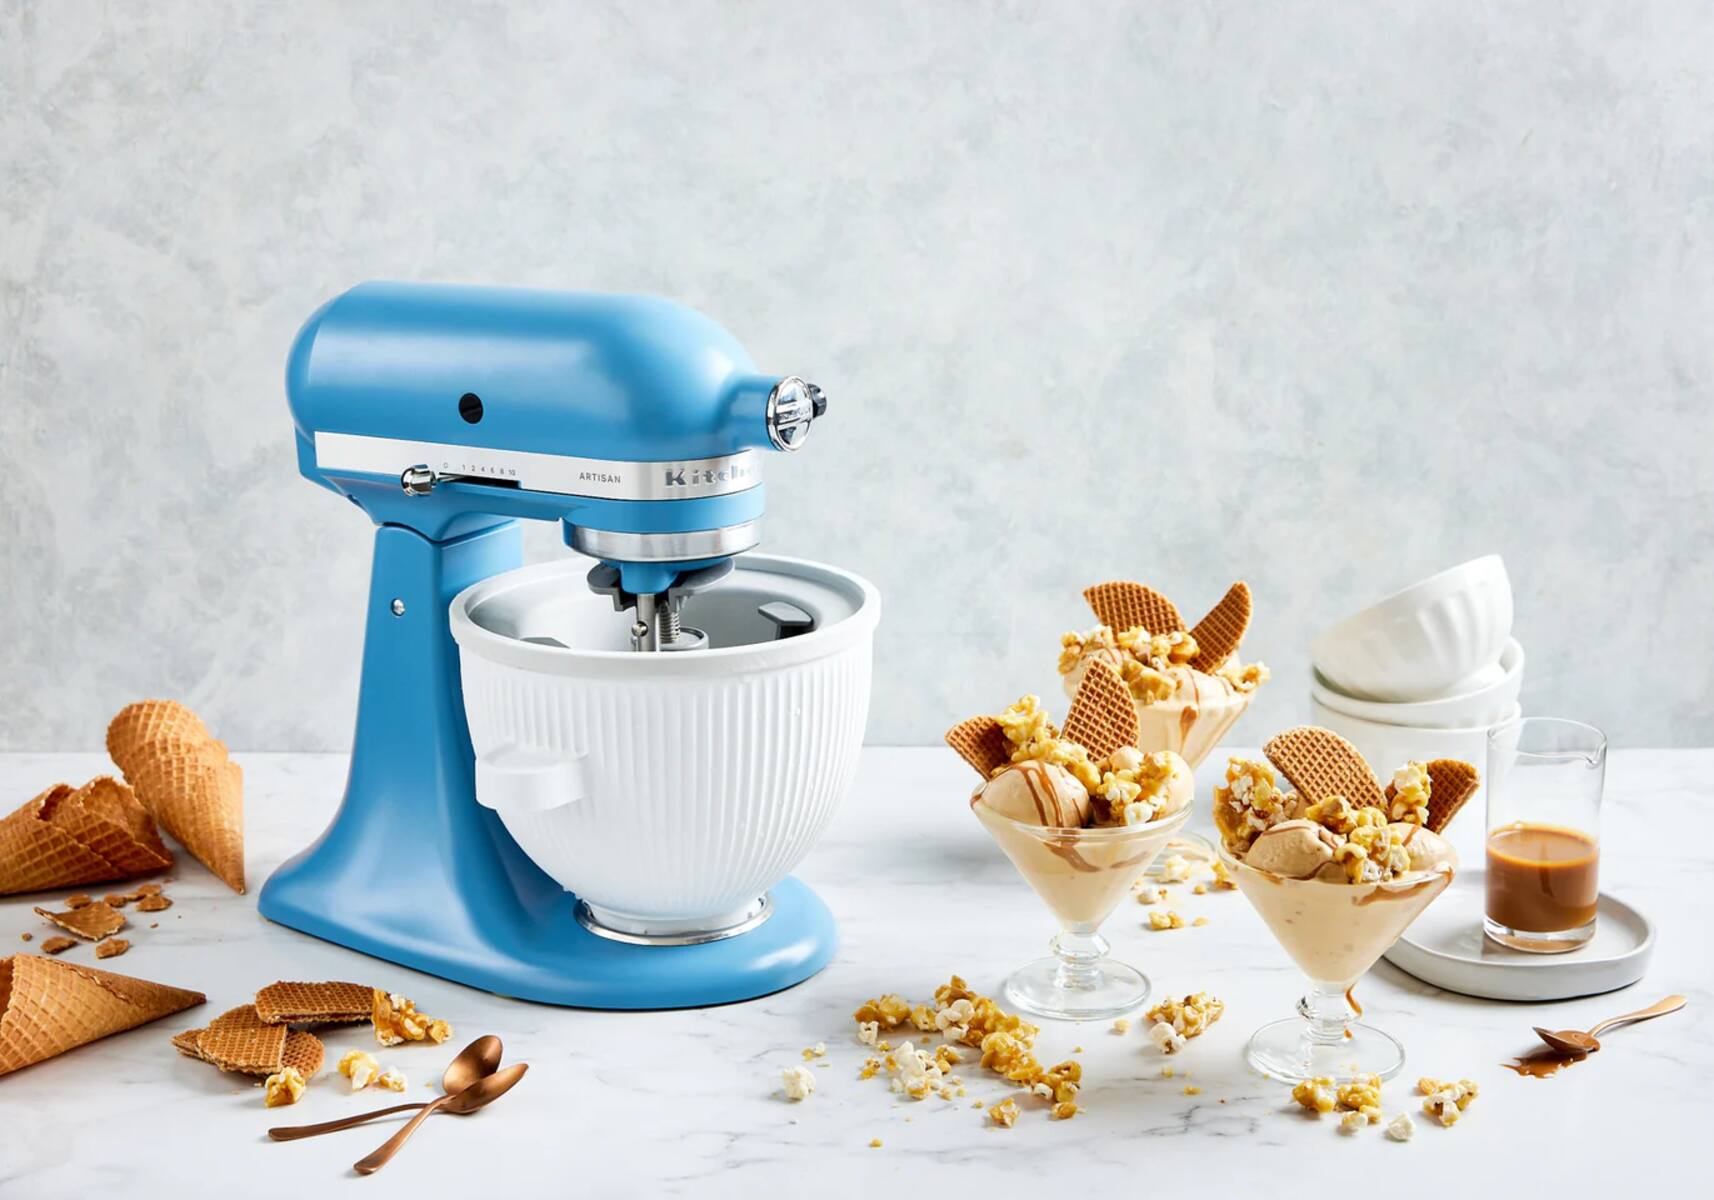
- Pour the Mixture Into the Freezer Bowl: Remove the dasher from the freezer bowl and pour the chilled ice cream mixture into the assembled freezer bowl. Leave a small gap at the top to account for expansion during the churning process.
- Start the Churning Process: Carefully insert the dasher back into the freezer bowl and place the lid securely on top. Turn on the stand mixer and let it churn the ice cream mixture. The dasher will rotate and incorporate air into the mixture, creating a creamy and smooth texture.
- Churn Until Desired Consistency: The churning time can vary depending on the recipe and the desired consistency of your ice cream. Follow the guidelines provided in your recipe, but typically, it can take anywhere from 15 to 30 minutes for the ice cream to reach a soft-serve consistency.
During the churning process, you may notice the ice cream mixture freezing to the sides of the freezer bowl. Use a spatula or wooden spoon to scrape down the sides and incorporate the frozen mixture back into the churning process.
It’s important to monitor the churning process to prevent overchurning. Overchurning can result in a grainy or icy texture. Keep a close eye on the ice cream as it churns and stop the mixer when the consistency is to your liking.
Now that the ice cream is churning away, it’s time to move on to the next step: monitoring the churning process.
Step 5: Monitor the Churning Process
As the ice cream mixture churns in the Kitchen Aid Ice Cream Maker, it’s important to monitor the churning process to ensure optimal results. Follow these essential steps to monitor the progress of your ice cream:
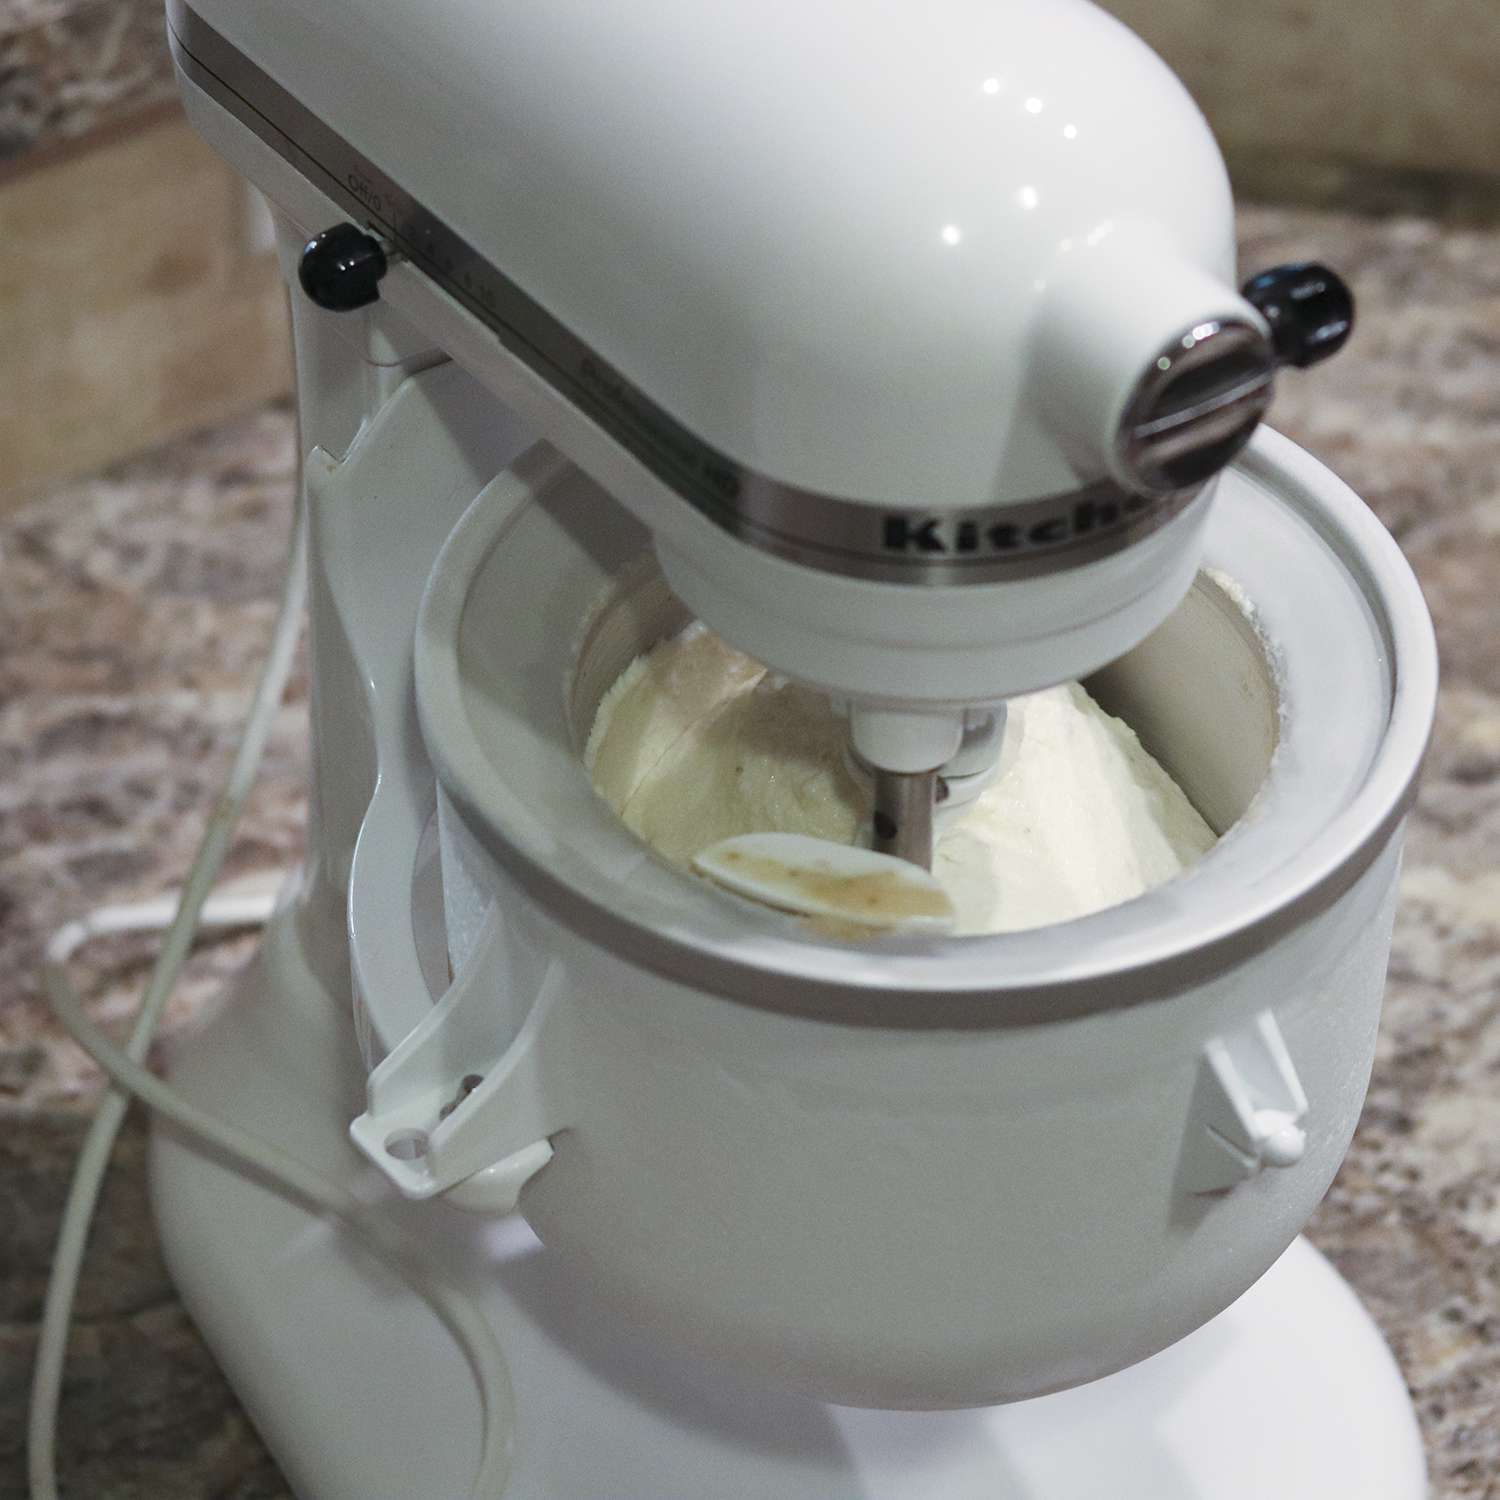
- Observe the Consistency: Watch as the ice cream mixture churns and pay attention to its consistency. It will gradually thicken and become more solid as it freezes.
- Scrape Down the Sides: Occasionally, stop the mixer and scrape down the sides of the freezer bowl with a spatula or wooden spoon. This helps to incorporate any frozen portions back into the mixture and promotes even freezing.
- Check for Desired Texture: After a few minutes of churning, dip a spoon into the ice cream mixture and observe its texture. If it’s too soft and runny, continue churning. If it has reached a thick, creamy consistency like soft-serve ice cream, it may be ready to move on to the next step.
- Perform the “Clean Spoon” Test: Take a clean spoon and dip it into the churned ice cream mixture. Lift it out and observe. If the ice cream is sticking to the spoon and not easily dripping or sliding off, it has reached a good consistency and is ready for the next step.
- Do Not Overchurn: Be cautious not to overchurn your ice cream. Overchurning can lead to a grainy or icy texture, so it’s important to monitor the mixture closely and stop the process when it reaches the desired consistency.
Remember that the churning time may vary depending on the specific recipe and personal preferences. It can take anywhere from 15 to 30 minutes to achieve the desired texture, but always refer to the instructions in your recipe for guidance.
Once you have determined that the ice cream has reached the desired consistency, it’s time to move on to the next step: adding mix-ins if desired.
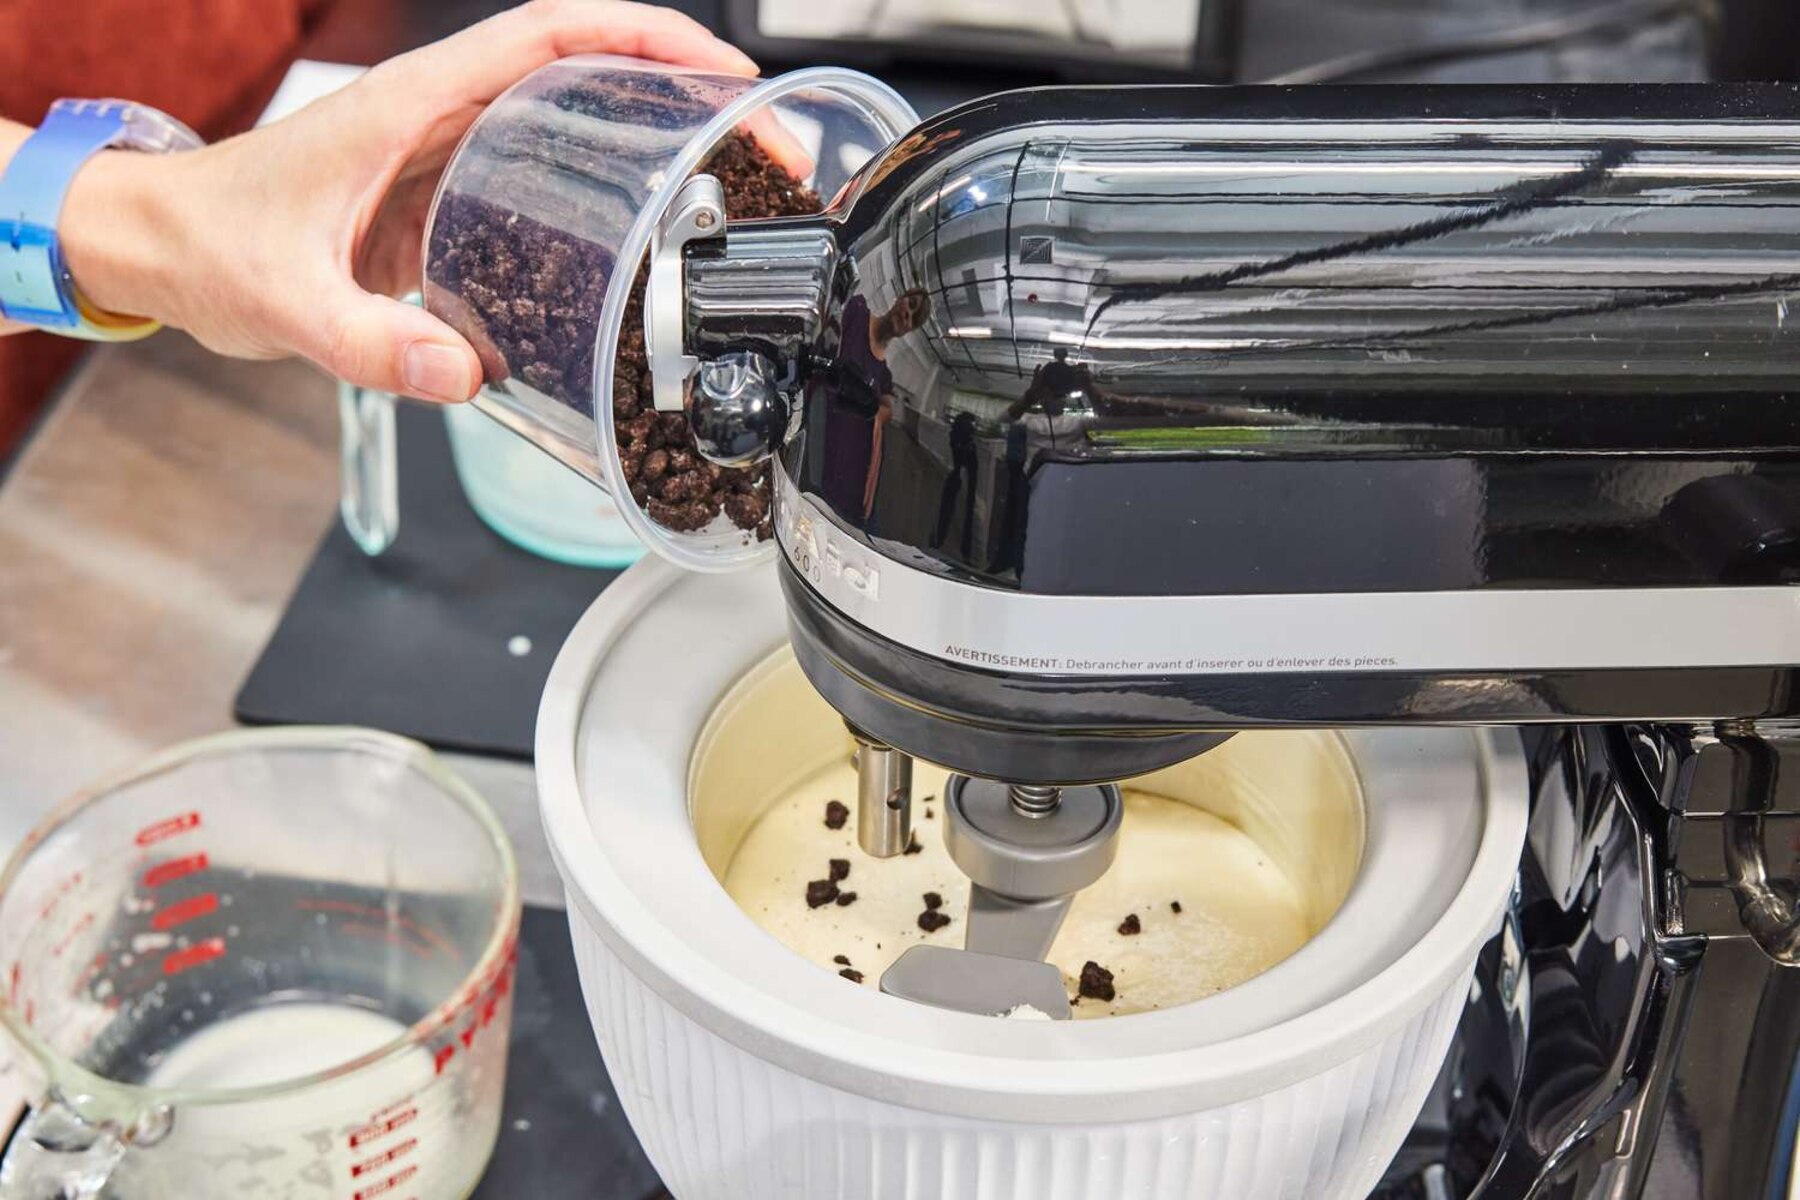
Step 6: Add Mix-ins (Optional)
Adding mix-ins to your homemade ice cream can take it to the next level, enhancing both flavor and texture. This step is entirely optional but can provide a delightful surprise in every scoop. Follow these simple guidelines to add mix-ins to your churned ice cream:
- Prepare Your Mix-ins: Consider the mix-ins you would like to incorporate into your ice cream. Popular options include chocolate chips, crushed cookies, chopped nuts, fruit chunks, or swirls of caramel or fudge. Prepare your mix-ins by chopping, crushing, or melting them according to your preference.
- Add Mix-ins During Churning: If you prefer a more evenly distributed mix-in, add them during the last few minutes of churning. Stop the mixer, remove the lid, and pour the mix-ins into the churning ice cream. Turn the mixer back on and let it continue to churn until the mix-ins are incorporated throughout.
- Add Mix-ins After Churning: For more defined and visible mix-ins, such as large cookie chunks or whole pieces of fruit, it’s best to add them after the churning process. Transfer the churned ice cream to a separate container and gently fold in the mix-ins using a spatula or wooden spoon. Be careful not to overmix and deflate the ice cream.
- Consider Layering: For certain mix-ins, such as ripple sauces or multiple flavors of ice cream, you can create layers for added variety. Alternate layers of churned ice cream and mix-ins in a container, creating a visually appealing and flavorful treat.
- Remember to Freeze: Once you have added your desired mix-ins, cover the container and place it in the freezer to further solidify the ice cream. Allow it to freeze for a few hours or until it reaches your desired firmness.
Remember, the mix-ins you choose are completely customizable based on your preferences and creativity. Feel free to experiment with different combinations to create your own signature ice cream flavors.
Now that you have added your mix-ins, it’s time to move on to the next step: removing the ice cream from the freezer bowl.
Step 7: Remove the Ice Cream from the Freezer Bowl
After the ice cream has churned to your desired consistency and you have incorporated any mix-ins, it’s time to remove it from the freezer bowl. Follow these steps to safely and easily remove the ice cream:
- Turn off the Stand Mixer: Before removing the ice cream, ensure that the stand mixer is turned off and unplugged. This will prevent any accidental movement and ensure your safety.
- Detach the Ice Cream Maker Attachment: Carefully lift the Ice Cream Maker attachment from the attachment hub of the stand mixer. Twist it counterclockwise until it releases and is no longer connected to the hub.
- Remove the Freezer Bowl: Lift the freezer bowl from the stand mixer base and place it on a stable and flat surface. Be careful as the bowl may still be quite cold.
- Scoop Out the Ice Cream: Using a sturdy ice cream scoop, begin scooping out the churned ice cream from the bowl. Take your time to ensure each scoop is neat and well-formed. Transfer the scooped ice cream into a separate container for storage.
- Scrape the Bowl: Once you have removed most of the ice cream, use a spatula or spoon to scrape any remaining ice cream from the sides and bottom of the freezer bowl. This will help you maximize your yield and ensure you don’t waste any delicious ice cream.
- Seal and Store: Once you have transferred all the ice cream into a separate container, seal it with an airtight lid or cover. Place the container back into the freezer and allow the ice cream to firm up for a few hours before serving.
With the ice cream successfully removed from the freezer bowl, you can now enjoy your homemade frozen delight whenever you desire.
Now that you have learned how to remove the ice cream from the freezer bowl, let’s move on to the final step: serving and savoring your creation!
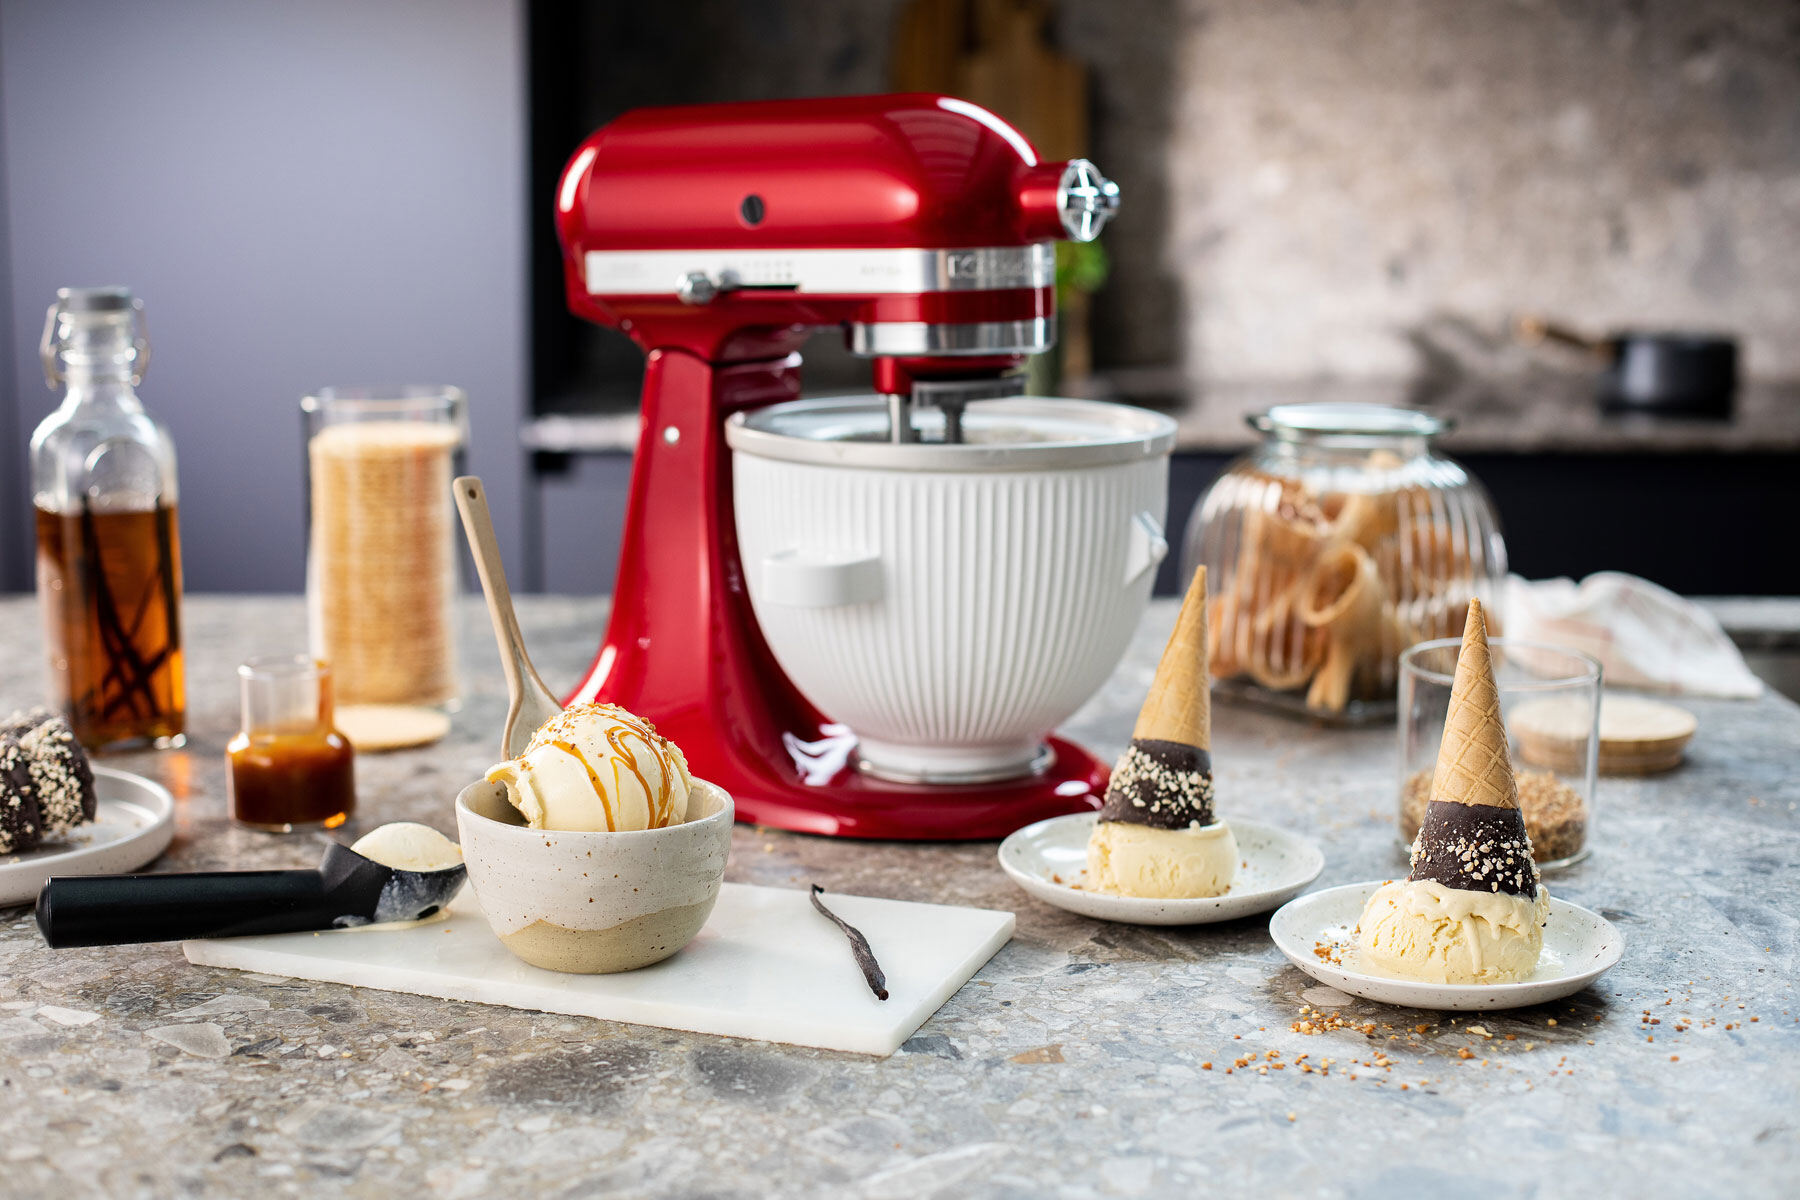
Step 8: Serve and Enjoy!
Congratulations, you’ve reached the final step of the process – it’s time to serve and enjoy your delicious homemade ice cream! Follow these steps to savor every spoonful:
- Retrieve the Chilled Ice Cream: Remove the container of ice cream from the freezer and let it sit at room temperature for a few minutes to soften slightly. This will make scooping easier and ensure a smooth texture.
- Scoop and Serve: Using an ice cream scoop, carefully scoop the desired amount of ice cream into bowls, cones, or dishes. Aim for even and well-rounded portions for an enticing presentation.
- Optional: Garnish with Toppings: For an extra touch of decadence, consider adding delicious toppings to your ice cream. Choices can range from classic favorites like sprinkles, chocolate sauce, or whipped cream, to more adventurous options like chopped nuts, fresh fruit, or cookie crumbles.
- Share and Enjoy: Gather your loved ones or indulge in a solitary moment of delight as you enjoy your homemade creation. Take the time to savor each creamy bite and appreciate the fruits of your labor.
- Store Leftover Ice Cream: If you have any remaining ice cream, promptly return it to the freezer in an airtight container. Properly stored, homemade ice cream can last for a few weeks, although it’s unlikely to stay uneaten for that long!
Remember, the beauty of homemade ice cream lies in its versatility. Feel free to experiment with different flavors, mix-ins, and toppings to create endless combinations that suit your taste preferences.
So, gather your loved ones, create lasting memories, and enjoy the sweet, creamy goodness of your homemade ice cream creation!
Conclusion
Congratulations on successfully learning how to attach the Kitchen Aid Ice Cream Maker to your stand mixer and creating delicious homemade ice cream! By following the step-by-step guide, you can now indulge in the joy of crafting your own unique flavors and sharing delightful frozen treats with friends and family.
Throughout this process, you learned how to assemble the Ice Cream Maker attachment, prepare the ice cream mixture, attach the Ice Cream Maker to the stand mixer, and churn the ice cream to the perfect consistency. We explored the option of adding mix-ins for added flavor and texture, and finally, we discovered how to remove the ice cream from the freezer bowl and serve it with flair.
Homemade ice cream allows you the freedom to experiment and create flavors that cater to your personal taste preferences. With the Kitchen Aid Ice Cream Maker, you can bring the ice cream parlor experience into your own kitchen, delighting your loved ones with unique and delicious frozen desserts.
Be sure to store any leftover ice cream properly to preserve its quality and enjoy it in the days to come. Don’t hesitate to continue exploring new recipes and techniques to expand your ice cream-making skills.
Now that you have the knowledge and tools to attach the Kitchen Aid Ice Cream Maker and create homemade ice cream, it’s time to unleash your creativity and enjoy the sweet rewards of your culinary adventure. So, gather your ingredients, fire up your stand mixer, and get ready to savor the satisfaction of homemade ice cream!