Introduction
Adding a link to Google Calendar can be a useful way to provide attendees or participants with easy access to important information, such as event details, registration pages, or related documents. By including a link, you eliminate the need for attendees to search for the information separately, making it more convenient and efficient for everyone involved.
In this article, we will guide you through the simple steps of adding a link to Google Calendar. Whether you are organizing a meeting, webinar, workshop, or any other type of event, you can follow these instructions to ensure that your attendees have all the necessary resources at their fingertips.
With Google Calendar being a widely used scheduling tool, it is important to familiarize yourself with its features and make the most out of its capabilities. By adding a link, you can enhance the functionality and accessibility of your events, ultimately improving the overall experience for both yourself and your attendees.
So, let’s dive into the step-by-step process of adding a link to your Google Calendar events and make your event management more seamless and productive!
Step 1: Open Google Calendar
To begin, you’ll need to open Google Calendar on your preferred device. If you’re using a computer, you can simply open a web browser and navigate to calendar.google.com. If you’re using a mobile device, you can open the Google Calendar app.
Once you’ve opened Google Calendar, you’ll be prompted to sign in with your Google account. If you don’t have an account, you can easily create one by clicking on the “Create Account” button.
After signing in, you’ll be directed to the main calendar view, where you can see your upcoming events and schedule new ones. Take a moment to familiarize yourself with the interface, as we’ll be using it in the following steps to add a link to your event.
Note that Google Calendar is a cloud-based platform, which means that any changes or additions you make will automatically sync across all your devices, ensuring that you have access to your schedule wherever you go.
Now that you have Google Calendar open and ready to use, let’s move on to the next step and create a new event.
Step 2: Create a New Event
Creating a new event in Google Calendar is straightforward and intuitive. To get started, locate the “+” button or the “Create” button, typically found in the top left corner of the interface on both the web version and the mobile app.
Clicking on this button will open a new event creation form, where you can input all the necessary details for your event. Start by entering the title or name of your event in the designated field.
You can also specify the date and time of your event. If it’s a one-day event, simply select the desired date from the calendar view. If your event spans multiple days or has a recurring schedule, you can choose the respective options and input the necessary information.
Additionally, you can set up notifications to remind yourself and the attendees of upcoming events. This feature can be helpful in ensuring that everyone is aware of the event and has enough time to prepare.
Furthermore, you can specify the location or venue of your event. It can be a physical address, a meeting room, or a virtual conference link.
Once you have inputted all the relevant event details, click the “Save” button to create the event. You will be directed back to the main calendar view, where you can see the newly created event displayed on the respective date and time.
Now that you have successfully created a new event in Google Calendar, let’s move on to the next step and learn how to add event details in order to provide more information to your attendees.
Step 3: Choose the Date and Time
Choosing the appropriate date and time for your event is essential to ensure that both you and your attendees are on the same page regarding the schedule. In this step, we’ll guide you through the process of selecting the date and time for your event in Google Calendar.
When creating a new event, Google Calendar provides you with various options to customize the date and time settings to suit your needs. Here’s how you can choose the date and time:
- Select the desired date: In the event creation form, click on the date field to open a calendar view. Choose the specific date for your event by clicking on it. If your event spans multiple days, you can select the start and end dates accordingly.
- Set the start and end times: Below the date field, you’ll find separate fields to input the start and end times of your event. Click on these fields to select the respective times from the dropdown menu. If your event doesn’t have a specific end time, you can leave the end time field empty.
- Specify the event duration: Google Calendar automatically calculates the duration of your event based on the start and end times you’ve chosen. However, you can manually adjust the duration if needed.
- Add reminders: To ensure that you and your attendees stay on top of the event, you can set up reminders. Google Calendar offers various reminder options, such as notifications before the event starts or at a specific time prior to the event.
Once you have chosen the date and time settings for your event, click the “Save” button to save the changes and proceed to the next step.
Now that you have successfully chosen the date and time for your event, let’s move on to the next step and add event details to provide more information to your attendees.
Step 4: Add Event Details
Adding event details in Google Calendar is crucial to provide your attendees with all the necessary information they need to know about your event. In this step, we’ll walk you through the process of adding event details to make your event description more informative and engaging.
When creating a new event or editing an existing one, you’ll notice a text box labeled “Add description.” This is where you can input relevant details about your event, such as the agenda, speaker bios, presentation topics, or any other information you want to share with your attendees.
Here are a few tips to help you effectively add event details:
- Be clear and concise: Use clear language to convey the purpose and key points of the event. Avoid using jargon or complex terms that may confuse your attendees.
- Include contact information: If attendees need to reach out to you or have any questions regarding the event, it’s helpful to include your contact details or an email address they can contact.
- Add links or attachments: If you have additional resources, such as presentation slides, handouts, or registration forms, you can include links or attachments in the event description to make them easily accessible to your attendees.
- Format the text: Utilize formatting options such as bold and bullet points to highlight important information or create a structured layout for better readability.
By providing comprehensive event details, you not only keep your attendees well-informed but also increase their engagement and interest in the event. Additionally, it helps to set the right expectations and ensure everyone is on the same page regarding the event’s purpose and agenda.
Once you have added all the necessary event details in the description box, don’t forget to click the “Save” button to save the changes and proceed to the next step.
Now that you have successfully added event details, let’s move on to the next step and learn how to incorporate a link into your Google Calendar event.
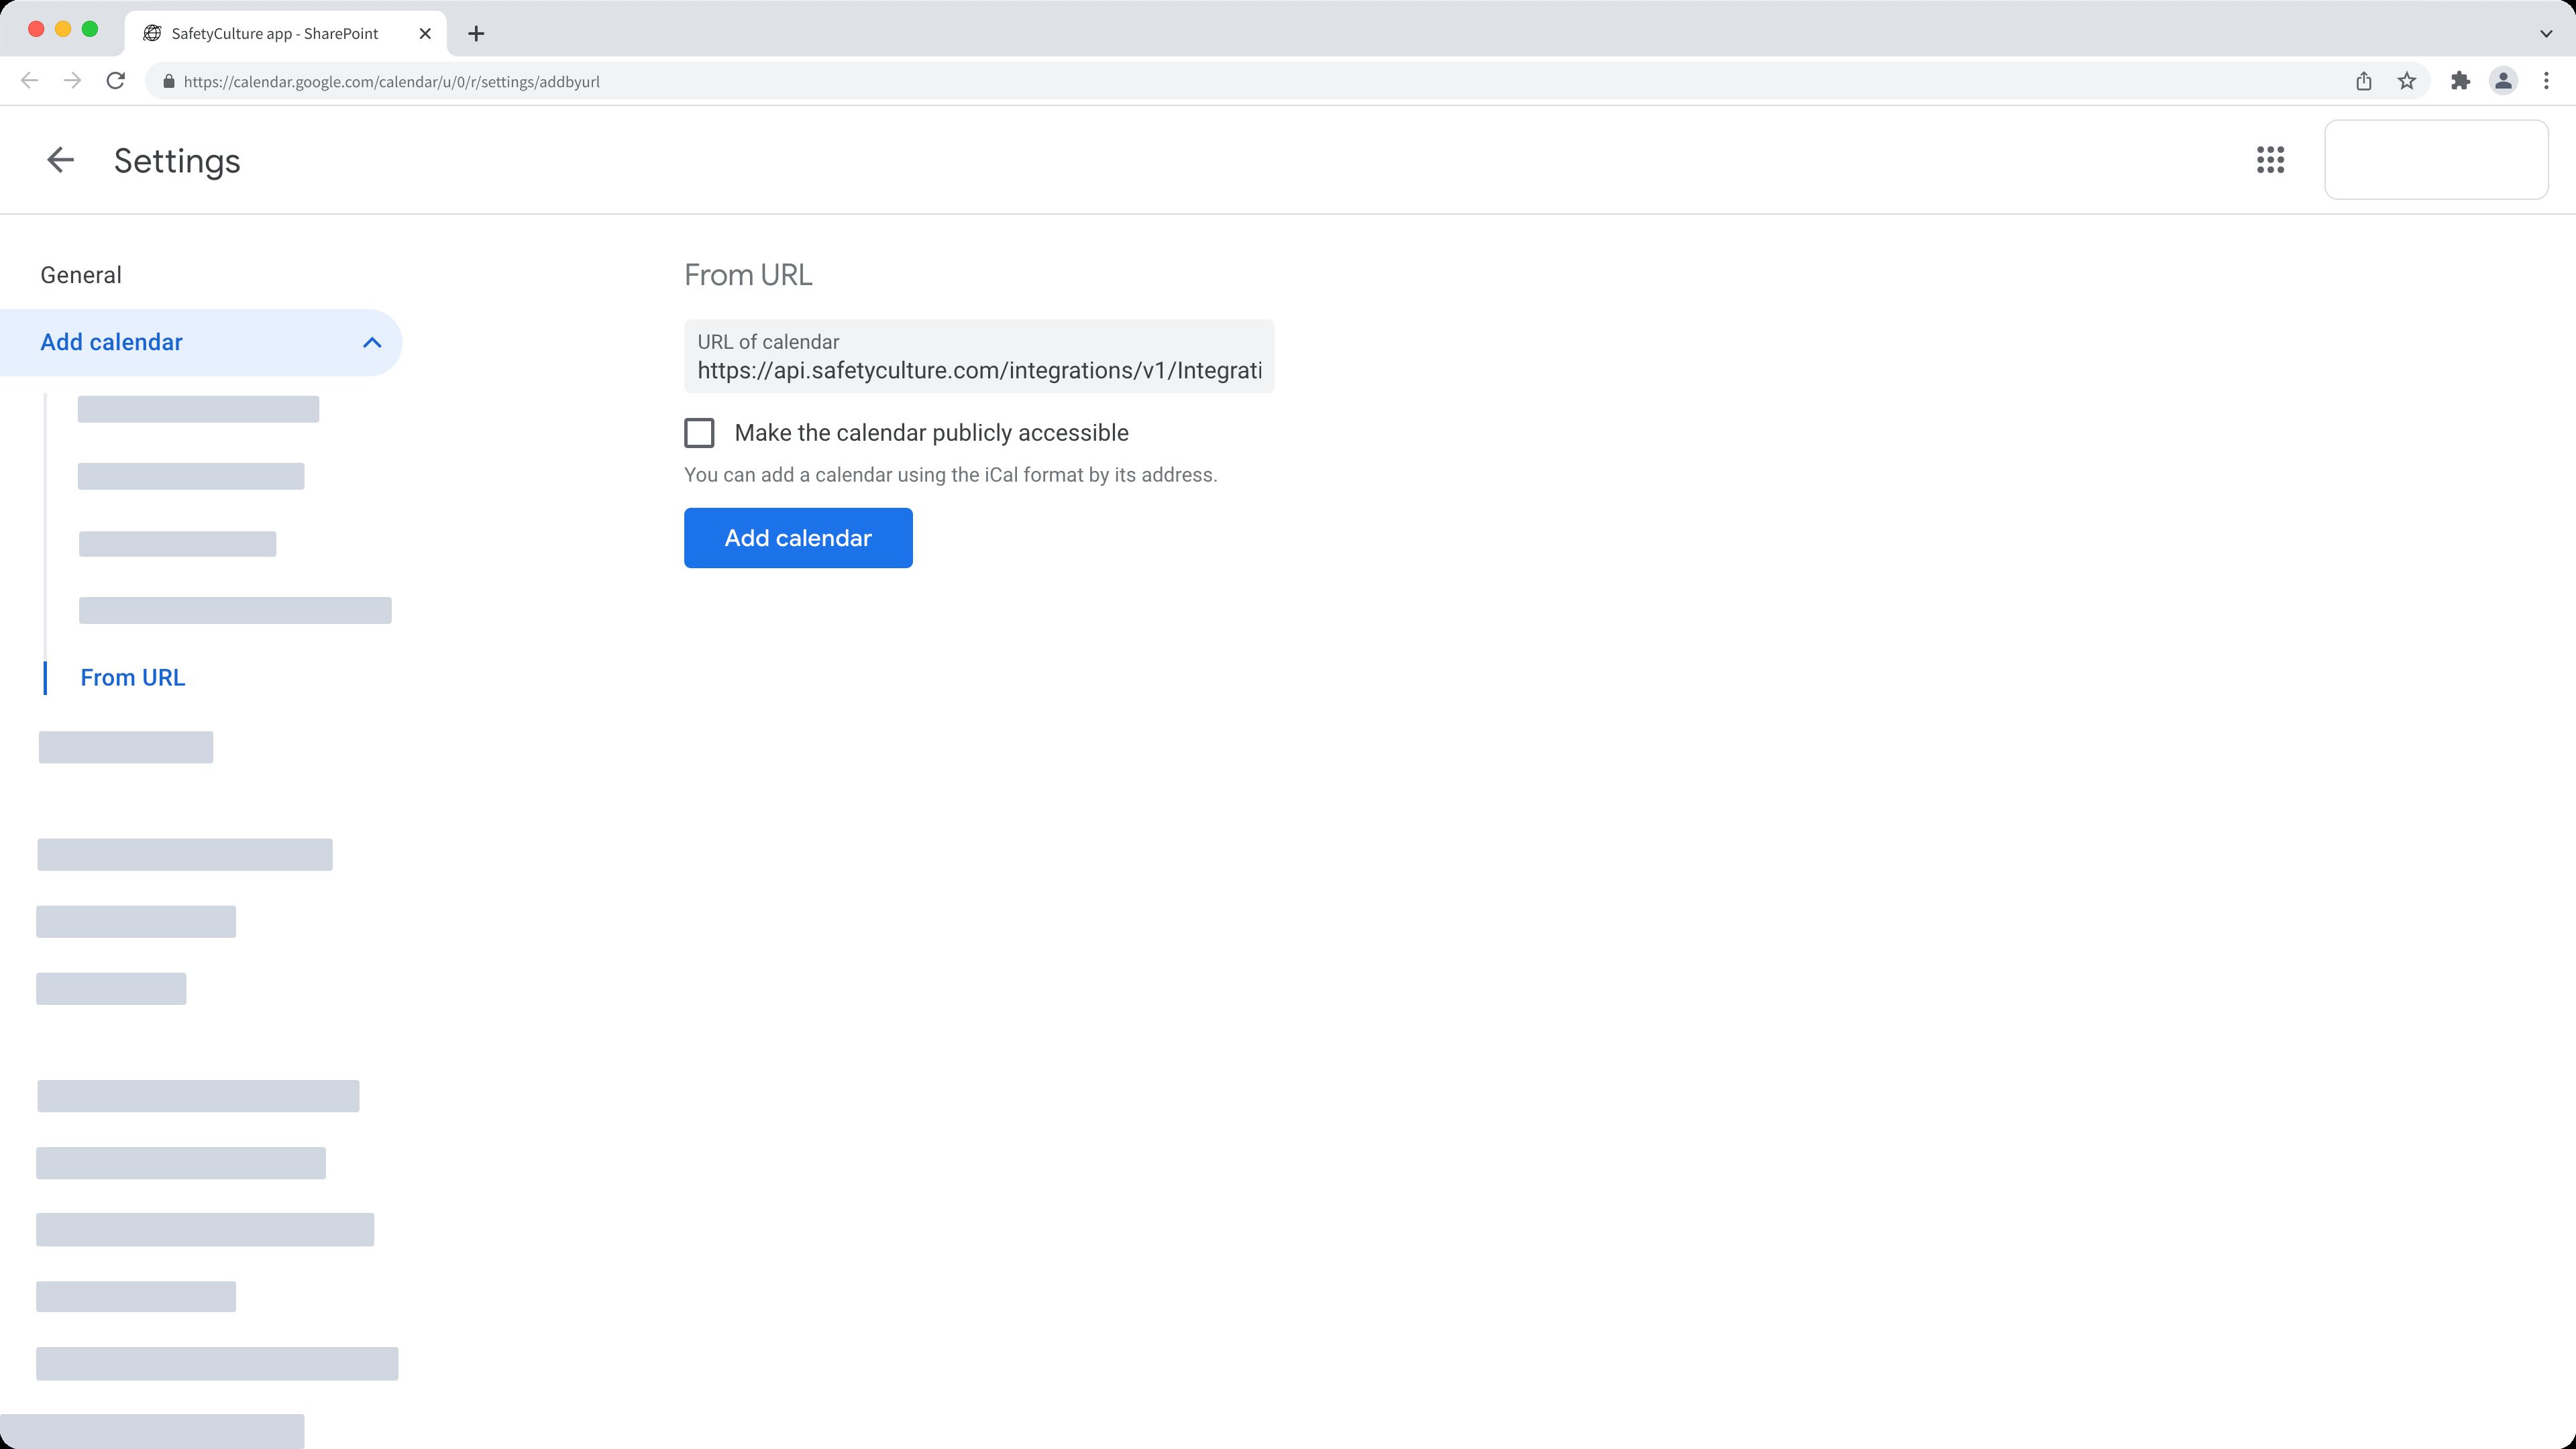
Step 5: Add a Link
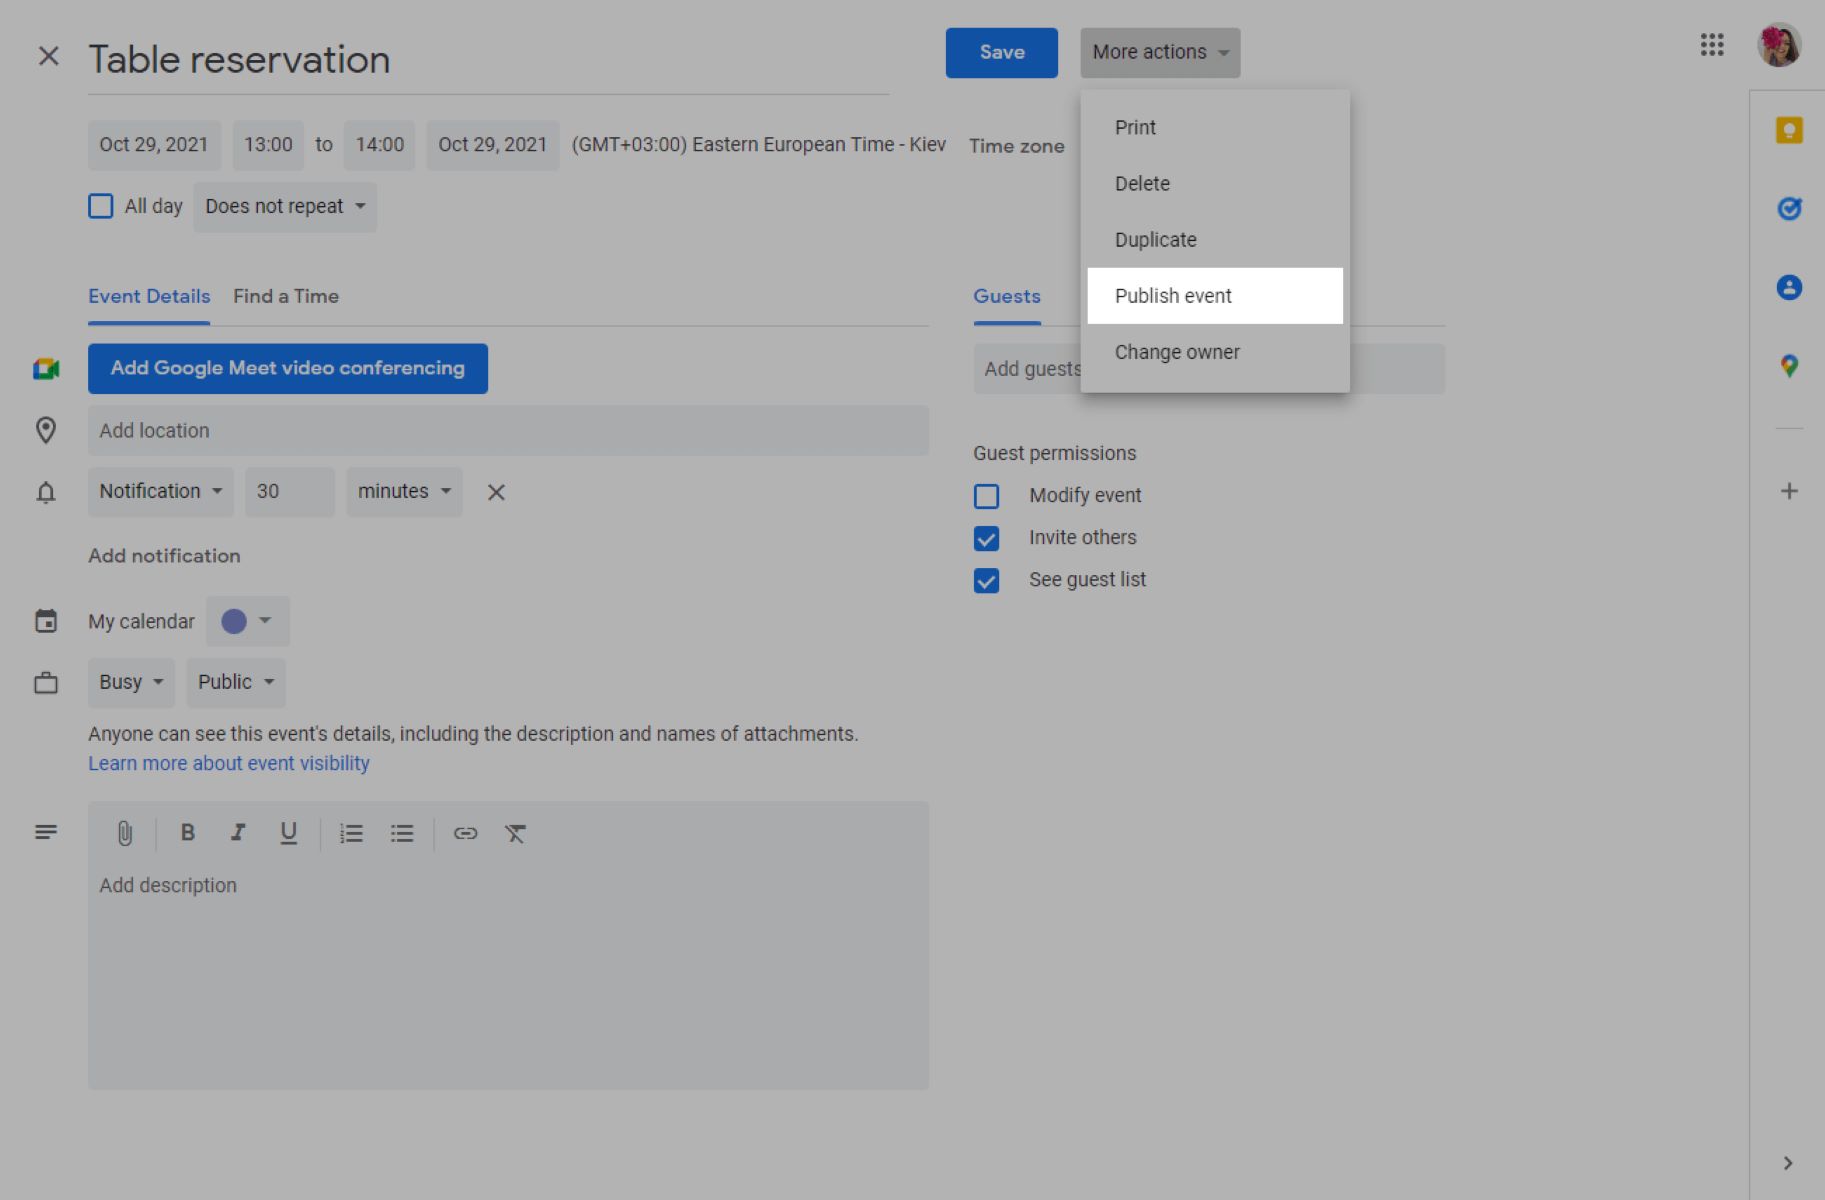
Adding a link to your Google Calendar event allows you to seamlessly connect your attendees with important resources, such as registration pages, event websites, documents, or other relevant information. By including a link, you provide easy access to valuable content without requiring your attendees to search for it separately. Here’s how you can add a link to your event:
- Open the event: Locate the event in your Google Calendar and click on it to open the event details.
- Edit the event: Depending on the version of Google Calendar you are using, you may see an “Edit” or a pencil icon. Click on it to edit the event.
- Find the “Add description” field: In the event editing form, locate the text box labeled “Add description.”
- Add the link: Within the description box, you can place your cursor at the appropriate spot and then type or paste the link. Make sure to include the full URL, starting with “https://” or “http://”. For example, “https://www.example.com”
- Format the link: To make the link more visually appealing and easily recognizable, you can format it as a hyperlink. Highlight the link text, click on the “Insert link” button in the text editor toolbar, and enter the URL. Google Calendar will automatically convert the text into a clickable link.
By adding a link to your event description, you empower your attendees to explore additional information or take necessary actions with just a single click. It enhances the user experience and streamlines the process of accessing important resources related to your event.
After adding the link, ensure that you save the changes to update the event details. Click the “Save” button or the equivalent option to confirm the changes you’ve made to the event.
Now that you have successfully added a link to your Google Calendar event, let’s move on to the final step and save the event to complete the process.
Step 6: Save the Event
Once you have added all the necessary details, including the link, to your Google Calendar event, it’s important to save the event to ensure that all your changes are applied. Saving the event marks its creation or modification and updates the schedule accordingly. Here’s how you can save the event:
- Review the event details: Before saving the event, take a moment to review all the event details to ensure accuracy. Check the title, date and time, event description, and any other relevant information.
- Click the “Save” button: Located at the bottom of the event editing form, you will find the “Save” button. Click on it to save the updated event details.
- Confirmation message: After saving the event, Google Calendar will display a confirmation message, indicating that the event has been saved successfully. You may also see an option to invite guests or share the event, depending on your preferences.
- Attendee notifications: If you have set up notifications or reminders for the event, attendees will receive notifications based on the preferences you specified. This serves as a helpful reminder and ensures that everyone is aware of the upcoming event.
By saving the event, you finalize the process and ensure that all the information is stored correctly in Google Calendar. The event will now be visible in your calendar and the calendars of any invited attendees. It’s important to note that any changes or updates you make to the event in the future can be saved by following the same process.
Now that you have successfully saved the event, you have completed the process of adding a link to your Google Calendar event. Congratulations!
Remember to regularly check and manage your Google Calendar to stay organized and keep track of your upcoming events. By utilizing the various features and functions offered by Google Calendar, you can streamline your event planning and ensure successful and efficient scheduling.
Conclusion
Adding a link to your Google Calendar events can greatly enhance the experience for both organizers and attendees. By including a link, you provide easy access to important information, resources, and registration pages, eliminating the need for attendees to search for them separately. This not only saves valuable time but also ensures that everyone has the necessary resources at their fingertips.
In this article, we walked through the step-by-step process of adding a link to your Google Calendar events. We started by opening Google Calendar and creating a new event. Then, we learned how to choose the date and time, add event details, and incorporate a link into the event description. Finally, we saved the event to complete the process.
By following these simple steps, you can effectively utilize Google Calendar as a comprehensive event management tool. Whether you’re organizing meetings, webinars, workshops, or any other type of event, adding a link can enhance accessibility and ensure that everyone is on the same page.
Keep in mind that Google Calendar is a versatile and user-friendly platform, offering various customization options for event management. Explore its features and experiment with different settings to optimize your event planning and organization.
Now that you have a clear understanding of how to add a link to your Google Calendar events, go ahead and apply this knowledge to streamline your event management and provide a more seamless experience for your attendees. Make the most out of Google Calendar’s functionality and ensure that your events are well-organized and easily accessible for all participants.
Happy event planning!