Introduction
Welcome to this guide on how to activate your Jitterbug smartphone! Whether you’re a new customer or upgrading to the Jitterbug smartphone, this step-by-step tutorial will walk you through the process, ensuring a smooth and hassle-free activation.
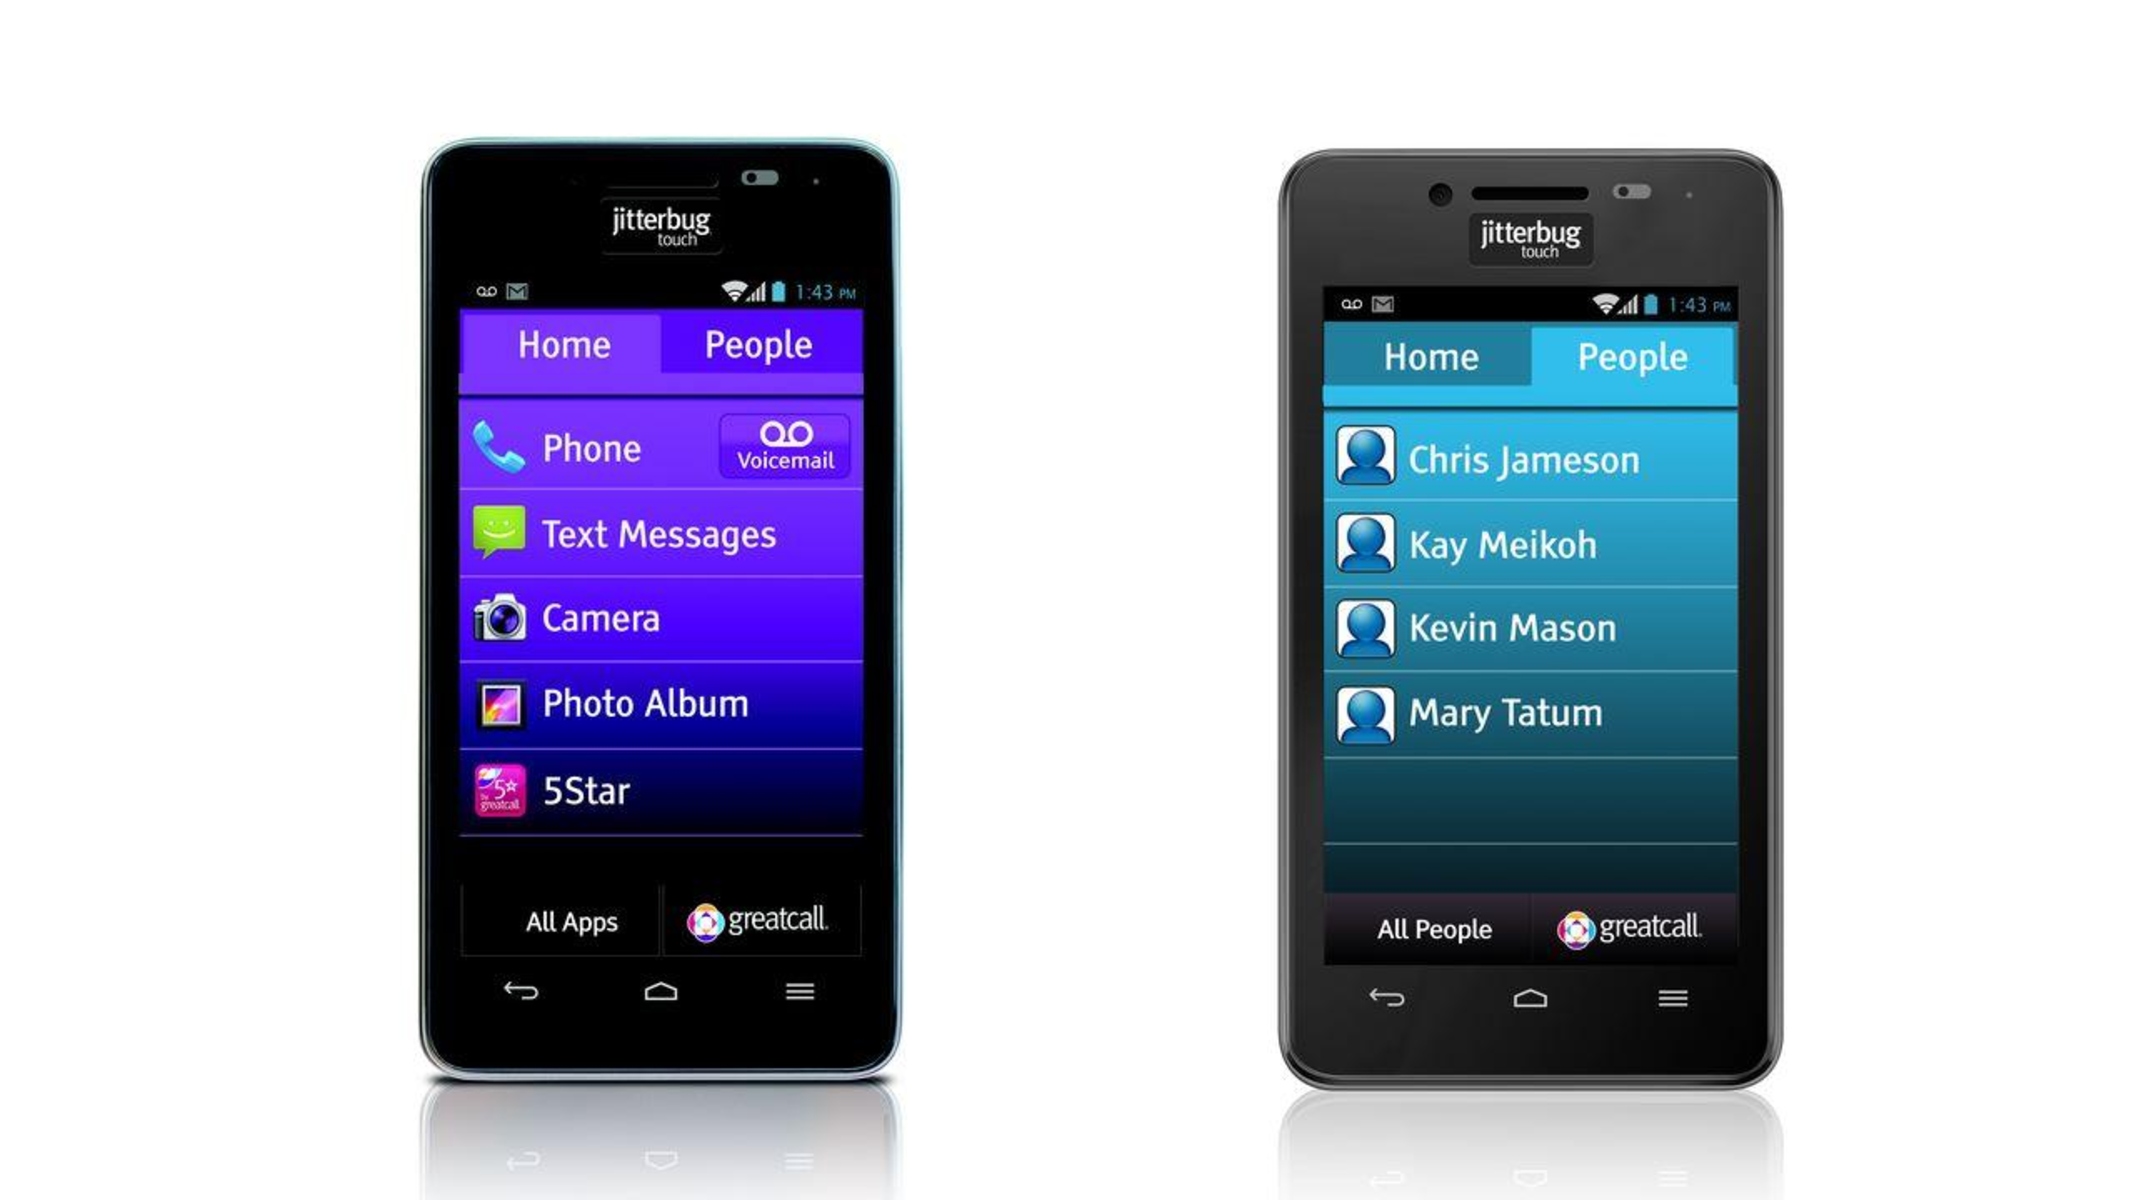
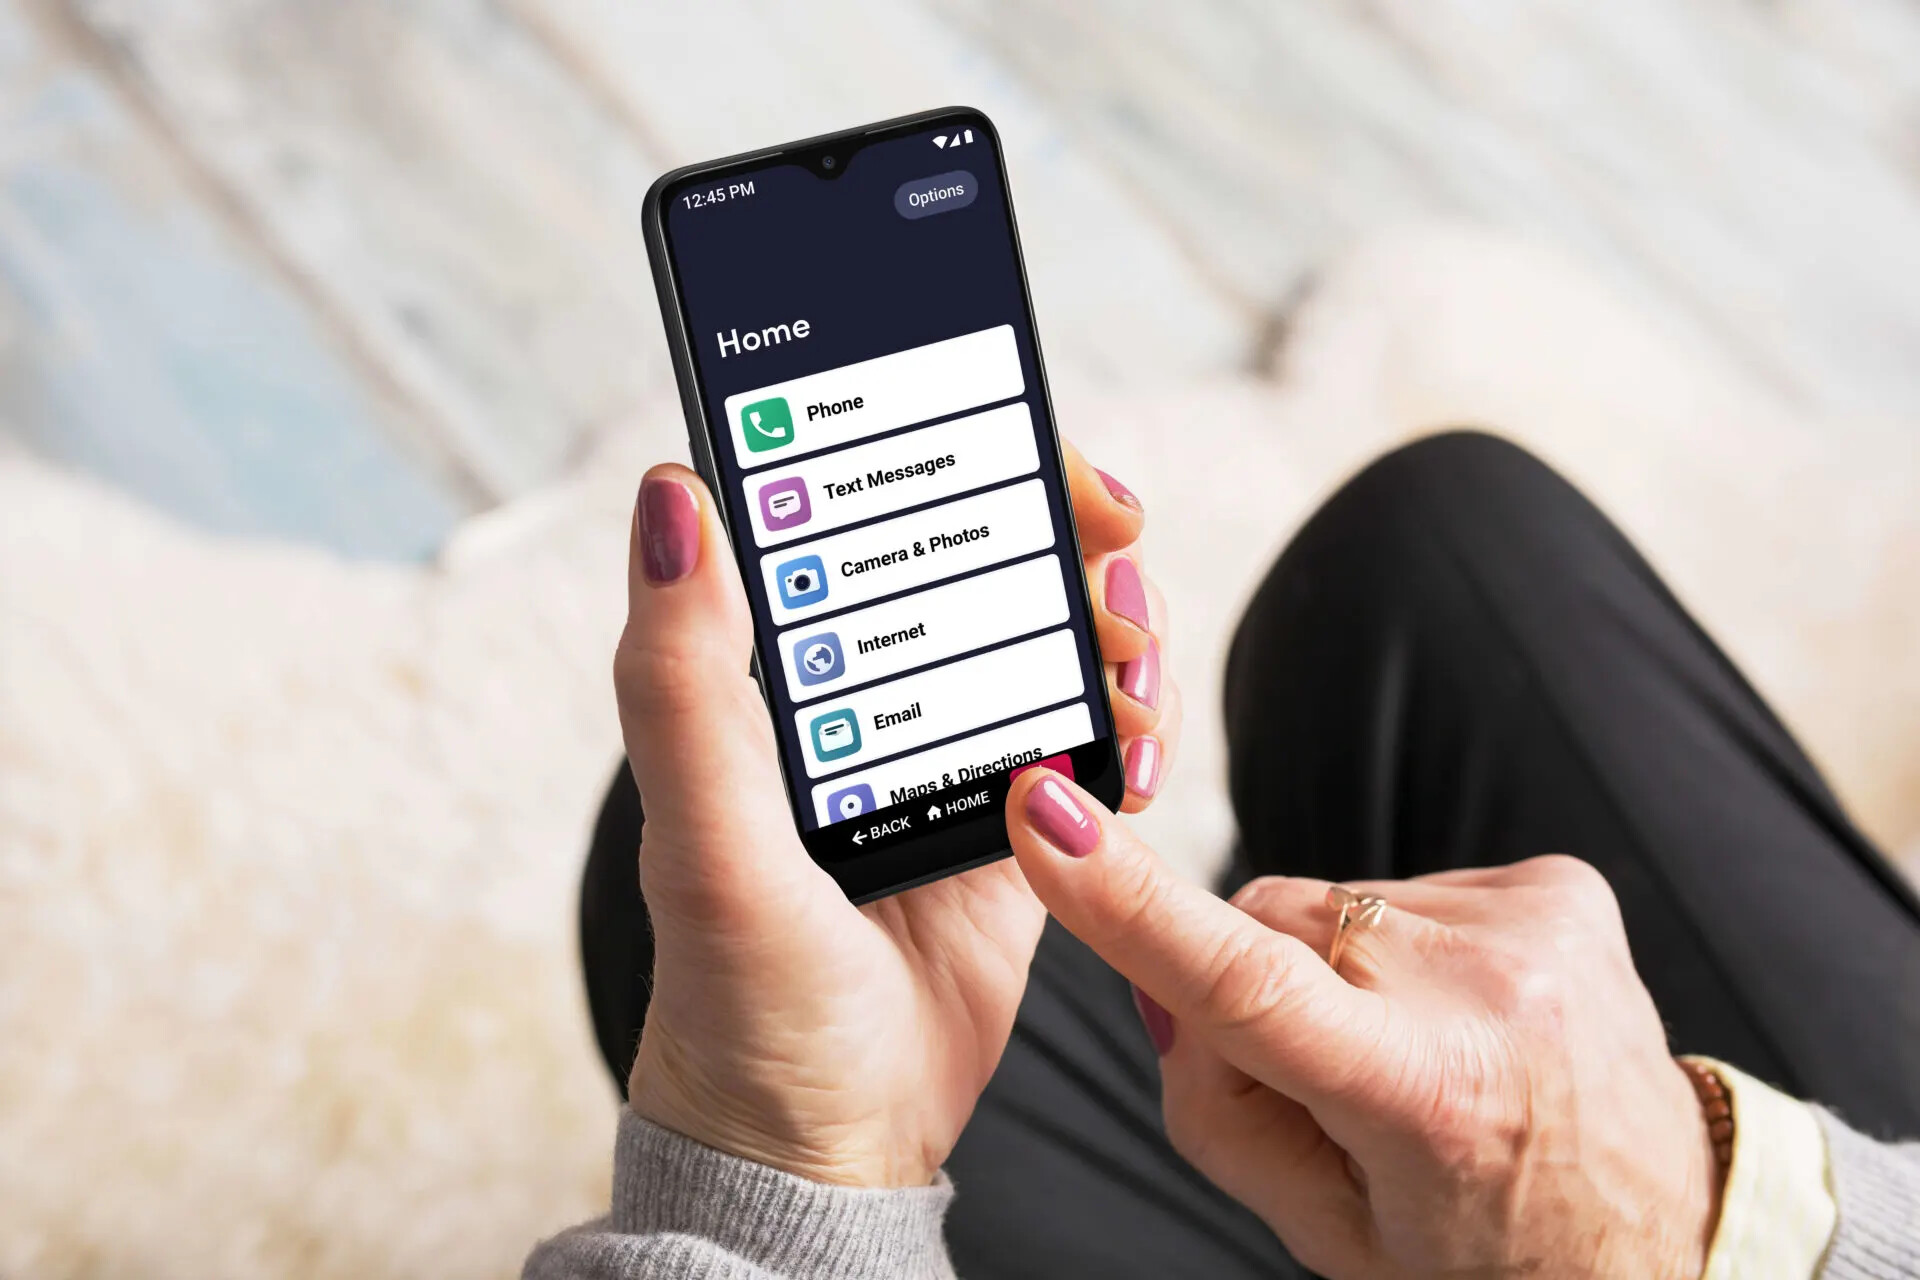
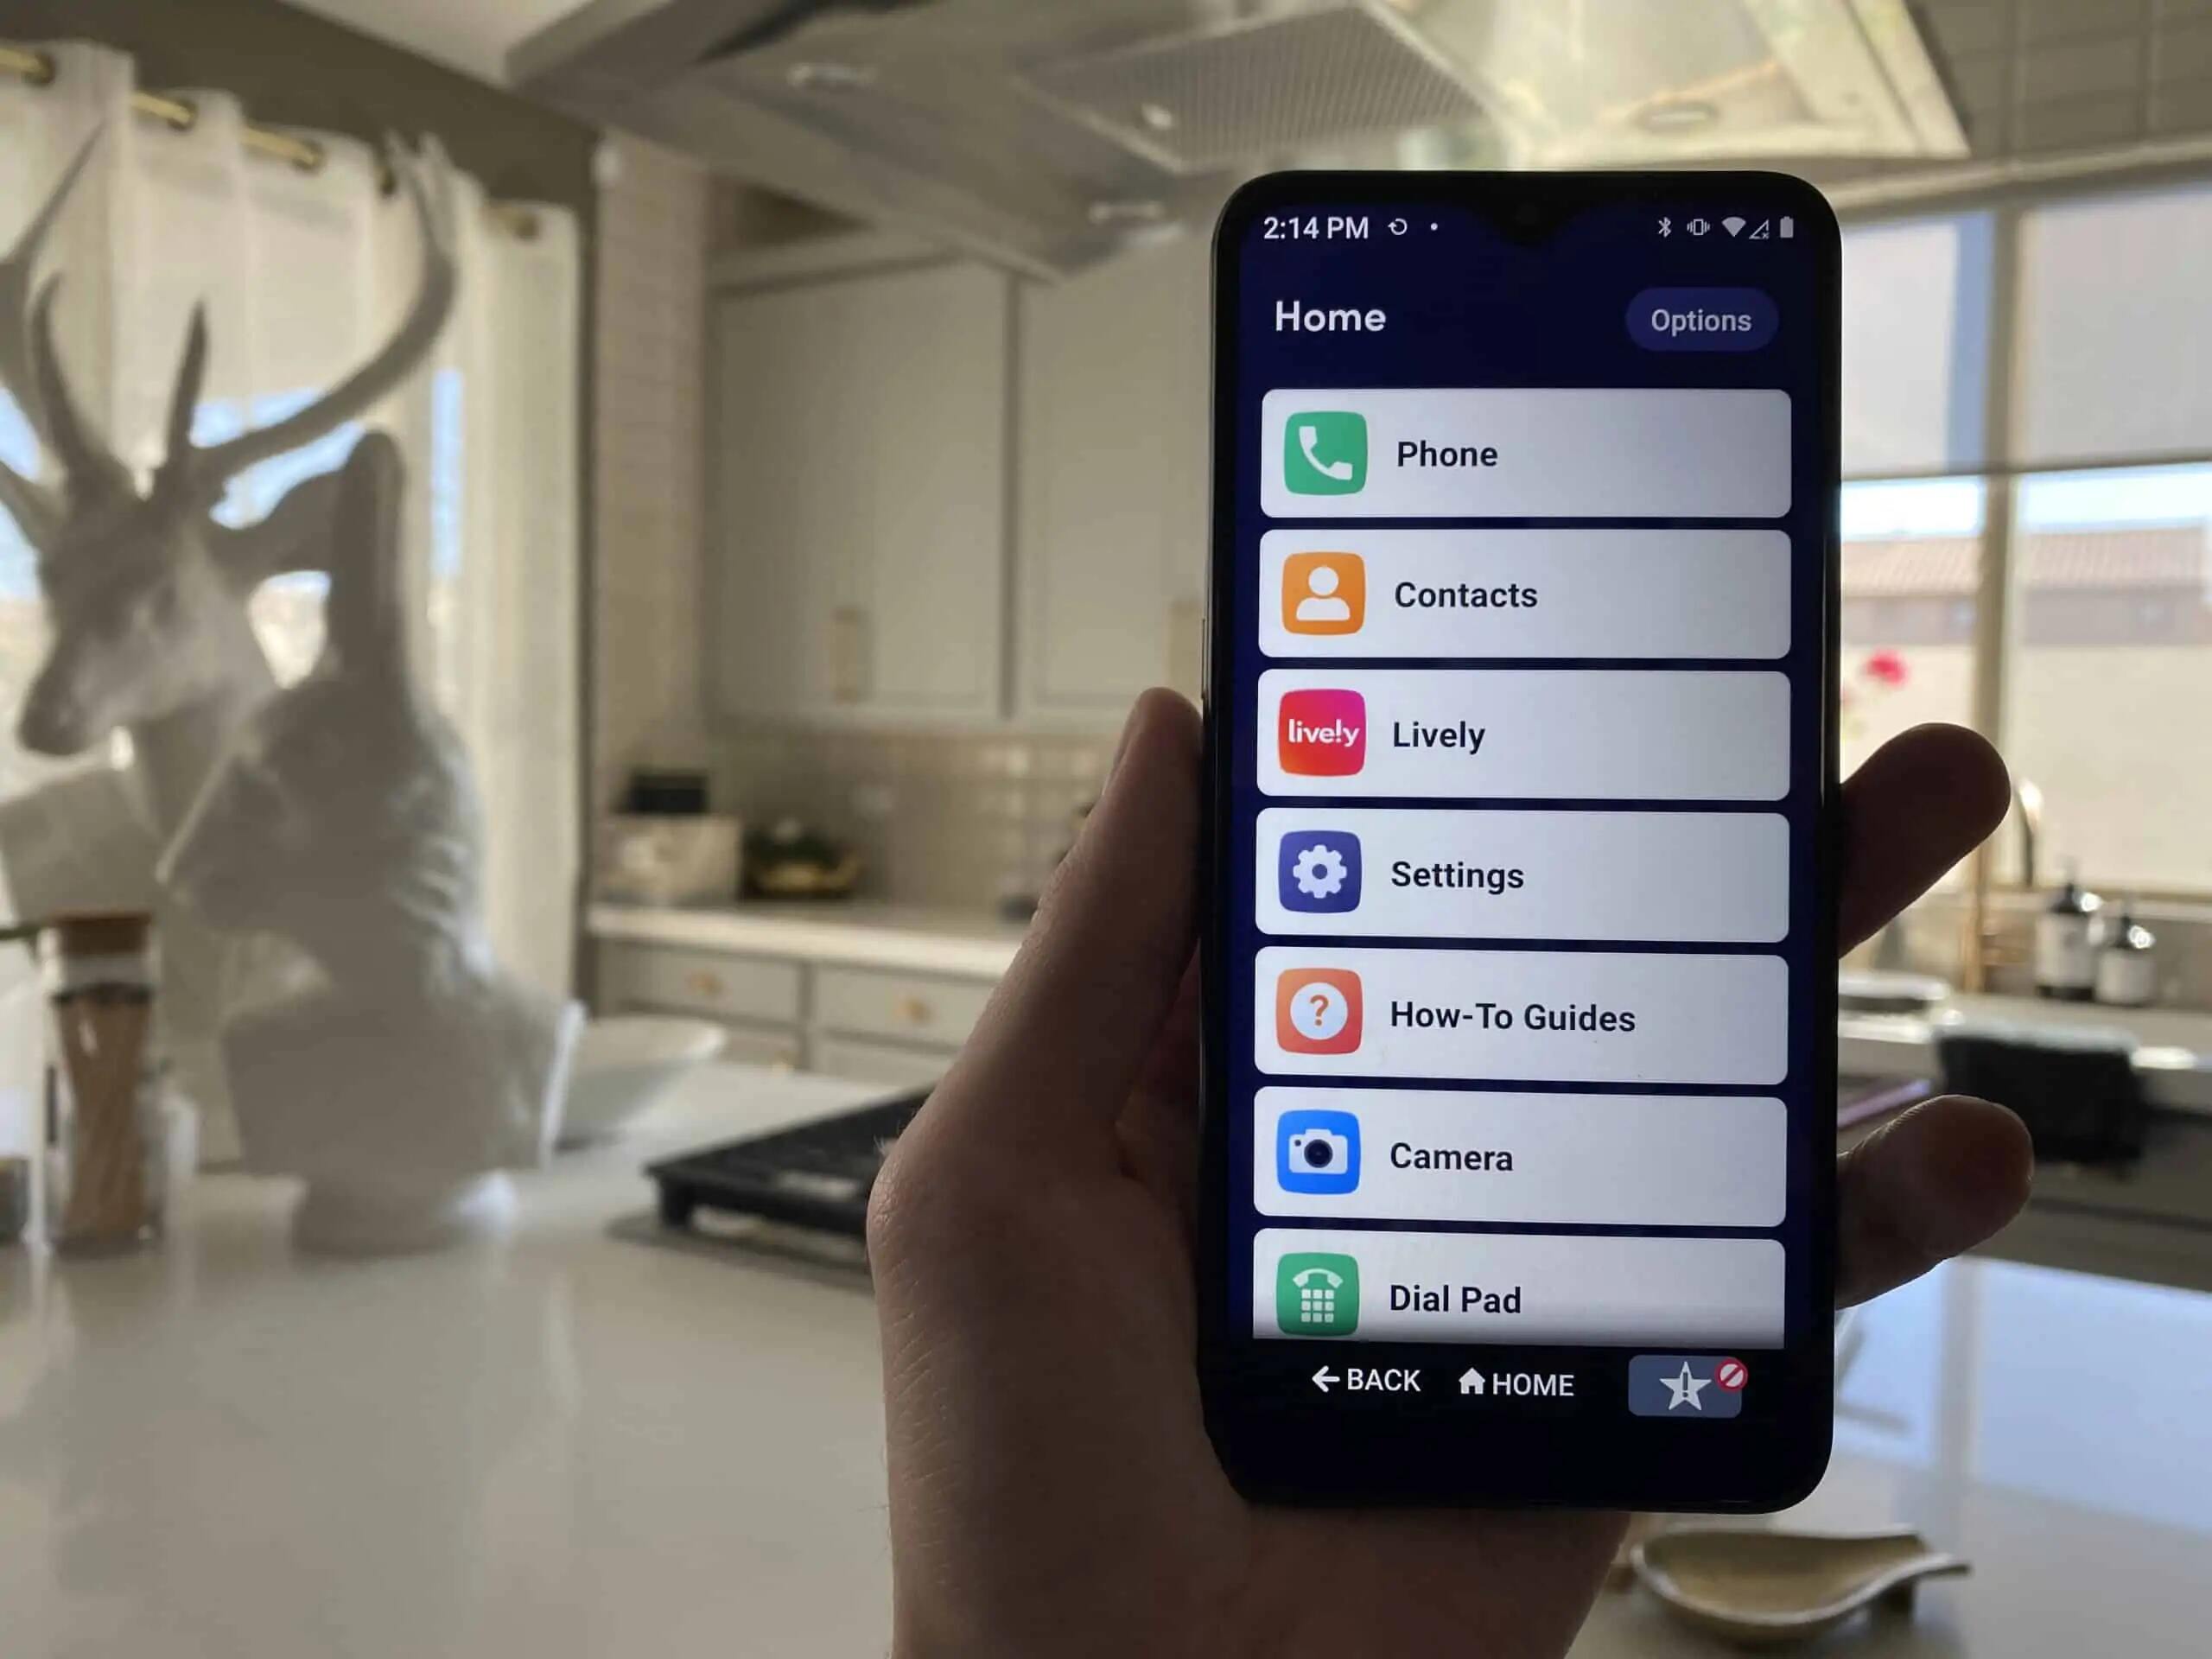
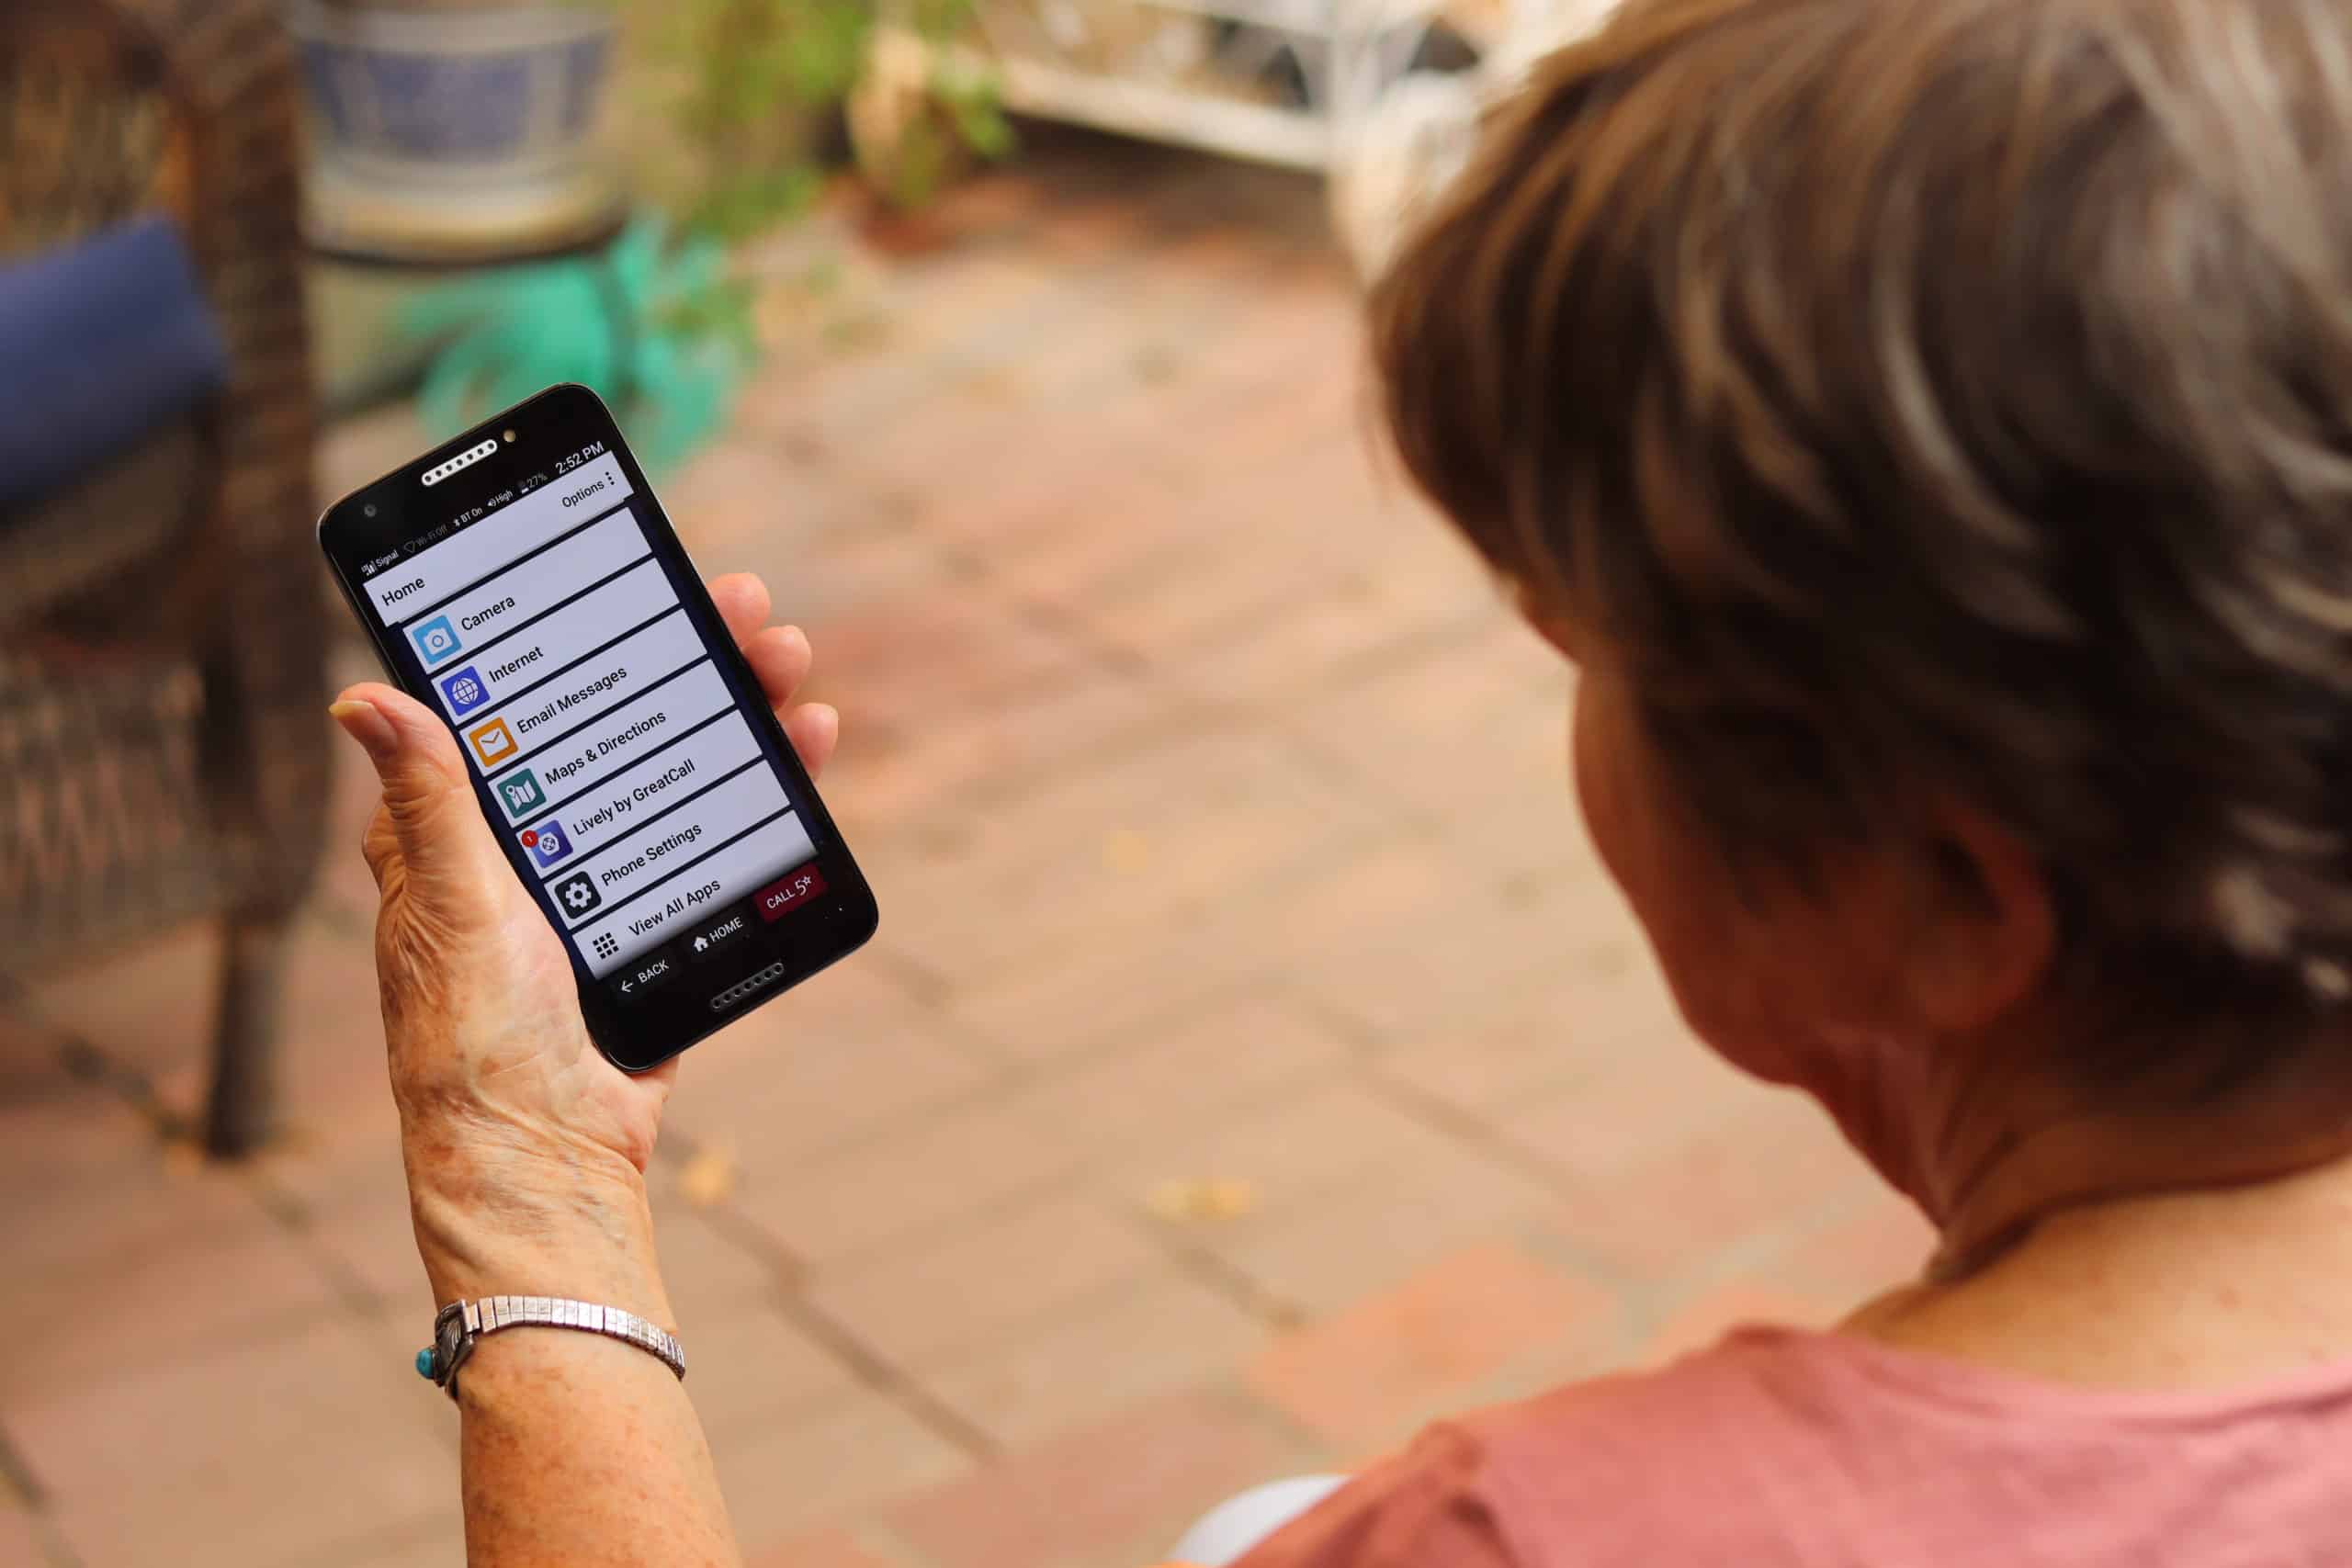
The Jitterbug smartphone is specifically designed for seniors, offering a user-friendly interface and simplified features. With its large, easy-to-read screen and straightforward setup, activating your Jitterbug smartphone is a breeze.
Activating your Jitterbug smartphone allows you to access a variety of features and services, such as making calls, sending text messages, browsing the internet, and using helpful applications. This guide will provide clear instructions to get your Jitterbug smartphone up and running in no time.
Before we dive into the activation process, please make sure you have your Jitterbug smartphone and all the necessary accessories on hand. It’s also important to have a stable internet connection to ensure a successful activation.
Now that you’re ready, let’s begin the process of activating your Jitterbug smartphone!
Step 1: Check the Package Contents
Before getting started with the activation process, it’s important to check the package contents to ensure that you have everything you need. This will help ensure a smooth activation and avoid any unnecessary delays.
When you receive your Jitterbug smartphone package, carefully open it and take out all the contents. Typically, the package will include the following items:
- Jitterbug smartphone
- Charging cable
- Wall adapter
- Instruction manual
- Any additional accessories or documentation
Take a moment to inspect each item to make sure it’s in good condition and free from any defects or damages. If you notice any issues, such as a damaged screen or missing accessories, it’s important to contact customer support or your service provider as soon as possible.
Additionally, it’s a good idea to read through the instruction manual provided in the package. This will give you an overview of the phone’s features and functions, as well as specific instructions on how to activate and set up your Jitterbug smartphone.
By thoroughly checking the package contents and familiarizing yourself with the included items, you’ll be well-prepared to proceed with the activation process.
Step 2: Charge the Phone
After verifying the package contents, it’s essential to charge your Jitterbug smartphone before proceeding with the activation process. This will ensure that the device has sufficient battery power for setup and usage.
Start by locating the provided charging cable and wall adapter in the package. Plug one end of the charging cable into the smartphone’s charging port, which is typically located at the bottom or side of the device. Then, insert the other end of the cable into the wall adapter.
Next, find a nearby electrical outlet and plug the wall adapter into it. Ensure that the outlet is functioning properly and that the charger is securely connected. Once plugged in, a charging indicator or battery icon should appear on the screen, indicating that the smartphone is charging.
Allow the Jitterbug smartphone to charge for a sufficient period of time to reach a decent battery level. The initial charging process may take some time, so it’s advisable to leave the phone connected for at least a couple of hours or until the battery is fully charged.
During the charging process, it’s a good idea to refrain from using the phone or turning it on. This allows the battery to charge more efficiently and ensures a longer overall battery life for your device.
Once the Jitterbug smartphone has reached an adequate battery level, you’ll be ready to move on to the next step of the activation process. Charging the phone beforehand ensures that you won’t encounter any power-related issues during setup and ensures a smooth activation experience.
Step 3: Turn on the Phone
With your Jitterbug smartphone fully charged, it’s time to power it on and get ready for the activation process. Turning on the phone is a simple step that will allow you to access the initial setup and activation screens.
To turn on your Jitterbug smartphone, locate the power button, typically found on the side or top of the device. Press and hold the power button for a few seconds until the screen lights up, and the Jitterbug logo appears. Release the power button, and the phone will begin to boot up.
As the phone powers on, you may see additional startup screens or animations. This is normal and part of the initial setup process. It’s important to allow the phone enough time to complete the booting process and load the necessary system files.
Once the startup process is complete, you’ll be greeted with the setup wizard, guiding you through the initial configuration steps. This will include language selection, Wi-Fi setup, and other essential settings.
If prompted, select your preferred language from the options provided. Then, follow the on-screen instructions to connect your Jitterbug smartphone to a Wi-Fi network. A stable internet connection is required for the activation process, as well as for downloading any necessary updates or additional content.
Once connected to Wi-Fi, the phone may check for updates and download them if necessary. It’s recommended to allow the updates to install to ensure that your Jitterbug smartphone is running the latest software version, providing the best performance and security.
With the phone powered on and connected to Wi-Fi, you’re now ready to proceed to the next step of the activation process.
Step 4: Sign in or Create an Account
Now that your Jitterbug smartphone is powered on and connected to Wi-Fi, it’s time to sign in or create an account to proceed with the activation. Signing in or creating an account is necessary to associate your phone with your service provider, ensuring that it is activated and ready to use.
If you are an existing customer with a Jitterbug smartphone or have an account with the service provider, select the “Sign in” option on the setup wizard. Enter your login credentials, such as your username and password, and follow the on-screen prompts to sign in to your account.
If you are a new Jitterbug smartphone customer or do not have an existing account, look for the “Create an Account” option and select it. This will initiate the account creation process, where you will be required to provide personal information and create a username and password.
Make sure to enter accurate and up-to-date information during the account creation process. This information is necessary for your service provider to activate your phone and provide you with the appropriate services and support.
Once you have signed in or created an account, the setup wizard may prompt you to review and agree to any terms and conditions or privacy policies. Take the time to read through this information carefully and, if satisfied, accept the terms to continue with the activation process.
By signing in or creating an account, you are ensuring that your Jitterbug smartphone is associated with your account and ready for activation. This step is crucial for enabling the full functionality of your phone and accessing the services provided by your service provider.
Step 5: Set up the Phone
After signing in or creating an account, you can now proceed with setting up your Jitterbug smartphone. This step involves customizing various settings to suit your preferences and ensuring that the phone is ready for use.
Follow the on-screen instructions provided by the setup wizard to configure the initial settings. This may include options such as date and time settings, display brightness, sound preferences, and other personalization options.
During the setup process, you may also have the opportunity to transfer data from your old phone to your new Jitterbug smartphone. If you wish to transfer contacts, messages, or other data, follow the prompts and select the appropriate transfer method, such as using a backup file, syncing with a cloud service, or transferring via Bluetooth.
Additionally, you may have the option to customize the home screen layout, choose default apps for specific functions, and set up any additional security measures, such as a PIN or fingerprint unlock.
Take your time to explore and adjust the various settings based on your preferences. This will ensure that your Jitterbug smartphone is tailored to your needs and provides an optimal user experience.
Once you have finished setting up the phone and have customized the necessary settings, the setup wizard will guide you to the final step of the activation process: activating your Jitterbug smartphone with your service provider.
By following the setup instructions and configuring the phone to your preferences, you are ready to proceed to the final step of activation.
Step 6: Activate the Phone
With your Jitterbug smartphone set up and personalized, it’s time to activate the phone with your service provider. Activation is the final step in the process, ensuring that your phone is ready to make calls, send messages, and access all the features and services provided by your service plan.
Follow the prompts provided by the setup wizard to activate your Jitterbug smartphone. This may involve providing necessary information, such as your phone number, account details, or activation code. The specific steps may vary depending on your service provider, so make sure to carefully follow the on-screen instructions.
If required, the setup wizard may prompt you to insert a SIM card into your Jitterbug smartphone. Locate the SIM card slot, usually located on the side or back of the phone. Carefully insert the SIM card provided by your service provider, making sure it fits securely into the slot.
Once the activation process is initiated, your Jitterbug smartphone will communicate with your service provider’s system to establish a connection. This may take a few moments, so be patient and allow the activation process to complete.
During the activation process, you may see progress indicators or notifications on the screen. Once the activation is successful, you should receive a confirmation message or notification indicating that your Jitterbug smartphone is now activated and ready to use.
At this point, you can test the functionality of your phone by making a test call or sending a text message. Ensure that you have a strong cellular signal or are connected to a Wi-Fi network for the best calling and messaging experience.
Congratulations! You have successfully activated your Jitterbug smartphone. Now you can start exploring all the features and capabilities of your phone and enjoy the benefits of a fully functional device.
Conclusion
Congratulations on successfully activating your Jitterbug smartphone! By following the step-by-step guide provided in this tutorial, you have taken the necessary steps to set up your phone and ensure that it is ready for use.
Starting with checking the package contents, charging the phone, and turning it on, you have followed a systematic approach to get your Jitterbug smartphone up and running. By signing in or creating an account, you have associated your phone with your service provider, enabling access to services and support.
Setting up the phone and personalizing the settings has allowed you to tailor the Jitterbug smartphone to your preferences, ensuring an optimal user experience. And finally, by activating the phone with your service provider, you have completed the process and can now enjoy all the features and services that your Jitterbug smartphone has to offer.
Remember to familiarize yourself with the user manual provided in the package for more information on using your Jitterbug smartphone’s features and functions. Don’t hesitate to reach out to customer support or your service provider if you encounter any difficulties or have any questions along the way.
Thank you for choosing the Jitterbug smartphone. We hope this guide has been helpful in activating your phone and that you enjoy a seamless and enjoyable experience with your new device!