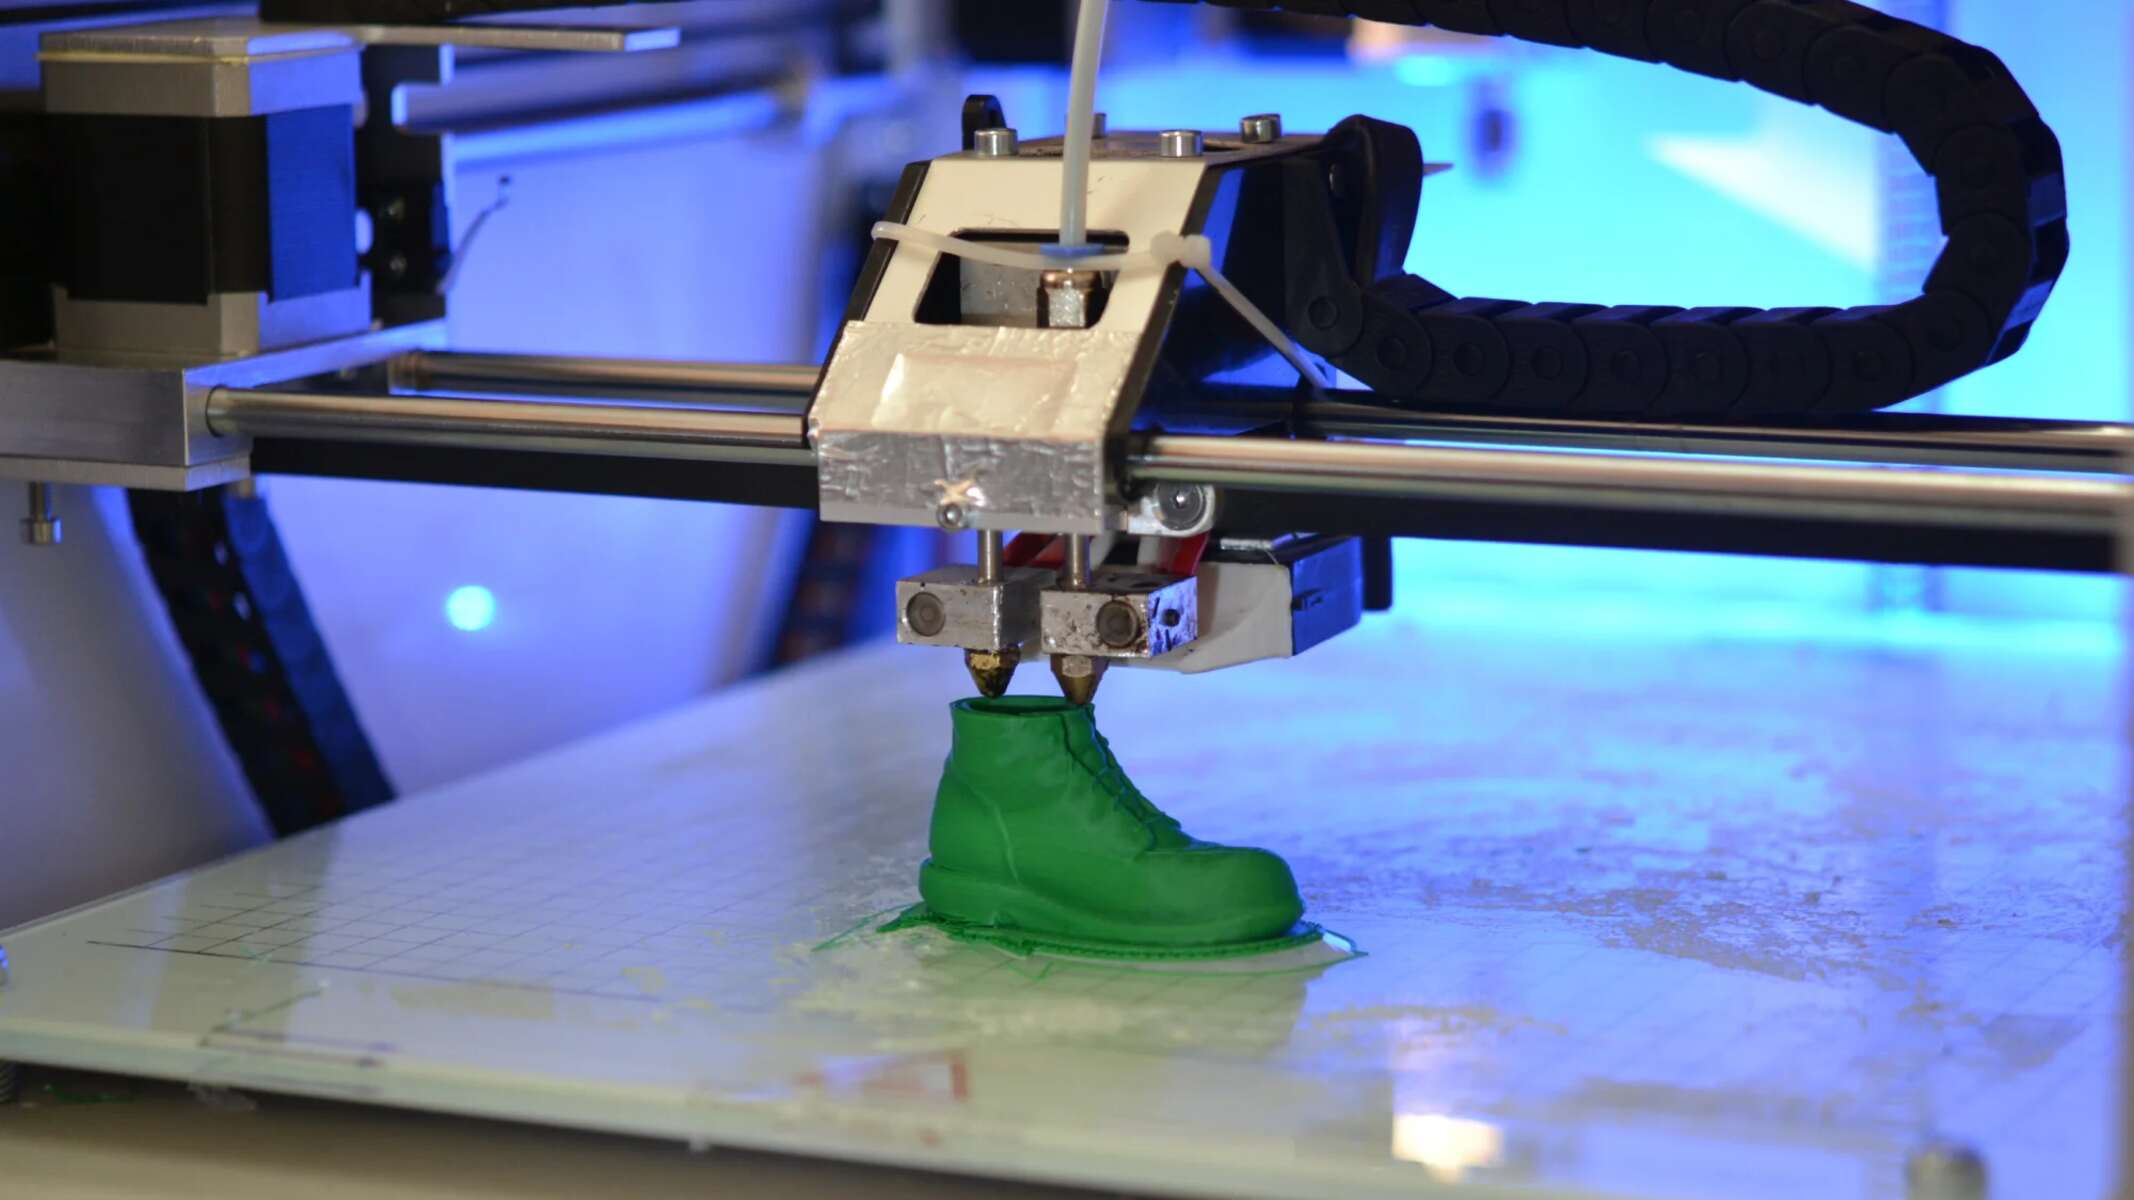
Introduction
Welcome to the exciting world of 3D printing! With this revolutionary technology, you can bring your digital designs to life, creating tangible objects that were once only possible in your imagination. But what if you don’t have access to a 3D printer? Don’t worry! In this article, we’ll explore how you can 3D print without owning a printer.
Gone are the days when you needed to invest in expensive equipment and learn complex software to enjoy the benefits of 3D printing. Thanks to the rise of online 3D printing services, anyone can now easily turn their ideas into reality. These services provide a platform where you can upload your digital models and have them printed and delivered to your doorstep.
Not only does using an online 3D printing service save you the hassle of buying and maintaining a 3D printer, but it also opens up a world of possibilities. These services offer a wide range of materials, colors, and finishes, allowing you to create customized objects with professional-grade quality.
In this article, we’ll guide you through the process of 3D printing without a printer. We’ll cover everything from choosing the right online 3D printing service to preparing and customizing your model for printing. By the end, you’ll have all the knowledge you need to bring your ideas to life through 3D printing.
Using Online 3D Printing Services
Online 3D printing services are a convenient and cost-effective way to bring your 3D designs to life. These platforms connect designers with 3D printing facilities around the world, making the process easily accessible to anyone with an internet connection. Here’s how you can use online 3D printing services:
1. Research and choose a reliable service: Begin by researching different online 3D printing services and comparing their features, materials, pricing, and customer reviews. Look for platforms that have a user-friendly interface and offer a wide range of printing options.
2. Create or obtain a 3D model: If you don’t have a 3D model ready, you can either design one yourself using 3D modeling software or obtain pre-made models from online repositories that offer free or paid designs. Make sure the model is compatible with the chosen 3D printing service’s supported file formats.
3. Check the design guidelines: Each 3D printing service will have specific design guidelines to ensure successful printing. These guidelines may include minimum wall thickness, minimum detail size, and recommendations for file format and resolution. Familiarize yourself with these guidelines to avoid any potential issues during the printing process.
4. Upload your model: Once you have your 3D model ready, navigate to the chosen 3D printing service’s website and follow their instructions to upload your model. You may need to specify the desired dimensions, materials, and any additional requirements or customizations.
5. Preview and customize: Most online 3D printing services provide a preview of your model before finalizing the order. Take advantage of this feature to inspect your design from different angles, check for any errors or imperfections, and make any necessary adjustments or customizations.
6. Get a price quote: Depending on the chosen service, you may receive an instant price quote based on the specifications and options you’ve chosen. Take note of the cost and evaluate if it fits within your budget. If the price is too high, you can consider making modifications to your design or choosing a different material to reduce costs.
7. Place your order: Once you’re satisfied with the preview and price quote, proceed to place your order. Review the order details carefully, including the size, materials, and any additional options you’ve chosen. Double-check the shipping information to ensure your 3D print is delivered to the correct location.
8. Pay and track your order: Complete the payment process using the available payment methods. You will typically receive a confirmation email with a tracking number that allows you to monitor the progress of your 3D print, from production to shipping.
9. Receive your 3D print: After the production process is complete, your 3D print will be carefully packaged and shipped to your designated address. Depending on the chosen service and shipping method, the delivery time may vary. Remember to handle your 3D print with care upon arrival.
Using online 3D printing services simplifies the process of getting your designs 3D printed, even without owning a printer. By following these steps and utilizing the features and options offered by the online platform, you can bring your digital creations to life with ease and convenience.
Choosing and Preparing Your Model
When it comes to 3D printing, the first step is to choose or create a 3D model that you want to bring to life. Whether you are designing your own model or obtaining one from an online repository, there are a few important factors to consider during the selection process:
1. Purpose and functionality: Think about the purpose and functionality of your 3D print. Are you creating a prototype, an artistic sculpture, or a functional object? Understanding the intended use of your print will help guide your choices in terms of design complexity, material selection, and structural requirements.
2. Size and scale: Consider the size and scale of your 3D print. Take into account the dimensions and proportions that are appropriate for your desired application. Keep in mind that larger prints may require additional support structures and longer printing times.
3. Design complexity: Evaluate the complexity of your selected design. Intricate and highly detailed models may require higher printing resolution to accurately capture all the fine details. If your design has intricate overhangs or unsupported areas, you may need to consider adding support structures during the preparation process.
4. Printability: Before finalizing your model, check if it is printable. Pay attention to features like thin walls, small details, and overhangs that may affect the printability. Use software tools, such as mesh repair and slicing software, to identify and fix any issues that could potentially cause printing problems.
5. Material compatibility: Consider the material compatibility with your chosen 3D printing service. Different printing technologies and materials have specific requirements and limitations. Make sure your model is suitable for the available materials and can be successfully printed using the technology offered by the service.
Once you’ve selected your 3D model, you need to properly prepare it for the printing process. Here are some important steps to follow:
1. Check the file format: Ensure that your model is saved in a compatible file format supported by the chosen 3D printing service. Common formats include STL, OBJ, and FBX.
2. Scale and orient the model: Adjust the scale of your model, if needed, to match the desired size. Also, consider the orientation of your print to maximize print quality and minimize the need for supports. Experiment with different orientations to achieve the optimal balance between visual appeal and printability.
3. Algorithmically generate supports (if required): If your model has complex overhangs or unsupported areas, you may need to generate support structures. This is particularly important for resin-based or stereolithography (SLA) 3D printing technologies. Use software tools to automatically generate supports or manually add them to ensure successful printing and easy removal afterwards.
4. Hollowing and infill options: If your model doesn’t require solid fill, hollowing it can help save material and reduce printing time. Many slicing software programs offer options to hollow out your model and set the desired infill percentage, which determines the amount of internal structure. This is particularly useful when creating larger prints or reducing printing costs.
5. Export the prepared model: Once your model is ready, export it as a new file after making all the necessary adjustments. This ensures that you have a separate copy of the model that is specifically optimized for 3D printing.
By carefully selecting and preparing your 3D model, you can optimize the printing process and increase your chances of achieving successful and high-quality prints.
Uploading Your Model to the Online 3D Printing Service
Once you have your 3D model prepared and ready for printing, the next step is to upload it to the chosen online 3D printing service. Here’s how you can easily upload your model and get it ready for printing:
1. Sign in to your account: If you haven’t already done so, sign in to your account on the online 3D printing service’s website. If you’re new to the platform, you may need to create an account first.
2. Find the “Upload” or “Start a New Order” option: Navigate to the appropriate section of the website that allows you to upload your 3D model. Look for buttons or links that indicate “Upload” or “Start a New Order.”
3. Select the file: Click on the “Upload” button or link and browse your computer to locate the file of your 3D model. Select the file and confirm the upload.
4. Model preview: After the file is uploaded, the online 3D printing service will generate a preview of your model. This allows you to examine your design from different angles and ensure it is correctly uploaded. Take advantage of the built-in 3D viewer or rotate and zoom functions to inspect your model thoroughly.
5. Scale and set dimensions: Depending on the platform, you may have the option to adjust the scale and dimensions of your model. Ensure that the dimensions are accurate and correspond to your desired print size. Make any necessary adjustments to achieve the desired size and proportions.
6. Material and color selection: Choose the material and color for your 3D print. Online 3D printing services usually offer a variety of materials, such as PLA, ABS, resin, nylon, and more. Consider the properties and characteristics of each material and select the one that best suits your project’s requirements. Additionally, if color options are available, choose the color that matches your vision.
7. Required settings and options: Some online services may provide additional options or settings for your print. These could include layer thickness, infill density, and print resolution. Adjust these settings according to your preferences or project requirements. If you are unsure, the default settings provided by the service are usually a good starting point.
8. Quantity and additional copies: Specify the desired quantity of prints you want to order. If you require multiple copies of your model, enter the desired quantity accordingly. Some services may offer discounts or bulk pricing for larger orders.
9. Review the order summary: Before finalizing the order, carefully review the order summary. Double-check the chosen options, materials, dimensions, and any additional features. Ensure that everything is as you intended and make any necessary adjustments before proceeding.
10. Confirm and place the order: Once you are satisfied with the order details, confirm and place your order. Take note of any order number or confirmation email that you receive, as this will be important for tracking and reference purposes.
By following these steps to upload your model to the online 3D printing service, you can ensure that your design is accurately captured and ready for production. Take the time to review the preview and confirm the order details to ensure a smooth and successful printing process.
Customizing Your 3D Print
When using an online 3D printing service, you have the opportunity to customize your 3D print and add personal touches to make it truly unique. Here are some ways you can customize your 3D print:
1. Adding text or logos: Consider incorporating text or logos into your design to add a personalized touch. Online 3D printing services often provide options for adding text or embossing logos onto your 3D model. This is particularly useful for branding, personalization, or creating custom gifts.
2. Modifying the design: If you want to make modifications to the existing design, you can use 3D modeling software to tweak elements or add new features. This allows you to turn a generic design into something that is truly your own. Use tools like Boolean operations, scaling, and reshaping to customize the model according to your preferences.
3. Combining multiple models: Another way to customize your 3D print is by combining multiple models into a single print. This can be useful when you want to create a more complex or intricate object. Merge different elements together using 3D modeling software to create a cohesive and unique design.
4. Surface finishes and textures: Explore the option of adding surface finishes and textures to your 3D print. Some online 3D printing services offer different finishes, such as smooth, matte, or glossy, which can enhance the visual appeal of your object. Additionally, you can experiment with textures like wood grain, stone patterns, or even customized patterns to give your print a unique feel.
5. Custom color options: Depending on the selected online 3D printing service, you may have the option to choose custom colors for your print. This allows you to add vibrant splashes, gradient effects, or even multi-colored elements to your design. Consider the effect that different colors can have on the overall look and feel of your 3D print.
6. Functional modifications: In addition to aesthetic customizations, you can also make functional modifications to your 3D print. This could involve integrating moving parts, adding assembly features, or incorporating specific mechanisms into your design. Consider the functionality you want your print to have and modify the model accordingly.
7. Assembly or disassembly options: If your model consists of multiple components, you can customize the design to be assembled or disassembled easily. This allows for more flexibility and convenience, especially if your design requires intricate or delicate parts.
When customizing your 3D print, it’s important to consider the limitations and capabilities of the chosen online 3D printing service. Some customization options may require additional costs or specific printing technologies. Make sure to review the customization options offered by the service and choose the ones that best suit your needs and budget.
Remember, the goal of customization is to create a 3D print that reflects your unique vision and personal style. Take advantage of the available options and tools to make your design stand out and create a one-of-a-kind 3D print that you can be proud of.
Choosing the Right Material for Your 3D Print
Choosing the right material is crucial when it comes to 3D printing. The material you select will not only affect the durability and strength of your 3D print but also its appearance and functionality. With a wide range of materials available, here are some factors to consider when choosing the right material for your 3D print:
1. Functional requirements: Consider the intended function of your 3D print. If you need a strong and rigid object, materials like ABS or nylon are suitable choices. On the other hand, if you require flexibility or impact resistance, materials like TPU or TPE (thermoplastic elastomers) may be more appropriate. Evaluate the specific properties and characteristics of each material to match your functional requirements.
2. Visual appeal: Think about the desired aesthetics of your 3D print. Some materials offer a smooth and glossy finish, while others provide a matte or textured appearance. Consider the visual look you want to achieve and choose a material that aligns with your design goals. Additionally, certain materials may be more suitable for adding post-processing finishes or paint to enhance the overall look of the print.
3. Material properties: Familiarize yourself with the properties of different materials. Some materials have a higher melting point, while others may be more resistant to chemicals or temperature fluctuations. Understand the specific strengths, weaknesses, and limitations of each material to ensure it meets the requirements of your project.
4. Cost considerations: Budget is an important factor to consider when choosing a material. Different materials come at various price points, so evaluate the cost of the material and how it fits within your budget. Keep in mind that more exotic or specialized materials may be pricier than standard options.
5. Printing technology compatibility: Take into account the compatibility of the material with the chosen online 3D printing service’s technology. Each material may require specific printing parameters and processes. Ensure that the material is compatible with the available printing technology and that the service can successfully print with the chosen material.
6. Material availability: Confirm the availability of the material you choose. While some materials are widely available, others may have limited availability due to manufacturing constraints or regional limitations. Make sure the material you desire is accessible and can be easily obtained from the chosen online 3D printing service or other reliable sources.
7. Environmental considerations: Consider the environmental impact of the material. Some materials, such as PLA (polylactic acid), are derived from renewable resources and are biodegradable, while others may have a larger carbon footprint or require specific disposal methods. Evaluate the environmental implications of the material and choose one that aligns with your sustainability values.
By carefully considering these factors, you can select the right material for your 3D print that meets your functional requirements, provides the desired aesthetics, fits within your budget, and aligns with your environmental considerations. Remember to consult the available material options provided by the online 3D printing service and make an informed decision based on the specific needs of your project.
Selecting the Appropriate Print Settings
Choosing the appropriate print settings is crucial for achieving a successful and high-quality 3D print. These settings determine how your model will be printed, including factors such as layer height, print speed, and infill density. Here are some considerations when selecting the print settings for your project:
1. Layer height: Layer height refers to the thickness of each layer applied during the printing process. A smaller layer height, such as 0.1mm, produces finer details but results in longer printing times. Conversely, a larger layer height, like 0.3mm, allows for faster prints but with slightly reduced detail. Choose the layer height based on the level of detail required for your model and the time constraints you have.
2. Print speed: The print speed determines how fast the print head moves during the printing process. Higher print speeds can reduce printing time but may sacrifice print quality, especially for intricate designs. Slower print speeds generally result in better surface finish and finer details. It’s recommended to start with the default suggested print speed provided by the 3D printing service and adjust accordingly based on the complexity and size of your model.
3. Infill density: Infill density refers to the internal structure of your print. Higher infill percentages create stronger and more solid prints, but use more material and take longer to print. Lower infill percentages, such as 10-20%, are suitable for prints that don’t require extensive strength. Adjust the infill density based on the application of your print and the desired balance between strength and material usage.
4. Support structures: If your model has overhangs or unsupported areas, support structures may be necessary to ensure successful printing. Most slicing software includes options to generate automatic supports. Consider enabling supports for areas where the overhang angle exceeds the printer’s capability. Keep in mind that supports are usually printed in the same material as your model and removing them may require additional post-processing steps.
5. Raft and brim: For prints that have a small footprint or adhere poorly to the print bed, using a raft or brim can help improve bed adhesion. A raft is a thick layer that is printed beneath your model, providing a stable foundation. A brim creates a thin perimeter around the model to increase surface area and adhesion. Experiment with these options if your prints are experiencing bed adhesion issues.
6. Print temperature: The print temperature is the temperature at which the printer’s nozzle melts the filament. Different materials have different recommended print temperatures. It’s crucial to choose the appropriate print temperature to ensure proper flow and adhesion of the material. Consult the material specifications provided by the 3D printing service or manufacturer to determine the optimal print temperature.
7. Cooling settings: Cooling settings control the cooling fan speed during the printing process. The fan helps solidify each layer, reducing warping and improving overall print quality, especially for materials like PLA. You can adjust the cooling settings based on the material being used, the size of the printed object, and any specific recommendations provided by the printing service or material manufacturer.
When selecting the appropriate print settings, it is crucial to strike a balance between print quality, speed, and material usage. You may need to experiment and iterate to find the optimal settings for your specific model and desired outcome. Take note of the successful print settings for future reference and continually refine your settings based on your experience and feedback from the online 3D printing service.
Reviewing and Confirming Your Order
Before finalizing your order with the online 3D printing service, it’s crucial to review and confirm all the details to ensure a smooth and successful printing process. Here are some important steps to take when reviewing and confirming your order:
1. Model preview: Most 3D printing services provide a model preview after you have uploaded your file. Take the time to carefully inspect the model from different angles and zoom in to check for any imperfections or errors. Ensure that the model accurately represents your design and meets your expectations.
2. Dimensions and scaling: Double-check the dimensions of your model and compare them to your intended size. Verify that the scaling is correct and matches your requirements. Pay attention to any requested units of measurement and confirm that they are accurate.
3. Material selection: Review the chosen material for your 3D print. Ensure that the selected material aligns with your desired characteristics, functionality requirements, and visual appeal. Cross-reference the material specifications with your project needs to confirm it is the right choice.
4. Customizations: If you have any customizations such as engravings, color choices, or additional options, review them to confirm that they are accurately specified. Double-check spelling, alignment, and any other details to minimize errors or misunderstandings.
5. Quantity and pricing: Verify the quantity of prints you are ordering and ensure it matches your requirements. Check the pricing information to confirm that it aligns with your budget. Take note of any quantity discounts or promotions that may apply to your order.
6. Shipping and delivery details: Carefully review the shipping address and contact information provided. Make sure that the address is complete and correct to avoid any delivery issues. Consider any specific shipping preferences or requirements, such as choosing a faster shipping method or adding insurance.
7. Terms and conditions: Take the time to read and understand the terms and conditions of the online 3D printing service. Familiarize yourself with any policies related to refunds, cancellations, returns, or disputes. This ensures that you have a clear understanding of your rights and responsibilities as a customer.
8. Confirm the order: Once you have thoroughly reviewed all the details, confirm the order through the online 3D printing service’s website. This typically involves clicking on a “Confirm” or “Place Order” button. Some services may require an additional step of making the payment before the order is considered finalized.
9. Order confirmation: After confirming the order, keep an eye out for a confirmation email or order number provided by the 3D printing service. This will serve as proof of your order and will be important for tracking, any future inquiries, or order modifications.
By carefully reviewing and confirming your order, you can minimize the chances of errors or misunderstandings during the printing process. It allows you to double-check the details, ensure accuracy, and provide clear instructions for the 3D printing service. Taking the time to carefully review all aspects of your order promotes a smoother and more satisfying experience for both you and the service provider.
Paying for Your 3D Print
Once you have confirmed your order with the online 3D printing service, it’s time to make the payment. Paying for your 3D print is a crucial step in the process. Here are some important considerations when it comes to payment:
1. Payment methods: Online 3D printing services typically offer a range of payment methods to accommodate different preferences and needs. Common payment options include credit/debit cards, PayPal, bank transfers, or other secure online payment platforms. Choose the payment method that you are most comfortable with and that is available through the chosen service.
2. Payment security: When making an online payment, it’s important to prioritize security. Ensure that the online 3D printing service has appropriate security measures in place to protect your financial information. Look for indicators such as secure payment gateways, SSL encryption, and reputable payment processors. If you have any concerns about payment security, reach out to the service provider for clarification.
3. Currency conversion and fees: If you are paying in a different currency than the one used by the online 3D printing service, be aware of any currency conversion fees or exchange rates that may apply. Some payment methods may charge additional fees for currency conversion, so factor this into your budget and consider using a payment method that minimizes these fees.
4. Payment verification: In some cases, additional verification steps may be required to ensure the validity of your payment. This could involve confirming your identity, providing additional documentation, or going through a verification process with your payment provider. Be prepared to comply with any verification processes to ensure a smooth transaction.
5. Order tracking and payment confirmation: After making the payment, you should receive a confirmation email or payment receipt from the online 3D printing service. This will serve as proof of your payment and order confirmation. Keep this information safe and easily accessible for future reference and tracking purposes.
6. Additional fees and taxes: Depending on your location and the online 3D printing service’s policies, additional fees and taxes may apply to your order. These could include shipping costs, import duties, or local taxes. Familiarize yourself with any potential additional charges and factor them into your budget to avoid any surprises.
7. Payment disputes and customer support: If you encounter any issues or have concerns regarding your payment, don’t hesitate to reach out to customer support. They can provide assistance and guidance in resolving any payment-related problems, ensuring a satisfactory resolution for both parties involved.
Remember, completing the payment process is a crucial step to finalize your order and initiate the production of your 3D print. By choosing a secure and reliable payment method, understanding any applicable fees or taxes, and keeping track of payment confirmations, you can ensure a smooth and hassle-free payment experience.
Tracking and Receiving Your 3D Print
After you have paid for your 3D print, the next exciting step is to track and receive your finished product. Online 3D printing services typically provide tracking information so you can monitor the progress of your order. Here’s what you need to know about tracking and receiving your 3D print:
1. Order tracking information: Once your order is confirmed and in production, the online 3D printing service will provide you with tracking information. This could include a tracking number or a link to a shipment tracking page. Keep this information safe and easily accessible for future reference.
2. Estimated delivery time: The online 3D printing service will provide an estimated delivery time for your order. This is an approximation of when you can expect to receive your 3D print. Bear in mind that unforeseen circumstances, such as shipping delays or customs clearance, could impact the actual delivery time.
3. Monitor the progress: Use the provided tracking information to monitor the progress of your 3D print. Follow the tracking updates from the shipping carrier to see the movement of your package. Note that there may be some time lag between scanning updates, especially during busy shipping periods or if the package is being shipped internationally.
4. Contact customer support: If you have any concerns or questions about the status of your shipment, reach out to the online 3D printing service’s customer support. They can provide you with additional information or assist you in resolving any issues that may arise during the shipping process.
5. Package reception: Once your package arrives, carefully inspect it for any signs of damage during transit. If the package appears to be damaged, document the condition with photographs and contact customer support immediately. Follow any instructions provided by the shipping carrier for receiving the package safely.
6. Quality check: Examine your 3D print carefully to ensure that it meets your expectations. Inspect the quality, surface finish, and overall accuracy of the print. If you notice any defects or errors, contact the online 3D printing service to discuss potential solutions or resolutions.
7. Post-processing and finishing: Depending on your preferences and the chosen online 3D printing service, you may want to perform additional post-processing or finishing on your 3D print. This could involve sanding, painting, or applying other finishes to enhance the appearance or functionality of your print. Follow any recommended guidelines or instructions for post-processing to achieve the desired result.
8. Share your feedback: If you are satisfied with your 3D print and the overall experience with the online 3D printing service, consider leaving feedback or a review. This helps the service provider improve their services and assists other customers in making informed decisions.
By actively tracking and monitoring the progress of your shipment, you can stay informed about the whereabouts of your 3D print and prepare for its arrival. Inspect the package and the print itself upon receipt to ensure its quality, and don’t hesitate to reach out to customer support if you have any concerns or questions. Enjoy the excitement of receiving your 3D print and exploring the possibilities of this incredible technology!
Conclusion
3D printing without owning a printer has become more accessible than ever before, thanks to the rise of online 3D printing services. In this article, we explored the process of harnessing these services to bring your digital designs to life. By using online platforms, you can upload your 3D models, customize them, choose the right material and print settings, and track and receive the final product.
Using online 3D printing services offers numerous advantages. It eliminates the need for expensive equipment and extensive technical knowledge, making the process more accessible to individuals and businesses alike. These services also provide a wide range of materials and customization options, allowing you to bring your unique ideas to life.
Throughout the process, it is essential to consider factors such as functional requirements, visual appeal, budget, and printing technology compatibility when making decisions about materials and print settings. Taking the time to review and confirm your order ensures that you’ll be satisfied with the final 3D print. And once your order is complete, tracking its progress and carefully inspecting the received product ensures a smooth and successful experience.
By utilizing online 3D printing services, you can bring your creations to life without the requirement of owning a 3D printer. Whether you need prototypes for product development, customized objects for personal use, or art pieces for creative expression, the world of 3D printing is at your fingertips.
So, embrace the possibilities that online 3D printing services offer, and let your imagination soar as you transform your digital designs into tangible, real-world objects. Get started today and experience the exciting realm of 3D printing without the need for a printer of your own.