How Do You Scroll On A MacBook Pro
Scrolling on a MacBook Pro is a breeze thanks to the intuitive trackpad and a range of customizable options. Whether you prefer using multi-touch gestures or the traditional scroll bar, Apple offers different methods to cater to your scrolling preferences. In this article, we’ll explore three primary ways to scroll on a MacBook Pro.
1. Trackpad Scrolling:
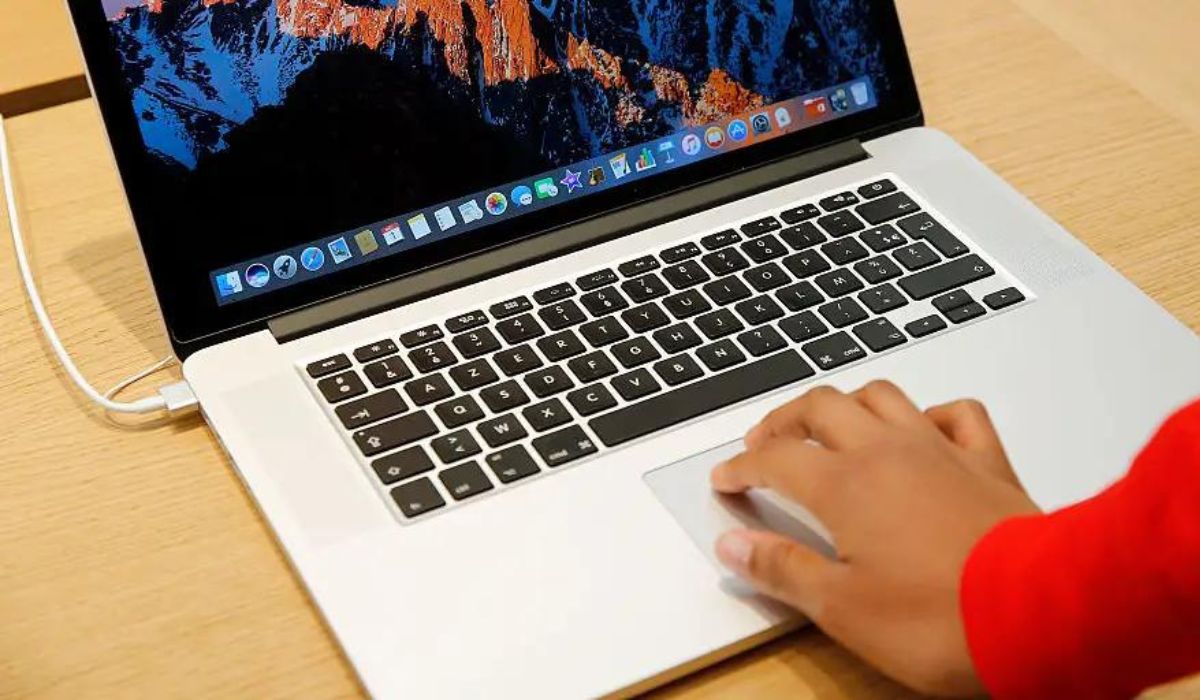
The MacBook Pro comes equipped with a multi-touch trackpad that allows for smooth and effortless scrolling. To scroll using the trackpad, simply place two fingers on the trackpad’s surface and move them up or down. This gesture allows you to scroll vertically through documents, web pages, and other content with ease.
2. Two-Finger Scrolling:
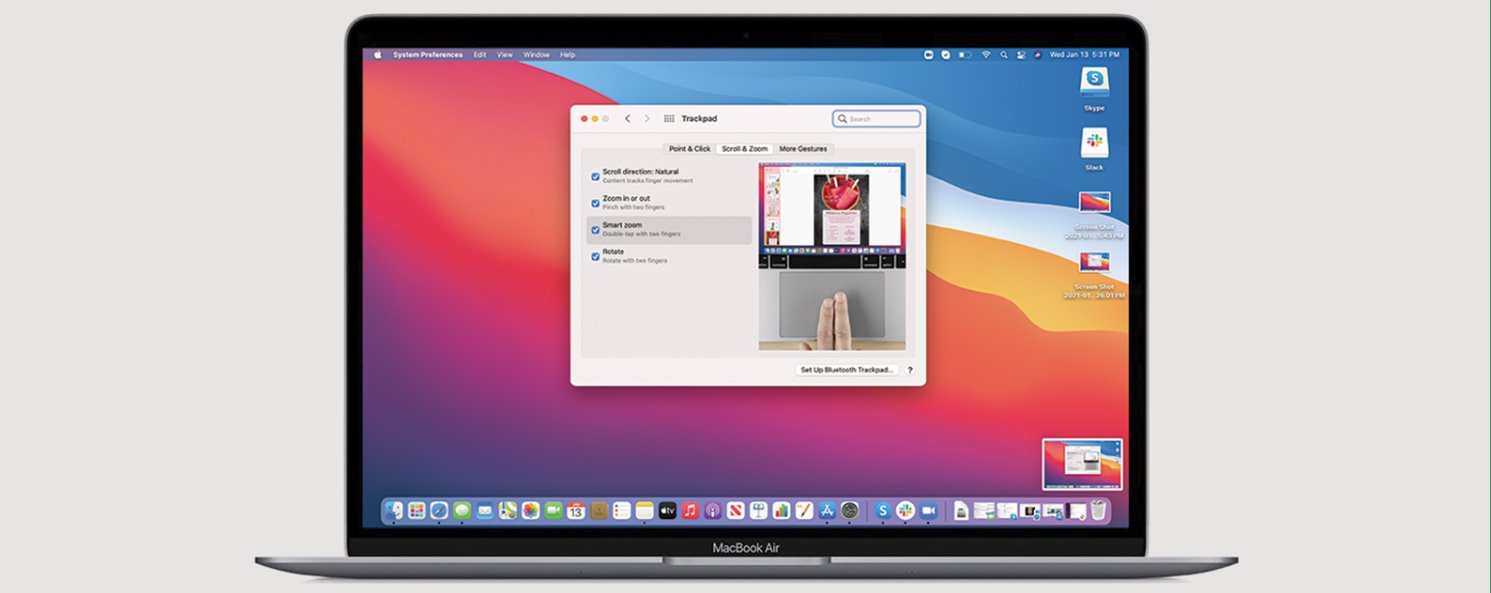
If you find it more comfortable to use individual fingers for scrolling, you can enable two-finger scrolling on your MacBook Pro. To do this, go to “System Preferences” > “Trackpad” and check the box next to “Scroll direction: natural.” With two-finger scrolling enabled, you can scroll through content by placing two fingers on the trackpad and moving them up or down.
3. Scroll Bar Scrolling:
Alternatively, you can use the traditional scroll bar to navigate through web pages and documents. The scroll bar appears on the right side of the screen when you open a file or webpage that requires scrolling. Simply click and drag the scroll bar up or down to scroll through the content. You can also customize the scroll bar behavior in the “System Preferences” > “General” menu.
It’s worth mentioning that these scrolling methods are not limited to MacBook Pro users. They can be applied on other Mac devices such as the MacBook Air, iMac, and Mac mini.
Now that you are familiar with the different scrolling methods available on a MacBook Pro, you can choose the one that suits your preferences. Whether you prefer using the trackpad’s multi-touch gestures, enabling two-finger scrolling, or sticking with the traditional scroll bar, Apple offers a range of options to enhance your scrolling experience on a MacBook Pro.
How Do You Scroll On A MacBook Pro
MacBook Pro laptops are popular among professionals and creative individuals for their sleek design, powerful performance, and user-friendly features. One of the key features that make using a MacBook Pro a pleasant experience is the smooth and effortless scrolling. Whether you’re reading an article, browsing through social media feeds, or working on a document, scrolling allows you to navigate through content with ease.
In this article, we will explore the different methods available to scroll on a MacBook Pro. Apple provides various options to cater to diverse preferences and ensure a seamless scrolling experience. Whether you want to use the trackpad’s multi-touch gestures, enable two-finger scrolling, or stick with the traditional scroll bar, there’s a scrolling method that suits your needs.
Scrolling is an essential function that allows users to move vertically or horizontally through digital content. It helps navigate through lengthy documents, web pages, emails, spreadsheets, and much more. While scrolling on a MacBook Pro may seem straightforward, Apple has implemented several features and customizable options to enhance the scrolling experience.
The MacBook Pro’s trackpad is at the heart of its scrolling functionality. The multi-touch trackpad allows users to interact with their laptops using intuitive gestures. It detects various touch movements, making scrolling a natural and effortless process.
With the trackpad, users can employ two-finger scrolling. This gesture involves placing two fingers on the trackpad’s surface and moving them up or down. This intuitive gesture is similar to how you’d scroll on a touchscreen device, offering a familiar and seamless experience for MacBook Pro users.
Along with the trackpad, the MacBook Pro also provides the traditional scroll bar for scrolling. The scroll bar appears on the right side of the screen when you open a file or webpage that requires scrolling. By clicking and dragging the scroll bar up or down, users can navigate through the content at their own pace.
Apple understands the importance of personalized user experiences, and that’s why they offer customizable settings for scrolling. Users can adjust the scroll direction, scroll bar behavior, and other preferences according to their liking. These options can be accessed and modified in the “System Preferences” menu, allowing you to tailor the scrolling experience based on your specific needs.
Now that we’ve introduced the concept of scrolling on a MacBook Pro and highlighted the various methods available, let’s explore each scrolling method in detail. By the end of this article, you’ll have a comprehensive understanding of how to scroll on a MacBook Pro and can choose the method that best suits your preferences and workflow.
Trackpad Scrolling
The trackpad is an essential component of a MacBook Pro, and it offers a range of features and gestures that make scrolling a breeze. With its multi-touch functionality, the trackpad allows for smooth and fluid scrolling through different types of content.
To initiate trackpad scrolling, simply place two fingers on the trackpad’s surface and move them up or down. This gesture enables vertical scrolling, allowing you to navigate through web pages, documents, emails, and more. The trackpad’s sensitive sensors accurately interpret the movement of your fingers, ensuring a responsive and seamless scrolling experience.
In addition to vertical scrolling, the trackpad also supports horizontal scrolling. To scroll horizontally, place two fingers on the trackpad and move them left or right. This gesture is particularly useful when navigating through wide spreadsheets, photo galleries, or zoomed-in content.
The trackpad on a MacBook Pro further enhances the scrolling experience with additional gestures. For instance, a three-finger swipe can be used to quickly switch between full-screen apps or desktop spaces. A four-finger swipe can activate the App Exposé, providing an overview of all open windows for easy navigation.
If you encounter inverted scrolling (sometimes called natural scrolling), where swiping up actually scrolls down and vice versa, don’t worry – it can be easily adjusted to your preference. Simply go to “System Preferences” > “Trackpad” and check or uncheck the “Scroll direction: natural” option. This will allow you to customize the scrolling direction to your liking.
Trackpad scrolling is a versatile and intuitive method that keeps your interactions and gestures in sync with the content on your MacBook Pro. Whether you’re browsing the web, reading through lengthy documents, or navigating your favorite apps, the trackpad provides a seamless scrolling experience that adapts to your touch.
With its precise sensors and support for multi-finger gestures, the trackpad on a MacBook Pro offers a level of control and fluidity that makes scrolling a pleasure. It’s no wonder that many users praise the trackpad as one of the standout features of Apple laptops, as it effortlessly enhances the overall user experience.
Now that you understand how trackpad scrolling works on a MacBook Pro, let’s move on to explore another method of scrolling – two-finger scrolling.
Two-Finger Scrolling
For those who prefer a more individualized approach to scrolling, the MacBook Pro offers the option of two-finger scrolling. This method allows you to scroll through content using the movement of two fingers on the trackpad.
To enable two-finger scrolling, navigate to “System Preferences” > “Trackpad” and check the box next to “Scroll direction: natural.” This option ensures that the scrolling motion matches the direction of your finger movement, providing a more natural scrolling experience.
Once two-finger scrolling is enabled, you can easily scroll through documents, web pages, and other content by placing two fingers on the trackpad and moving them up or down. This gesture mirrors the scrolling action performed by using the trackpad with multiple fingers, but with the added benefit of individual finger control.
Two-finger scrolling is particularly useful for those who may find using multiple fingers on the trackpad uncomfortable or prefer a more precise scrolling experience. By using only two fingers, you have more control over the scrolling speed and can navigate through content at your preferred pace.
In addition to vertical scrolling, you can also perform horizontal scrolling using the two-finger method. Simply place two fingers on the trackpad and move them left or right to scroll horizontally through wide documents, images, or other content that extends beyond the screen width.
If you find that the default scrolling speed is too slow or fast for your liking, you can adjust it to your preference. In the “System Preferences” > “Trackpad” menu, you will find options to change the tracking speed, allowing you to fine-tune the scrolling experience to match your desired sensitivity.
The ability to customize the scrolling speed and direction, coupled with the convenience of using just two fingers, makes two-finger scrolling a popular choice among MacBook Pro users. It offers a personalized scrolling experience that can be easily tailored to meet individual preferences and needs.
Now that you are familiar with the option of two-finger scrolling on a MacBook Pro, let’s move on to explore another method – scroll bar scrolling.
Scroll Bar Scrolling
In addition to trackpad gestures, MacBook Pro users have the option of using scroll bar scrolling to navigate through content. The scroll bar appears on the right side of the screen when you open a file or webpage that requires scrolling.
To scroll using the scroll bar, simply click and drag the handle up or down. As you move the handle, the content on the screen will scroll accordingly. The length of the scroll bar represents the length of the document or webpage, giving you a visual indication of your current position within the content.
Scroll bar scrolling is a more traditional method that many users are familiar with, particularly those who have been using computers for a longer period of time. It provides a tactile input method for scrolling that can be advantageous for precise navigation or for those who prefer physical feedback.
In addition to vertical scrolling, the scroll bar also supports horizontal scrolling when necessary. If the content extends beyond the width of the screen, a horizontal scroll bar will appear at the bottom of the window. Similar to vertical scrolling, you can click and drag the handle to the left or right to scroll horizontally through the content.
Apple offers options to customize the scroll bar behavior in the “System Preferences” menu. Here, you can choose to always show the scroll bars or allow them to appear only when scrolling, depending on your preferences.
While some users may find trackpad gestures or two-finger scrolling more convenient, scroll bar scrolling remains a viable option for those who prefer a more traditional way of scrolling. It provides a familiar interface and customizable options to enhance the scrolling experience on a MacBook Pro.
Now that you have explored the three primary methods of scrolling on a MacBook Pro – trackpad scrolling, two-finger scrolling, and scroll bar scrolling – you have a range of options to choose from based on your preferences and workflow. Each method offers its own advantages, allowing you to tailor the scrolling experience to match your needs.
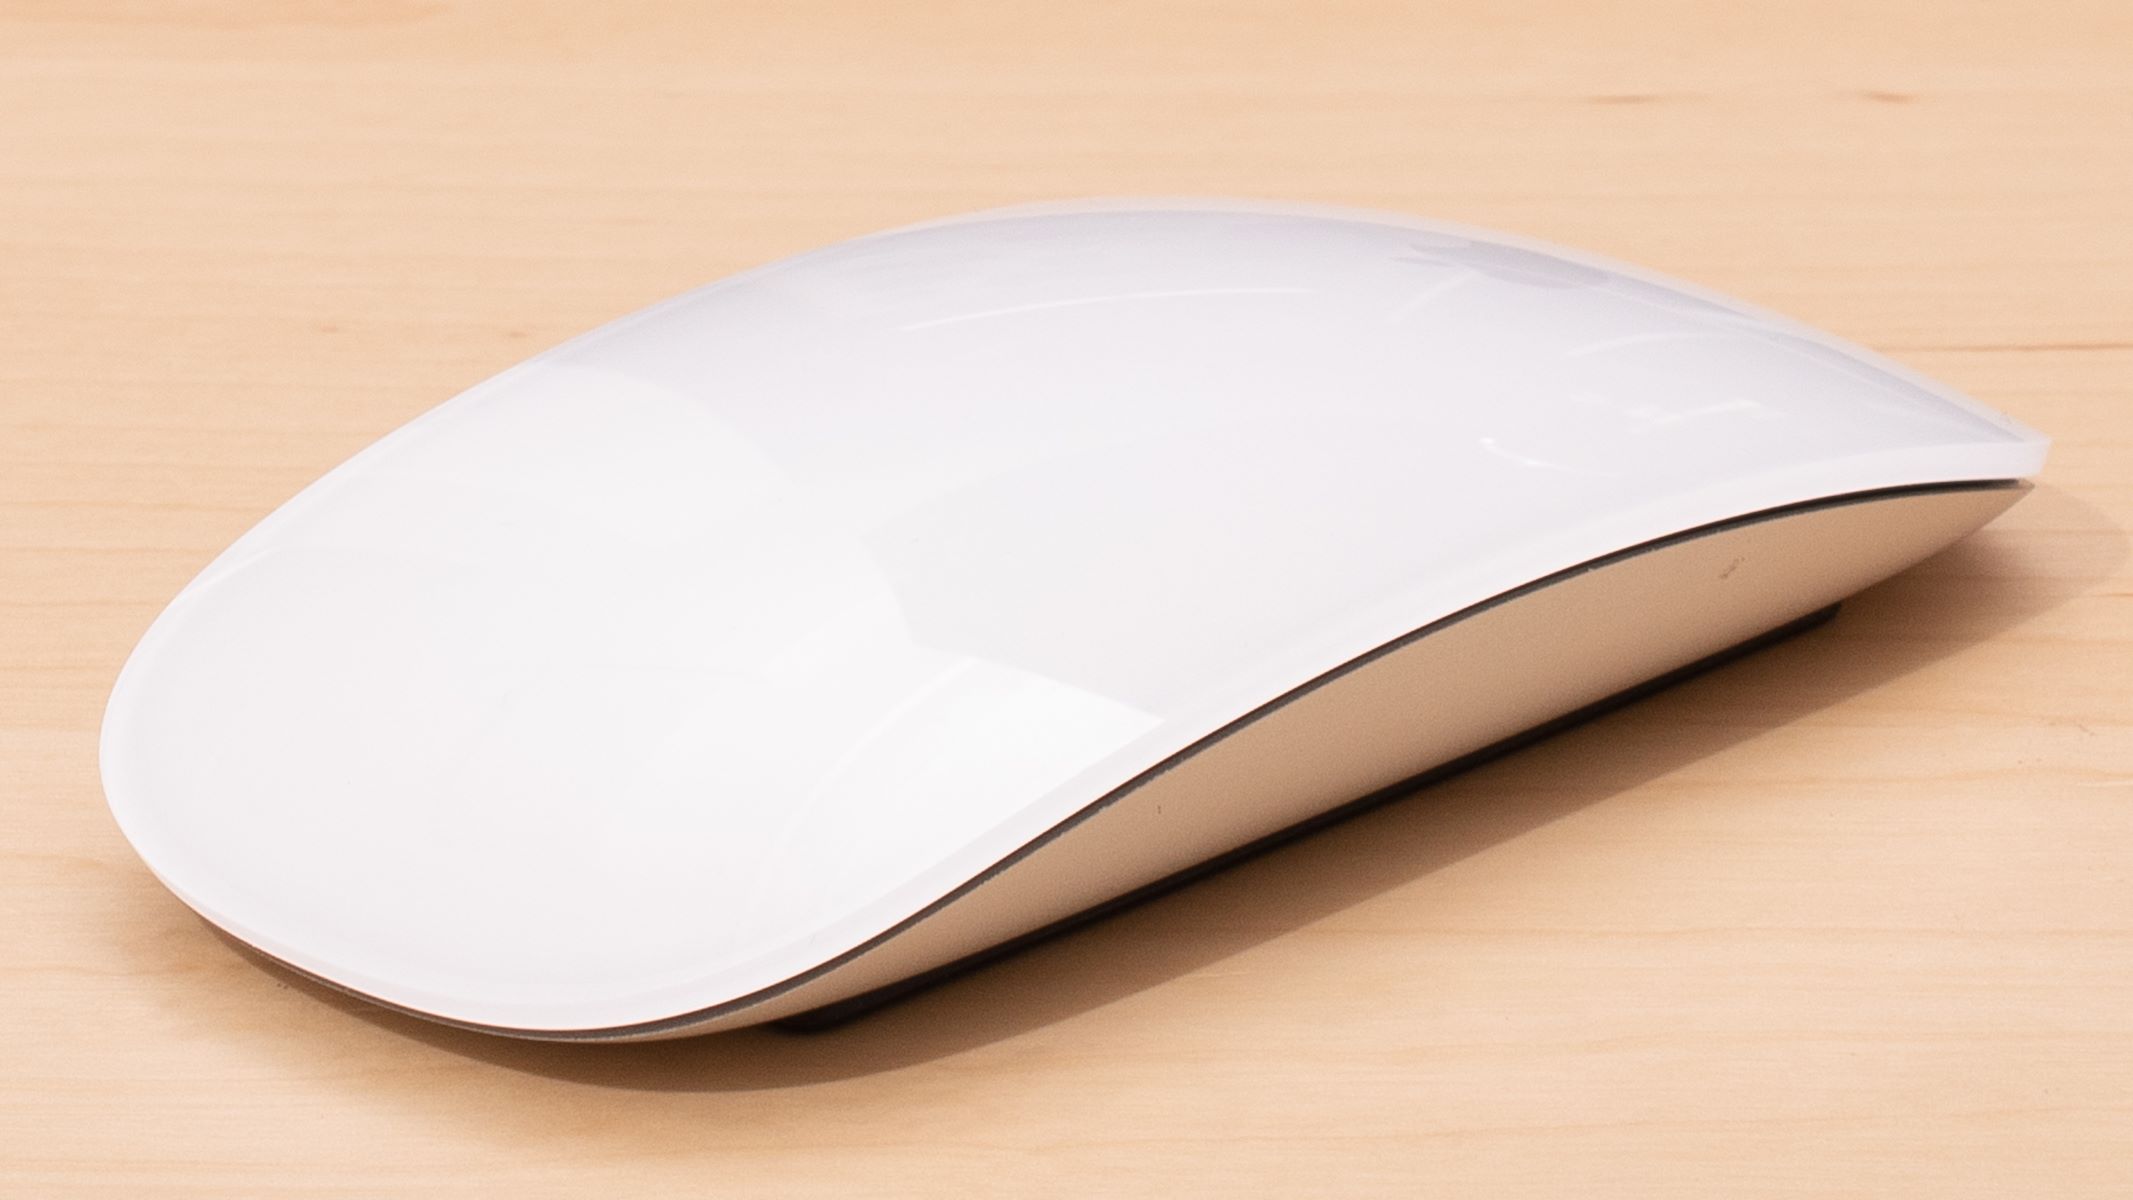
Magic Mouse Scrolling
For MacBook Pro users who prefer using a mouse over the trackpad, the Magic Mouse provides a seamless scrolling experience. With its sleek design and touch-sensitive surface, the Magic Mouse allows for effortless scrolling in a similar manner to the trackpad gestures.
To scroll using the Magic Mouse, simply swipe your finger vertically on the mouse’s surface. This motion will allow you to scroll through documents, web pages, and other content smoothly. The Magic Mouse’s sensitive sensors accurately detect the movement of your finger, ensuring a responsive and fluid scrolling experience.
In addition to vertical scrolling, the Magic Mouse also supports horizontal scrolling. To scroll horizontally, swipe your finger left or right on the mouse’s surface. This gesture is particularly useful when navigating through wide spreadsheets, photo albums, or zoomed-in content.
The Magic Mouse provides a customizable scrolling experience through the macOS settings. You can adjust the scrolling direction, speed, and acceleration to match your preferences. To access these settings, go to “System Preferences” > “Mouse” and explore the available options for scrolling.
Another convenient feature of the Magic Mouse is its multi-touch capabilities. You can perform gestures such as swiping between full-screen apps or activating Mission Control for quick navigation. These gestures enhance the overall productivity and efficiency while working with your MacBook Pro.
The Magic Mouse’s smooth scrolling and customizable settings make it an excellent choice for those who prefer using a mouse over the trackpad. Whether you’re editing documents, browsing the internet, or working on creative projects, the Magic Mouse offers a comfortable and intuitive scrolling experience.
It’s important to note that the Magic Mouse is not limited to MacBook Pro users only. It can also be used with other Mac devices, providing a versatile scrolling option across the Apple ecosystem.
Now that you are familiar with the Magic Mouse scrolling capabilities, you have yet another method to choose from when scrolling on your MacBook Pro or other Mac devices.
Conclusion
Scrolling on a MacBook Pro is a seamless and customizable experience, thanks to the various methods available. Whether you prefer using the trackpad’s multi-touch gestures, enabling two-finger scrolling, utilizing the traditional scroll bar, or opting for the Magic Mouse’s touch-sensitive surface, Apple caters to diverse preferences and offers options to enhance your scrolling experience.
The trackpad, with its intuitive multi-touch functionality, allows for effortless scrolling by simply placing two fingers on the trackpad’s surface and moving them up or down. This gesture provides precise control and a familiar scrolling experience akin to touchscreen devices.
The option of two-finger scrolling offers a more individualized approach, allowing users to navigate through content using the movement of two fingers on the trackpad. With the ability to adjust scrolling speed and direction, two-finger scrolling provides a personalized scrolling experience tailored to your preferences.
The traditional scroll bar, a familiar method for many users, offers tactile input and visual cues, enabling you to click and drag the handle to scroll through the content. Customizable scroll bar behavior provides flexibility, allowing you to choose when the scroll bar appears or remains visible at all times.
For those who prefer using a mouse, the Magic Mouse provides a sleek and efficient scrolling experience. Its touch-sensitive surface allows for smooth vertical and horizontal scrolling motions, and customizable settings make it a versatile option for scrolling on a MacBook Pro.
By understanding and utilizing the different scrolling methods available on a MacBook Pro, you can tailor your scrolling experience to match your preferences and workflow. Whether you’re reading documents, browsing the web, or working on creative projects, these scrolling options enhance navigation and productivity.
Apple’s dedication to user experience is evident in the extensive range of customizable settings offered for scrolling. From adjusting the scrolling direction and speed to fine-tuning different gestures, users have the freedom to create a scrolling experience that feels natural and comfortable.
So, the next time you’re using your MacBook Pro, explore the various scrolling methods available and find the one that best suits your needs. Whether it’s the trackpad’s multi-touch gestures, two-finger scrolling, scroll bar scrolling, or Magic Mouse scrolling, Apple’s attention to detail ensures a seamless scrolling experience for every MacBook Pro user.