Introduction
As technology continues to evolve, our devices are becoming more interconnected than ever before. One such example is the ability to connect AirPods, Apple’s popular wireless earbuds, to a Chromebook. This seamless integration allows users to enjoy their favorite media, make hands-free calls, and immerse themselves in a world of entertainment without the hassle of tangled wires.
In this article, we will guide you through the simple steps to connect your AirPods to a Chromebook. Whether you are a student, professional, or simply an avid Chromebook user, having the freedom to use your AirPods with your device can greatly enhance your productivity and overall experience.
Before diving into the step-by-step process, it is important to ensure that your Chromebook is compatible with AirPods. While AirPods are primarily designed for use with Apple devices, they can still be paired with some Chromebook models that support Bluetooth connectivity.
So, if you’re ready to break free from wires and enjoy the convenience of using your AirPods with your Chromebook, let’s get started!
Step 1: Check if your Chromebook is compatible with AirPods
Before attempting to connect your AirPods to your Chromebook, it is crucial to ensure that your Chromebook is compatible with AirPods. While AirPods are primarily designed for use with Apple devices, certain Chromebook models support Bluetooth connectivity with AirPods.
To determine if your Chromebook is compatible, follow these simple steps:
- First, check if your Chromebook has Bluetooth capabilities. Most Chromebooks come with built-in Bluetooth, but it’s always a good idea to double-check.
- Access the settings menu on your Chromebook by clicking on the system tray in the bottom-right corner of the screen. Then, click on the gear icon to open the settings.
- In the settings menu, locate the “Bluetooth” option. If it is present, your Chromebook is equipped with Bluetooth capabilities.
- Next, click on the Bluetooth option to access the Bluetooth settings. Ensure that the Bluetooth toggle is enabled or turned on.
- Finally, check if your Chromebook is running on the latest operating system. Keeping your Chromebook updated is essential for compatibility with various devices, including AirPods.
If your Chromebook satisfies all these criteria, congratulations! You can proceed to the next step and start connecting your AirPods to your Chromebook. If not, you may need to consider alternative wireless earbud options or explore other ways to connect your Chromebook to audio devices.
By following this first step, you will determine the compatibility of your Chromebook with AirPods, ensuring a smooth and successful connection process.
Step 2: Turn on Bluetooth on your Chromebook
Now that you have confirmed the compatibility of your Chromebook with AirPods, the next step is to enable Bluetooth on your device. Bluetooth is the wireless technology that allows devices to communicate and connect with each other.
To turn on Bluetooth on your Chromebook, follow these simple steps:
- Click on the system tray in the bottom-right corner of the screen, which will display a set of icons and shortcuts.
- Locate and click on the Bluetooth icon, which resembles a letter “B” made of curved lines.
- A pop-up menu will appear, displaying the Bluetooth settings. Ensure that the Bluetooth toggle is enabled or turned on. If it’s already enabled, the toggle will appear in the “on” position.
- If Bluetooth was previously disabled, toggling it on may prompt your Chromebook to search for nearby devices automatically.
Once Bluetooth is enabled on your Chromebook, it is ready to discover and connect to your AirPods.
Note: It is essential to keep your Chromebook within the effective range of your AirPods, typically around 10 meters or 30 feet. This ensures a stable and uninterrupted connection between the two devices.
Now that you have successfully turned on Bluetooth on your Chromebook, you are ready to proceed to the next step and put your AirPods into pairing mode.
Step 3: Put your AirPods in pairing mode
Before you can connect your AirPods to your Chromebook, you will need to put your AirPods into pairing mode. Pairing mode allows your AirPods to be discoverable and ready to connect to other devices.
To put your AirPods in pairing mode, follow these steps:
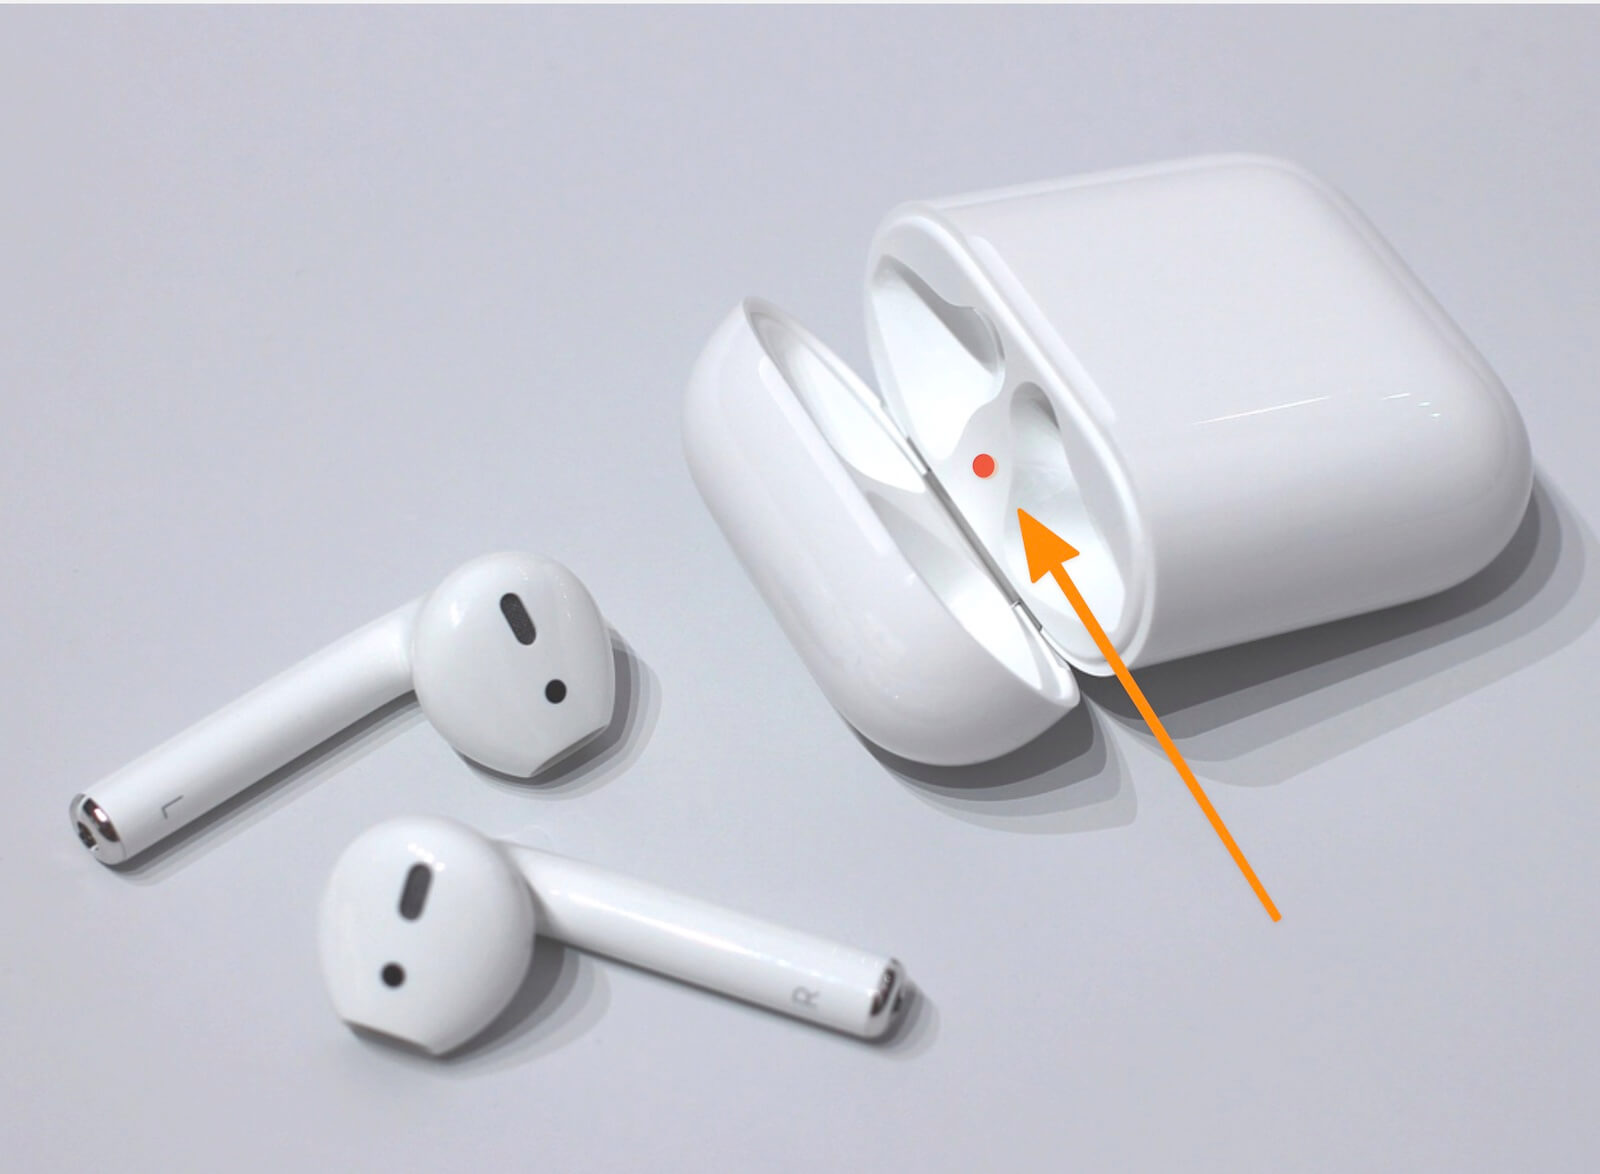
- First, open the lid of your AirPods case.
- On the back of the case, you will find a small button. Press and hold this button for a few seconds until the LED light located inside the case starts to blink white.
- The blinking white light indicates that your AirPods are now in pairing mode and ready to connect to a new device.
It is important to note that if your AirPods are already connected to another device, you will need to disconnect them first before putting them into pairing mode.
By following these steps, you have successfully put your AirPods into pairing mode, and they are now ready to connect to your Chromebook. Let’s move on to the next step and establish the connection between the two devices.
Step 4: Connect AirPods to your Chromebook
Now that your AirPods are in pairing mode, it’s time to connect them to your Chromebook. The process of connecting your AirPods may vary slightly depending on the Chromebook model, but the general steps remain the same.
To connect your AirPods to your Chromebook, follow these simple instructions:
- Click on the status area in the bottom-right corner of the screen to expand the system tray.
- Click on the Bluetooth icon to open the Bluetooth settings.
- In the list of available devices, you should see your AirPods listed. Click on the name of your AirPods to initiate the connection.
- Wait for a few moments while your Chromebook establishes the connection with your AirPods.
- Once the connection is established, you will see a confirmation message, and the LED light on your AirPods case will turn solid white or blue, depending on the model.
- Your AirPods are now successfully connected to your Chromebook, and you can start enjoying your audio wirelessly.
If your Chromebook does not automatically detect your AirPods, try putting them back into pairing mode and refreshing the Bluetooth settings on your Chromebook.
Remember, once your AirPods are connected, they will automatically connect to your Chromebook whenever they are in range and your Chromebook’s Bluetooth is enabled.
Now that you have successfully connected your AirPods to your Chromebook, it’s time to move on to the final step and test the connection to ensure everything is working properly.
Step 5: Test the connection
After connecting your AirPods to your Chromebook, it is important to test the connection to ensure that everything is working properly. Testing the connection will help you confirm that the audio is being transmitted seamlessly and that you can enjoy a wireless audio experience with your AirPods.
Follow these steps to test the connection between your AirPods and your Chromebook:
- Open a media player or streaming app on your Chromebook, such as YouTube, Spotify, or a video conference tool. Play a video or a song to test the audio playback.
- Ensure that the audio output is set to your AirPods. You can do this by clicking on the audio settings and selecting your AirPods as the output device.
- Adjust the volume on your AirPods by using the volume controls on the Chromebook or the physical controls on the AirPods themselves.
- Listen to the audio to ensure that it is clear and without any interruptions. If you experience any issues, try disconnecting and reconnecting your AirPods or restarting your Chromebook.
- Test the microphone on your AirPods by making a voice recording or engaging in a video call. Ensure that the microphone is capturing your voice clearly and that the audio is being transmitted to the recipient without any issues.
If everything is working as expected during the testing phase, congratulations! You have successfully connected and tested your AirPods with your Chromebook. You can now enjoy a wireless audio experience while using your Chromebook for various tasks.
If you encounter any difficulties during the testing phase, refer back to the previous steps and ensure that your AirPods are properly connected, the Bluetooth is enabled on your Chromebook, and the volume levels are appropriately adjusted.
By testing the connection, you can ensure a seamless audio experience and troubleshoot any issues that may arise, allowing you to fully utilize the functionality of your AirPods with your Chromebook.
Conclusion
In this guide, we have walked you through the steps to connect your AirPods to a Chromebook. By following these simple instructions, you can enjoy the convenience and freedom of using your AirPods with your Chromebook, whether for listening to music, watching videos, or engaging in online meetings.
We began by checking the compatibility of your Chromebook with AirPods and ensuring that your device has Bluetooth capabilities. Next, we turned on Bluetooth on the Chromebook and put the AirPods into pairing mode. We then connected the AirPods to the Chromebook and tested the connection to ensure smooth audio playback and microphone functionality.
By successfully completing these steps, you have unlocked the potential of your Chromebook and AirPods, allowing you to explore a world of wireless audio and improved productivity.
It is worth noting that while the steps outlined in this guide are specific to AirPods and Chromebooks, the general process can be applied to other Bluetooth-enabled wireless earbuds and audio devices.
Remember to keep your Chromebook and AirPods updated to the latest software versions to ensure optimal compatibility and performance. Additionally, if you encounter any issues during the connection process, refer back to the instructions and troubleshoot accordingly.
Now that you have successfully connected your AirPods to your Chromebook, enjoy the freedom of wireless audio and make the most out of your Chromebook experience!