Introduction
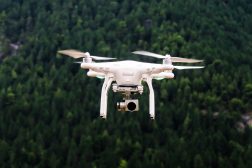
Building a drone can be an exciting and rewarding project for tech enthusiasts, hobbyists, and even professionals in the field. With advancements in technology and the availability of components, it has become easier than ever to create your own custom drone. Whether you’re looking to capture breathtaking aerial photography, engage in FPV racing, or explore the world of autonomous flight, building a drone allows you to tailor it to your specific needs and preferences.
But where do you start? In this guide, we will take you through the step-by-step process of building your very own drone. From choosing the right components to programming the flight controller, we will cover the key aspects involved in the construction of a drone.
Before we dive into the technical aspects, it’s important to mention that building a drone requires some basic knowledge of electronics and a familiarity with tools such as a soldering iron. However, even if you’re new to this, don’t be discouraged! With some research, patience, and a willingness to learn, you can successfully build your drone and embark on a new and exciting journey in unmanned aerial vehicles (UAVs).
Throughout this guide, we will provide you with detailed instructions, tips, and considerations to ensure you build your drone safely and efficiently. So, let’s get started on this adventure to create your very own flying machine!
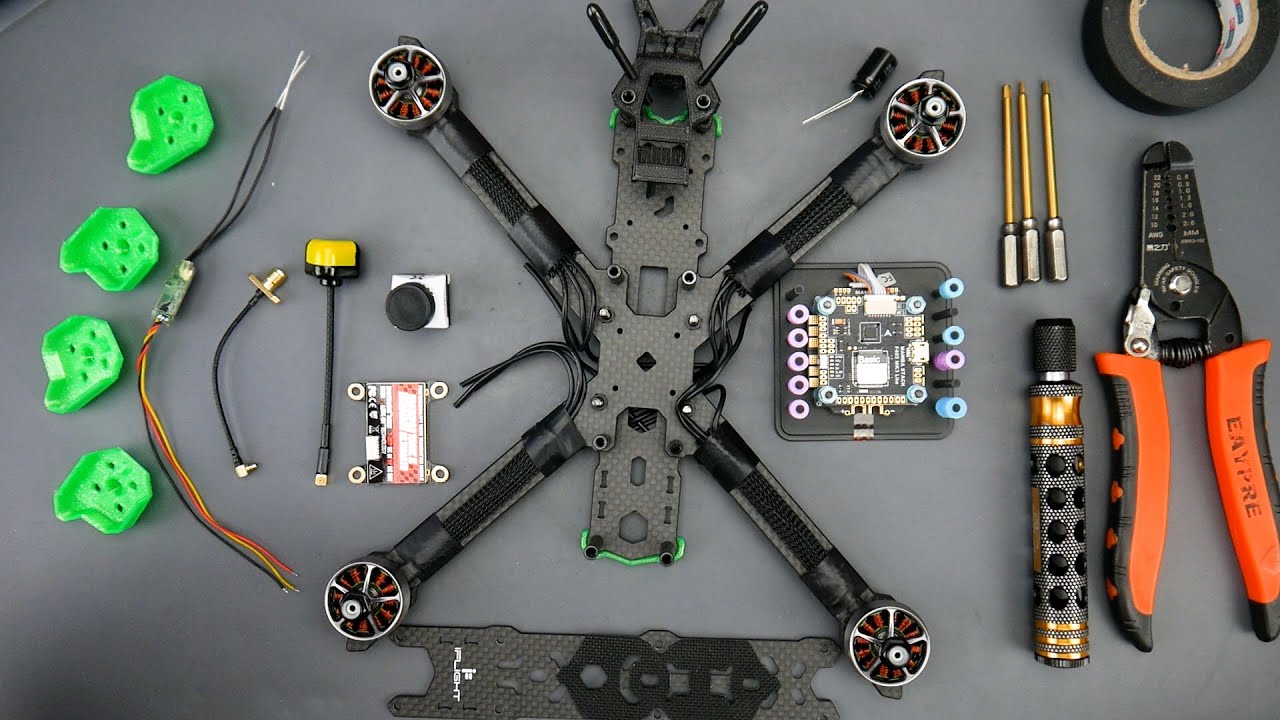
Choosing the Right Components
When it comes to building a drone, choosing the right components is crucial. The components you select will determine the performance, functionality, and even the durability of your drone. Here are some key considerations to keep in mind:
1. Frame: The frame is the foundation of your drone, providing the structure and housing for all other components. It’s important to choose a frame that is sturdy, lightweight, and designed for your intended use – whether it’s aerial photography, racing, or aerial mapping.
2. Flight Controller: The flight controller is like the brain of your drone, controlling the flight characteristics and stability. Look for a reliable and feature-rich flight controller that is compatible with both the frame and the firmware you plan to use.
3. Motors and Propellers: The motors and propellers are responsible for generating the thrust and lift necessary for flight. Consider the motor type (brushed or brushless), the Kv rating, and the propeller size when selecting these components. It’s important to ensure they are appropriate for the weight and size of your drone.
4. Electronic Speed Controllers (ESCs): The ESCs regulate the speed of the motors and provide a smooth and controlled throttle response. Make sure the ESCs are compatible with both the flight controller and the motor specifications. Opt for ESCs with sufficient amperage to handle the power requirements of your chosen motors.
5. Battery: The battery provides the power to keep your drone airborne. Consider the capacity (mAh), voltage, and discharge rate when selecting a battery. It’s important to choose a battery that is compatible with both your ESCs and the weight of your drone to ensure optimal flight performance.
6. Camera and Gimbal: If you’re interested in aerial photography or videography, choosing the right camera and gimbal setup is crucial. Consider factors such as image quality, resolution, stabilization capabilities, and payload capacity when making your selection.
7. Radio Control System: The radio control system allows you to pilot your drone remotely. Look for a reliable and feature-rich transmitter and receiver that offers a good range and frequency compatibility for your area.
8. Additional Components: Depending on your specific needs, you may also need additional components such as GPS modules, telemetry systems, FPV equipment, or sensors for autonomous flight. Consider the functionalities you require and choose the corresponding components accordingly.
By carefully selecting the right components, you can ensure that your drone performs optimally and meets your specific requirements and goals. Take the time to research and compare different options to find the best combination of components for your project.
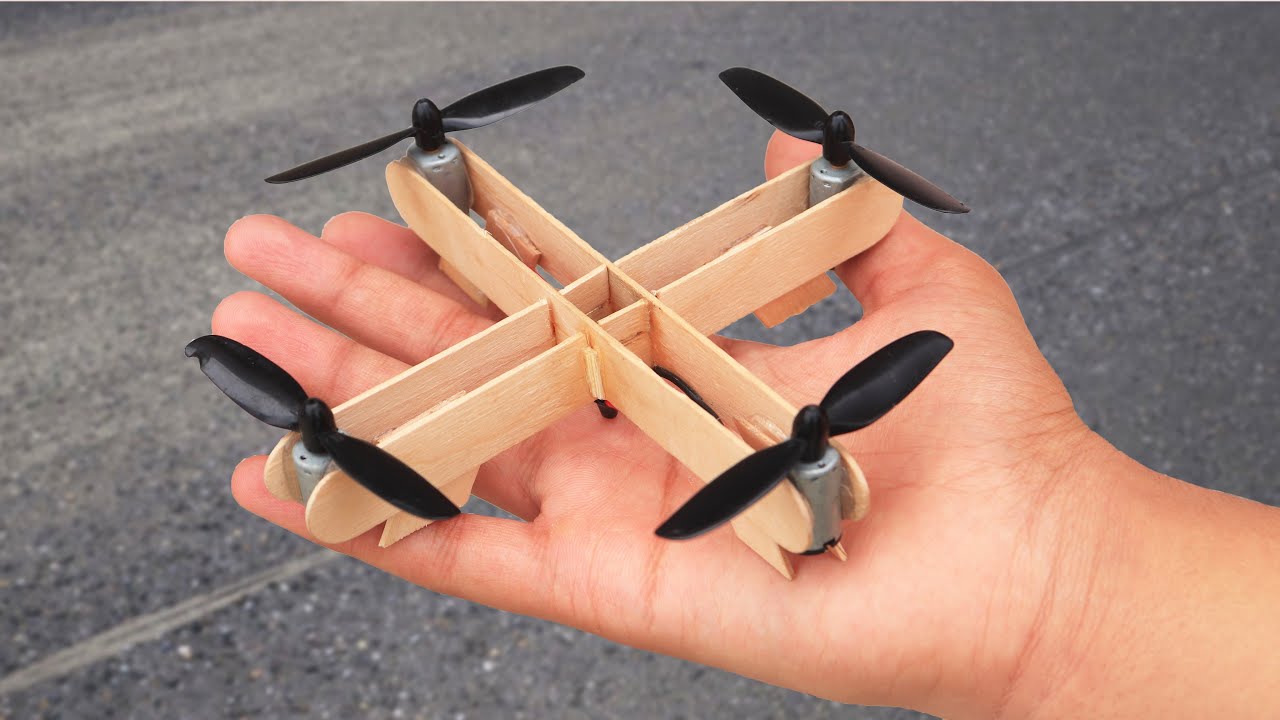
Assembling the Frame
Once you have gathered all the necessary components, the next step is to assemble the frame of your drone. The frame serves as the foundation that holds all the other components securely in place. Here’s a step-by-step guide on how to assemble the frame:
1. Familiarize Yourself with the Frame: Start by familiarizing yourself with the different parts of the frame. Read the instruction manual or watch video tutorials if available to understand how the frame pieces fit together.
2. Prepare your Workspace: Find a clean and well-lit workspace to work on. Gather all the necessary tools, such as a screwdriver, wrench, and threadlocker, to help with the assembly process.
3. Attach the Arms: Begin by attaching the arms of the frame to the main body. Use the provided screws and secure them tightly. Pay attention to any specific instructions or markings on the frame to ensure correct alignment.
4. Install the Flight Controller Mounting Plate: Locate the designated area on the frame for the flight controller. Attach the mounting plate securely using the provided screws. This will be the place where the flight controller will be placed later on.
5. Mount the Power Distribution Board (PDB): If your frame includes a separate PDB, now is the time to mount it. The PDB is responsible for distributing power to the different components of your drone. Secure it in the designated area on the frame and connect the necessary cables.
6. Attach Landing Gear (if applicable): If your drone requires landing gear for added stability and protection, now is the time to attach it. Follow the instructions provided with the landing gear kit and secure it to the frame using screws or other provided fasteners.
7. Check for Stability: Once all the components are attached to the frame, check for any loose connections or wobbling. Ensure that all screws are tightened properly and that the frame feels stable and secure.
8. Double-Check Alignment: Take a final look at the alignment of the frame and its components. Ensure that everything is correctly positioned and oriented, as this will affect the overall flight performance of your drone.
By following these steps, you will have successfully assembled the frame of your drone. It’s important to be patient and meticulous during this process to ensure that all components are securely attached and aligned. With the frame assembled, you can now move on to the next step of installing the flight controller.
Installing the Flight Controller
The flight controller is the brain of your drone, responsible for controlling its flight characteristics and stability. Installing the flight controller correctly is essential for smooth and safe operation. Here is a step-by-step guide on how to install the flight controller:
1. Locate the Mounting Area: Refer to the instruction manual or guide that comes with your frame to identify the designated mounting area for the flight controller. This is usually a flat surface with pre-drilled holes or mounting points.
2. Prepare the Flight Controller: Before installing the flight controller, ensure that it is properly configured and updated with the latest firmware. Follow the manufacturer’s instructions to prepare the flight controller for installation.
3. Secure the Flight Controller: Place the flight controller onto the designated mounting area on the frame. Align the mounting holes on the flight controller with the corresponding holes on the frame.
4. Attach the Mounting Screws: Insert the mounting screws through the holes on the flight controller and tighten them securely into the frame. Be careful not to overtighten as it may damage the flight controller or the frame.
5. Connect the Flight Controller: Once the flight controller is securely mounted, you need to connect it to the other components of your drone. This includes connecting the ESCs, receiver, and other peripherals as per the flight controller’s specifications.
6. Organize the Wiring: Properly organize and secure the wiring using cable ties or wire wraps. Keeping the wiring neat and tidy will not only make troubleshooting easier but also help prevent any loose connections during flight.
7. Perform Initial Tests: Now that the flight controller is installed, it’s important to perform initial tests to ensure that it is working correctly. Power on the drone and verify that the flight controller is properly communicating with the receiver and all the components are functioning as expected.
8. Make Adjustments if Needed: If you encounter any issues during the initial tests, refer to the flight controller’s manual or online resources to troubleshoot and make any necessary adjustments to the settings or wiring connections.
By following these steps, you will have successfully installed the flight controller in your drone. It is important to double-check all the connections and ensure that the flight controller is securely mounted. With the flight controller in place, you can move on to the next step of connecting the electronic speed controllers (ESCs).
Connecting the Electronic Speed Controllers (ESCs)
The electronic speed controllers (ESCs) play a crucial role in controlling the speed and rotation of the motors. Properly connecting the ESCs to the flight controller is essential for the drone’s flight performance. Follow these steps to connect the ESCs:
1. Locate the ESC Connections: Refer to the flight controller’s manual or guide to identify the specific ports or pins designated for ESC connections. These are typically labeled with numbers or letters.
2. Prepare the ESCs: Ensure that each ESC is correctly calibrated and ready for installation. This involves verifying that the ESCs are compatible with your flight controller and motors, updating firmware if necessary, and setting the correct protocols.
3. Connect the ESCs to the Flight Controller: Begin by connecting the ESC signal wires to the corresponding ESC ports on the flight controller. Match the signal wire colors – typically black, red, and white or yellow – to their respective pins on the flight controller.
4. Power Connection: Most ESCs receive power directly from the flight controller, while others may require separate power connections. Check the specifications of your ESCs and make the necessary power connections as instructed.
5. Ground Connection: Establish a common ground connection by connecting the ground wire (usually black) from each ESC to any of the ground pins on the flight controller.
6. Motor Connection: Connect the three motor wires from each ESC to their respective motor terminals on the flight controller. It’s crucial to ensure that the wiring sequence for each motor is consistent with the flight controller’s motor configuration.
7. Verify the Connections: Once all the ESC connections are made, double-check each connection to ensure there are no loose wires or improper connections. Ensure that the signal, power, and ground wires are securely connected.
8. Test the Motor Spin: Power up the flight controller and perform a motor spin test to confirm that each motor spins in the correct direction and at the expected speeds. Adjust the motor direction or ESC calibration if needed.
By following these steps, you have successfully connected the electronic speed controllers to the flight controller. It’s important to ensure that all connections are secure and properly aligned. The ESCs play a crucial role in the drone’s performance, so take the time to verify the connections before moving on to the next step of attaching the motors and propellers.
Attaching the Motors and Propellers
The motors and propellers are essential components that provide the thrust and lift necessary for your drone to fly. Properly attaching the motors and propellers ensures that they are secure and aligned for optimal performance. Follow these steps to attach the motors and propellers:
1. Identify the Motor Mounting Holes: Locate the motor mounting holes on the arms of the drone frame. These holes are specifically designed to accommodate the motors.
2. Prepare the Motors: Make sure that the motors are correctly calibrated, wired, and ready for installation. Check the motor manufacturer’s guidelines for any specific instructions or precautions.
3. Align the Motors: Position each motor on its designated arm, aligning the mounting holes on the motor with the corresponding holes on the frame. Ensure that the motor wires are facing towards the center of the frame.
4. Secure the Motors: Once the motors are aligned, use the provided screws to attach them to the frame. Tighten the screws securely, but be cautious not to overtighten and risk damaging the motor or the frame.
5. Attach the Propellers: Depending on your motor type, attach the appropriate propellers onto the motor shafts. Match the propeller markings (usually labeled “A” or “B”) with the corresponding motor, ensuring that they rotate in the correct direction for optimal flight stability.
6. Secure the Propellers: Once the propellers are attached, use the provided propeller nuts or adapters to secure them tightly onto the motor shafts. Double-check that the propellers are securely fastened, as loose propellers can lead to unstable flight or even accidents.
7. Verify Motor Rotation: Power up the flight controller and perform a motor spin test to verify that each motor is spinning in the correct direction. If any motor is spinning in the wrong direction, you will need to reverse the motor wires in the ESC connection.
8. Check Motor Alignment: Once all the motors and propellers are attached, visually inspect them to ensure they are aligned properly. Make any necessary adjustments to ensure that all the propellers are in the same plane and evenly spaced from the frame.
By following these steps, you have successfully attached the motors and propellers to your drone. It’s important to double-check all the connections and ensure that they are securely fastened. With the motors and propellers properly installed, you are one step closer to completing your drone assembly.
Mounting the Camera and Gimbal
If you’re interested in aerial photography or videography, mounting a camera and gimbal to your drone is essential for capturing stable and high-quality footage. Here are the steps to mount the camera and gimbal:
1. Choose the Right Camera and Gimbal: Select a camera and gimbal system that suits your needs and budget. Consider factors such as camera resolution, stabilization capabilities, weight, and compatibility with your drone frame.
2. Determine Mounting Position: Identify the optimal mounting position on your drone’s frame for the camera and gimbal system. This is typically on the front end or under the drone, depending on the frame design.
3. Mount the Gimbal: Attach the gimbal to the designated mounting area on the frame, following the manufacturer’s instructions. Use the provided screws or mounting brackets to secure the gimbal in place. Ensure that it is positioned securely and aligned appropriately.
4. Install the Camera: Attach the camera to the gimbal, making sure it is securely fitted and properly aligned. Check if there are any specific connections or cables required between the camera and the gimbal system.
5. Cable Management: Take the time to properly route and manage the cables from the camera and gimbal. Use zip ties, Velcro straps, or cable clips to keep the cables tidy and prevent interference with other components.
6. Verify Balance: Check the balance of the gimbal and make any necessary adjustments to ensure it is properly balanced. This helps optimize the stabilization and performance of the gimbal during flight.
7. Power and Test: Connect the necessary cables from the gimbal to the flight controller or power distribution board. Follow the instructions provided with your specific gimbal system for power connections. Power on the drone and test the functionality of the gimbal to ensure smooth movement and stabilization.
8. Fine-Tune Settings: If your gimbal provides the option to adjust settings or fine-tune the stabilization control, carefully configure the settings to achieve the desired performance for your camera and shooting style.
Remember to always follow local regulations and guidelines regarding the use of cameras and gimbals on drones for privacy and safety reasons. By properly mounting your camera and gimbal, you’ll be ready to capture stunning aerial footage and take your drone photography or videography to the next level.
Wiring and Connecting the Power Distribution Board
The power distribution board (PDB) serves as the central hub for distributing power to the various components of your drone. Properly wiring and connecting the PDB ensures that all the components receive the necessary power and operate reliably. Here are the steps to wire and connect the PDB:
1. Locate the PDB Connectors: Identify the power input and output connectors on the PDB. The power input connector is usually where you connect the battery, while the output connectors distribute power to the different components.
2. Prepare the Wiring: Measure and cut appropriate lengths of wire for each connection. Use wire strippers to remove a small section of insulation from each wire end, exposing the conductor ready for soldering or crimping.
3. Connect the Battery: Start by connecting the battery to the power input connector on the PDB. Follow the polarity markings (+/-) to ensure the correct orientation and securely attach the wires using soldering or appropriate connectors.
4. Connect the ESCs: Connect each electronic speed controller (ESC) to the PDB’s output connectors. Typically, there are separate positive (+) and negative (-) pads or pins for each ESC connection. Solder or attach the ESC wires accordingly.
5. Distribute Power: Connect the power output lines from the PDB to each respective component, including the flight controller, camera, receiver, and any other onboard devices. Ensure that the power is distributed evenly and adequately to each component.
6. Make Secure Connections: Double-check all the connections to ensure they are secure and free from any loose wires or poor solder joints. This step is crucial to prevent power loss, voltage drops, or potential damage to the components.
7. Verify Voltage Levels: Use a multimeter to verify the voltage levels at different points on the PDB. This step will help you ensure that there are no voltage irregularities or inconsistencies that could potentially affect the performance of your drone.
8. Test Power Distribution: Power on the drone and check that all the connected components receive power as expected. Verify that the ESCs, flight controller, and other devices are functioning correctly.
By following these steps, you have successfully wired and connected the power distribution board of your drone. It’s important to ensure that all connections are secure and properly soldered or crimped. With a reliable power distribution system in place, you can move on to the next step of programming the flight controller.
Programming the Flight Controller
Programming the flight controller is a crucial step that allows you to customize and configure the settings necessary for your drone’s flight behavior and functionality. Here’s a step-by-step guide to programming the flight controller:
1. Connect to the Flight Controller: Connect the flight controller to your computer using a USB cable or the designated programming interface. Ensure that you have the necessary software or firmware update tool installed on your computer.
2. Firmware Update: Check if there are any firmware updates available for your flight controller. If needed, download the latest firmware version from the manufacturer’s website and follow the instructions provided to update the flight controller’s firmware.
3. Open the Configuration Software: Launch the configuration software or firmware update tool on your computer. This software allows you to access and modify the flight controller’s settings and parameters.
4. Configure Flight Modes: Determine the flight modes you want to use for your drone, such as stability mode, acrobatic mode, or GPS-assisted mode. Assign the appropriate switches or buttons on your transmitter to activate these flight modes.
5. Adjust PID Settings: The Proportional, Integral, and Derivative (PID) settings affect the drone’s stability and responsiveness. Fine-tune these settings to optimize your drone’s performance. Start with default values and make incremental adjustments based on flight tests and desired behavior.
6. Set Up Radio Controls: Configure the radio controls to ensure proper communication between the transmitter and the flight controller. Assign the correct channels for throttle, pitch, roll, and yaw control, and calibrate the controls if necessary.
7. Enable Flight Features: Enable or disable specific flight features, such as self-leveling, auto-landing, or return-to-home (RTH) functionality. Activate or customize these features based on your drone’s capabilities and your intended use.
8. Test and Calibrate: Once you have made changes or adjustments to the flight controller’s settings, perform test flights to evaluate the drone’s behavior and stability. Make note of any necessary fine-tuning or tweaking required to achieve your desired flight performance.
Remember to refer to the flight controller’s manual or online resources for specific instructions and recommended configurations. Take your time to experiment and fine-tune the settings to match your flying preferences and the capabilities of your drone.
By properly programming the flight controller, you can optimize your drone’s flight characteristics, responsiveness, and overall performance. Take the time to familiarize yourself with the available settings and make gradual adjustments based on your flight tests and desired flight behaviors.
Testing and Calibrating the Drone
After assembling and programming your drone, it is crucial to perform thorough testing and calibration to ensure its proper functionality and stability. Here are the steps to test and calibrate your drone:
1. Pre-Flight Checklist: Before conducting any test flights, go through a pre-flight checklist to ensure that all connections, components, and settings are in order. Check for secure attachments, battery levels, transmitter calibration, and any necessary flight permits or restrictions.
2. Ground Testing: Begin by conducting ground testing to verify motor spin direction, transmitter control response, and flight controller stability. Ensure that all motors spin the correct way, and the drone responds accurately to transmitter inputs.
3. Level and Trim: Place your drone on a flat and level surface. Use the flight controller or transmitter trim settings to ensure the drone remains stable and level without drifting or tilting. Adjust as needed to achieve a balanced and even hover.
4. Propeller Balancing: Check the balance of each propeller by using a propeller balancing tool or simply placing them on a horizontal rod. Ensure that all propellers have an equal weight distribution to minimize vibrations during flight.
5. Compass Calibration: If your drone has a compass sensor, follow the flight controller’s instructions to calibrate it. Usually, this involves twisting and rotating the drone in different orientations to calibrate the compass’s reference points for accurate readings.
6. Flight Stability Test: Gradually increase the throttle and observe the drone’s response. Pay attention to stability, levelness, and any abnormal behavior or vibrations. Correct any issues by adjusting the PID settings or performing further calibration if necessary.
7. GPS Functionality Test (if applicable): If your drone is equipped with GPS, test its functionality by engaging GPS-assisted flight modes such as position hold or return-to-home (RTH). Ensure the drone accurately maintains its position and returns safely when prompted.
8. Range and Signal Test: Gradually increase the distance between the drone and the transmitter while monitoring the controller’s signal strength. Validate that the drone maintains a stable connection and responds accurately within the manufacturer’s specified range.
9. Battery Performance Test: Conduct flight tests to evaluate the drone’s flight time and battery performance. Monitor the battery voltage and flight duration to ensure it aligns with the battery’s specifications and the flight controller’s battery monitor readings.
10. Functional Test: Test the functionality of additional features like the camera, gimbal, and any other onboard systems. Verify that they operate smoothly and deliver the desired results during flight.
Regular testing and calibration are essential to maintain the drone’s performance and safety throughout its lifespan. It is recommended to revisit these steps periodically, especially after any modifications or upgrades to the drone. By conducting comprehensive testing and calibration, you can ensure that your drone is operating optimally and ready for a successful and enjoyable flight experience.
Conclusion
Building your drone can be a rewarding and exciting endeavor. From choosing the right components to programming the flight controller and calibrating the drone, each step is crucial in creating a well-functioning and reliable aerial vehicle. By following the steps outlined in this guide, you can successfully construct your drone and customize it to your specific needs and preferences.
Remember, building a drone requires some basic knowledge of electronics and familiarity with tools. It’s essential to conduct thorough research, follow manufacturer instructions, and exercise caution throughout the process. Taking your time and paying attention to detail will ensure the safety and success of your drone-building project.
Once you have finished constructing your drone, don’t forget to conduct comprehensive testing and calibration to ensure its proper functionality and stability. Performing these tests and adjustments will optimize the drone’s flight performance and address any potential issues before taking it to the sky.
Additionally, we recommend staying informed about local regulations and guidelines regarding drone usage in your area. Responsible and safe flying practices not only protect the drone and its components but also ensure the well-being and privacy of others.
Building a drone is not only a technical achievement but also a creative expression. Whether you’re using it for aerial photography, videography, racing, or exploration, the possibilities are endless. Enjoy the process of building, experimenting, and pushing the limits of your custom-made drone.
So, roll up your sleeves, gather your tools, and embark on the fantastic journey of building your own drone. Explore the skies, capture breathtaking footage, and experience the joy of piloting your very own creation!