Introduction
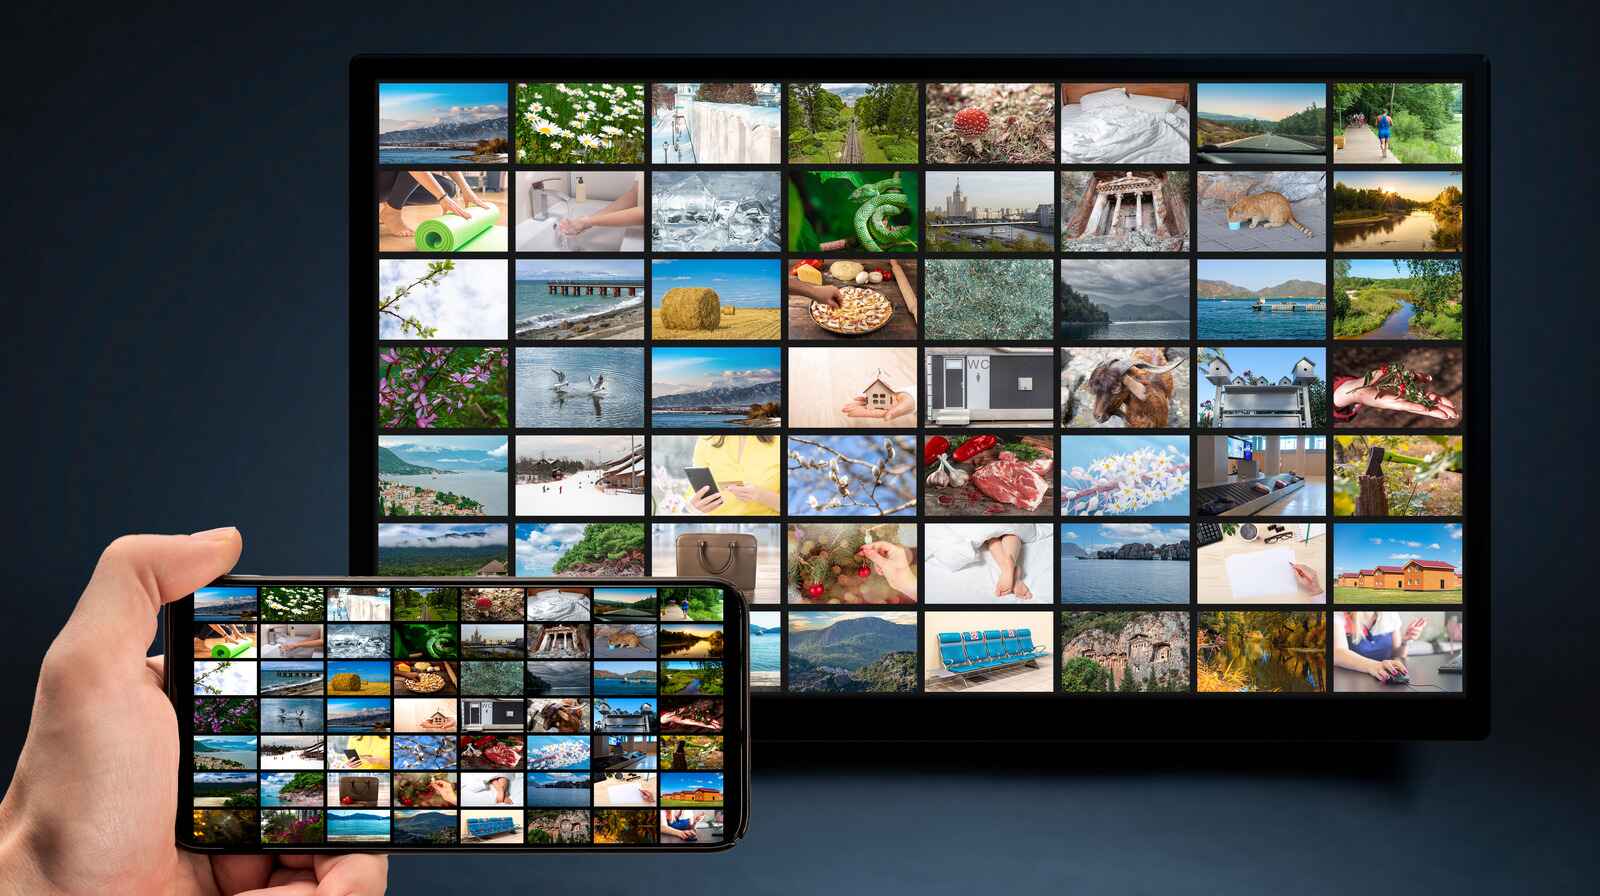
As the era of smartphones continues to flourish, so does our love for capturing precious moments through pictures. Whether it’s a breathtaking sunset, a memorable event, or a candid snapshot of your loved ones, these moments deserve to be showcased and admired. One way to relive these memories is by transferring the pictures from your phone to a digital photo frame.
Digital photo frames have become increasingly popular as a modernized way of displaying and sharing pictures. They offer the convenience of rotating through a slideshow of your favorite images, eliminating the need for printing and framing individual photographs. If you’re wondering how to transfer pictures from your phone to a digital photo frame, you’ve come to the right place.
In this article, we will explore various methods for transferring pictures effectively and effortlessly. From traditional options like Bluetooth and SD cards to more advanced techniques involving WiFi connectivity and mobile apps, we’ll cover the spectrum of possibilities. Whether you’re a tech-savvy individual or a novice in the world of digital gadgets, there’s a method that will suit your needs.
While the specific instructions may vary depending on the make and model of your digital photo frame and smartphone, the underlying principles remain the same. By following the guidelines provided and adapting them to your specific devices, you’ll be able to enjoy your favorite memories on the larger screen of your digital photo frame in no time.
So, if you’re ready to transfer your pictures and bring your memories to life, read on to discover the different ways to transfer pictures from your phone to your digital photo frame.
Different Ways to Transfer Pictures
When it comes to transferring pictures from your phone to a digital photo frame, there are several methods you can use. Each method has its own advantages and requirements, so it’s crucial to choose the one that works best for you. Let’s explore five common ways to transfer pictures:
1. Bluetooth: Bluetooth is a wireless technology that allows devices to connect and transfer data over short distances. Many digital photo frames come equipped with Bluetooth functionality, making it easy to transfer pictures directly from your phone. Simply enable Bluetooth on both devices, pair them, and select the pictures you want to transfer. This method is convenient and doesn’t require any additional cables or accessories.
2. SD Card or USB Drive: Most digital photo frames have slots for SD cards or support USB drives. To transfer pictures using this method, simply save the desired photos onto the SD card or USB drive from your phone, insert it into the corresponding slot on the photo frame, and select the pictures to display. This approach is straightforward and doesn’t rely on wireless connectivity.
3. WiFi Connectivity: Many modern digital photo frames come with built-in WiFi connectivity, allowing you to transfer pictures wirelessly. To use this method, connect both your phone and the photo frame to the same WiFi network. Then, use the manufacturer’s app or web interface to select and transfer the pictures from your phone to the photo frame. WiFi connectivity offers convenience and eliminates the need for physical storage devices.
4. Cloud Services: Cloud-based services like Google Photos, iCloud, and Dropbox provide an easy and efficient way to transfer pictures from your phone to a digital photo frame. Simply upload your photos to the cloud service of your choice and access them from the photo frame using its corresponding app or web interface. This method offers flexibility, as you can access your pictures from anywhere with an internet connection.
5. Mobile Apps: Some digital photo frames have companion mobile apps that facilitate picture transfers. These apps can provide additional features, such as automatic syncing with your phone’s camera roll or the ability to create custom slideshows. Simply install the app on your phone, connect it to the photo frame, and follow the prompts to transfer and display your pictures.
Each of these methods has its own advantages and limitations. Consider your specific needs, the devices you own, and the features you desire before deciding on the best approach to transfer pictures from your phone to your digital photo frame.
Bluetooth
Bluetooth technology allows you to connect devices wirelessly and transfer data over short distances. Many digital photo frames are equipped with Bluetooth functionality, making it a convenient method for transferring pictures from your phone. Here’s how you can use Bluetooth to transfer pictures:
1. Ensure that both your phone and digital photo frame have Bluetooth capabilities. If your devices don’t have built-in Bluetooth, you may need to purchase a Bluetooth adapter for the photo frame.
2. Enable Bluetooth on both devices. On your phone, go to the Settings menu and look for the Bluetooth option. Turn it on and make sure it’s visible to other devices.
3. On the digital photo frame, navigate to the settings menu and find the Bluetooth option. Enable Bluetooth and set it to discoverable mode.
4. Pair your phone with the digital photo frame. On your phone, select the digital photo frame’s name from the list of available devices. You may need to enter a PIN or confirm a passcode to complete the pairing process.
5. Once the devices are paired, you can begin transferring pictures. Open the gallery or photos app on your phone and select the pictures you want to transfer. Look for the sharing options and choose the Bluetooth option. Select the digital photo frame from the list of available devices.
6. The selected pictures will be sent to the digital photo frame via Bluetooth. The speed of transfer will depend on the file sizes and the Bluetooth version supported by both devices. Larger files may take longer to transfer.
7. On the digital photo frame, you will usually find a Bluetooth folder or a designated area where the transferred pictures will be stored. The frame will automatically start displaying the transferred pictures once the transfer is complete.
Using Bluetooth to transfer pictures is a simple and wireless method, but it has its limitations. Bluetooth connections have restricted range, usually up to 100 meters. Additionally, the transfer speed may be slower compared to other methods like WiFi or USB. However, Bluetooth is a popular choice for quick and hassle-free transfers between devices in close proximity.
Before transferring pictures via Bluetooth, make sure that both devices are sufficiently charged to avoid interruptions during the transfer. It’s also important to note that the specific steps and options may differ depending on the manufacturer and model of your digital photo frame and phone.
SD Card or USB Drive
If your digital photo frame has an SD card slot or supports USB drives, transferring pictures using these storage devices is a reliable and straightforward method. Here’s how you can transfer pictures from your phone to a digital photo frame using an SD card or USB drive:
1. Check if your digital photo frame has an SD card slot or supports USB drives. Most photo frames have these features, but it’s always best to consult the user manual or check the manufacturer’s website for compatibility.
2. On your phone, locate the pictures you want to transfer. You can either select individual pictures or create a folder with the selected images.
3. If transferring to an SD card, insert the card into your phone (if it supports expandable storage) or use a card reader to connect it to your computer. If using a USB drive, connect it to your phone using an OTG (On-The-Go) adapter.
4. Once the SD card or USB drive is connected, navigate to the selected pictures and copy them to the storage device. You can do this by selecting the pictures and choosing the “Copy” or “Move” option. Alternatively, you can create a folder on the storage device and move the pictures into that folder.
5. Safely eject the SD card or USB drive from your phone or computer and insert it into the corresponding slot on your digital photo frame. Ensure that the frame is turned off before inserting or removing the storage device.
6. Turn on your digital photo frame and wait for it to detect the inserted SD card or USB drive. The frame will usually automatically start displaying the pictures once they are detected.
SD cards and USB drives provide a convenient way to transfer pictures, as they can store a large number of images and are easily portable. Additionally, this method does not rely on wireless connectivity, making it a reliable choice even in areas with weak network signals. However, it does require physical access to the SD card or USB drive and may involve additional steps such as copying the pictures from your phone to the storage device.
When using an SD card or USB drive, ensure that the storage device is compatible with your digital photo frame and supports the file formats used by your phone’s camera. It’s also essential to handle the storage device with care and protect it from physical damage or data corruption.
Keep in mind that different digital photo frames have varying capabilities and support different file formats. It’s advisable to refer to the manufacturer’s instructions or user manual for specific guidelines on using SD cards or USB drives with your photo frame.
WiFi Connectivity
WiFi connectivity offers a seamless and convenient way to transfer pictures from your phone to a digital photo frame. Many modern photo frames come with built-in WiFi capabilities, allowing you to transfer pictures without the need for physical storage devices. Here’s how you can use WiFi to transfer pictures:
1. Ensure that both your phone and digital photo frame are connected to the same WiFi network. If your phone is not already connected, go to the Settings menu, find the WiFi option, and select the network you want to connect to. Follow the prompts to enter the WiFi password if necessary.
2. On your digital photo frame, locate the WiFi settings. This is typically found in the settings menu or setup wizard. Follow the on-screen instructions to connect the photo frame to your WiFi network.
3. Once both devices are connected to the same WiFi network, download and install any required apps or software on your phone or digital photo frame. Some photo frames have a specific app provided by the manufacturer, while others may have built-in support for popular cloud storage services like Google Photos or Dropbox.
4. Open the app or software on your phone and follow the instructions to select the pictures you want to transfer. Choose the option to transfer the pictures to the digital photo frame or link your cloud storage account with the frame’s app.
5. The selected pictures will be transferred over the WiFi network to the digital photo frame. Depending on the size and number of pictures, the transfer may take a few minutes. Make sure that both devices remain connected to the WiFi network during the transfer.
6. After the transfer is complete, the digital photo frame will typically start displaying the transferred pictures automatically. You may also have options to customize the slideshow settings, such as setting the transition effects or display duration.
WiFi connectivity enables you to transfer pictures wirelessly and eliminates the need for physical storage devices like SD cards or USB drives. It also allows for more flexibility, as you can access your pictures from multiple devices and locations as long as they are connected to the same WiFi network.
When using WiFi connectivity for picture transfers, ensure that both your phone and digital photo frame have stable and reliable internet connections. Slow or unstable WiFi networks can result in interrupted transfers or slower processing times. Additionally, make sure to protect your WiFi network with a strong password to prevent unauthorized access.
The specific steps for WiFi connectivity may vary depending on the manufacturer and model of your digital photo frame. Consult the user manual or manufacturer’s website for detailed instructions on setting up and using WiFi connectivity for picture transfers.
Cloud Services
Cloud services provide a convenient and flexible way to transfer pictures from your phone to a digital photo frame. With cloud storage solutions like Google Photos, iCloud, or Dropbox, you can store your pictures online and access them from any device with an internet connection. Here’s how you can use cloud services to transfer pictures:
1. Choose a cloud storage service that suits your needs and preferences. Popular options include Google Photos, iCloud, Dropbox, and Amazon Photos. Sign up for an account if you don’t already have one.
2. Install the corresponding app for the cloud storage service on your phone, if available. Alternatively, you can access the service through a web browser on your phone.
3. Upload the pictures you want to transfer to the cloud storage service. You can do this by selecting the pictures from your phone’s gallery app and using the sharing option to upload them to the cloud storage app. Alternatively, you can manually upload them through the cloud storage app or website.
4. Once the pictures are uploaded to the cloud, open the app or website on your digital photo frame. Sign in to your cloud storage account and navigate to the folder or album where the uploaded pictures are located.
5. Select the pictures you want to display on your digital photo frame and choose the option to download or sync them to the photo frame. The exact steps may vary depending on the cloud storage service and photo frame model.
6. The selected pictures will be downloaded or synced to your digital photo frame, and they will start displaying automatically. The frame may provide options to customize the slideshow settings, such as the duration of each picture or transition effects.
Using a cloud service to transfer pictures offers various benefits. Your pictures are securely stored in the cloud, reducing the risk of losing them if your phone or photo frame gets damaged. Additionally, you can access your pictures from multiple devices, making it easy to share and manage your photo collection.
When using cloud services, it’s essential to ensure that your cloud storage account has sufficient storage space for your pictures. Some services offer limited free storage, while others require a subscription for larger storage capacities. You may need to manage your storage allocation by removing older pictures or upgrading your storage plan.
Remember to maintain a stable and reliable internet connection on both your phone and digital photo frame when using cloud services. Slow or intermittent connections may result in delays or disrupted transfers.
Each cloud storage service may have its own interface and features. Familiarize yourself with the specific steps and options provided by your chosen service, and consult the user manuals or help documentation for your digital photo frame for instructions on how to access and download pictures from the cloud.
Mobile Apps
Many digital photo frames come with companion mobile apps that enhance the functionality and ease of transferring pictures. These apps offer additional features such as automatic syncing with your phone’s camera roll or the ability to create custom slideshows. Here’s how you can use mobile apps to transfer pictures:
1. Check if your digital photo frame has a dedicated mobile app. You can usually find this information in the user manual or on the manufacturer’s website. If available, download and install the app from the App Store or Google Play Store.
2. Launch the mobile app on your phone and follow the instructions to set up and connect your photo frame. This usually involves connecting both devices to the same WiFi network and completing a one-time pairing or registration process.
3. Once your phone and digital photo frame are connected, the mobile app will provide various options for transferring pictures. You can typically choose to sync your phone’s camera roll, select specific albums or folders, or even create custom slideshows with filters and transitions.
4. Select the pictures you want to transfer from your phone to the digital photo frame using the options provided by the mobile app. Depending on the app, you may be able to choose individual pictures, entire albums, or specific dates or events.
5. After selecting the pictures, initiate the transfer process through the mobile app. The app will transfer the pictures wirelessly to your digital photo frame via WiFi, eliminating the need for physical storage devices or manual file transfers.
6. Once the transfer is complete, the digital photo frame will start displaying the transferred pictures according to the settings and preferences configured through the mobile app. You may have options to customize the slideshow, such as specifying the duration of each picture or adding background music.
Mobile apps provide a convenient way to transfer pictures and offer additional features to enhance your viewing experience. They often streamline the process of selecting and organizing pictures, ensuring that your favorite memories are displayed effortlessly on your digital photo frame.
It’s essential to ensure that both your phone and digital photo frame have compatible operating systems and meet the minimum requirements specified by the mobile app. Regularly updating the app and firmware on both devices is also advisable to access the latest features and ensure optimal performance.
Keep in mind that the availability and functionality of mobile apps may vary depending on the manufacturer and model of your digital photo frame. Consult the user manual or manufacturer’s website for specific instructions on downloading, installing, and using the mobile app for your photo frame.
Tips for Successful Picture Transfers
Transferring pictures from your phone to a digital photo frame can be a smooth and enjoyable process with the right approach. Here are some tips to ensure successful picture transfers:
1. Organize your pictures: Before transferring the pictures, organize them into albums or folders. This will make it easier to select specific pictures or create custom slideshows on your digital photo frame.
2. Resize your pictures: Depending on the resolution and screen size of your digital photo frame, it may be beneficial to resize your pictures before transferring them. This can help optimize the display quality and reduce the file size for quicker transfers.
3. Check compatibility: Ensure that the file formats supported by your digital photo frame and the picture resolution align with what your phone can provide. Consult the user manual or manufacturer’s website for the required specifications of your photo frame.
4. Protect your pictures: Make sure to back up your pictures before transferring them. If anything goes wrong during the transfer process, you won’t risk losing your valuable memories.
5. Clean your digital photo frame: Regularly clean the screen and body of your photo frame to ensure optimal image quality and prevent any interference during picture transfers.
6. Maintain sufficient battery charge: Ensure that both your phone and digital photo frame are charged adequately before initiating transfers. A drained battery can interrupt the transfer process or cause undesired results.
7. Use a secure network: When using WiFi or cloud services for picture transfers, make sure you are connected to a secure network. Avoid using public or unsecured networks to protect your personal data.
8. Keep your devices updated: Regularly update the firmware on your digital photo frame and keep your phone’s operating system and photo-related apps up to date. This will ensure compatibility and access to the latest features.
9. Test the transfer: Perform a test transfer with a small number of pictures to ensure that everything is functioning correctly before transferring a large batch of pictures.
10. Read the user manual: Familiarize yourself with the user manual or instructions provided by the manufacturer of your digital photo frame. It will provide specific guidance on the picture transfer process and any unique features or settings.
Following these tips will help you have smooth, successful picture transfers from your phone to your digital photo frame. Remember to tailor these suggestions to match the specific requirements and capabilities of your devices.
Conclusion
Transferring pictures from your phone to a digital photo frame allows you to bring cherished memories to life on a larger screen. With various methods at your disposal, such as Bluetooth, SD cards or USB drives, WiFi connectivity, cloud services, and mobile apps, you can choose the approach that suits your preferences and devices.
Bluetooth offers a convenient wireless connection, SD cards and USB drives provide physical storage options, WiFi connectivity enables seamless transfers over a shared network, cloud services allow for remote access and storage, and mobile apps enhance functionality and customization.
To ensure successful picture transfers, follow some helpful tips like organizing your pictures, resizing them if necessary, checking compatibility, backing up your pictures, maintaining a clean photo frame, keeping batteries charged, using secure networks, updating firmware and software, testing transfers, and referring to user manuals.
Remember that each digital photo frame and phone model may have specific instructions, so consult the manufacturer’s guidelines for accurate details.
Now that you’re equipped with the knowledge of different transfer methods and useful tips, you can effortlessly transfer your pictures from your phone to your digital photo frame. Enjoy reliving your precious memories and showcasing them in a visually stunning way.