Introduction
Setting up your Wacom tablet is an essential step to unleash the full potential of your digital art and design experience. Whether you’re a seasoned artist or a beginner looking to explore your creativity, a Wacom tablet can greatly enhance your workflow and precision. In this article, we will guide you through the process of setting up your Wacom tablet so that you can start creating beautiful digital masterpieces in no time.
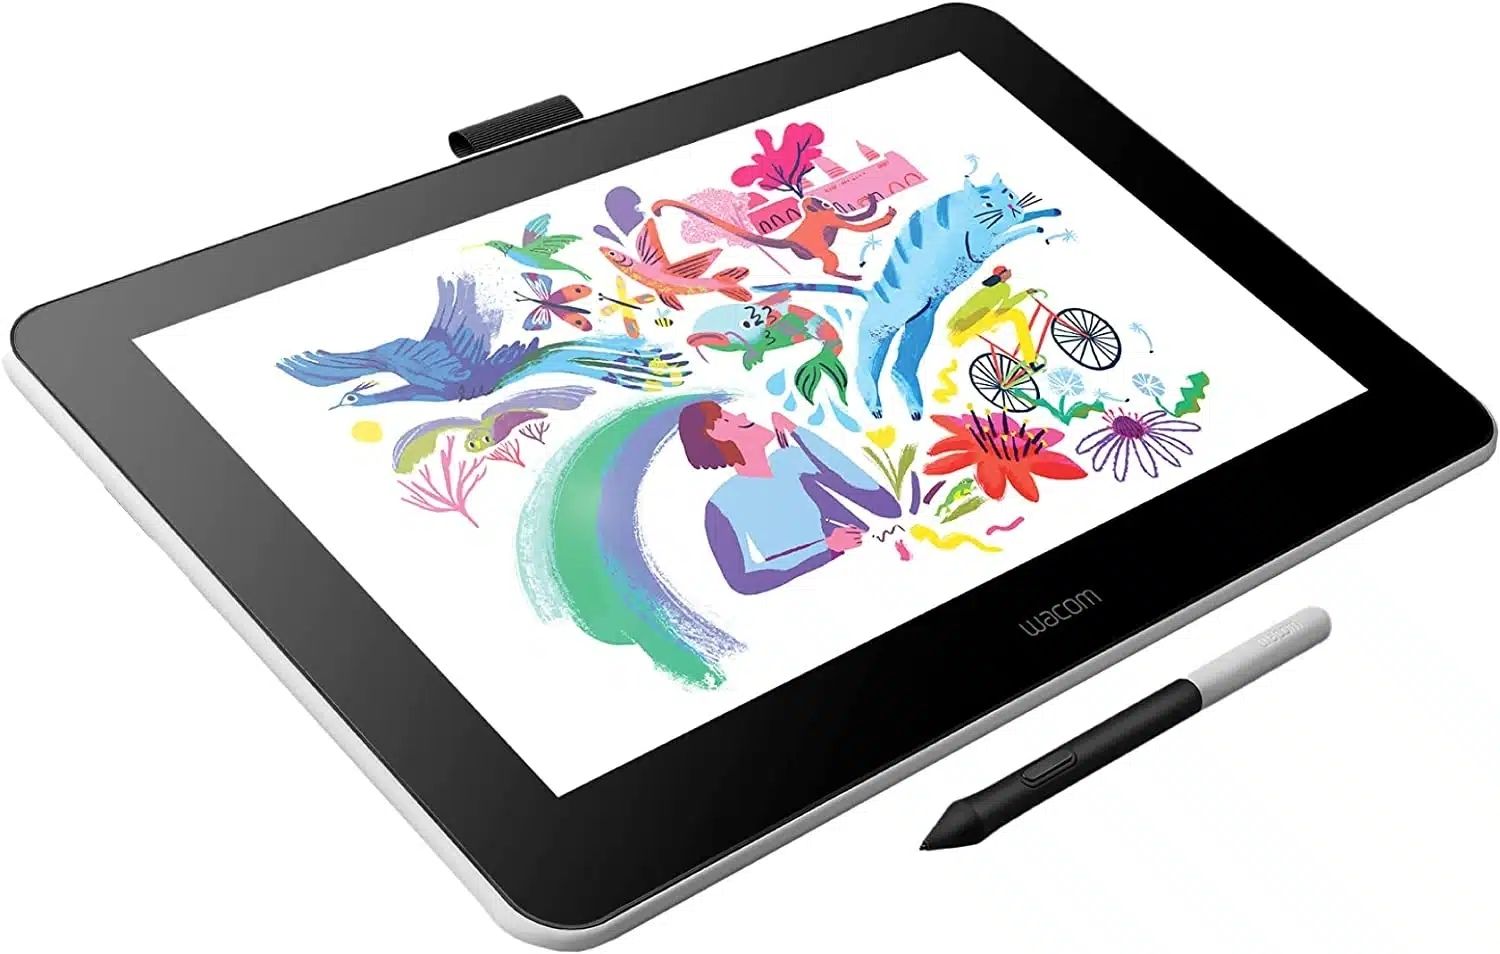
Wacom tablets are widely regarded as the industry standard in digital tablets, offering a range of models catering to different needs and budgets. These tablets come equipped with a pressure-sensitive stylus, allowing you to draw, sketch, and paint with remarkable accuracy and control. With features like programmable buttons, customizable pen settings, and touch gestures, Wacom tablets provide a seamless and intuitive user experience.
Whether you’re a graphic designer, illustrator, photographer, or just someone who enjoys digital art, having a Wacom tablet can significantly enhance your productivity and creativity. The tablet’s ergonomic design and natural pen-to-paper feel make it easier to create digital art that closely resembles traditional artwork.
In the following sections, we will walk you through the step-by-step process of setting up your Wacom tablet. We’ll cover everything from checking the system requirements and installing the necessary drivers to customizing the tablet settings and testing its functionality. By the end of this guide, you’ll have your Wacom tablet up and running, ready to embark on your creative journey.
Step 1: Checking the Requirements
Before you dive into setting up your Wacom tablet, the first step is to ensure that your computer meets the necessary requirements. Checking the system requirements will help ensure a smooth and hassle-free installation process. Here are the key requirements to consider:
- Operating System Compatibility: Wacom tablets are compatible with popular operating systems such as Windows and macOS. Make sure that your computer is running one of these supported operating systems.
- Hardware Specifications: Check the minimum hardware specifications recommended by Wacom for the tablet to function optimally. This typically includes the minimum processor speed, RAM, and available USB ports.
- Internet Connection: An internet connection is usually required to download the necessary drivers and software updates for your Wacom tablet. Ensure that you have a stable internet connection to complete the setup process.
Once you have verified that your computer meets these requirements, you can proceed to the next step of installing the Wacom drivers. It is vital to have the correct drivers installed to ensure seamless communication between your Wacom tablet and your computer’s operating system.
Additionally, it’s worth noting that different Wacom tablet models may have specific compatibility requirements. Check the documentation that comes with your tablet or visit the Wacom website for detailed information about compatibility and system requirements for your specific tablet model.
By ensuring that your computer meets all the necessary requirements, you are laying the foundation for a successful setup and optimal performance of your Wacom tablet. Once you have confirmed the compatibility, let’s move on to the next step, which is installing the requisite drivers for your tablet.
Step 2: Installing the Wacom Drivers
Installing the correct drivers for your Wacom tablet is crucial to ensure its proper functionality and compatibility with your computer. The drivers act as the bridge between your tablet and the operating system, allowing them to communicate effectively. Follow these steps to install the Wacom drivers:
- Visit the Wacom Website: Go to the official Wacom website and navigate to the drivers download page. This page contains the latest drivers for all Wacom tablet models.
- Select Your Tablet Model: Choose your specific tablet model from the list provided on the website. Ensure that you are selecting the appropriate driver for your tablet and operating system.
- Download and Run the Installer: Once you have selected the correct driver, click on the “Download” button to save the installer file to your computer. Locate the downloaded file and double-click to run the installer.
- Follow the Installation Wizard: The installation process may vary slightly depending on your operating system. Generally, you would need to accept the terms and conditions, choose the installation location, and select any additional components or features you want to install. Follow the on-screen prompts and instructions to complete the installation.
- Restart Your Computer: After the installation is complete, it is recommended to restart your computer. This ensures that the driver changes take effect and your Wacom tablet is properly recognized by the system.
- Connect Your Wacom Tablet: Once your computer is back up, connect your Wacom tablet to the computer using the provided USB cable. The tablet should be detected by your operating system, and the necessary drivers will be automatically loaded.
After successfully installing the Wacom drivers and connecting your tablet, you are one step closer to unleashing its full potential. The drivers enable the tablet to communicate with your computer, allowing you to access all the advanced features and customization options provided by your Wacom tablet.
In the next step, we will guide you through the process of connecting your Wacom tablet to your computer, ensuring a secure and stable connection for seamless interaction between the two.
Step 3: Connecting the Tablet to Your Computer
Now that you have successfully installed the Wacom drivers on your computer, it’s time to connect your Wacom tablet. Follow these steps to establish a secure and stable connection between your tablet and computer:
- Locate the USB Port: Identify the USB port on your computer where you will connect the Wacom tablet. Most computers have multiple USB ports, so choose a convenient and easily accessible one.
- Connect the USB Cable: Take the USB cable that came with your Wacom tablet and plug one end into the USB port on your computer. Plug the other end into the corresponding port on your tablet. Ensure a secure connection by pushing the plug firmly into the ports.
- Power On the Tablet: Some Wacom tablets have physical power buttons or switches. If your tablet has one, press the power button to turn it on. Other tablets may power on automatically when connected to the computer.
- Wait for System Recognition: Your computer should detect the connected Wacom tablet and display a message indicating that it has been recognized. Depending on your operating system, the tablet may be detected and installed automatically, or you may need to follow additional on-screen instructions to complete the setup process.
Once your Wacom tablet is connected to your computer and recognized by the system, you are now ready to configure the tablet settings according to your preferences. The next step will guide you through adjusting the tablet settings and customizing the pen settings to optimize your digital art experience.
Remember, if you encounter any issues in connecting your Wacom tablet, ensure that the USB cable is properly plugged in and try connecting to a different USB port on your computer. If the problem persists, consult the user manual or visit the Wacom support website for troubleshooting assistance.
Step 4: Adjusting the Tablet Settings
Now that your Wacom tablet is connected to your computer, it’s time to adjust the tablet settings to suit your preferences and workflow. Follow these steps to customize the tablet settings:
- Open the Wacom Tablet Settings: Look for the Wacom Tablet icon in your system tray (Windows) or menu bar (Mac). Right-click (Windows) or click (Mac) on the icon to open the tablet settings menu.
- Explore the Settings: The tablet settings menu provides a variety of options to customize your tablet experience. Take some time to explore the different tabs and options available. You can adjust parameters such as pen pressure sensitivity, tablet orientation, scroll speed, and more.
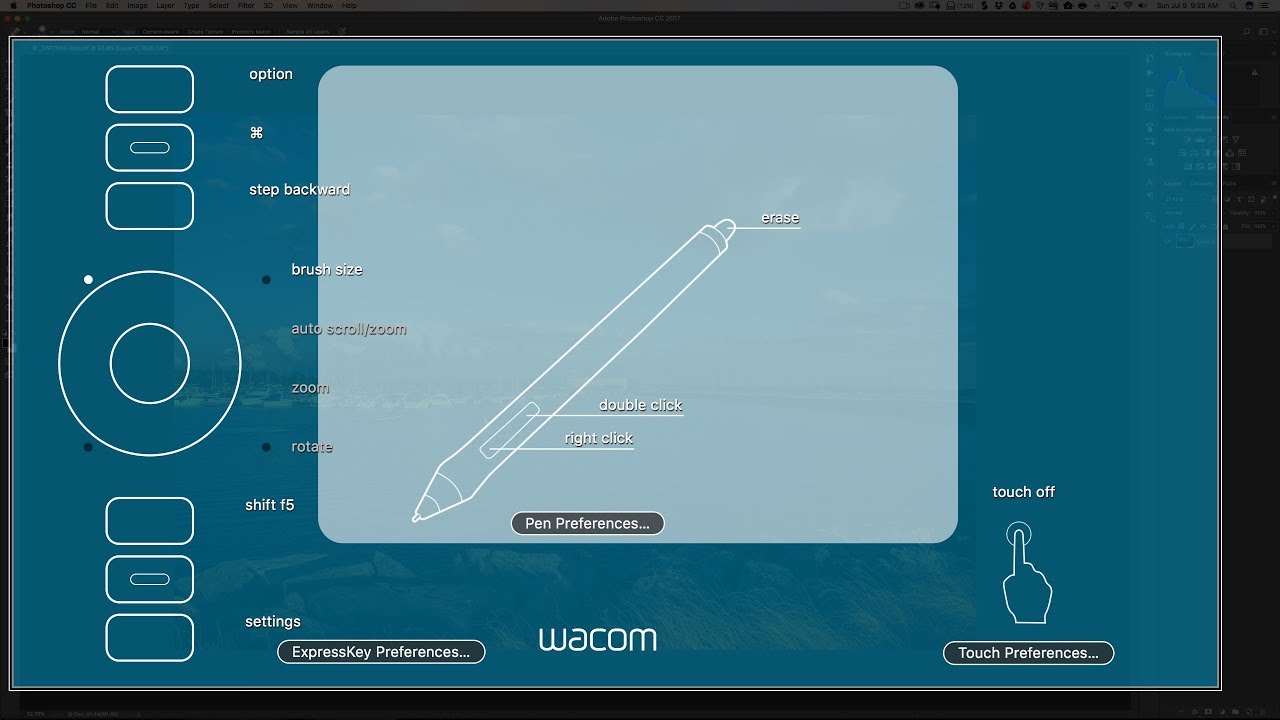
- Configure Pen Settings: The pen settings allow you to customize the behavior of the stylus. You can adjust the primary and secondary buttons on the pen, assign different functions to them, and even set application-specific settings. Experiment with different settings to find what works best for you.
- Adjust Touch Gesture Settings (If Applicable): Some Wacom tablets come with touch capability. If your tablet supports touch gestures, you can customize the gestures to perform specific actions or navigation commands. This feature can greatly enhance your productivity and navigation speed.
- Set ExpressKeys Configuration: Wacom tablets often have programmable buttons called ExpressKeys. These keys can be assigned to commonly used functions or keyboard shortcuts. Set up the ExpressKeys according to your workflow and preferences, making it easier to access certain commands or tools quickly.
Throughout the adjustment process, take the time to experiment with different settings and options to find your optimal configuration. Every artist and designer has different preferences, so it’s essential to fine-tune the tablet settings to match your unique needs.
Once you have adjusted the tablet settings to your satisfaction, you are ready to move on to the next step of setting up pressure sensitivity, which plays a crucial role in creating expressive and dynamic digital art.
Step 5: Customizing the Pen Settings
Customizing the pen settings on your Wacom tablet allows you to fine-tune the behavior of the pen and stylus according to your preferences. Follow these steps to customize the pen settings:
- Open the Wacom Tablet Settings: Locate the Wacom Tablet icon in your system tray (Windows) or menu bar (Mac). Right-click (Windows) or click (Mac) on the icon to open the tablet settings menu.
- Navigate to Pen Settings: In the tablet settings menu, navigate to the “Pen” tab or a similar section that specifically deals with the pen settings. This is where you can make adjustments to various pen-related parameters.
- Adjust Pressure Sensitivity: Pressure sensitivity is a crucial feature of Wacom tablets, allowing you to control line thickness and opacity by varying the pressure applied while drawing. Play around with the pressure sensitivity settings to find the level that suits your drawing style and desired effect.
- Experiment with Tip Feel: Different Wacom pens offer various tip feels, such as soft, firm, or standard. Depending on your preference, you can select the tip feel that provides the most comfortable and natural drawing experience for you.
- Modify Button Functions: Some Wacom pens have buttons on them that can be customized to perform different functions. Explore the options to assign specific actions or keyboard shortcuts to these buttons, such as undo, eraser, or changing brush settings.
- Configure Tilt and Rotation: If your Wacom pen supports tilt and rotation, you can customize these settings as well. Tilt allows you to control brush angle and shading, while rotation can be utilized to rotate the canvas or adjust other parameters.
During the customization process, take the time to experiment with different pen settings and observe how they affect your drawing experience. Keep in mind that finding the right settings may require some trial and error, but it’s worth the effort to achieve the most comfortable and efficient workflow.
Once you have customized the pen settings to your liking, you are now ready to explore one of the most captivating features of a Wacom tablet: pressure sensitivity. In the next step, we will guide you through configuring pressure sensitivity, enabling you to create stunning digital art with varying line weights and brush effects.
Step 6: Setting Up Pressure Sensitivity
Configuring pressure sensitivity on your Wacom tablet is essential for creating expressive and realistic digital art. Pressure sensitivity allows you to control the thickness, opacity, and other parameters of your brush strokes based on the pressure applied with the pen. Follow these steps to set up pressure sensitivity:
- Open the Wacom Tablet Settings: Locate the Wacom Tablet icon in your system tray (Windows) or menu bar (Mac). Right-click (Windows) or click (Mac) on the icon to open the tablet settings menu.
- Navigate to Pen Settings: In the tablet settings menu, navigate to the “Pen” or “Advanced Pen” tab. This is where you can configure the pressure sensitivity settings.
- Adjust Sensitivity Curve: The sensitivity curve determines how pressure affects your brush strokes. You can set it to be linear, meaning that pressure has a consistent effect, or adjust it to have a more gradual or sensitive response. Experiment with different curve settings to find the one that suits your drawing style.
- Test Pressure Sensitivity: Use the provided test area or open your preferred drawing software to test the pressure sensitivity. Create a few brush strokes with varying pressure to ensure that the brush responds as expected. If necessary, go back to the settings and make further adjustments until you achieve the desired effect.
- Fine-Tune Sensitivity: Some Wacom tablets offer additional options to fine-tune the pressure sensitivity, such as adjusting the minimum and maximum pressure levels. Explore these options to further refine the response and control of your brush strokes.
Remember, every artist has different preferences when it comes to pressure sensitivity. Take the time to experiment with different settings and find what feels most comfortable and natural for your drawing style. It may take some trial and error to achieve the desired results, but with patience and practice, you’ll be able to unleash your creativity with precision and control.
Now that you have successfully set up pressure sensitivity, you are ready to move on to the next step, configuring the ExpressKeys on your Wacom tablet. These programmable buttons provide quick access to frequently used functions and shortcuts, optimizing your workflow and enhancing your productivity as a digital artist.
Step 7: Configuring ExpressKeys
Configuring the ExpressKeys on your Wacom tablet allows you to customize the tablet’s programmable buttons according to your specific needs and workflow. These buttons can be assigned to frequently used functions, keyboard shortcuts, or even application-specific commands. Follow these steps to configure the ExpressKeys:
- Open the Wacom Tablet Settings: Locate the Wacom Tablet icon in your system tray (Windows) or menu bar (Mac). Right-click (Windows) or click (Mac) on the icon to open the tablet settings menu.
- Navigate to ExpressKeys Settings: In the tablet settings menu, find the “ExpressKeys” or “Buttons” tab. This is where you can configure the functions of the tablet’s programmable buttons.
- Select the Button: Choose the ExpressKey button you want to customize. This may vary depending on your tablet model, but most tablets have multiple programmable buttons located on the side of the tablet or near the drawing area.
- Assign the Function: Once you’ve selected a button, choose the function you want to assign to it. This can include keyboard shortcuts, commonly used commands, opening specific applications, or even launching your preferred drawing software.
- Configure Application-Specific Settings (Optional): Some Wacom tablets allow you to set up application-specific settings for the ExpressKeys. This means you can assign different functions to the buttons based on the software you’re using. For example, you can have a different set of shortcuts for Photoshop compared to Illustrator.
- Test and Modify: Test the assigned functions by pressing the programmed ExpressKeys. Ensure that the assigned functions work as intended. If necessary, go back to the settings and modify the assignments until you have a configuration that suits your workflow.
Configuring the ExpressKeys provides you with quick and convenient access to commonly used functions and commands, reducing the time spent searching through menus or reaching for your keyboard. By customizing the programmable buttons to match your specific needs, you can streamline your workflow and enhance your productivity as a digital artist.
Once you have configured the ExpressKeys to your preference, you are now ready for the final step of testing the functionality of your Wacom tablet. Testing the tablet’s functionality ensures that all the settings and configurations are working correctly and that you’re ready to start creating your digital masterpieces with precision and ease.
Step 8: Testing Tablet Functionality
Before you embark on your creative journey with your Wacom tablet, it’s essential to test its functionality to ensure everything is working correctly. Follow these steps to perform a comprehensive test of your tablet:
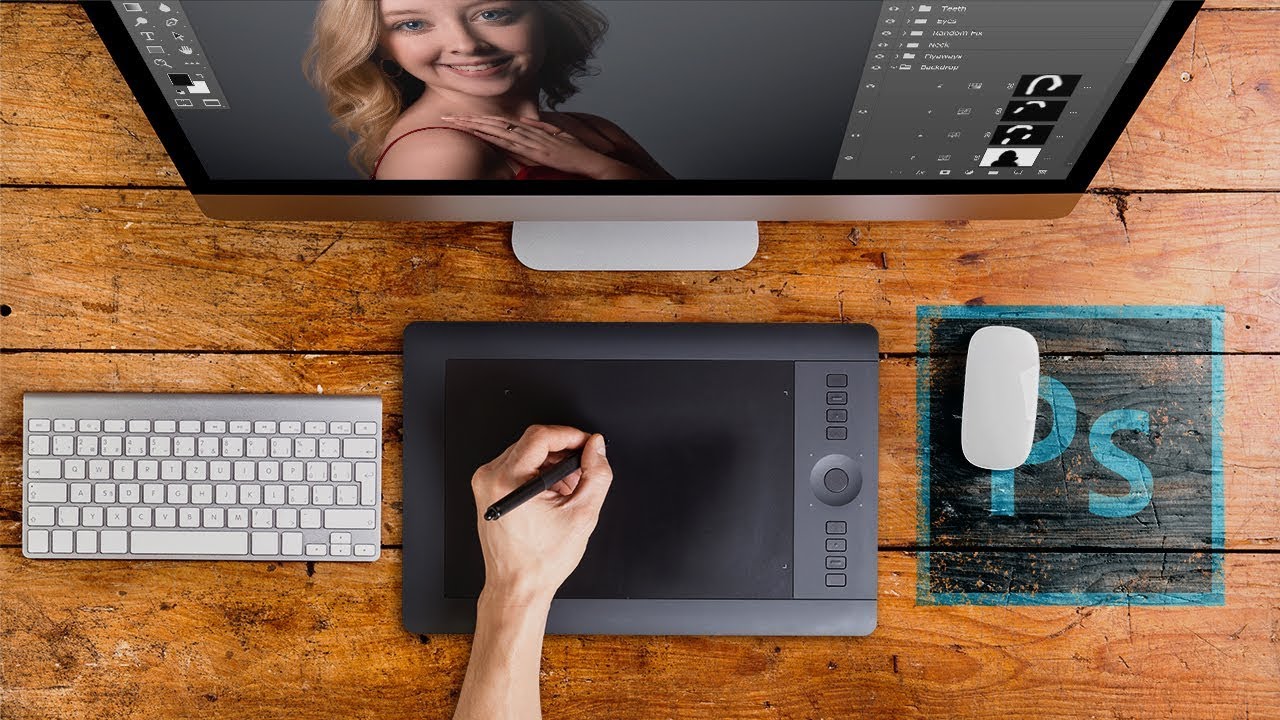
- Open Your Preferred Drawing Software: Launch your preferred drawing software, whether it’s Adobe Photoshop, Corel Painter, or any other application you use for digital art.
- Create Sample Brush Strokes: Use your Wacom pen to create a series of brush strokes in various sizes and pressures. Pay attention to how the strokes respond to pressure sensitivity and if they reflect your intended brush settings.
- Test ExpressKeys: Press each programmed ExpressKey to verify that it triggers the assigned function or command correctly. Ensure that the functions you have assigned to the ExpressKeys work as expected and enhance your workflow.
- Check for Cursor Accuracy: Move the pen across the tablet’s surface and observe the corresponding cursor movement on your computer screen. Verify that the cursor accurately follows the pen’s movement without any noticeable lag or inaccuracy.
- Test Pen Buttons: If your pen has additional buttons, test them to ensure they function properly. Check if the buttons perform the assigned functions, such as right-click or eraser, without any issues.
- Verify Gesture Recognition (If Applicable): If your Wacom tablet supports touch gestures, test them to ensure they are recognized correctly. Try various gestures, such as pinch-to-zoom or swipe gestures, and verify that the tablet accurately detects and responds to them.
Performing these tests will give you peace of mind and ensure that your Wacom tablet is fully functional and ready for your creative endeavors. If you encounter any issues during testing, refer to the user manual or visit the Wacom support website for troubleshooting assistance.
Once you have successfully tested the functionality of your Wacom tablet, congratulations! You are now fully set up and ready to let your creativity soar. Enjoy the seamless and intuitive experience of using a Wacom tablet, and let your imagination unfold on the digital canvas.
Conclusion
Setting up your Wacom tablet is an exciting and essential step towards elevating your digital art and design experience. By following the steps outlined in this guide, you have successfully installed the Wacom drivers, connected the tablet to your computer, adjusted tablet settings, customized pen settings, set up pressure sensitivity, configured the ExpressKeys, and tested the tablet’s functionality. Now, armed with a fully functional and personalized tablet, you are ready to unleash your creativity and bring your artistic visions to life.
With its advanced features, such as pressure sensitivity, customizable pen settings, and programmable ExpressKeys, your Wacom tablet provides you with unprecedented control and precision in your digital artwork. Whether you’re a professional artist, a hobbyist, or just starting your creative journey, the Wacom tablet offers a seamless and intuitive drawing experience that closely emulates traditional art mediums.
Remember to continually explore and experiment with the various settings and features of your Wacom tablet. This will help you fine-tune your workflow and discover new ways to express your creativity. Don’t be afraid to try different brushes, techniques, or software applications to further enhance your digital art experience.
Lastly, keep in mind that mastery takes time and practice. As you spend more time with your Wacom tablet, you will become more comfortable and proficient in using its features. Whether you’re creating stunning illustrations, retouching photos, or designing captivating digital graphics, your Wacom tablet will be an indispensable tool in your creative arsenal.
So, go ahead and let your imagination run wild. Embrace the possibilities that your Wacom tablet offers and embark on a journey of artistic expression like never before. Enjoy the freedom, precision, and endless creative potential that your Wacom tablet brings to your digital art endeavors.