Introduction
Welcome to the world of Mac! If you’re wondering how to get another browser on your Mac, you’ve come to the right place. While Safari is the default browser on macOS, many users prefer to have alternatives for various reasons. Whether you’re looking for additional features, improved performance, or compatibility with specific websites and web apps, installing another browser can open up a world of possibilities for your browsing experience.
Having an alternative browser on your Mac allows you to explore different user interfaces, customizable options, and unique features that may better suit your needs and preferences. Additionally, some websites may work better or display differently in certain browsers, so having more than one at your disposal can offer a practical solution for compatibility issues.
But with the plethora of browser options available, how do you choose which one to install? Don’t worry; we’ll walk you through the process step by step, making it easy for you to install and enjoy a new browsing experience on your Mac.
In this article, we will guide you through the steps to get another browser on your Mac. We will cover everything from researching and choosing the right browser to installing it on your Mac and setting it as your default browser. So, let’s dive in!
Why would I want another browser on my Mac?
While Safari is a reliable and capable browser, there are several reasons why you may want to install another browser on your Mac. Let’s explore some common scenarios:
1. Compatibility: Different browsers have different rendering engines, which can affect how websites and web apps are displayed. In some cases, a website may not work properly or have limited functionality on Safari but may function flawlessly on another browser. Having an alternative browser can help ensure a seamless browsing experience across various websites and platforms.
2. Customization and Features: Each browser offers a unique set of features and customization options. If you find Safari’s feature set lacking or want to explore new functionalities, installing another browser can provide you with a wider range of options. Whether you’re looking for advanced privacy controls, built-in developer tools, or seamless integration with extensions, a different browser can cater to your specific needs.
3. Performance and Speed: While Safari is designed to offer fast and efficient performance, some users may find that other browsers provide even better speed and responsiveness. If you frequently engage in resource-intensive activities such as online gaming, media streaming, or running web applications, a browser optimized for performance may enhance your overall experience.
4. Familiarity: If you’ve been using a particular browser on other devices or platforms, you might prefer to have the same browser on your Mac for consistency and ease of use. This is especially true if you have a well-established browsing workflow or if you heavily rely on specific browser extensions or plugins.
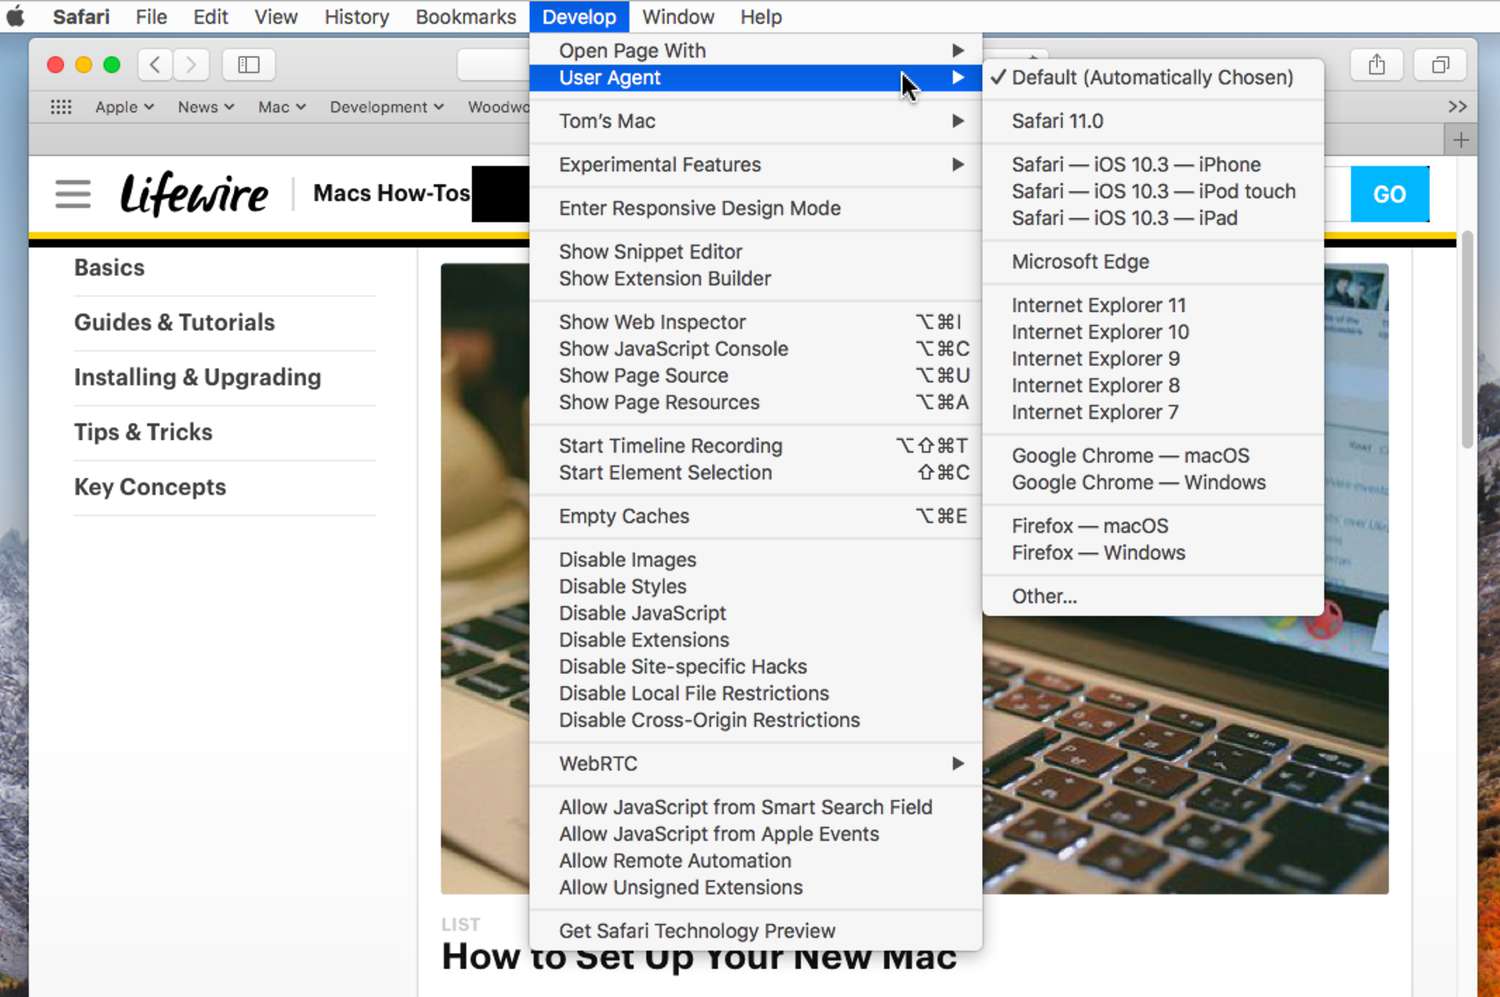
5. Testing and Development: If you’re a web developer or designer, having access to multiple browsers is essential for testing and ensuring cross-browser compatibility. Installing alternative browsers on your Mac allows you to preview your websites or web applications in different environments, ensuring that they function as intended for all users.
With these factors in mind, it’s clear that having another browser on your Mac can greatly enhance your browsing experience, providing you with more flexibility, compatibility, and customization options. Now that you understand the benefits, let’s move on to the steps to choose and install your desired browser on your Mac.
How do I choose which browser to install?
When it comes to choosing the right browser for your Mac, there are a few factors to consider. Here are some key considerations to help you make an informed decision:
1. Purpose: Determine the purpose for which you need another browser. Are you looking for a browser with advanced privacy features? Do you need one specifically tailored for web development? Understanding your requirements will narrow down your options and assist in choosing the most suitable browser.
2. Compatibility: Consider the compatibility of the browser with the websites and web apps you regularly use. Some websites may work better or have optimized features in certain browsers. If you rely heavily on specific web applications, ensure that the browser you choose supports their functionalities.
3. User Interface: Evaluate the user interface of each browser. Look for a clean and intuitive design that aligns with your preferences. A cluttered or complicated interface can hinder your browsing experience, so opt for a browser with an interface that feels comfortable and easy to navigate.
4. Performance: Take into account the performance and speed of the browser. Look for benchmarks and user reviews to assess its reliability and efficiency. A faster browser can significantly enhance your browsing speed and overall productivity.
5. Customization: Check if the browser allows customization options to tailor it to your needs. Look for features like customizable themes, extensions, and add-ons. Having the ability to personalize your browsing experience can greatly enhance your workflow.
6. Security and Privacy: Consider the security features of each browser. Look for built-in privacy controls, anti-tracking measures, and regular security updates. If online privacy is a top concern for you, choose a browser that prioritizes user data protection.
7. Cross-Platform Compatibility: If you use multiple devices, consider a browser that is available on other platforms. Having a consistent browsing experience across all your devices can be convenient and time-saving.
8. User Reviews and Recommendations: Read reviews and seek recommendations from trusted sources or friends. Their insights and experiences can help you gain a better understanding of the pros and cons of different browsers.
By considering these factors, you can narrow down your choices and find the browser that best fits your needs and preferences. Once you’ve made your decision, it’s time to move on to the next step: downloading and installing the browser on your Mac.
Step 1: Research and choose the browser you want to install
Researching and choosing the browser that suits your needs is an important first step in the process of getting another browser on your Mac. Here’s how you can go about it:
1. Assess your requirements: Determine the specific features and functionalities you’re looking for in a browser. Do you prioritize speed, security, customization, or compatibility? Understanding your priorities will help you narrow down your options.
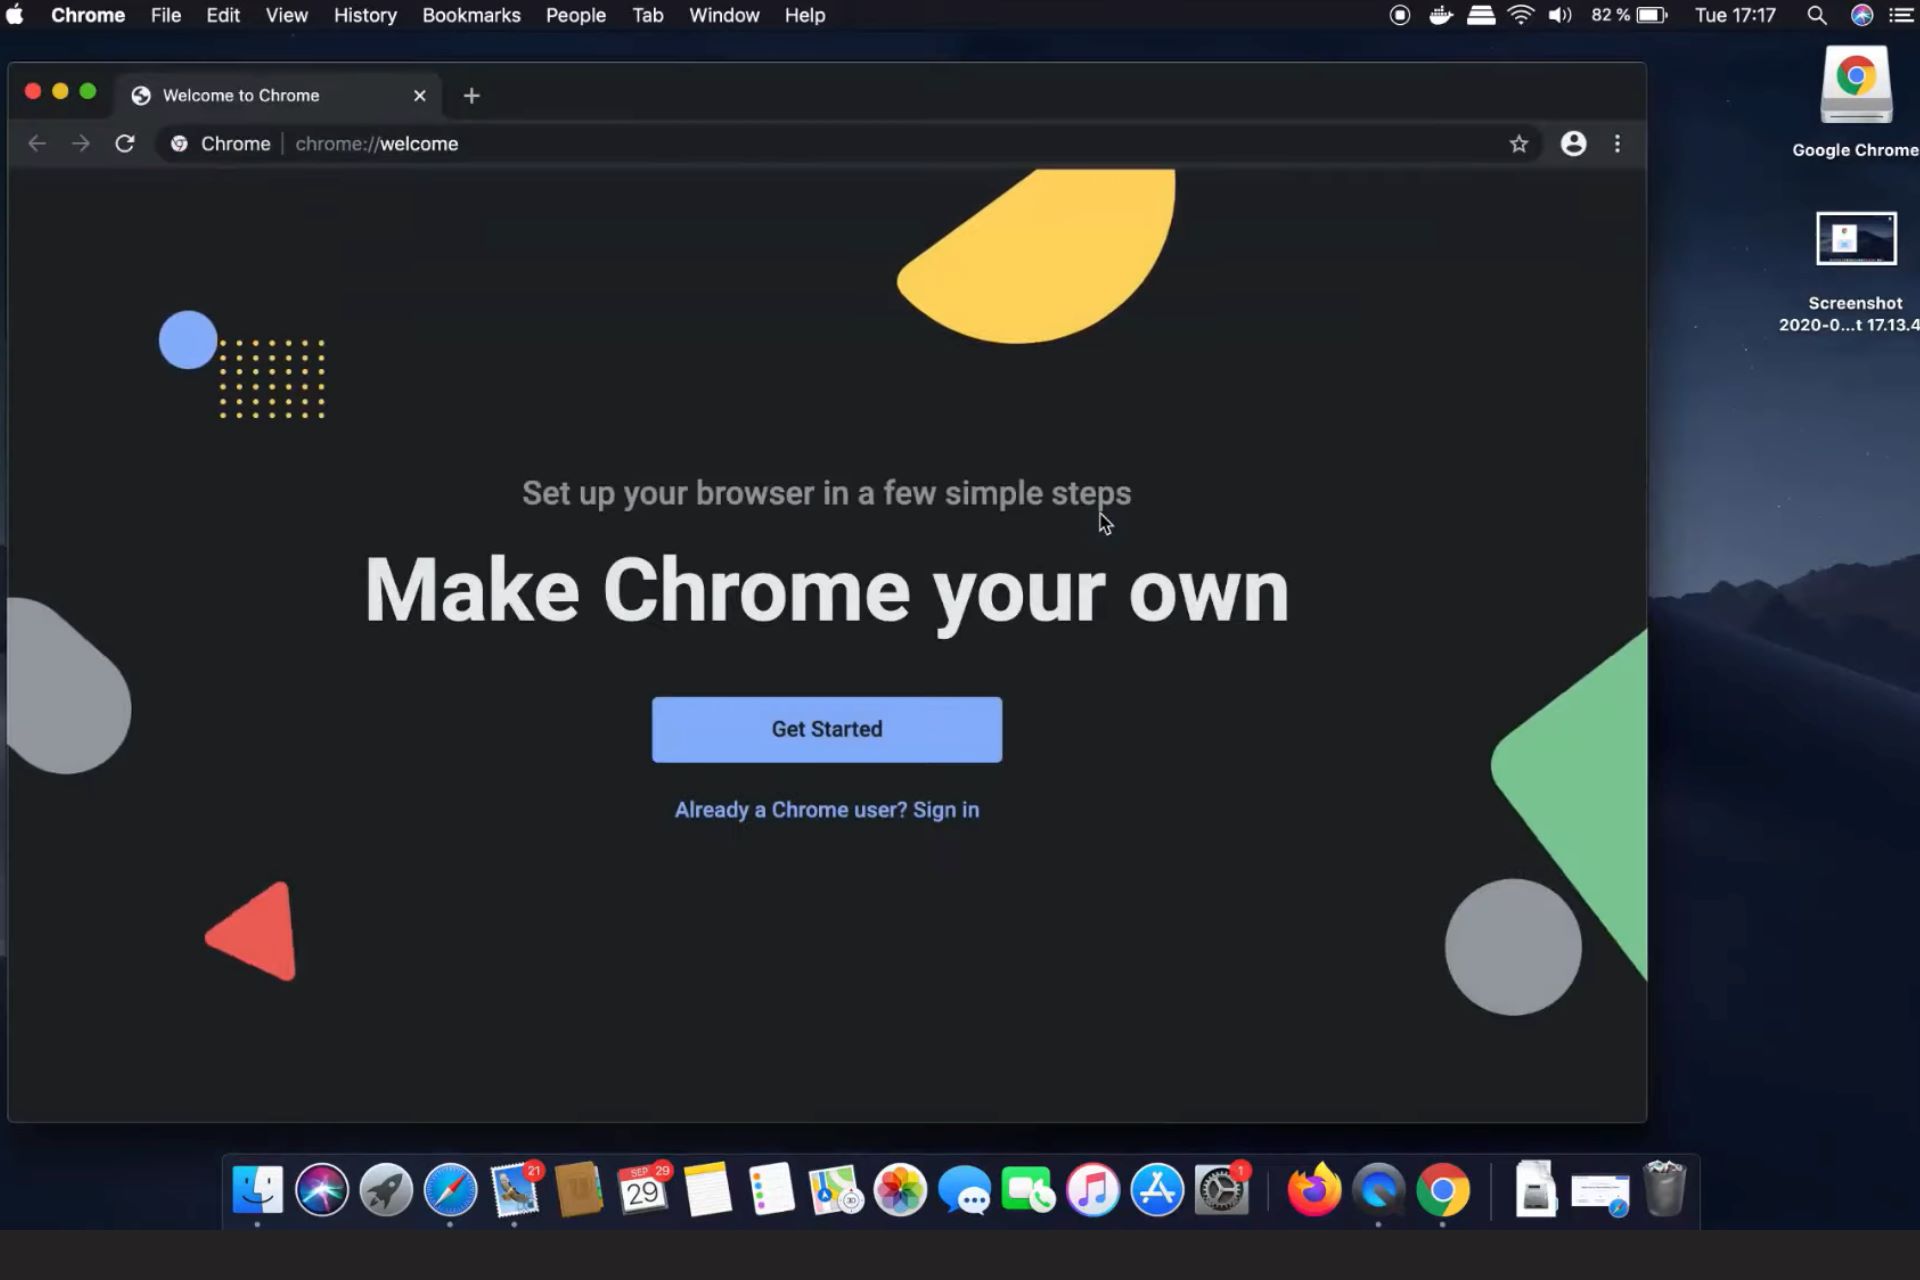
2. Explore popular browsers: Familiarize yourself with the most popular browsers available for macOS. Some popular choices include Google Chrome, Mozilla Firefox, Microsoft Edge, and Opera. Each has its unique features and advantages, so take the time to explore their websites and read about their key offerings.
3. Read user reviews and comparisons: To get a better understanding of each browser’s performance, usability, and reliability, read user reviews and comparisons. This will give you insights into the experiences of other users and help you make an informed decision based on real-world feedback.
4. Consider compatibility: Pay attention to the compatibility of the browser with the websites and web apps you use frequently. Ensure that the browser you choose supports the features and functionalities required for your browsing needs. Some browsers may have better compatibility with certain websites, so take that into account when making your decision.
5. Check for extensions and add-ons: If you rely on specific extensions or add-ons for your browsing experience, make sure that the browser you choose supports them. Check if the browser has a reliable and diverse collection of extensions available in its store.
6. Take privacy and security into account: If privacy and security are important to you, prioritize browsers with robust privacy features. Look for features such as built-in tracker blockers, strict privacy controls, and regular security updates.
7. Evaluate ease of use: Consider the user interface and overall user experience of each browser. Look for a clean and intuitive design that aligns with your preferences. A browser that is easy to navigate and use can make your browsing experience more enjoyable.
8. Consider cross-platform availability: If you use multiple devices, check if the browser is available on other platforms such as Windows, iOS, or Android. Having a consistent browsing experience across all your devices can simplify your workflow.
By thoroughly researching and comparing different browsers, you can make an informed decision that suits your specific needs and preferences. Once you have chosen the browser you want to install, it’s time to move on to the next step: downloading it from the official website.
Step 2: Download the browser from the official website
Once you have decided on the browser you want to install on your Mac, the next step is to download it from the official website of the browser developer. Here’s how you can do it:
1. Open your current browser: Launch your existing browser, such as Safari, that you are using on your Mac. This will allow you to access the official website of the browser you want to download.
2. Search for the official website: Use a search engine to find the official website of the browser you have chosen. For example, if you have decided to install Google Chrome, search for “Google Chrome official website”.
3. Locate the download page: Once you are on the official website of the browser, navigate to the download page. It is usually labeled as “Download” or “Get [browser name]”. Look for a prominent button or link that indicates the download page.
4. Choose the correct version: On the download page, you may find different versions of the browser available, such as stable releases, beta versions, or developer builds. Select the most appropriate version for your needs. It is recommended to choose the stable release for regular use.
5. Click on the download button: Once you have chosen the version, click on the download button or link to start the download process. The file will typically be saved in your Mac’s default downloads folder unless you specify a different location.
6. Monitor the download progress: Depending on your internet speed, the download may take a few seconds to several minutes. Keep an eye on the download progress to ensure it completes successfully.
7. Wait for the download to finish: Once the download is complete, you can close your current browser or continue using it while the downloaded file is being prepared for installation.
8. Locate the downloaded file: Open the Finder on your Mac and go to the default downloads folder or the folder you specified during the download process. Locate the downloaded browser file, which is usually in .DMG or .EXE format.
9. Install the browser: Double-click on the downloaded file to initiate the installation process. Follow the on-screen instructions to complete the installation. This may involve dragging the browser icon to the Applications folder or running an installer wizard.
10. Eject the disk image (if applicable): If your downloaded file comes in a disk image format (.DMG), once the installation is complete, remember to eject the disk image. Simply right-click on the disk image and select “Eject”.
By following these steps and downloading the browser from the official website, you can ensure a safe and trustworthy installation process. Once the browser is successfully installed, you’re ready to move on to the next step: setting the new browser as your default browser (optional).
Step 3: Install the browser on your Mac
After downloading the browser from the official website, the next step is to install it on your Mac. Follow these steps to complete the installation process:
1. Open the downloaded file: Go to the location where you saved the downloaded browser file (usually in the Downloads folder) and double-click on it to open it. The file may have a .DMG or .EXE extension, depending on the browser you downloaded.
2. Run the installer: Once you open the downloaded file, you will likely see an installer window or wizard. Follow the instructions provided by the installer to proceed with the installation. The steps may vary depending on the browser you are installing.
3. Agree to the terms and conditions: In the installer window, you may be required to accept the terms and conditions or license agreement of the browser. Read through the terms, and if you agree, check the box indicating your acceptance or click on the “Agree” button.
4. Select the installation location: Next, you may be prompted to choose the installation location for the browser. The default location is usually the Applications folder on your Mac. If you wish to install the browser elsewhere, select the desired folder or location.
5. Authenticate the installation: Depending on your Mac’s security settings, you may need to enter your administrator password or provide your fingerprint to authorize the installation. This step ensures that only authorized users can install applications on your Mac.
6. Wait for the installation to complete: Once you have specified the installation location and authenticated the installation, the browser installation process will begin. Wait for the installation to complete. The progress may be indicated by a progress bar or other visual indicators.
7. Close the installer: After the installation is finished, you will typically see a message indicating that the installation was successful. Close the installer window or wizard. You can now find the newly installed browser in your Applications folder.
8. Restart your Mac (optional): Although not always necessary, it is recommended to restart your Mac after installing a new browser. This ensures that any system changes related to the installation are properly applied and helps optimize the performance of the newly installed browser.
Once you have completed these steps, you have successfully installed the new browser on your Mac. Congratulations! You are now ready to explore the features and functionalities of your chosen browser and enjoy a fresh browsing experience. If desired, you can proceed to the optional step of setting the new browser as your default browser.
Step 4: Set the new browser as your default browser (optional)
Setting the newly installed browser as your default browser can streamline your browsing experience and ensure that all links and web content open in your preferred browser automatically. Follow these steps to set your new browser as the default on your Mac:
1. Open System Preferences: Click on the Apple menu located at the top-left corner of your screen and select “System Preferences” from the dropdown menu.
2. Choose “General”: In the System Preferences window, click on the “General” icon.
3. Select your default browser: Look for the “Default web browser” option and click on the dropdown menu next to it. A list of browsers installed on your Mac will appear.
4. Choose your new browser: From the dropdown menu, select your newly installed browser as the default. The browser’s name should now be displayed next to “Default web browser”.
5. Close System Preferences: Once you have selected your new browser as the default, close the System Preferences window. The changes will be saved automatically.
6. Test the default browser: Open any web link or click on a webpage file on your Mac to test if the new browser is set as the default. The link or file should open in your newly installed browser.
If, at any point, you wish to change the default browser back to Safari or another browser, simply follow the same steps and select the desired browser from the dropdown menu in the “General” section of your Mac’s System Preferences.
Setting your new browser as the default allows for a more seamless browsing experience, ensuring that all links and web content open directly in your preferred browser without further adjustments.
With your new browser successfully installed and optionally set as the default, you are now ready to explore its features, customize settings, and enjoy a fresh and personalized browsing experience on your Mac.
Conclusion
Congratulations! You’ve now learned how to get another browser on your Mac. By researching, choosing, downloading, and installing a new browser, you’ve opened up a world of possibilities for your browsing experience.
Having an alternative browser on your Mac can provide you with access to additional features, improved performance, and compatibility with specific websites and web apps. Whether you need a browser for personal use, web development, or specialized tasks, there are plenty of options available to cater to your specific needs and preferences.
Remember to assess your requirements, read user reviews, and consider factors such as compatibility, customization, security, and ease of use when choosing a browser. Take advantage of the official websites of popular browsers to download the desired browser, and follow the installation process to ensure a successful setup.
Setting your new browser as the default on your Mac is optional but can streamline your browsing experience. By following the steps to set it as the default browser, you ensure that all links and web content open automatically in your preferred browser.
Now that you have successfully installed and optionally set your new browser as the default, you’re ready to explore its features, enjoy a fresh browsing experience, and optimize your productivity online.
So go ahead, dive into the world of browsing possibilities on your Mac, and make the most out of your online adventures!