Introduction
Amazon Prime, a popular subscription service offered by Amazon, provides a multitude of benefits to its members, such as free two-day shipping, access to exclusive deals, unlimited streaming of movies and TV shows, and more. However, there may come a time when you decide to cancel your Amazon Prime membership for various reasons, such as cost-saving measures or changing preferences.
In this article, we will guide you through the steps to cancel your Amazon Prime membership effortlessly. Whether you’re looking to end your free trial or terminate a paid membership, we have you covered. We’ll also address some common questions and concerns that may arise during the cancellation process.
Before canceling Amazon Prime, it’s important to consider the benefits you’ll be giving up. Think about whether the cost of the membership justifies the perks you’re receiving. If you’re unsure, you can always take advantage of Amazon Prime’s free trial period to experience the benefits firsthand before making a decision.
Now, let’s dive into the step-by-step process of canceling Amazon Prime memberships.
Steps to Cancel Amazon Prime Membership
Cancelling your Amazon Prime membership is a straightforward process that can be done in a few simple steps. Follow the instructions below to end your Prime membership:
- Login to your Amazon account: Visit the Amazon website and sign in using your account credentials. Make sure you have the correct login information to access your account.
- Go to the “Account & Lists” section: Once you are logged in, locate the “Account & Lists” dropdown menu on the top right corner of the Amazon homepage. Click on it to view the options.
- Access “Your Prime Membership”: From the dropdown menu, select the “Your Prime Membership” option. This will take you to the Prime membership management page.
- Select the “End Membership” option: On the Prime membership management page, you will find the option to “End Membership” on the left sidebar. Click on it.
- Confirm cancellation and provide feedback: Amazon will display information about the benefits you will lose upon cancelation. If you still wish to proceed, click on the “Continue to Cancel” button and follow the prompts to confirm your cancellation. You may also have an option to provide feedback on your experience with Amazon Prime.
Once you complete these steps, your Amazon Prime membership will be cancelled, and you will no longer be charged for the service. Keep in mind that any remaining months in your current billing period will still be active until their expiration.
It’s important to note that if you have additional subscriptions linked to your Amazon Prime account, such as Prime Video or Amazon Music Unlimited, the cancellation of your Prime membership may not affect these services. You might need to cancel those subscriptions separately if you no longer wish to continue them.
Step 1: Login to your Amazon Account
The first step in cancelling your Amazon Prime membership is to login to your Amazon account. Follow the instructions below to access your account:
- Visit the Amazon website: Open a web browser and go to the official Amazon website.
- Enter your login credentials: On the Amazon homepage, locate the “Sign-In” button on the top right corner. Click on it to proceed to the login page.
- Provide your email or mobile number: Enter the email address or mobile number associated with your Amazon account. Make sure to use the one linked to your Amazon Prime membership.
- Enter your password: Input your password in the designated field. Double-check for any typos or errors to ensure accuracy.
- Click “Sign-In”: Once you have entered your login credentials, click on the “Sign-In” button to access your Amazon account.
After successfully logging in, you will gain access to your personalized Amazon account dashboard, where you can manage your Prime membership and perform various account-related actions.
It’s important to remember that you need to use the same Amazon account that you used to sign up for Amazon Prime in order to cancel your membership. If you have multiple Amazon accounts, ensure you log in with the correct one associated with your Prime subscription.
Once you have completed this step and successfully logged in to your Amazon account, you can proceed to the next step in the cancellation process.
Step 2: Go to the “Account & Lists” Section
After logging in to your Amazon account, the next step to cancel your Amazon Prime membership is to navigate to the “Account & Lists” section. Follow these instructions to find the “Account & Lists” section:
- Locate the navigation menu: Once you are logged in to your Amazon account, you will see a series of links and options near the top right corner of the page. Look for the “Account & Lists” dropdown menu.
- Click on “Account & Lists”: Click on the “Account & Lists” dropdown menu to reveal a list of options.
By clicking on the “Account & Lists” dropdown menu, you will be directed to a page where you can manage various account settings and access important features of your Amazon account.
The “Account & Lists” section is designed to provide a convenient place for you to modify and update your account details, such as your payment methods, shipping addresses, and Prime membership.
Once you’ve reached the “Account & Lists” page, you’re ready to proceed to the next step of cancelling your Amazon Prime membership.
Step 3: Access “Your Prime Membership”
Once you have reached the “Account & Lists” section of your Amazon account, the next step in cancelling your Amazon Prime membership is to access the “Your Prime Membership” page. Follow these instructions to find and navigate to the “Your Prime Membership” page:
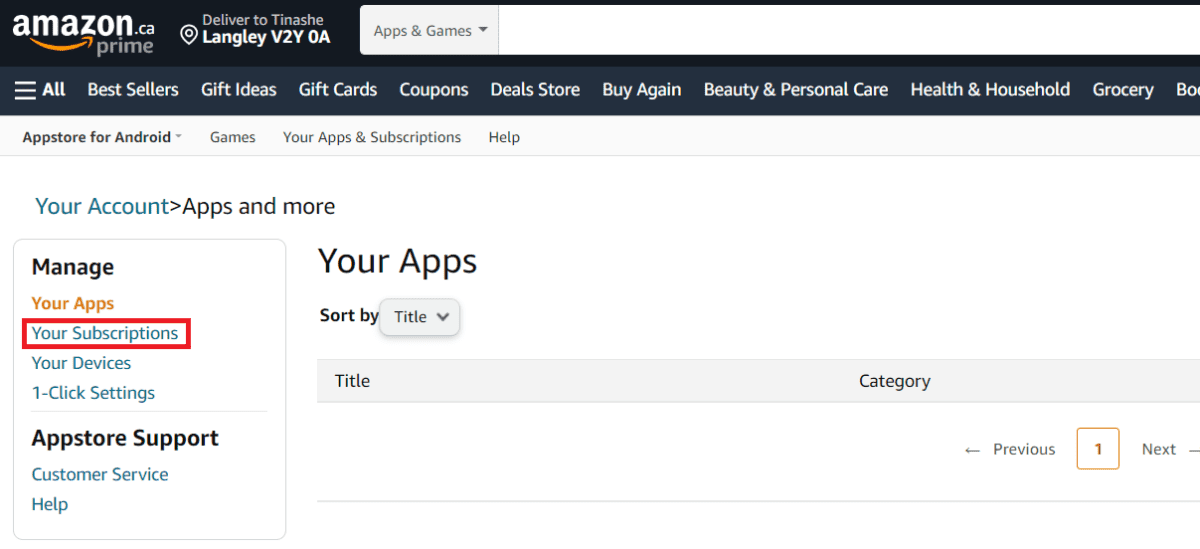
- Look for the “Memberships & Subscriptions” subsection: On the “Account & Lists” page, scroll down until you find the “Memberships & Subscriptions” subsection.
- Find the “Your Prime Membership” link: Within the “Memberships & Subscriptions” subsection, locate the link that says “Your Prime Membership.”
- Click on the “Your Prime Membership” link: Click on the “Your Prime Membership” link to access your Prime membership management page.
Once you have successfully accessed the “Your Prime Membership” page, you will be presented with an overview of your Prime membership status and various options to modify your membership details.
On this page, you can view information such as your membership type, renewal date, and the benefits included with your Prime membership. You will also find options to manage your payment methods, update your membership settings, and, of course, cancel your membership.
Now that you have reached the “Your Prime Membership” page, you are ready to proceed to the next step in the Amazon Prime cancellation process.
Step 4: Select the “End Membership” Option
Once you have accessed the “Your Prime Membership” page, the next step in cancelling your Amazon Prime membership is to select the “End Membership” option. Follow the instructions below to proceed:
- Look for the “Manage Membership” section: On the “Your Prime Membership” page, scroll down until you find the “Manage Membership” section.
- Find the “End Membership” option: Within the “Manage Membership” section, locate and click on the “End Membership” option.
By selecting the “End Membership” option, you indicate your intention to cancel your Amazon Prime membership. This action will lead you to a page that provides more details about the cancellation process and the potential impacts on your account.
Amazon will typically inform you about the benefits you will lose upon cancelling your membership, such as free shipping benefits, access to Amazon Prime Video, and other exclusive deals and offers. It’s important to review this information before proceeding.
During the cancellation process, Amazon might provide additional offers or incentives to encourage you to continue your membership. If you decide to proceed with the cancellation, stay focused and follow through with your intention to end your Amazon Prime membership.
Now that you have selected the “End Membership” option, you are ready to move on to the next step in the Amazon Prime cancellation process.
Step 5: Confirm Cancellation and Provide Feedback
After selecting the “End Membership” option, the final step to cancel your Amazon Prime membership is to confirm the cancellation and provide any feedback you may have. Follow the instructions below to complete the process:
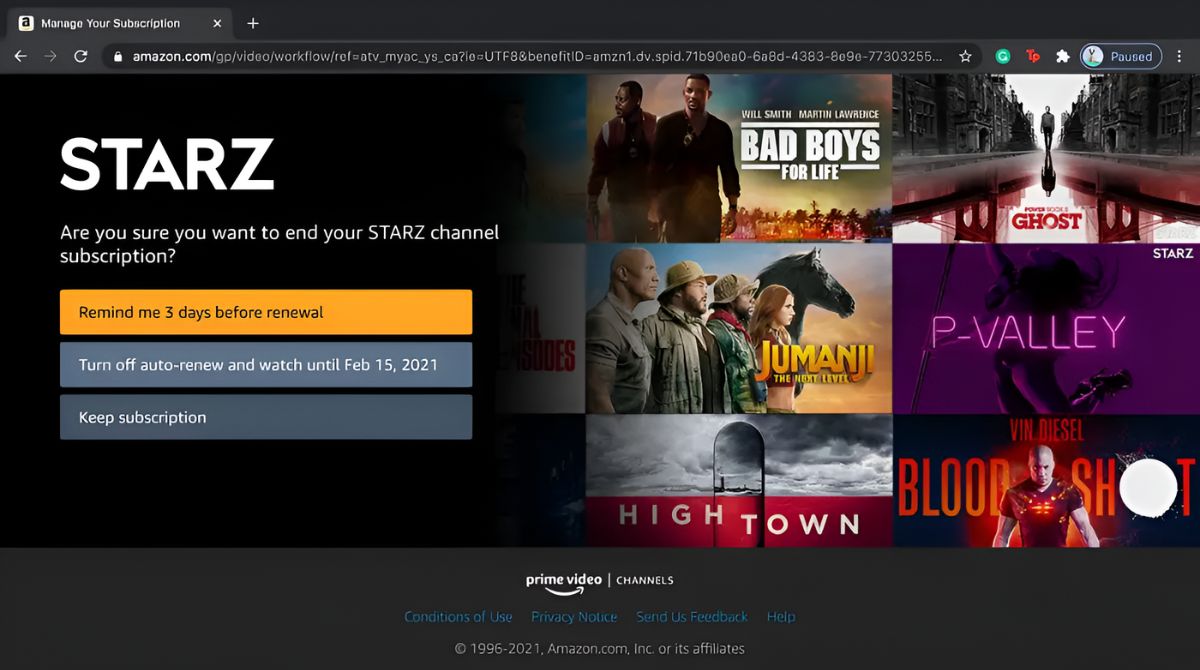
- Review the cancellation information: On the cancellation page, carefully review the details and information provided by Amazon. This may include a summary of the benefits you will lose and the impact on your account.
- Click on the “Continue to Cancel” button: If you are certain about cancelling your Amazon Prime membership, click on the “Continue to Cancel” button to proceed.
- Confirm the cancellation: Amazon may ask you to confirm your decision once again. This is to ensure that you genuinely want to cancel your membership. Click on the appropriate confirmation button to proceed with the cancellation.
After confirming your cancellation, you may have the opportunity to provide feedback on your Amazon Prime experience. This feedback can help Amazon understand the reasons behind your decision and improve their services for future customers.
Remember, submitting feedback is optional, but it can be a valuable way to share your thoughts and suggestions with Amazon.
Once you have confirmed the cancellation and provided any feedback, your Amazon Prime membership will be officially cancelled. You will no longer have access to Prime benefits and will not be charged for the service in future billing cycles.
Note that any active Prime benefits or subscriptions associated with your Amazon account, such as Prime Video or Amazon Music Unlimited, may still remain active unless cancelled separately.
Congratulations! You have successfully cancelled your Amazon Prime membership.
Cancelling Amazon Prime Free Trial
If you signed up for an Amazon Prime free trial but have decided not to continue with the paid membership, you can easily cancel your free trial to avoid any future charges. Follow the steps below to cancel your Amazon Prime free trial:
- Login to your Amazon account: Visit the Amazon website and sign in using the account information you used to start your free trial.
- Navigate to “Your Prime Membership”: Once you are logged in, access the “Your Prime Membership” page, which can typically be found under the “Account & Lists” section.
- Choose “Do Not Continue”: On the “Your Prime Membership” page, you will see an option to “Do Not Continue” the Prime membership. Click on this option to cancel your free trial.
By choosing the “Do Not Continue” option, you indicate that you do not wish to continue with the paid Amazon Prime membership after the free trial period ends.
It’s important to note that cancelling your Amazon Prime free trial during the trial period will prevent any future charges. However, you will still be able to enjoy the benefits of Amazon Prime until the trial period comes to an end.
Keep in mind that once your free trial is cancelled, you will no longer have access to the exclusive benefits that come with an Amazon Prime membership, such as free two-day shipping and Prime Video.
Before cancelling your free trial, make sure to take advantage of all the benefits it offers. This will allow you to experience the full range of services and decide whether a paid Amazon Prime membership is right for you.
By following these steps, you can easily and hassle-free cancel your Amazon Prime free trial and avoid any future charges.
Step 1: Login to your Amazon Account
The first step to cancelling your Amazon Prime free trial is to login to your Amazon account. By logging in, you will gain access to the necessary settings and options to manage your trial subscription. Follow the instructions below to login to your Amazon account:
- Visit the Amazon website: Open a web browser and navigate to the official Amazon website.
- Locate the “Sign-In” button: Look for the “Sign-In” button on the top right corner of the Amazon homepage. Click on it to proceed to the login page.
- Enter your login credentials: On the login page, enter your email address or mobile number associated with your Amazon account. Then input your password in the designated field.
- Click “Sign-In”: Once you have entered your login credentials, click on the “Sign-In” button to access your Amazon account.
After successfully logging in, you will be redirected to your personalized Amazon account dashboard. From here, you can manage your account settings, view order history, and access various features offered by Amazon.
It’s crucial to ensure that you are using the correct Amazon account associated with your Prime free trial. If you have multiple Amazon accounts, make sure to use the one you used to start the trial.
Now that you have logged in to your Amazon account, you can proceed to the next step in the process of cancelling your Amazon Prime free trial.
Step 2: Navigate to “Your Prime Membership”
After logging in to your Amazon account, the next step to cancel your Amazon Prime free trial is to navigate to the “Your Prime Membership” page. By accessing this page, you will have the ability to manage your Prime membership settings and make changes accordingly. Follow the instructions below to navigate to “Your Prime Membership”:
- Locate the “Your Account” dropdown menu: On the Amazon homepage, look for the “Your Account” dropdown menu located in the top right corner. Click on it to reveal a list of options.
- Select “Your Prime Membership”: From the dropdown menu, click on the “Your Prime Membership” option. This will direct you to the Prime Membership page.
Once you select “Your Prime Membership,” you will be taken to a page that provides an overview of your Prime membership details, including your trial period and upcoming renewal date.
On this page, you will also find options to manage your Prime settings, such as updating payment information, adding or removing beneficiaries, and customizing your membership preferences.
It’s important to ensure that you are on the correct page dedicated to your Prime membership. Make sure to double-check that you are viewing the details of your free trial subscription before proceeding.
Now that you have successfully navigated to the “Your Prime Membership” page, you are ready to move on to the next step in cancelling your Amazon Prime free trial.
Step 3: Choose “Do Not Continue” to Cancel
Once you have reached the “Your Prime Membership” page, the next step to cancel your Amazon Prime free trial is to choose the “Do Not Continue” option. This will indicate that you do not want to continue with the paid subscription after the trial period ends. Follow the steps below to cancel your free trial:
- Review your trial details: On the “Your Prime Membership” page, take a moment to review the details of your free trial, including the trial duration and the upcoming renewal date.
- Click on the “Do Not Continue” button: Look for the “Do Not Continue” button or a similar option on the page. Clicking on this button will initiate the cancellation process for your free trial.
- Confirm the cancellation: Amazon may require you to confirm the cancellation by clicking on a confirmation button or completing a short questionnaire. Follow the prompts provided to finalize the cancellation.
By choosing the “Do Not Continue” option, you inform Amazon that you do not wish to proceed with the paid subscription once the trial period ends. This ensures that you will not be charged for an Amazon Prime membership.
After completing these steps, your free trial cancellation will be processed, and you will no longer have access to the Prime benefits offered during the trial period.
It’s important to note that you can continue enjoying the benefits of Amazon Prime until the trial period ends. Take this time to experience and explore the features and services the membership offers.
Congratulations! You have successfully cancelled your Amazon Prime free trial and avoided any future charges.
Common Questions and Concerns
As you navigate the process of cancelling your Amazon Prime membership, you may have some questions or concerns. In this section, we will address a few common queries that often arise during the cancellation process:
1. How long does it take to cancel Amazon Prime?
The cancellation of your Amazon Prime membership is typically processed immediately after you complete the necessary steps. You should receive confirmation of the cancellation shortly after. However, it’s always a good practice to log out of your Amazon account and check your account settings or email to ensure that the cancellation has been successfully processed.
2. Will I get a refund after cancelling my Prime membership?
If you have been charged for an annual or monthly membership and decide to cancel in the middle of your billing period, you may be eligible for a partial refund based on Amazon’s refund policy. However, if you cancel during a free trial period, you will not be charged, and no refund will be necessary.
3. Can I still use Prime benefits after cancelling?
No, once you cancel your Amazon Prime membership, you will no longer have access to the benefits associated with Prime. This includes free two-day shipping, Prime Video, Prime Music, and other exclusive offers. However, if you have purchased any Prime-exclusive items, you will still receive the respective benefits related to those items.
4. Can I rejoin Amazon Prime after cancelling?
Yes, you can rejoin Amazon Prime at any time after cancelling. Simply follow the necessary steps to subscribe to Prime again, and you can once again enjoy the benefits of the membership.
If you have any further questions or concerns about the cancellation process or Amazon Prime membership, it is recommended to reach out to Amazon customer support for assistance. They will be able to provide you with more specific information and address any additional inquiries you may have.
By addressing these common questions and concerns, we hope to provide clarity and support as you navigate the cancellation process of your Amazon Prime membership.
How long does it take to cancel Amazon Prime?
When it comes to cancelling your Amazon Prime membership, the process is typically quick and straightforward. Once you complete the necessary steps to cancel, the cancellation is usually processed immediately. However, it’s important to note that the actual timing may vary based on factors such as your location and internet connection speed.
After you initiate the cancellation process by selecting the “End Membership” option, Amazon will provide confirmation of your decision. This confirmation serves as proof that your cancellation request has been received.
In most cases, you should receive an email notification confirming the cancellation within a few minutes of initiating the process. This email will typically include details about the cancellation and the date your Prime membership will officially end.
It’s important to keep in mind that although the cancellation is processed quickly, it’s crucial to double-check your account settings to ensure that the cancellation has been successfully implemented. Take a few minutes to log out of your Amazon account, log back in, and review your membership status to ensure that it reflects the cancelled Prime membership.
If you encounter any issues or do not receive the confirmation email within a reasonable period, it’s advisable to contact Amazon customer support for assistance. They will be able to verify the status of your cancellation request and provide any necessary clarification or support.
By understanding the general timeframe for cancelling Amazon Prime and following up with an account check, you can ensure a smooth and hassle-free cancellation process.
Will I get a refund after cancelling my Prime membership?
Whether or not you will receive a refund after cancelling your Amazon Prime membership depends on the specific circumstances of your membership and timing of the cancellation. Let’s explore a few scenarios:
1. Cancelling during a free trial period:
If you decide to cancel your Amazon Prime membership during the free trial period, you will not be charged for the subscription and therefore no refund will be necessary. You can continue enjoying the benefits of Prime until the trial period ends, at which point the membership will automatically convert to a paid subscription unless cancelled.
2. Cancelling a monthly or annual membership:
If you are in the midst of a paid monthly or annual Amazon Prime membership and choose to cancel, you may be eligible for a partial refund based on Amazon’s refund policy. Amazon typically does not provide prorated refunds for unused portions of a paid membership, but they may make an exception in some cases. It’s important to review the specific terms and conditions of your Prime membership regarding refunds or contact Amazon customer support for more information regarding your individual situation.
3. Cancelling after the renewal date:
If you decide to cancel your Amazon Prime membership after the renewal date, no refund will be issued for the current billing period. However, the cancellation will prevent any future charges from occurring.
To determine your eligibility for a refund or obtain more information, it is advisable to contact Amazon customer support. They can provide specific details regarding your membership and guide you through any refund processes that may apply.
It’s important to keep in mind that cancelling your Prime membership will revoke access to the associated benefits, such as free two-day shipping, Prime Video, Prime Music, and more.
By understanding Amazon’s refund policy and reaching out to customer support as needed, you can gain clarity about the potential for a refund after cancelling your Amazon Prime membership.
Can I still use Prime benefits after canceling?
No, once you cancel your Amazon Prime membership, you will no longer have access to the vast array of benefits and features that come with the membership. This includes popular features like free two-day shipping, Prime Video, Prime Music, Prime Reading, and more. Here’s a closer look at some of the Prime benefits you will no longer have access to after canceling:
1. Free Shipping: One of the major perks of Amazon Prime is free two-day shipping on eligible items. After canceling, you will need to meet the standard shipping requirements, which may include minimum order thresholds or additional shipping fees.
2. Prime Video: Amazon Prime Video offers a vast library of movies, TV shows, and original content. Once you cancel your Prime membership, you will no longer have access to this streaming service and will need to subscribe to it separately if desired.
3. Prime Music and Prime Reading: Prime members can enjoy access to a wide selection of music and e-books through Prime Music and Prime Reading. Cancelling your membership means you will no longer have access to these benefits and will need to explore alternative music or e-book platforms.
4. Exclusive Deals and Promotions: Amazon Prime members often receive exclusive access to lightning deals, special discounts, and early access to certain sales events. After canceling, you will lose access to these exclusive promotions.
It’s important to keep in mind that any content or purchases made through Prime benefits will no longer be accessible once your membership is canceled. It’s advisable to use any remaining benefits or redeem any eligible promotions before canceling to make the most of your Prime membership.
If you find that you miss the benefits of Amazon Prime, you can always choose to rejoin and resubscribe to regain access to the wide range of Prime benefits. However, remember to weigh the cost and benefits to ensure it aligns with your needs and preferences.
Once you cancel your Amazon Prime membership, it’s important to explore alternative options that may provide similar benefits or services based on your specific interests and requirements.
By understanding that Prime benefits are tied directly to the membership and will cease upon cancellation, you can make an informed decision regarding whether to continue or cancel your Amazon Prime subscription.
Can I rejoin Amazon Prime membership after canceling?
Yes, you can rejoin Amazon Prime membership at any time after canceling. Whether you canceled due to budget constraints, a temporary break from the service, or other reasons, Amazon allows you to revisit Prime membership whenever you desire. Here’s what you need to know:
1. Account Eligibility: As long as you have an Amazon account, you can rejoin Prime membership. You can use the same account you previously used for Prime or create a new account if needed.
2. Restarting Membership: To rejoin Amazon Prime, log in to your Amazon account and visit the Prime membership page. From there, you can choose to reactivate your membership by selecting the appropriate membership plan and submitting the required payment information.
3. Benefits Resumed: Once you rejoin Amazon Prime, you will regain access to all the benefits available to Prime members, including free two-day shipping, Prime Video, Prime Music, Prime Reading, and exclusive deals. Your previous settings, preferences, and saved content may also carry over to your new membership.
4. Trial Eligibility: If you previously canceled your free trial of Amazon Prime, you may be eligible for another free trial if you haven’t used it previously on the same account. Keep in mind that Amazon’s terms and conditions regarding free trials may vary, so it’s essential to review the details before signing up again.
Rejoining Amazon Prime allows you to enjoy all the benefits and convenience the service provides. However, it’s important to consider your needs, preferences, and circumstances before deciding to reactivate your membership. Assess factors such as the cost of the membership, available benefits, and whether you will utilize the services sufficiently to justify the expense.
Remember that you have the flexibility to come back to Amazon Prime in the future, even if you canceled previously. Take the time to evaluate your requirements and make an informed decision about rejoining Prime if the benefits align with your needs.
Conclusion
Cancelling your Amazon Prime membership can be a straightforward process if you follow the necessary steps outlined in this guide. Whether you are cancelling a paid membership or a free trial, it’s essential to consider your needs, preferences, and budget before making the decision.
By logging in to your Amazon account, navigating to the appropriate settings, and choosing to cancel your membership, you can end your Prime subscription. Be mindful of any trial periods, benefits, or refund policies that may apply during the cancellation process.
Although cancelling your Amazon Prime membership means losing access to the range of exclusive benefits and services that come with it, you have the option to rejoin at any time, should you decide to do so. Take into account your usage patterns, budget, and desired services to determine if Amazon Prime continues to align with your needs.
Remember to double-check your account settings, verify the cancellation confirmation, and contact Amazon customer support if you encounter any issues or have specific inquiries regarding your membership.
We hope this guide has provided clarity and guidance on how to cancel your Amazon Prime membership effectively. Whether you choose to continue with Prime or explore alternative options, we wish you the best in your online shopping and streaming experiences!