Why is it important to back up your Android phone?
Backups are an essential part of protecting your valuable data and ensuring its availability in case of emergency. This is especially true for Android phone users, as these devices contain numerous personal files, important contacts, messages, and other data that we rely on daily. Here are a few key reasons why backing up your Android phone is crucial:
1. Data loss prevention: Accidents happen, and your Android phone could be damaged, lost, or stolen at any time. Without a proper backup, you risk losing all your precious photos, videos, documents, and other personal data. By regularly backing up your phone, you can minimize the chances of permanent data loss and have peace of mind knowing that your information is secure.
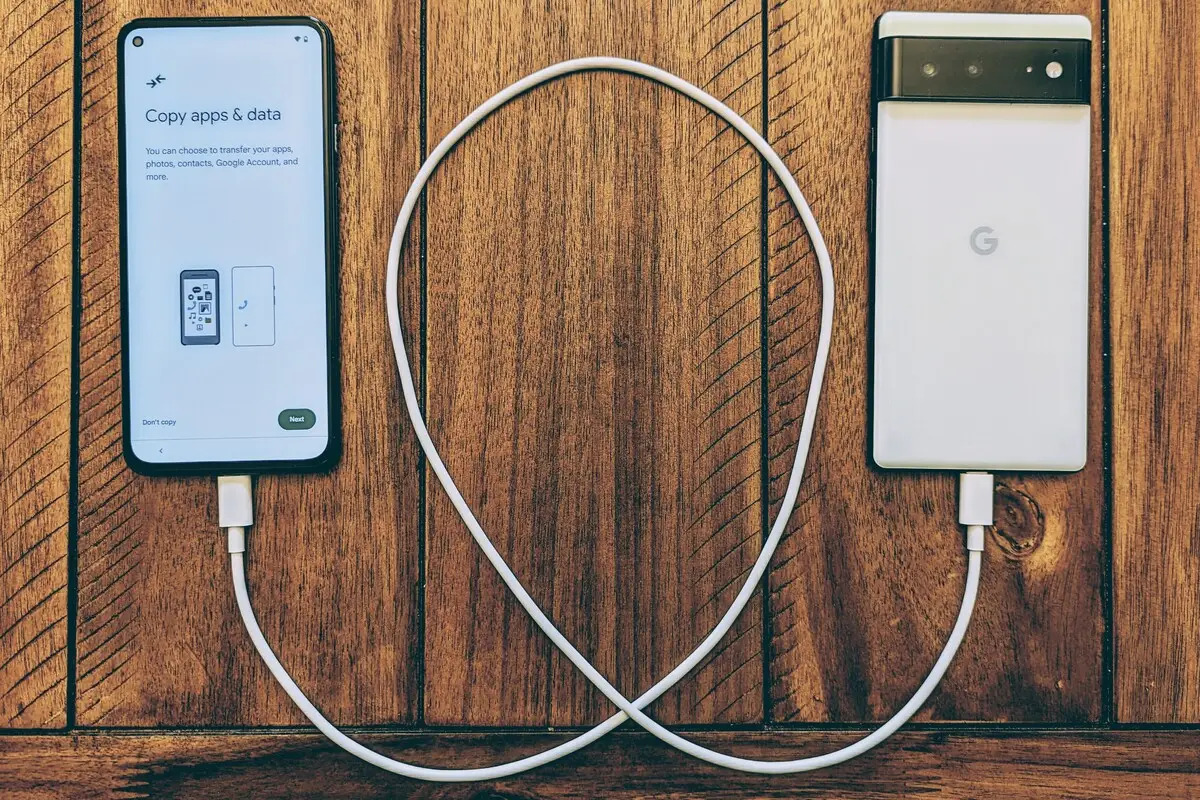
2. Seamless device migration: When it’s time to upgrade to a new Android phone or switch to a different device, having a backup makes the transition smooth. By restoring your backup on the new device, you can transfer your apps, settings, contacts, and other data effortlessly, without the hassle of manually transferring each item.
3. Restoration after a factory reset: At times, performing a factory reset becomes necessary to resolve software issues or optimize device performance. However, this wipes out all the data stored on the phone. With a recent backup, you can quickly restore your important files and settings after the reset, saving you the trouble of reconfiguring everything from scratch.
4. Protection against malware and viruses: Malicious software and viruses can wreak havoc on unprotected devices. If your Android phone becomes infected, you may lose access to your data, or worse, unknowingly spread the malware to others. Regularly backing up your phone ensures you have a clean copy of your data that can be restored if needed, minimizing the impact of an infection.
5. Peace of mind: Knowing that your personal and important data is backed up gives you peace of mind. Life is unpredictable, and having a backup plan for your Android phone ensures that even in the event of an unfortunate incident, you can easily recover your data and continue with minimal disruption.
In summary, backing up your Android phone is not just an option, but a necessity. It protects your data, enables seamless device migration, allows for easy restoration after a reset, safeguards against malware and viruses, and provides you with peace of mind. With so many convenient methods available, there’s no reason to put off backing up your Android phone any longer.
Different methods to back up your Android phone
Backing up your Android phone is a straightforward process, thanks to the various methods available. Whether you prefer using built-in features or third-party apps, here are some different methods you can use to back up your Android phone:
1. Using Google Account: Android devices offer a built-in backup feature that allows you to back up your data to your Google Account. This includes app data, contacts, settings, and more. To enable this feature, go to your device’s Settings, find the “Backup & Reset” or “Backup & Restore” option, and select “Backup my data.” Keep in mind that you’ll need to sign in to your Google Account to access this feature.
2. Using a USB cable and computer: If you prefer a direct connection, you can back up your Android phone by connecting it to your computer using a USB cable. Once connected, you can transfer files manually or use software like Android File Transfer (for Mac) or Windows File Explorer (for Windows). This method allows you to back up photos, videos, documents, and other files by simply dragging and dropping them to your computer.
3. Using a cloud storage service: Cloud storage services like Google Drive, Dropbox, and OneDrive offer seamless ways to back up your Android phone. These services provide free storage space where you can upload your files and access them from any device with an internet connection. Simply install the respective app on your phone, sign in to your account, and enable backup settings to automatically sync your data to the cloud.
4. Using a third-party app: There are several third-party backup apps available on the Google Play Store that offer advanced backup and restore features. These apps, such as Titanium Backup, Helium, and Super Backup, allow you to selectively back up specific apps, settings, SMS messages, call logs, and more. They often provide additional features like scheduled backups, encryption, and easy restoration options.
5. Using a combination of methods: You can also opt for a combination of the above methods to create multiple backups for added security. For example, you could back up your data to both your Google Account and a cloud storage service simultaneously, ensuring that you have multiple copies stored in different locations.
Remember to regularly back up your Android phone to ensure that your data is up to date and secure. Choose the method that suits your needs, preferences, and level of technical expertise. By taking the time to backup your Android phone, you’ll have the peace of mind knowing that your valuable data is protected and easily recoverable in case of any unforeseen circumstances.
Method 1: Using Google Account
One of the easiest and most convenient methods to back up your Android phone is by using your Google Account. Android devices come with built-in backup and restore features that allow you to securely store your data in the cloud. Here’s how you can use your Google Account to back up your Android phone:
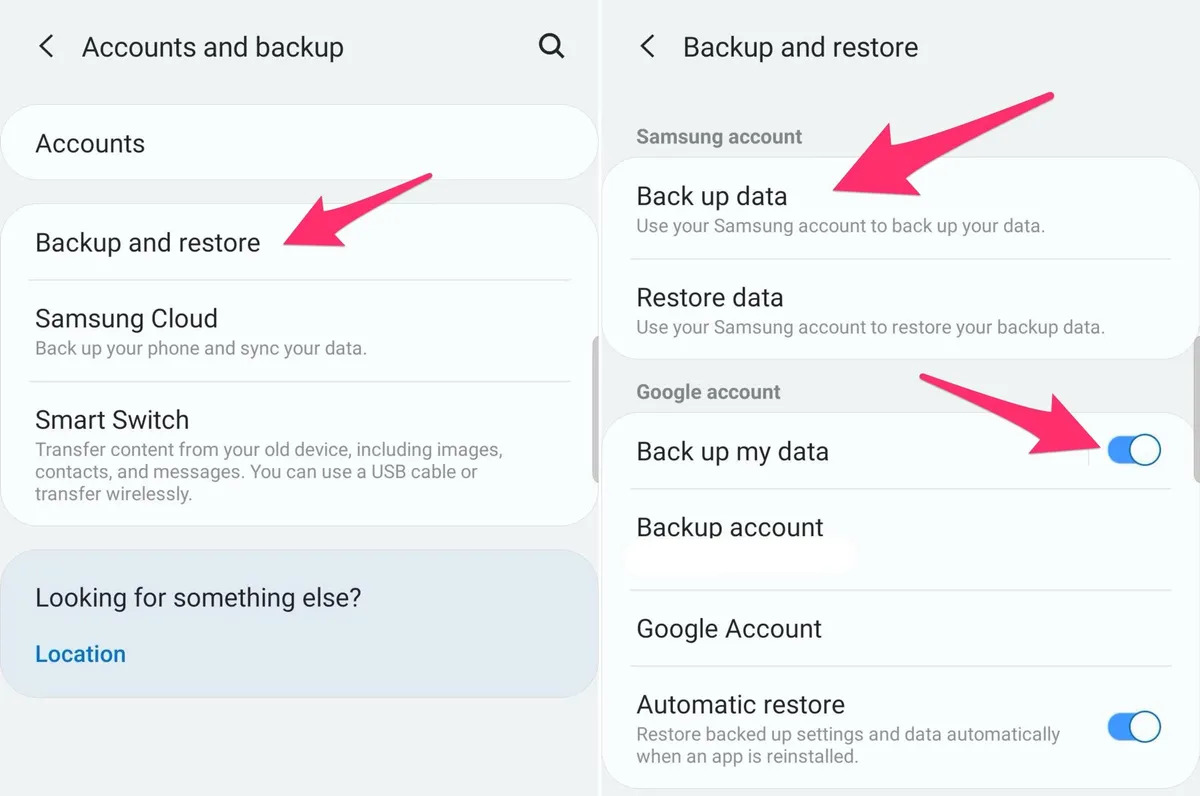
1. Enable Backup: Go to your Android device’s Settings and look for the “Backup & Reset” or “Backup & Restore” option. Tap on it and make sure the “Backup my data” toggle is turned on. This will enable automatic backups of your app data, contacts, settings, and other important information to your Google Account.
2. Check Backup Settings: Scroll down to see the additional backup settings. Ensure that the options for “App data,” “Call history,” “Contacts,” “Device settings,” and “SMS messages” are turned on if you want to include these in your backup. You can choose to enable or disable specific items based on your preference.
3. Manually Trigger Backup: By default, your Android phone automatically backs up your data over a Wi-Fi connection when it’s plugged in and idle. However, you can also manually trigger a backup at any time by selecting the “Backup now” or “Back up now” option in the Backup settings menu.
4. Check Storage Space: To view your backup storage settings, go to your Google Account settings. Under the “Personal info & privacy” section, select “Manage your Google Account.” Navigate to the “Storage” tab to see the available storage space and manage your backups. Google provides a generous amount of free storage for your Android backups, but you can purchase additional storage if needed.
5. Restore Data: If you ever need to restore your data on a new Android device or after a factory reset, simply sign in to your Google Account during the setup process on the new device. You will be prompted to restore from a previous backup. Select the desired backup, and your data will be restored to the new device, including your apps, contacts, settings, and more.
Using your Google Account to back up your Android phone ensures that your data is safely stored in the cloud, ready for recovery whenever you need it. It offers a seamless and convenient way to protect your valuable information without requiring any additional apps or services. Remember to keep your Google Account credentials secure to maintain the privacy and security of your backups.
Method 2: Using a USB cable and computer
If you prefer a direct connection and want to have more control over your backups, you can use a USB cable to connect your Android phone to a computer. This method allows you to manually transfer files and create backups on your computer. Here’s how you can use a USB cable and computer to back up your Android phone:
1. Connect your phone: Start by connecting your Android phone to your computer using a USB cable. Make sure the cable is securely connected to both the phone and the computer.
2. Select Transfer Files (MTP) mode: On your Android phone, when prompted with a USB connection option, choose the “Transfer Files” or “File Transfer” mode (referred to as MTP mode). This allows your computer to access the files on your phone.
3. Locate your phone on the computer: After selecting the correct USB mode, your computer should recognize your Android phone as an external storage device. On Windows, open File Explorer, and your phone should appear under “This PC” or “My Computer.” On Mac, you should see your phone as a mounted drive on the desktop or in Finder.
4. Backup media files: Navigate to your phone’s storage on the computer and locate the folders containing your media files, such as photos, videos, and music. Simply select and copy these files to a desired location on your computer’s hard drive. This method allows you to create manual backups of your media files by transferring them directly to your computer.
5. Backup other important files: Besides media files, you may also want to back up other important files, such as documents, downloads, or WhatsApp data. Navigate to the corresponding folders on your Android phone’s storage and copy these files to your computer as well.
6. Keep your backup organized: To make it easier to access and restore your backup in the future, consider creating dedicated folders on your computer and organizing your backup files into subfolders. This will ensure that your backup is easily accessible and manageable.
7. Regularly update your backup: It’s important to periodically update your backup to include any new files or changes you’ve made on your Android phone. By regularly connecting your phone to your computer and copying the updated files, you can maintain an up-to-date backup.
Using a USB cable and computer to back up your Android phone provides you with more control over your backup process. It allows you to manually select the files you want to back up and provides a secure means of storing your data on your computer’s hard drive. Remember to keep your backup location secure and to have additional backup copies in case of computer failure or data loss.
Method 3: Using a cloud storage service
Cloud storage services offer a convenient and reliable way to back up your Android phone. By using a cloud storage service, you can securely store your data on remote servers and access it from any device with an internet connection. Here’s how you can use a cloud storage service to back up your Android phone:
1. Select a cloud storage service: There are several popular cloud storage services available, such as Google Drive, Dropbox, and OneDrive. Choose the service that best suits your needs and preferences. Most services offer free storage space, with options to purchase additional storage if needed.
2. Install the app: Install the app for your chosen cloud storage service from the Google Play Store. Once installed, open the app and sign in to your account or create a new one if you don’t have an existing account. Follow the instructions to set up the app.
3. Configure backup settings: Within the cloud storage app settings, look for backup or sync options. Enable backup settings to automatically upload and sync your data to the cloud. This may include photos, videos, documents, and other files stored on your Android phone.
4. Select folders to back up: Some cloud storage services allow you to choose specific folders or file types to back up. Review the settings in the app and select the folders or file types you want to include in your backup. This gives you control over what data gets backed up to the cloud.
5. Enable automatic backup: To ensure that your data is continuously backed up, enable automatic backup settings. This will automatically sync your files to the cloud storage whenever there is a change or addition to the selected folders. This way, your backup is always up to date without any manual intervention.
6. Monitor your backup: Check the status of your backup within the cloud storage app or through its web interface. You should be able to see the backup progress, view the files stored in the cloud, and manage your backup settings. This allows you to keep track of your backup and ensure that everything is successfully uploaded.
7. Access and restore your data: In case you need to retrieve your data, you can easily access it through the cloud storage app or its web interface. Simply sign in to your account and browse through the files stored there. You can download specific files or restore your entire backup to a new Android device if needed.
Using a cloud storage service to back up your Android phone offers the advantage of remote storage and accessibility. Your data is securely stored off-site, reducing the risk of loss due to device damage or theft. Additionally, you can easily access and restore your data from any device with an internet connection, providing flexibility and convenience.
Method 4: Using a third-party app
If you want more advanced backup and restore features, you can opt for using a third-party app specifically designed for backing up Android phones. These apps provide additional functionalities and customization options to meet your specific backup needs. Here’s how you can use a third-party app to back up your Android phone:
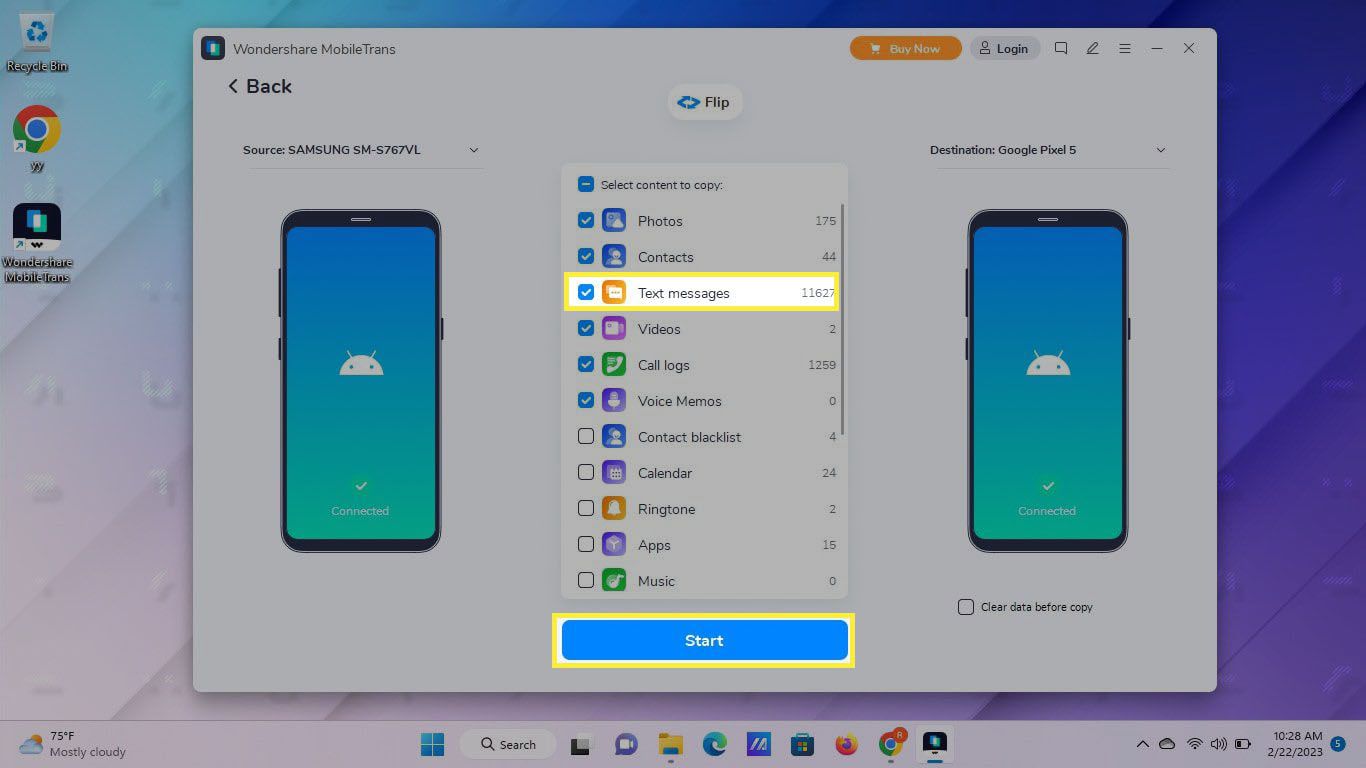
1. Explore third-party backup apps: Search for backup apps on the Google Play Store and read reviews to find the most suitable one for your needs. Popular options include Titanium Backup, Helium, and Super Backup. Remember to install the app from a trusted source and read user reviews to ensure its reliability.
2. Install and open the app: Install the chosen backup app on your Android phone from the Google Play Store. Once installed, open the app and follow any setup instructions or prompts to grant necessary permissions for backup operations.
3. Select backup options: Explore the app’s settings to determine what data and settings you want to include in your backup. Most backup apps allow you to choose individual apps, system settings, SMS messages, call logs, and other types of data for backup. Customize the backup options based on your preferences and requirements.
4. Perform the backup: Once you’ve configured the backup settings, initiate the backup process within the app. Depending on the selected options and the amount of data to be backed up, this process may take some time. Ensure that your phone is connected to a stable internet connection and has sufficient battery level or is connected to a power source.
5. Manage your backup: Explore the app’s interface to view your backup files and manage them as needed. Some backup apps allow you to schedule automatic backups at specified intervals, which ensures that your data is consistently backed up without requiring manual intervention. You can also choose to encrypt your backups for added security.
6. Restore from backup: Should the need arise, you can easily restore your data from the backup created by the third-party app. Open the app and navigate to the restore or recovery options. Select the desired backup and follow the instructions to restore your data. Keep in mind that this process will overwrite the existing data on your Android phone, so exercise caution when performing a restore.
Third-party backup apps offer more flexibility and control over your backup process. They often provide additional features like scheduled backups, selective app backup, and more granular control over the backup and restore process. Consider exploring different apps to find one that best aligns with your preferences and backup requirements.
Things to consider before backing up your Android phone
Before you proceed with backing up your Android phone, there are a few important factors to consider. Taking these into account will ensure that your backup process goes smoothly and that you maintain the integrity of your data. Here are some things to consider:
1. Storage space: Evaluate the available storage space on your chosen backup method. Whether you’re using your Google Account, a USB cable and computer, a cloud storage service, or a third-party app, ensure that you have enough space to accommodate all the data you want to back up. If you need more storage, consider upgrading or clearing unnecessary data to free up space.
2. Security and privacy: Pay attention to the security and privacy features provided by your chosen backup method. Ensure that your data is encrypted and protected against unauthorized access. If using a third-party app or cloud storage service, review their privacy policies and terms of service to understand how your data will be stored and used.
3. Selective backup: Determine which data and settings are most important to you and need to be included in the backup. Different backup methods may offer varying levels of flexibility in selecting specific apps, files, or settings. Consider whether you want to back up everything or only specific items to optimize the backup process and storage usage.
4. Frequency of backups: Decide how frequently you want to back up your Android phone. Regular backups ensure that you have up-to-date copies of your data. Consider a backup schedule that aligns with your usage patterns and the frequency of changes made to your data. Automated backup options, available in some methods, can simplify the process and ensure regular backups without manual intervention.
5. Multiple backup copies: It’s always a good practice to have multiple backup copies of your data. If feasible, create backups on different storage devices or services to minimize the risk of data loss. This provides redundancy and safeguards against hardware or system failures that may affect a single backup source.
6. Verification and testing: After creating a backup, verify that it was completed successfully and that you can access and restore the backed-up data. Test the restore process using a small sample of data to ensure that the backup is functional and reliable. Regularly check your backups to ensure their integrity and take corrective actions if any issues arise.
7. Update and maintenance: Keep your backup methods and apps updated to take advantage of the latest features, bug fixes, and security patches. Regularly review and adjust your backup settings as your data and usage patterns change. Maintain the health of your backup system to ensure its reliability and effectiveness.
By considering these factors before backing up your Android phone, you can ensure a smooth and successful backup process. Taking the time to plan and set up your backup method properly will provide you with peace of mind and ensure the safety and accessibility of your valuable data.
FAQs about backing up Android phones
Backing up your Android phone is a crucial task to safeguard your valuable data. However, you may have some questions or concerns about the process. Here are the answers to some frequently asked questions about backing up Android phones:
1. How often should I back up my Android phone?
It is recommended to back up your Android phone regularly, ideally on a weekly or monthly basis. However, the frequency of backups may vary based on your usage and the importance of your data. If you frequently create or modify important files or make significant changes to your device’s settings, consider more frequent backups.
2. Can I back up my Android phone without an internet connection?
Some backup methods, like using a USB cable and computer, allow you to create backups without an internet connection. However, other methods, such as using a cloud storage service, require an internet connection to upload your data to remote servers. Ensure that you have an active internet connection when using cloud-based backup methods.
3. Can I restore my backup to a different Android phone model?
In most cases, you can restore your backup to a different Android phone model, as long as it’s running the same or a newer version of Android. However, there might be limitations in certain situations, such as when restoring app data that is incompatible with the new device. It’s always recommended to check compatibility and test the restore process using a smaller sample of data before performing a complete restore.
4. How do I know if my backup was successful?
After completing a backup, it’s important to check that it was successful. Most backup methods provide a confirmation message or status indicating the completion of the backup process. Additionally, you can verify the backup by accessing and retrieving a sample of the backed-up data to ensure its integrity.
5. Can I restore individual files from my backup?
The ability to restore individual files from a backup varies depending on the chosen backup method. Some methods, such as using a USB cable and computer, allow you to manually browse the backup files and select specific files for restoration. Other methods, like cloud storage services or third-party backup apps, may have more comprehensive restore options, including individual file restoration.
6. Is it possible to back up my Android phone to multiple locations?
Yes, you can back up your Android phone to multiple locations for added security. For example, you can create backups using both a cloud storage service and a USB cable connected to your computer. Having multiple backup copies reduces the risk of data loss due to hardware failure or other unforeseen circumstances.
7. Can I back up app data without rooting my Android phone?
Most backup methods allow you to back up your app data without the need for rooting your Android phone. However, certain system settings and app-specific data may require additional permissions or rooting access. It’s recommended to review the capabilities and limitations of the chosen backup method to understand what can be backed up without rooting your device.
Backing up your Android phone is a vital task to ensure the safety and availability of your data. By understanding the backup process and addressing common concerns through these FAQs, you can confidently create backups and protect your important information.