Introduction
Welcome to the world of computing, where every piece of hardware plays a crucial role in ensuring smooth and efficient performance. One fundamental component that directly influences the speed and responsiveness of your system is Random Access Memory, commonly known as RAM. But have you ever wondered how much RAM your computer actually has? Knowing your system’s RAM configuration is essential for various reasons, from troubleshooting performance issues to planning for future upgrades.
In this article, we will explore the importance of understanding your RAM and guide you through the process of checking the RAM on different operating systems. Whether you’re using Windows, Mac, or Linux, we’ve got you covered! Additionally, we’ll discuss how third-party software can offer more detailed information about your RAM configuration, along with some useful tips for upgrading your RAM if necessary.
Before we dive into the details, let’s briefly shed some light on what RAM is and why it’s important to have a good understanding of its capacity and performance.
An Overview of RAM
RAM is a type of computer memory that provides fast access to data and instructions required by the operating system and running applications. Unlike storage devices such as hard drives or solid-state drives, RAM is volatile memory, meaning it is temporary and clears out when you power off your computer.
When you open an application or run a program, it gets loaded into RAM, allowing the processor to quickly access and manipulate the data. The more RAM you have, the more programs and data can be stored simultaneously, resulting in smoother multitasking and faster overall performance.
RAM comes in different capacities, usually measured in gigabytes (GB) or terabytes (TB). Common capacities for personal computers range from 4GB to 32GB or more, depending on the system requirements and your specific needs.
Now that we understand the importance of RAM in ensuring optimal system performance, let’s find out how you can check the RAM on your Windows, Mac, or Linux computer.
Overview of RAM
Random Access Memory, or RAM, is a vital component of every computer system. It serves as a temporary storage space that allows the processor to quickly access and manipulate data. Unlike permanent storage devices such as hard drives, RAM is volatile, meaning it loses its contents when the computer is powered off.
The primary purpose of RAM is to provide fast and temporary storage for the data and instructions required by the operating system and running applications. When you open a program or run a task, the data associated with it is loaded into RAM, allowing the processor to access it at high speeds. This significantly improves overall system performance and responsiveness.
RAM operates at a much faster pace than other storage devices because it uses integrated circuits to store and retrieve data. This enables the processor to quickly access information, resulting in faster application launches, smoother multitasking, and reduced lag in resource-intensive processes.
The capacity of RAM determines the amount of data that can be stored and accessed simultaneously. Higher RAM capacity allows for more programs and data to be stored in memory without the need for frequent data swapping to the slower permanent storage devices. As a result, systems with larger RAM capacities can handle more demanding tasks, such as running multiple applications simultaneously, editing large media files, or playing graphics-intensive games.
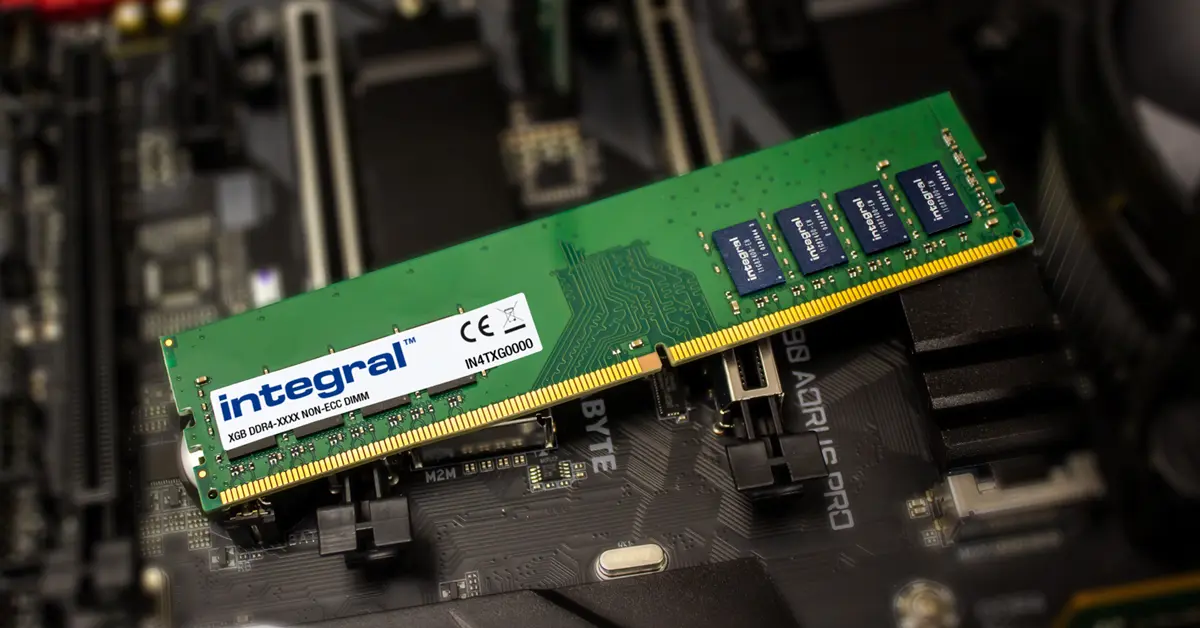
RAM modules come in various sizes, typically measured in gigabytes (GB) or terabytes (TB). The most common types of RAM used in personal computers include DDR (Double Data Rate) and DDR4 modules. DDR4 is the latest standard and offers higher speeds and improved energy efficiency compared to its predecessors.
It is important to note that the amount of RAM you need depends on your computing requirements. Basic tasks such as web browsing and word processing typically require 4GB to 8GB of RAM, while more demanding tasks like video editing or gaming may necessitate 16GB or more. Assessing your usage patterns and considering future needs can help determine the optimal RAM capacity for your system.
In the following sections, we will explore different methods to check the amount of RAM installed on your Windows, Mac, or Linux computer. Let’s dive in and discover how to unveil the secrets of your system’s RAM configuration!
Importance of Knowing Your RAM
Understanding the capacity and performance of your system’s RAM is crucial for several reasons. Whether you’re troubleshooting performance issues, planning software installations, or considering a RAM upgrade, having accurate knowledge of your RAM configuration is essential.
One primary reason to know your RAM is for troubleshooting purposes. If your computer is running slow or experiencing frequent crashes, insufficient RAM could be a possible cause. By identifying the amount of RAM installed, you can determine whether it meets the minimum requirements for the applications and tasks you’re running. This information can help you optimize your system’s performance by ensuring that your RAM capacity aligns with your computing needs.
Knowing your RAM also allows you to plan for future software installations and upgrades. Some software, particularly resource-intensive applications like video editing software and virtual machines, demand a certain amount of RAM to run smoothly. By having a clear understanding of your current RAM capacity, you can assess whether it can accommodate new applications or if an upgrade is necessary to ensure optimal performance.
Furthermore, knowledge of your RAM configuration is vital when considering a RAM upgrade. If you’re using memory-intensive programs or your computer feels sluggish during multitasking, increasing your RAM can significantly improve performance. Being aware of your system’s current RAM capacity enables you to make informed decisions about the amount of additional RAM required to meet your needs.
Another aspect to consider is compatibility. Different computer systems have specific requirements for RAM modules, such as type, speed, and maximum capacity. Knowing your current RAM specifications helps in selecting compatible RAM modules when purchasing upgrades, ensuring that the new memory components will work seamlessly with your existing hardware.
Overall, knowing your RAM configuration is essential for troubleshooting, planning software installations, and making informed decisions about RAM upgrades. It allows you to optimize your system’s performance, ensure compatibility with software requirements, and maximize multitasking capabilities.
In the next sections, we will explore how to check the amount of RAM installed on different operating systems – Windows, Mac, and Linux. Let’s dive in and find out how to uncover the RAM secrets of your computer!
Checking RAM on Windows
If you are using a Windows operating system, there are several straightforward methods to check the amount of RAM installed on your computer.
Method 1: Task Manager
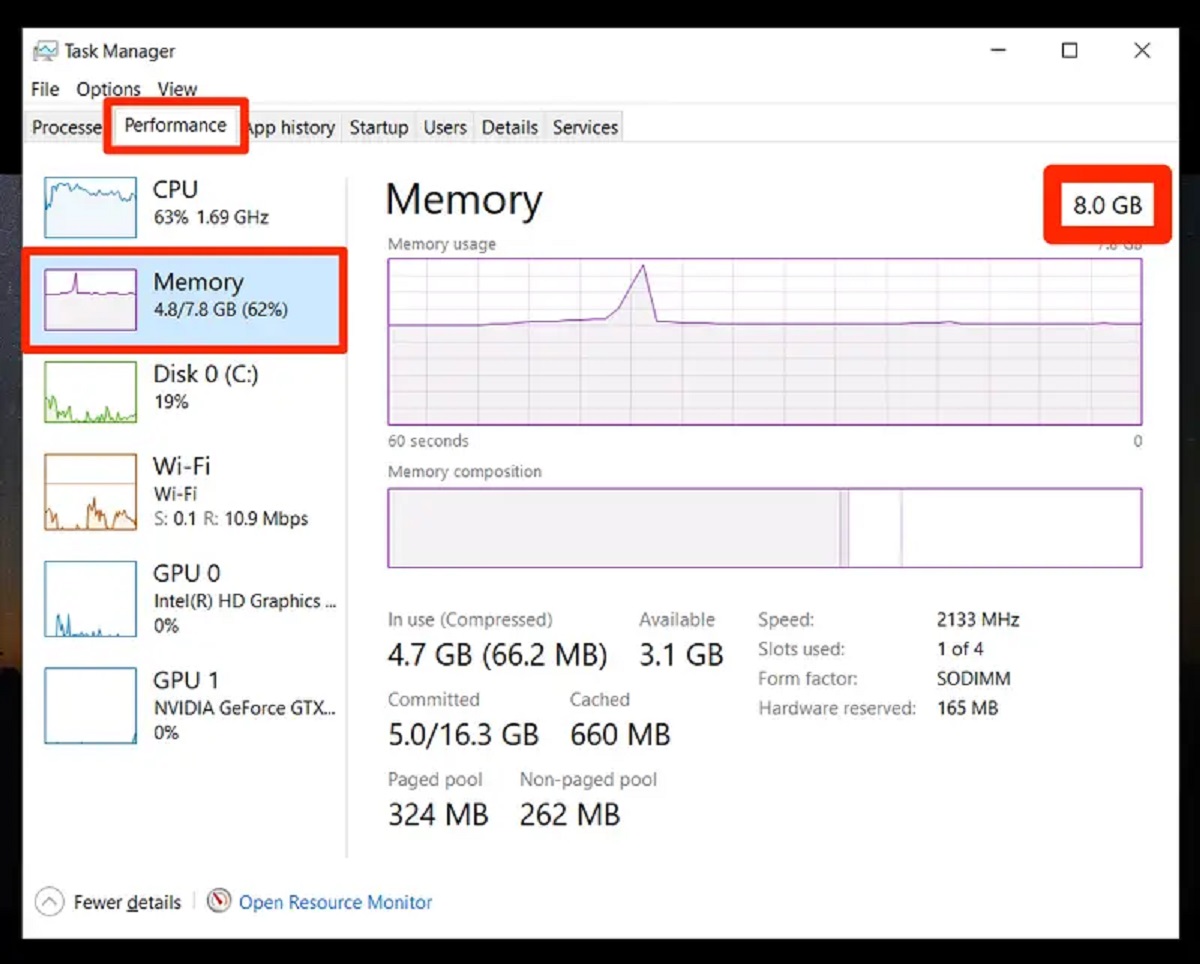
The easiest way to check your RAM usage is by using the built-in Task Manager. To access it, simply right-click on the taskbar and select “Task Manager” from the menu. Alternatively, you can press “Ctrl + Shift + Esc” on your keyboard to open Task Manager directly.
Once the Task Manager window is open, click on the “Performance” tab. Here, you will find various details about your computer’s performance, including the amount of RAM installed. The total physical memory will be displayed under the “Memory” section.
Method 2: System Information
Another way to check your RAM on Windows is by using the System Information utility. To access it, press the “Windows key + R” on your keyboard to open the Run dialog box. Then, type “msinfo32” and press Enter.
In the System Information window, navigate to the “System Summary” section on the left sidebar. Here, you will find detailed information about your computer’s hardware and software. Look for the “Installed Physical Memory (RAM)” field, which will display the total amount of RAM installed on your system.
Method 3: Control Panel
The Control Panel also provides a way to check your RAM on Windows. Open the Control Panel by searching for it in the Start menu or using the “Windows key + X” shortcut and selecting “Control Panel”. Within the Control Panel, choose “System and Security” and then click on “System”. Here, you will find the basic information about your computer, including the installed RAM.
These methods offer a quick and easy way to check the amount of RAM installed on your Windows computer. They provide you with the necessary information to assess your system’s performance and determine whether a RAM upgrade is needed to meet your computing needs.
In the next section, we will explore how to check your RAM on Mac computers.
Checking RAM on Mac
If you’re using a Mac computer, there are a few different ways to check the amount of RAM installed on your system.
Method 1: About This Mac
The easiest way to check your RAM on a Mac is by using the “About This Mac” feature. To access it, click on the Apple menu in the upper-left corner of the screen and select “About This Mac”.
In the window that appears, you will see an overview of your Mac’s hardware and software information. Click on the “Memory” tab, and you will find the total amount of RAM installed, along with other details such as the type and speed of the RAM modules.
Method 2: System Information
Another way to check your RAM on a Mac is through the System Information utility. To open it, click on the Apple menu, select “About This Mac”, and then click on the “System Report” button.
In the System Information window, navigate to the “Hardware” section on the left sidebar and select “Memory”. Here, you will find detailed information about your Mac’s RAM configuration, including the total installed memory, memory slots used, and RAM module specifications.
Method 3: Activity Monitor
The Activity Monitor application on Mac provides another method to check your RAM usage. To open it, go to Applications > Utilities > Activity Monitor.
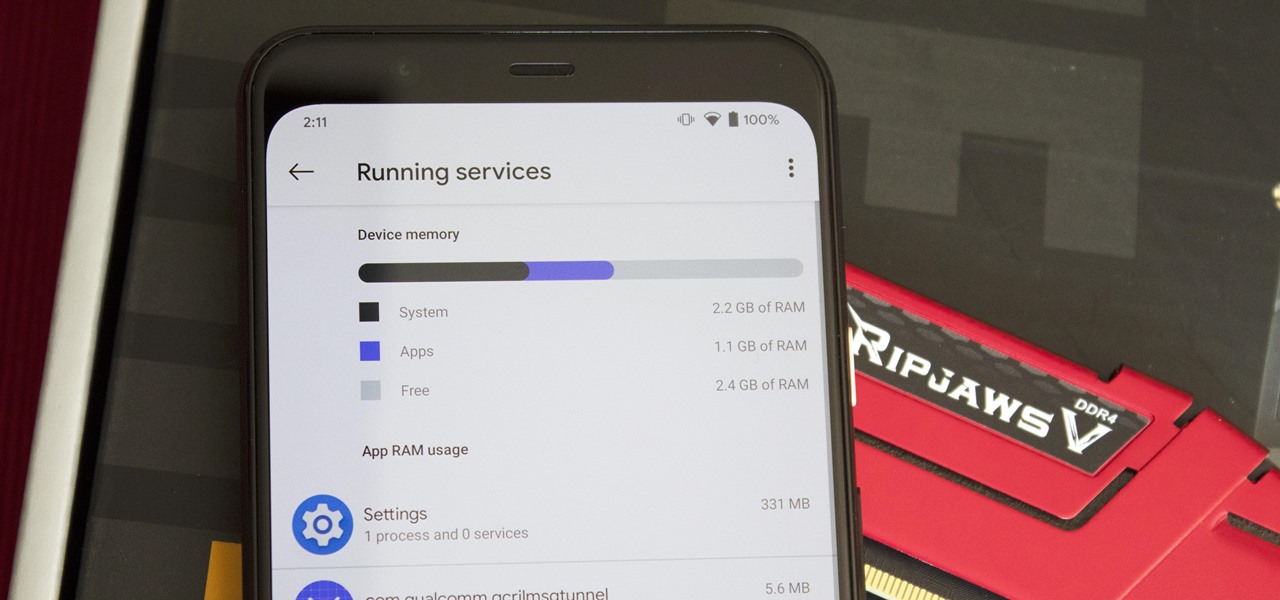
In the Activity Monitor window, click on the “Memory” tab. Here, you can view detailed information about your Mac’s memory usage, including the total memory, wired memory, active memory, inactive memory, and more. While this method doesn’t explicitly state the installed RAM, it provides valuable insights into how your system is utilizing memory.
These methods allow you to easily check the amount of RAM installed on your Mac computer, providing you with the necessary information to understand your system’s performance and make informed decisions about potential RAM upgrades.
In the next section, we will explore how to check your RAM on Linux systems.
Checking RAM on Linux
If you’re using a Linux-based operating system, there are multiple methods available to check the amount of RAM installed on your machine.
Method 1: Command Line
You can use the command line interface to check the RAM information on your Linux system. Open the Terminal or any other command line interface and enter the following command:
free -h
This command will display detailed information about the memory usage on your system, including the total, used, and available RAM.
Method 2: GNOME System Monitor
If you have a desktop environment with GNOME, you can use the GNOME System Monitor to check your RAM. Open the System Monitor by searching for it in the applications menu or using the “Ctrl + Alt + Del” shortcut. Click on the “Resources” tab, and you will find the RAM usage displayed at the bottom of the window.
Method 3: System Profiler and Benchmark
Another useful tool for checking your RAM on Linux is the System Profiler and Benchmark application. This utility provides detailed information about your system hardware configuration. To access it, open the application menu and search for “System Profiler and Benchmark”. Once opened, navigate to the “Memory” section to find the installed RAM information.
Method 4: /proc/meminfo File
Linux systems store various system information in virtual files, one of which is the /proc/meminfo file. You can view the contents of this file using a text editor or by running the following command:
cat /proc/meminfo
This will display detailed information about your system’s memory, including the total memory, available memory, and other memory statistics.
These methods provide different ways to check the amount of RAM installed on your Linux system. Whether you prefer using the command line or graphical tools, you can easily access the information you need to understand your system’s memory configuration.
In the next section, we will explore how third-party software can offer more detailed information about your RAM configuration regardless of the operating system you are using.
Using Third-Party Software to Check RAM
In addition to the built-in methods provided by operating systems, there are various third-party software options available that offer more detailed information about your RAM configuration. These tools often provide comprehensive insights into not only the amount of RAM installed but also other crucial details such as RAM speed, latency, and module specifications.
CPU-Z
CPU-Z is a popular and reliable tool that provides detailed information about the hardware components of your computer, including your RAM. It displays the number of memory slots used, the capacity of each slot, the total installed RAM, and the maximum supported frequency. CPU-Z is available for Windows and can be downloaded from the official website.
Speccy
Speccy is a comprehensive system information tool developed by CCleaner. It provides detailed information about various aspects of your system, including CPU, RAM, storage, and more. Speccy displays the installed RAM capacity, the number of memory slots used, and other important details. It is available for Windows and can be downloaded from the official website.
hwinfo
hwinfo is a powerful command-line tool available for Linux systems that provides detailed hardware information. With hwinfo, you can check the total memory installed, memory module details, memory speed, and other information related to your RAM configuration. It can be installed from the package manager of most Linux distributions.
These are just a few examples of the many third-party software options available for checking your RAM configuration. By utilizing such tools, you can gain valuable insights into your system’s memory performance and specifications, which can be particularly useful when considering RAM upgrades or troubleshooting performance issues.
Remember to obtain such software from trusted sources to ensure their safety and reliability. Additionally, always check for compatibility with your specific operating system and make sure to keep the software updated to access the latest features and improvements.
Now that we’ve explored how to check RAM using third-party software, let’s move on to the next section where we will provide useful tips for upgrading your RAM.
Tips for Upgrading Your RAM
If you find that your computer’s performance is sluggish or you’re regularly experiencing memory-related issues, it may be time to consider upgrading your RAM. Increasing your RAM can significantly improve your system’s performance and allow for smoother multitasking. Here are some tips to keep in mind when upgrading your RAM:
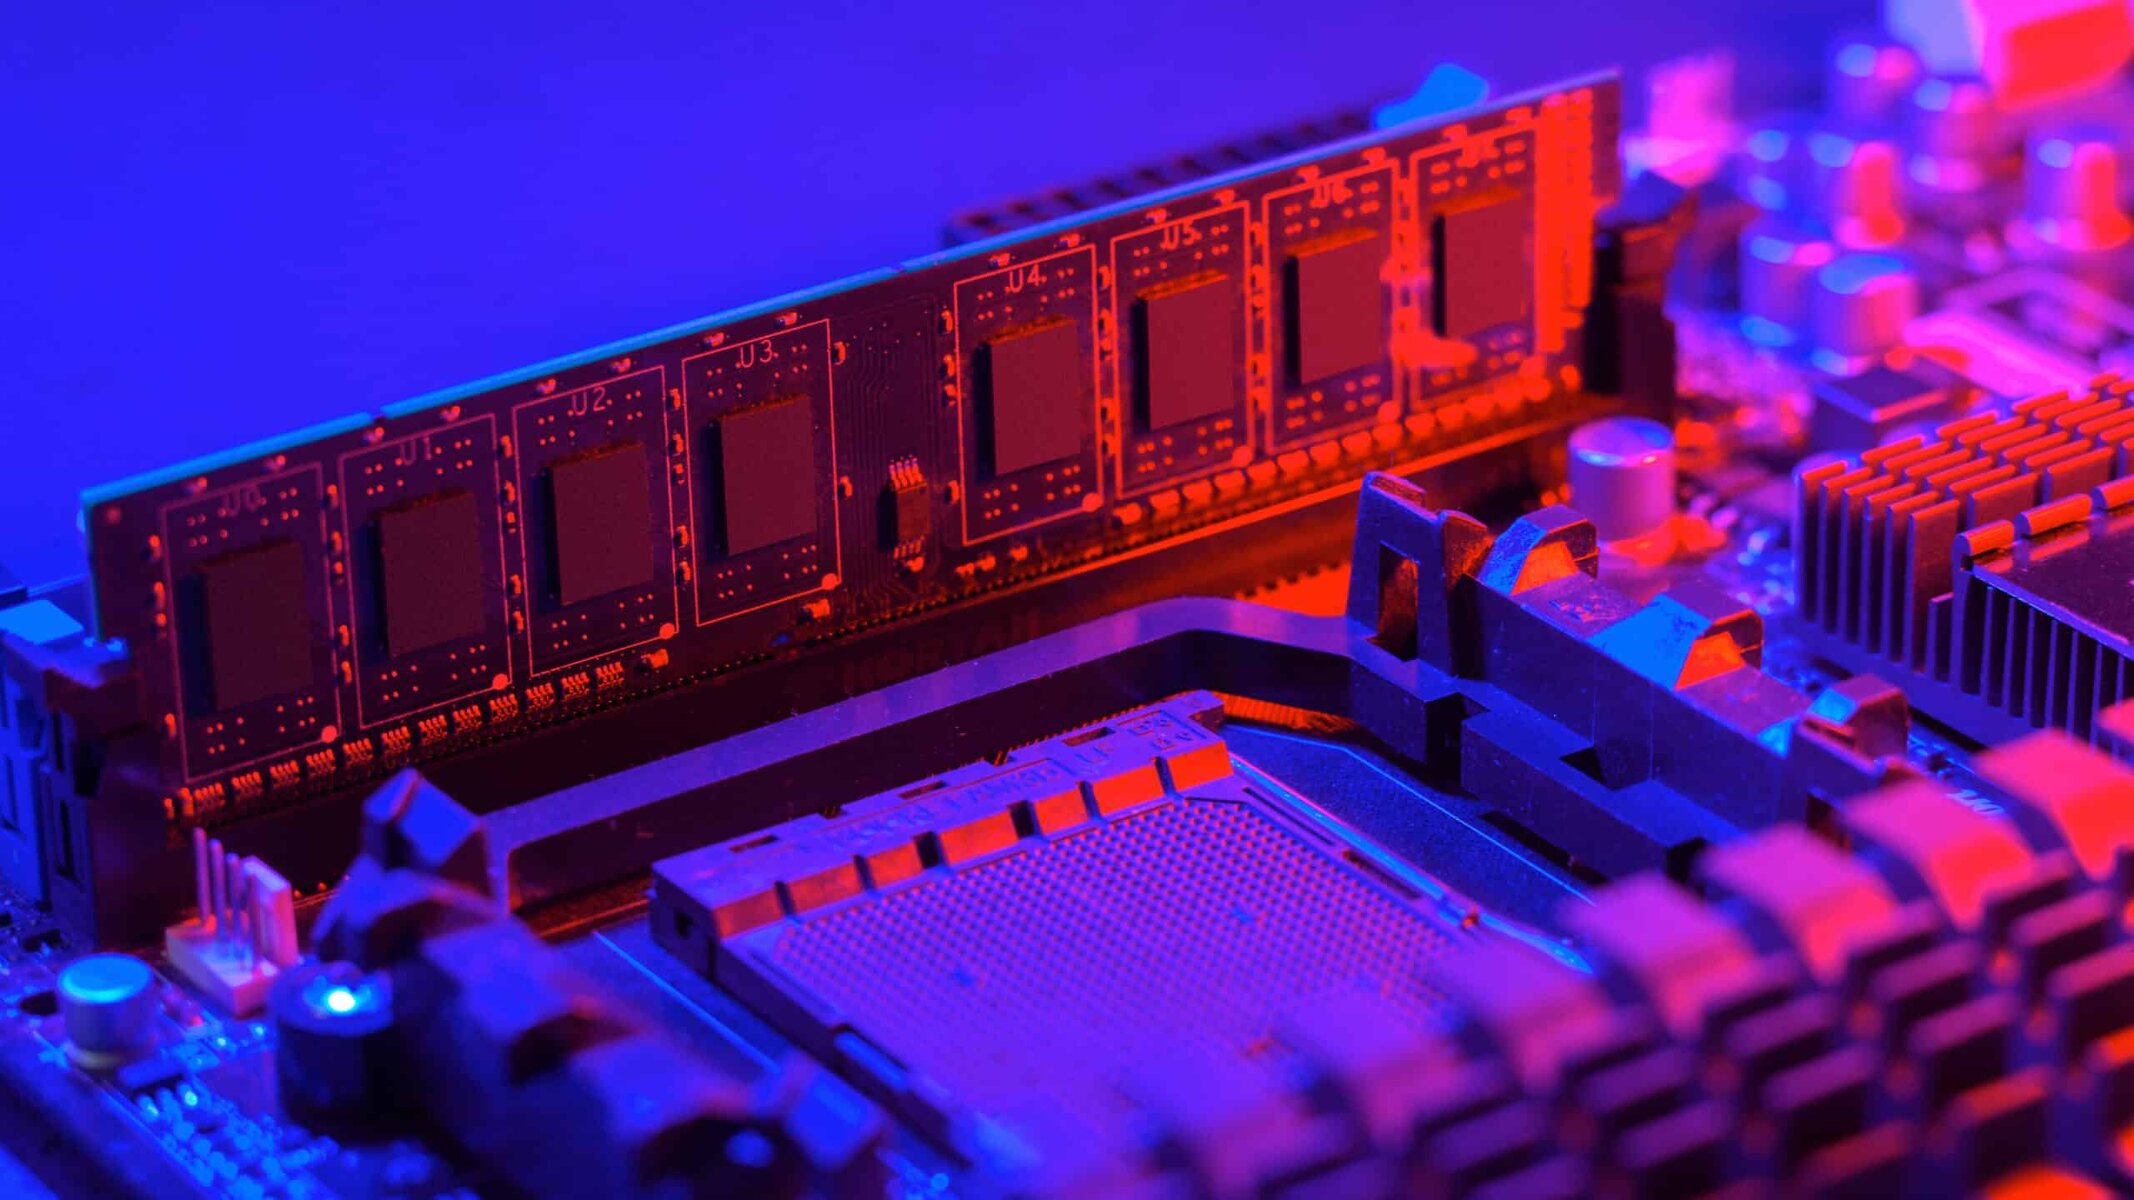
1. Determine Compatibility: Before purchasing new RAM modules, ensure that they are compatible with your computer’s motherboard. Check the motherboard’s specifications and the type of RAM (e.g., DDR4) supported by your system.
2. Identify Slot Availability: Determine the number of empty RAM slots on your motherboard. This will help you determine the maximum amount of RAM you can install without replacing existing modules.
3. Consider Dual Channel Configuration: If your motherboard supports dual-channel memory configuration, consider installing RAM modules in pairs for optimal performance. Dual-channel configuration can improve memory bandwidth and overall system responsiveness.
4. Choose Reliable Brands: Opt for reliable and reputable RAM brands to ensure compatibility, performance, and reliability. Brands such as Kingston, Corsair, Crucial, and G.SKILL are well-known for their high-quality RAM modules.
5. Properly Ground Yourself: Before handling any computer components, remember to ground yourself to avoid static electricity discharge. Either use an antistatic wrist strap or touch a grounded object to discharge any static buildup.
6. Install RAM in Proper Slots: Follow the motherboard’s manual to identify the correct RAM slots for installation. Improper installation can lead to compatibility issues and may prevent your computer from booting properly.
7. Perform a BIOS Update: Updating your motherboard’s BIOS to the latest version can ensure compatibility with newer RAM modules and optimize system performance. Check the manufacturer’s website for BIOS update instructions.
8. Test New RAM: After installing the new RAM, run memory diagnostic software or perform stress tests to verify its stability and ensure it is functioning properly.
9. Monitor RAM Usage: Keep an eye on your system’s RAM usage after installing the new modules. This will help you assess the improvement in performance and ensure that the upgraded RAM is being utilized efficiently.
By following these tips, you can make the process of upgrading your RAM smoother and more successful. Remember to consult your system’s documentation and seek professional assistance if needed. Upgrading your RAM can significantly boost your computer’s performance and enhance your overall computing experience.
Now that we’ve explored tips for upgrading your RAM, let’s conclude this article.
Conclusion
Understanding and monitoring your computer’s RAM configuration is essential for optimizing performance and ensuring a smooth computing experience. By knowing the amount of RAM installed, you can troubleshoot performance issues, plan for software installations, and make informed decisions about RAM upgrades.
In this article, we explored various methods to check RAM on different operating systems. For Windows users, the Task Manager, System Information, and Control Panel provide easy ways to obtain RAM information. Mac users can utilize the “About This Mac” feature, System Information, or Activity Monitor to access their RAM details. Linux users can rely on the command line, GNOME System Monitor, System Profiler and Benchmark, or the /proc/meminfo file to check RAM usage.
We also discussed the benefits of using third-party software tools like CPU-Z, Speccy, and hwinfo to obtain more detailed RAM information, including speed, latency, and module specifications.
When considering a RAM upgrade, it’s essential to determine compatibility, identify available slots, and choose reputable brands. Proper installation, BIOS updates, and testing new RAM modules are key to successful upgrades.
By following these guidelines, you can optimize your system’s performance, enhance multitasking capabilities, and ensure compatibility with software requirements.
Remember, RAM is a vital component that directly impacts your computer’s speed and responsiveness. Keep an eye on your RAM usage and periodically reassess your computing needs to stay ahead of potential bottlenecks.
Now that you have the knowledge and tools to check and upgrade your RAM, go ahead and unlock the full potential of your computer!