Introduction
Welcome to the world of computer hardware! If you’ve ever wondered how much RAM your computer has, you’ve come to the right place. RAM, or random access memory, is a crucial component of your computer that stores data for quick access by the processor. It plays a vital role in determining your computer’s speed and overall performance.
Whether you’re a tech enthusiast wanting to upgrade your RAM or simply curious about your system’s specifications, it’s essential to know how to check the amount of RAM your computer has. In this article, we’ll guide you through the steps of finding out how much RAM your computer has on the most popular operating systems – Windows, Mac, and Linux.
Not only will we cover the graphical user interface methods, but we’ll also explain how to check your RAM using the command line, as it provides more detailed and technical information. Additionally, we’ll briefly touch on understanding RAM specifications, so you can make sense of the numbers and technical jargon associated with it.
By the end of this article, you’ll have the knowledge and tools to determine the amount of RAM your computer has, as well as a better understanding of what those specifications mean. So, let’s dive in and find out how to uncover your computer’s RAM secrets!
Checking RAM on Windows
Windows provides a straightforward method to check your computer’s RAM. Here’s how you can do it:
- Start by pressing the Windows key on your keyboard, followed by typing “System” in the search bar. From the search results, click on “System” to open the System settings.
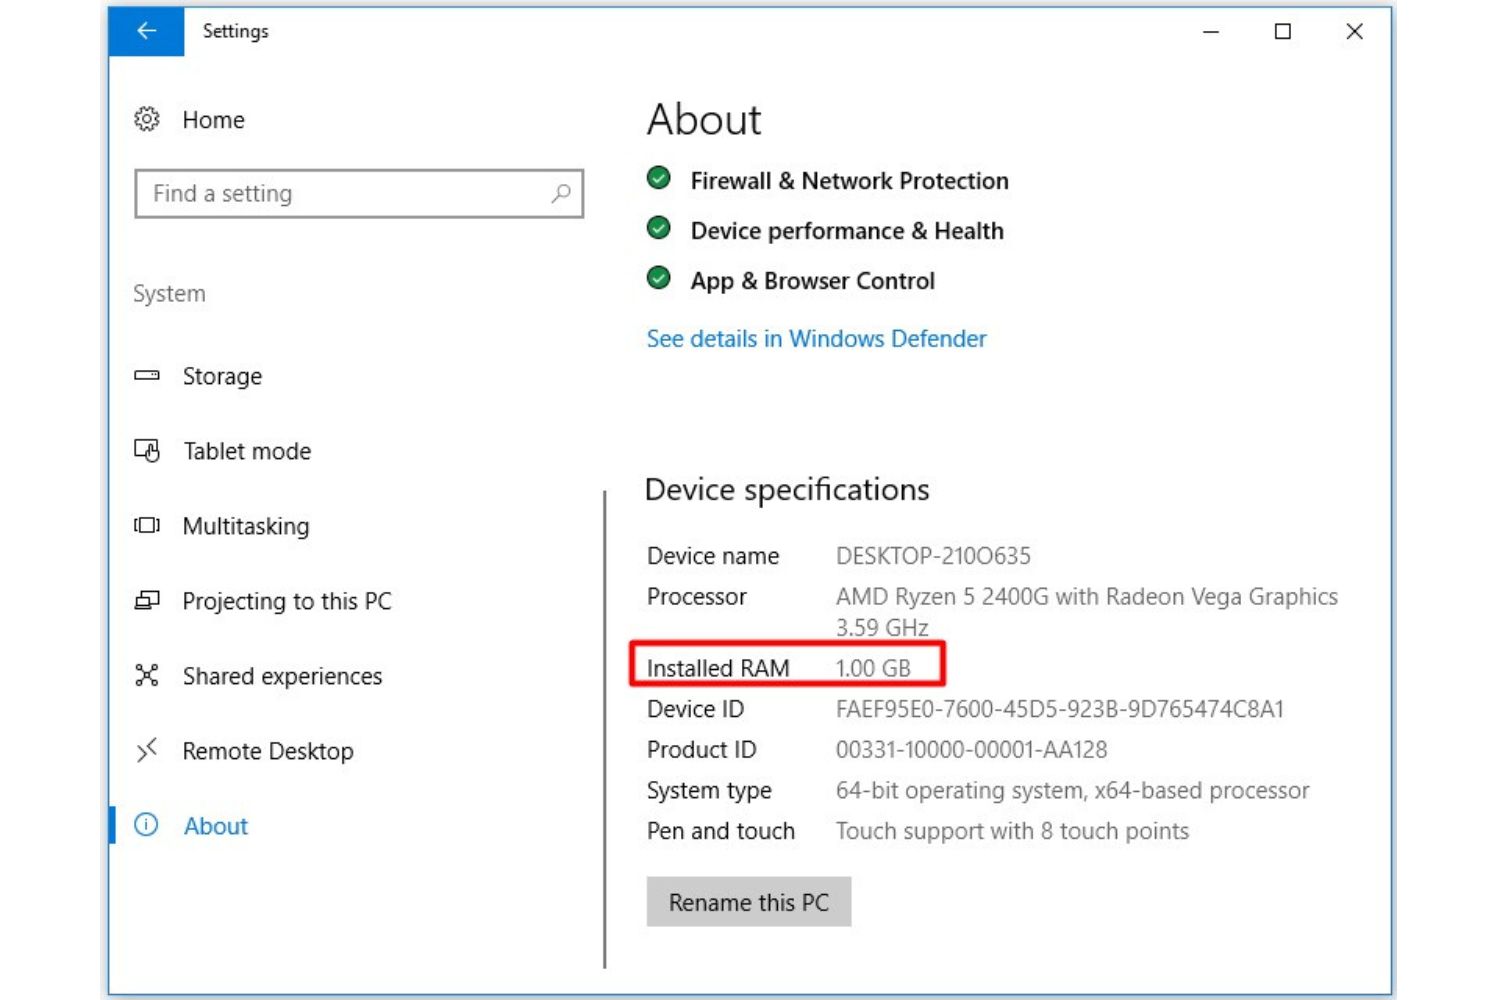
- In the System settings window, you’ll find the information about your computer’s RAM under the “Device specifications” section. Look for the line that says “Installed RAM” or “Memory (RAM)”.
- The value displayed is the total amount of RAM installed in your computer, typically in gigabytes (GB). For example, if it shows “8.00 GB”, it means you have 8 gigabytes of RAM.
If you’re looking for more detailed information, such as the RAM type, speed, or manufacturer, you can use the Command Prompt. Here’s how:
- Open the Command Prompt by pressing the Windows key and typing “Command Prompt” in the search bar. Click on “Command Prompt” from the search results to open it.
- In the Command Prompt window, type “wmic memorychip get Capacity, Manufacturer, Speed, MemoryType” and press Enter.
- After executing the command, you’ll see a list of all the memory modules installed in your computer, along with their capacity, manufacturer, speed, and memory type.
Having this information can be useful if you’re planning to upgrade your RAM or troubleshoot any issues related to memory. Now that you know how to check your RAM on Windows, let’s move on to checking it on a Mac.
Checking RAM on Mac
If you’re using a Mac computer, you can easily find out the amount of RAM installed. Follow these steps:
- Click on the Apple logo in the top-left corner of the screen and select “About This Mac” from the drop-down menu.
- In the window that appears, navigate to the “Overview” tab and click on the “System Report” button.
- This will open the System Information window. In the left sidebar, under the “Hardware” section, click on “Memory”.
- On the right side, you’ll see detailed information about your computer’s memory, including the total memory capacity, memory slots, and the type and speed of the installed RAM.
If you prefer using the Terminal for checking your RAM, here’s an alternative method:
- Open the Terminal, either by searching for it in Spotlight or navigating to Applications > Utilities > Terminal.
- In the Terminal window, type “system_profiler SPHardwareDataType | grep Memory” and hit Enter.
- The command will display information specifically related to the memory installed on your Mac.
Now you know how to check your computer’s RAM on a Mac. Let’s move on to Linux and see how you can check your RAM on this open-source operating system.
Checking RAM on Linux
If you are using a Linux-based operating system, there are a few different ways to check your RAM. Here are a couple of methods:
- Using the System Monitor:
- Many Linux distributions come with a built-in system monitor tool that provides detailed information about your computer’s resources, including RAM.
- Open the system monitor tool by searching for it in your application launcher or by pressing Ctrl+Alt+Del and selecting it from the menu.
- In the system monitor, navigate to the section that displays memory or RAM usage. Here, you will be able to see the total amount of RAM installed and how much is currently being used.
- Using the Command Line:
- If you prefer using the command line interface, you can use the free command to check your RAM on Linux.
- Open the terminal by searching for it in your application launcher or by pressing Ctrl+Alt+T.
- In the terminal, simply type free -h and press Enter.
- The output will display the total, used, and available RAM, along with other memory-related information.
These methods should give you a clear indication of your computer’s RAM on Linux. However, keep in mind that the exact steps and tools may vary depending on the distribution you are using. If these methods don’t work on your specific Linux distribution, a quick online search for checking RAM on your specific distribution will provide you with the necessary steps.
Now that you know how to check your RAM on Linux let’s move on to understanding RAM specifications.
Checking RAM on Command Line
If you prefer using the command line interface to check your computer’s RAM, you can do so on Windows, Mac, and Linux using specific commands. Here’s how:
- Windows:
- Open the Command Prompt as discussed earlier.
- Type “wmic MEMORYCHIP get BankLabel, Capacity, DeviceLocator, Speed, PartNumber” and press Enter.
- The command will display detailed information about each memory module installed in your computer, including the bank label, capacity, device locator, speed, and part number.
- Mac:
- Open the Terminal and type “system_profiler -type memory” or “sysctl -a | grep mem” and press Enter.
- The command will provide you with detailed information about your computer’s memory, including the type, speed, and capacity.
- Linux:
- Open the Terminal and type “sudo dmidecode –type 17” or “cat /proc/meminfo” and press Enter.
- The command will display detailed information about your computer’s memory, including the size, type, speed, manufacturer, and more.
By using these command line options, you can gather more technical details about your computer’s RAM, allowing you to understand the specifications and make informed decisions regarding upgrades or troubleshooting.
Now that you know how to check your RAM using the command line on different operating systems, let’s move on to understanding RAM specifications.
Understanding RAM Specifications
When checking your computer’s RAM, you may come across various specifications that provide details about its performance and capabilities. Understanding these specifications can help you make informed decisions when upgrading or troubleshooting your RAM. Here are some important specifications to be aware of:
- Capacity: RAM capacity refers to the amount of memory your computer has. It is measured in gigabytes (GB) and determines how much data can be stored and accessed simultaneously.
- Type: The RAM type indicates the technology used in the memory module. Common types include DDR4, DDR3, and DDR2, each with different performance and compatibility characteristics.
- Speed: RAM speed, measured in megahertz (MHz), determines how fast data can be transferred to and from the memory module. Higher speeds typically result in better performance.
- Latency: RAM latency refers to the delay in transferring data between the RAM module and the processor. Lower latency values indicate faster data access and better performance.
- Timing: RAM timing specification consists of a series of numbers (e.g., 16-18-18-36) that denote the sequence of events during data transfer. Lower timing values generally indicate better performance.
- Voltage: RAM voltage specifies the electrical power required for the memory module to function properly. It is important to ensure that the RAM voltage is compatible with your computer’s motherboard.
- ECC: Error Correcting Code (ECC) RAM is a type of memory that can detect and correct certain types of data errors. It is commonly used in server environments that require high data integrity.
These specifications can vary depending on the type and generation of RAM you have. It’s important to consult your computer’s documentation or manufacturer’s website to ensure compatibility when upgrading your RAM.
Now that you have a better understanding of RAM specifications, you can make more informed decisions when upgrading your computer’s memory or troubleshooting any performance issues related to RAM.
Conclusion
Knowing how much RAM your computer has is essential for understanding its performance capabilities and making informed decisions when it comes to upgrades or troubleshooting. In this article, we’ve explored various methods to check the RAM on different operating systems, including Windows, Mac, and Linux.
On Windows, you can easily find the installed RAM through the System settings or obtain detailed information using the Command Prompt. Mac users can navigate to the “About This Mac” section or use the Terminal to gather information about their computer’s memory. Linux users have options to check RAM through the system monitor or the command line using specific commands.
In addition to checking the amount of RAM, we’ve also discussed understanding important RAM specifications such as capacity, type, speed, latency, timing, voltage, and ECC. Having a grasp of these specifications can help you make informed decisions when upgrading or troubleshooting your RAM.
Remember that RAM plays a crucial role in your computer’s performance, so it’s important to ensure that you have an adequate amount for your computing needs. If you find that your computer’s RAM is insufficient, upgrading to a higher capacity or faster RAM can significantly enhance its performance.
We hope this article has been helpful in guiding you through the process of checking your computer’s RAM on various operating systems and understanding RAM specifications. Armed with this knowledge, you can now confidently navigate the world of computer memory and optimize your system’s performance.