Live streaming is becoming more popular as days go by. Most of us enjoy making videos with friends to have more fun. However, we still have to use a third-party tool to hold or participate in a show since multi-feature is not yet available on Facebook Live. There are a lot of tools that we can use to facilitate such activity, and one of these tools is BeLive.
In this article, we will discuss what BeLive is, its amazing features and their uses, and some of its competitors in the market. The pricing plans that it offers will also be discussed to give you ideas of how much money you would have to shell out to enjoy its features.
What is BeLive?
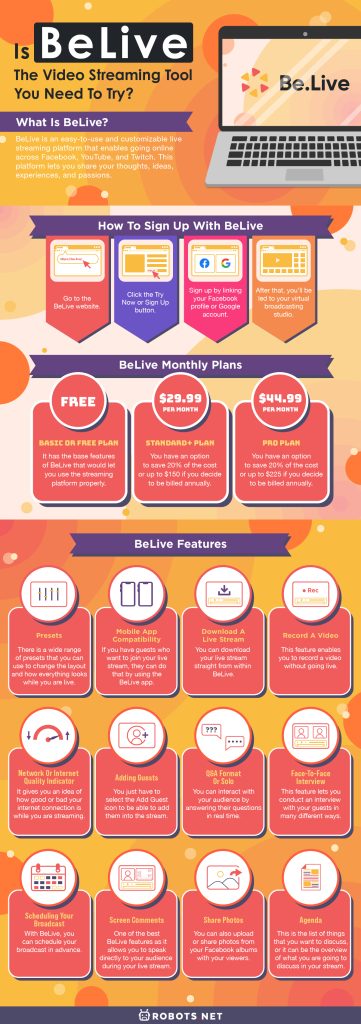
BeLive is an easy-to-use and customizable live streaming platform that enables going online across Facebook, YouTube, and Twitch. This platform lets you share your thoughts, ideas, experiences, and passions. Also, it allows you to meet new people and see different places. Moreover, it enables you to interact and engage with your friends and your audience, which can help you grow your community.
In addition to this, BeLive also has RTMP support, which lets you broadcast to other platforms aside from the supported ones. It is cross-platform that you can run in the browser of your PC or Mac, be it Chrome or Safari. You can also do everything that you want to do with it even when you are already live.
This platform is of great help not only to broadcasters and content creators to grow their audience but also to business owners that want to advertise their products.
If you’re enjoying this review of BeLive, check out our review of StreamYard and our Zoom vs Skype article.
How to Sign Up with BeLive
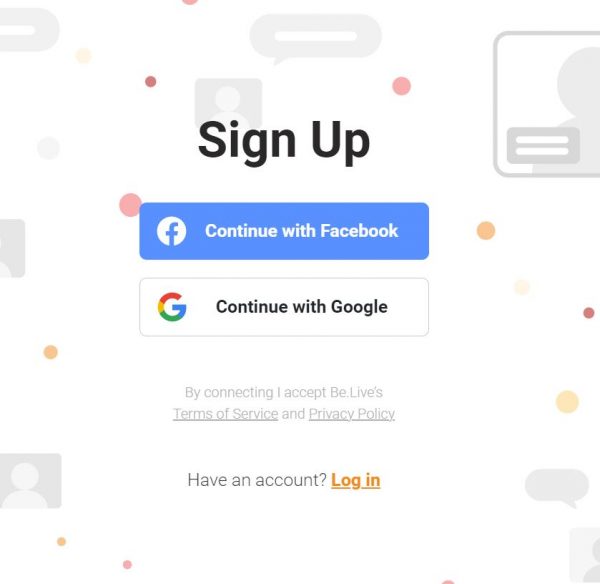
- Go to the BeLive website.
- Click the Try Now or Sign Up button.
- Sign up by linking your Facebook profile or Google account.
- After that, you’ll be led to your virtual broadcasting studio.
BeLive Monthly Plans
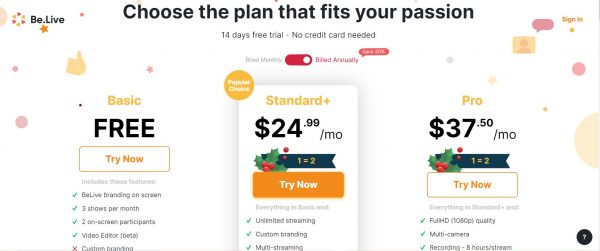
BeLive gives you a 14-day trial if it is your first time to use the platform. This 14-day trial will let you have access to all paid features of BeLive. After the trial, you will automatically get the Free or Basic Plan. With this plan, there’s no need for you to provide your payment details. However, there BeLive offers monthly plans if you’re satisfied with the services you had available to you during your 14-day trial.
Basic or Free Plan
This is what you will automatically get after the 14-day trial. It has the base features of BeLive that would let you use the streaming platform properly.
Standard+ Plan
This package is priced at $29.99 per month. However, you have an option to save 20% of the cost or up to $150 if you decide to be billed annually. The annual billing will only cost you $24.99 per month.
Pro Plan
Lastly, the Pro Plan will cost you $44.99 per month. However, you have an option to save 20% of the cost or up to $225 if you decide to be billed annually. The annual billing will only cost you $37.50 per month.
BeLive Features & How to Use Them
Presets
There is a wide range of presets that you can use to change the layout and how everything looks while you are live. You can add your logo to your streams. You can also change the background text and colors. Moreover, you can include frames that would appear on your live broadcasts.
Mobile App Compatibility
If you have guests who want to join your live stream from their phones or other devices, they can do that by using the BeLive app.
Download a Live Stream
After you went live, you can download your live stream straight from within BeLive.
Record a Video
This feature enables you to record a video without going live. However, you can still present your video as if it is live.
Network or Internet Quality Indicator
You can see it at the top left corner of the screen. It gives you an idea of how good or bad your internet connection is while you are streaming.
Adding Guests
If you wanted to do a live stream and then have someone to interview or present with you, you just have to select the Add Guest icon to be able to add them into the stream. A link will be provided after clicking the button. You can then send the link to other participants in your stream.
When your guest clicks the link, it will give him access to your live stream. Once your guest is on, you can see him at the bottom, and you can add him on the live stream by clicking “Show in Live Stream.” as the host of the live stream, you are in control of the admission and departure of your guests.
Q&A Format or Solo
With this format, you can interact with your audience by answering their questions in real time. They can ask you questions by typing on the Chat area, and they will all appear on the screen. This can lead to audience engagement, which is a great opportunity for you to gain your audience’s trust.
Face-to-Face Interview
This feature lets you conduct an interview with your guests in many different ways. Your invite link will be your guest’s one-click access to be part of your live stream. Your viewers can join and be part of your show with the use of their mobile devices, computer, or laptop. You can have up to ten guests, and you can interact with up to three people on the screen.
Scheduling Your Broadcast
With BeLive, you can schedule your broadcast in advance. In your Facebook group, there will be a notification of your broadcast with the description, image, and the scheduled time. They just need to click the notification to see when your broadcast will go live. If you have a change of mind, you also have an option to edit your schedule.
Adding a Destination
- Log in to your account but make sure your Chrome browser is up to date.
- Click on Set Destination that you will find at the top left portion of the studio.
- You can choose between Facebook or YouTube as your broadcast destination. However, you will need to select a specific destination for Facebook; it can be your timeline or any page or group that you manage.
- If you choose YouTube, select the Google Account that you want to connect with BeLive on the popup window. You need to give BeLive permissions to your Google account by clicking Allow. After that, set your stream privacy to either Private, Public, or Unlisted.
- Add a stream title and description to your stream.
- After that, click on Save.
How to Schedule Your Live on Facebook
- Log in to your BeLive account, and then click on Set Destination.
- Toggle on Schedule Stream.
- Set your preferred broadcast date and time. Set your broadcast seven days ahead of time.
- Then, choose Facebook as your preferred platform. Also, you will need to select a specific destination on Facebook where you will broadcast your stream.
- It is recommended for you to add an image for your scheduled post.
- Add a stream title and description to your stream.
- After that, click on Save.
Screen Comments
This is one of the best BeLive features as it allows you to speak directly to your audience during your live stream. You can go through the comments of your audience and click any of them to bring them up on the screen. This will help you create engagement for your broadcast and show your appreciation to your viewers.
Share Photos
You can also upload or share photos from your Facebook albums with your viewers. You just have to click on a photo that you want to share, and it will be added to your broadcast. Sharing your photos is one of the amazing ways of adding fun to your live broadcast.
Agenda
This is the list of things that you want to discuss, or it can be the overview of what you are going to discuss in your stream. They are divided into chapters so you can emphasize the things that you want to cover. The agenda is of great help if you want to share tips. Also, it helps keep your broadcast in order. If you happen to be distracted, you can easily catch up with your topic. If you bring your agenda on the screen, your audience will be able to know the subject that you are covering.
Adding An Agenda
- Click on the Agenda icon then click on Create new agenda.
- Type the title for your Agenda.
- Make your first agenda by typing it out. Your audience can see your Agenda if you decide to show it.
- You can have additional private notes on your Agenda that only you can see.
- To add another Agenda, click the Add item feature.
- To change the order, just click your agenda and drag them.
- You can display your Agenda on the screen and let your audience see it. To show or hide your agenda, just press the eye icon.
- To display your first Agenda on the screen, click Start. For your next Agenda, click on Next item.
- If you are finished showing your Agenda, you can click on the X icon that you can find at the top-right corner of the Agenda window.
Screen Updates
This feature lets you put updates on the screen. You can add text or crawler text to introduce a guest or share an idea. Adding text over your show will give you a chance to let your viewers know about your ideas or about the thing that you want to discuss with them. Screen updates will be of great help for your viewers to get by with the topics on your show.
Putting Updates on Screen
As mentioned, you can put text on your screen to give updates to your audience. Your text can be a fixed text or a scrolling text, also known as a crawler.
- From the toolbar, click on Text on Screen.
- Enter your text or crawler by typing. You can also add an emoji to the message.
- Click Show for your text to appear on the screen. You can also make your text disappear by clicking Hide.
Screen Share
This feature is especially helpful for tutorials and online classes. Moreover, you have an option to choose a window and share the screen. In the case of multiple monitors, you can choose the monitor screen you wish to broadcast. However, you need to have BeLive Chrome installed on your computer to be able to share your screen.
Changing the View Mode
BeLive offers modern ways on how your viewers can see and interact with you. It lets you focus on a particular person during your broadcast. Also, you can change the view mode and be able to focus on another person. This is possible to do even when you are sharing a photo.
Displaying Comment on the Screen
While you are live, you can see all of your comments and interactions with your audience. You can click on those comments, and they will appear on your live video as a featured comment.
Other Uses for BeLive
BeLive is not only used for live streaming; it can also be used for online classes. Its share screen feature is very useful for the teachers who want to share their notes with their students. Businesses can also benefit from this platform. BeLive is of great help for businesses because it provides many capabilities that can be useful for business owners to advertise their products.
BeLive Pros and Cons
Pros
- Simple and easy to use
- Stream live across different social media platforms
- Produce streams for your brand
- Engage with the audience through real-time chat
- Share and record your live stream
- Amazing customer service
- Supports multiple cameras
Cons
- Limited customization
- Unstable at times
- Bandwidth is pretty high
BeLive vs Competitors
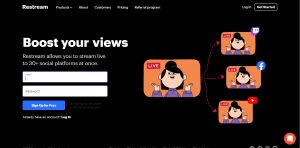
Restream
This is a powerful live-streaming solution. Also, it is effective to use as a streaming platform. It lets you create and broadcast your live content from your browser to more than 30 social media platforms all at the same time. These platforms include YouTube, Facebook, LinkedIn, Twitter, and Twitch. With this platform, you can interact with your viewers across platforms.
This is an ideal platform for businesses, non-profit organizations, entrepreneurs, content creators, government, and churches. Moreover, DJs, social community managers, streamers, influencers, and other individuals whose passion is live streaming are also finding great use out of this service. Restream provides help for you to reach your audience because it gives no limit to the number of social platforms that you can stream to at once.
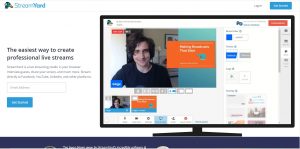
StreamYard
This web-based live streaming studio lets you video stream directly with some of the popular social media platforms. These include Facebook YouTube, Periscope, LinkedIn, and many others. It lets you interview and discuss anything with your guests. Also, it lets you engage and interact with your audience by acknowledging and paying attention to their comments and questions.
StreamYard has a lot of amazing features that can help you grow your audience. Moreover, it has tools to help you with complex stuff all the way. With that, you can focus on creating good content and thinking of great ideas to attract more viewers.
Zoom
This is a video conferencing platform that can be downloaded for free. It allows its users to connect online and perform video conferences, webinars, and live chat. Also, you can communicate with other people using video or audio. You can also share your screen share files and chat while you are conducting a meeting.
Zoom also lets you record your Facebook live streaming. You have an option to have your Zoom meeting or webinar go live on Facebook or YouTube. It is an ideal tool if you are doing a lot of webinars and meetings with a lot of participants.
Go Live With BeLive
People have different preferences as to what platform to use to do live streaming. Some platforms are integrated into a lot of popular social media platforms that can help you to reach out to a wide range of viewers. However, BeLive has unique features that make the live streaming experience a better one. It allows interviewing with a guest to be done on a computer or a smartphone. That way, you can always invite a guest who only has a smartphone. This is a big advantage to have, especially for a beginner, since not all people with great ideas have a desktop or laptop.
BeLive, in partnership with Facebook, allows you to grow your audience. This is because Facebook is popular with a lot of people. As you have a group on Facebook that you manage, you can always have a way to reach out to your audience. BeLive is not a bad idea to be tried as a live streaming platform.