With all the photo editing software available today, picking the best option becomes harder than you thought. Some can offer you services for free, while others would only give you significant features in exchange for a fee. While there are apps or software you can install on your smartphone or computer, you can also edit using a free online photo editor. These online photo editors would often set limitations on the usage, but there is one that’s completely free—iPiccy.
What is iPiccy?

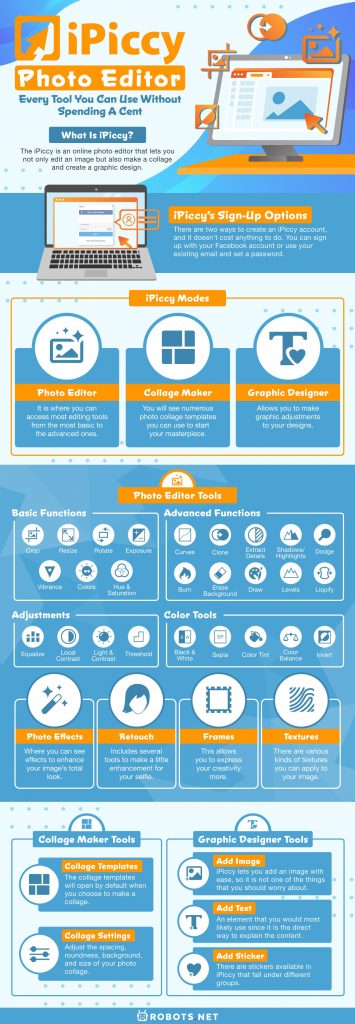
The iPiccy is an online photo editor that lets you not only edit an image but also make a collage and create a graphic design. It has a user interface that you would find easy to use so you’ll love it regardless of your photo editing experience. It also has all the basic tools you need from photo editing software as well as the advanced features that some don’t offer. With iPiccy, you can adjust light and color settings, apply filters and effects, and add text, shapes, and stickers.
The best part is everything it offers is completely free, with no pricing plan whatsoever. You would only need an internet connection and an updated browser to start editing your photo. It is worth noting that although you can access it for free, some tools would require you to sign up. This brings us to the next thing you should know – the sign-up options.
iPiccy’s Sign-Up Options
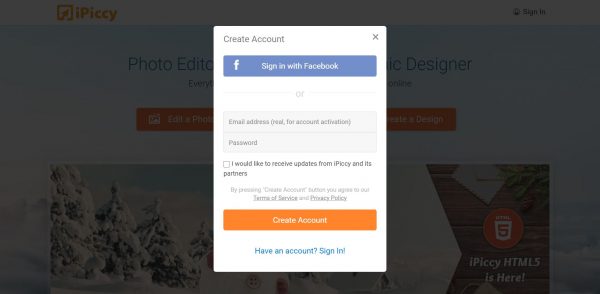
Certain features have an iPiccy’s logo next to them, which means they are exclusive for those who have already signed up. There are two ways to create an iPiccy account, and it doesn’t cost anything to do. You can sign up with your Facebook account or use your existing email and set a password. If you choose to sign up with your email, you will receive an email from iPiccy to confirm your account. Once you finish signing up, iPiccy will activate your account and give you access to the rest of the features.
iPiccy Modes
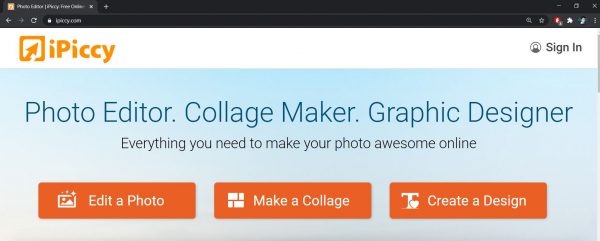
As mentioned earlier, you can do a lot with iPiccy aside from enhancing your image. There are three modes that you can choose from depending on the project you want to do. To know which one you should use, here are some descriptions for each mode.
Photo Editor
If you want a free online photo editor that allows you to enhance your image, iPiccy offers the Photo Editor mode. It is where you can access most editing tools from the most basic to the advanced ones. From this mode, you can adjust the brightness, saturation, and colors of your image so you can customize it however you want. This is also where you can find over 100 effects and filters so your image could look extraordinary in various ways.
There are also tools from the Photo Editor mode that let you do some facial retouching which you will know more about later. This mode also allows you access to the Frames and Textures tools so you can do all photo enhancements here. There are tools, however, that would ask you to sign in before you can use them completely. You can see the preview of the exclusive tools such as a filter or effect, but you cannot apply it unless you sign in.
Collage Maker
Aside from enhancing your image, you can also put together multiple images through the Collage Maker mode. From this mode, you will see numerous photo collage templates you can use to start your masterpiece. Not only does it let you drag and drop images, but it also lets you customize the collage according to your desire. You can change the background color as well as adjust the spacing and roundness of the images. You can also modify the size of the photo collage so it fits well on the platform you’re going to upload it to.
Graphic Designer

The last mode iPiccy offers is the Graphic Designer mode, which allows you to make graphic adjustments to your designs. You can add elements such as images, text, and stickers to your image so to fully express your creativity. In this mode, you can arrange the layers and move objects back or front according to the order you need them to be. It also offers full customization on each element nso you will not run out of ways to turn your art into its best version.
It is worth noting that iPiccy does not have stock images aside from the three samples they would offer before you start editing. This means your only option to have photos is to upload them from your computer. This will not be an issue for those who have their photos, but you might want to download those images if you don’t have any. Another thing you can upload from your computer is text font, giving you more ways to customize your image.
iPiccy Photo Editor Tools
You have learned from the brief description that there are many things you can do in Photo Editor mode. It is not impossible to get lost while editing, so it’s better to know more about what you can use from this mode. To help you familiarize yourself with its features, here are some details on every tool and how to apply it to your photo.
Basic Functions
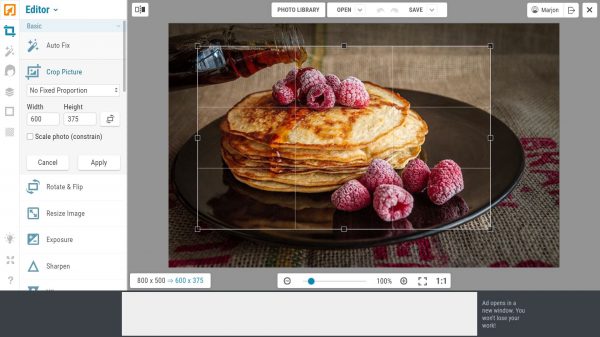
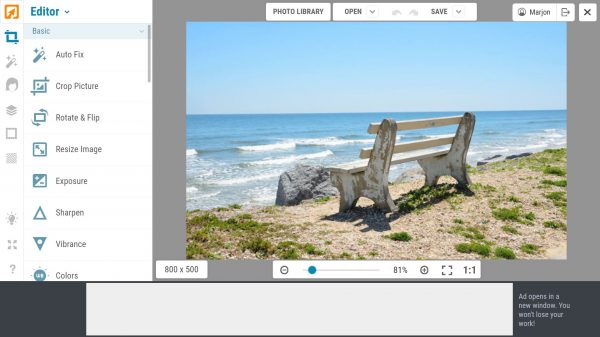
Basic functions are common for most online photo editing software, and iPiccy offers it all for free. Under this, there are various tools to customize your image however you want. You can crop, resize, rotate, and even flip your image horizontally or vertically. You can also adjust the exposure, vibrance, and sharpness as well as the white balance, hue, and saturation. The Basic functions also include the Auto Fix tool which fixes the Light and Tint, but you may also fix the Light only.
To start using some basic editing tools, you must first, of course, have an image to edit. You can import an image from your computer or use one of the three sample images that iPiccy provides. There is a high chance that you would upload an image since you came to iPiccy to edit one.
Assuming you’re already in the Editor mode, you can click the Open option to start importing your image. iPiccy will show you the Basic Editor tools by default, so you will see the Basic functions right away from the left panel. You can choose which tool you want to use on your image and see its preview as you click on the tool. You can also adjust the settings for each tool to achieve the look you want your image to have and apply it once done.
Advanced Functions
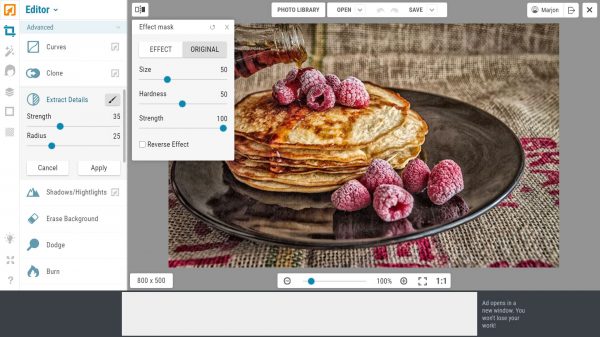
Aside from the basic functions, there are also advanced ones from the Basic Editor that you can use to edit your photos. Under this, there are tools that allow you to apply a little more advanced editing features to enhance your image. While some tools may still ask you to sign in, the benefits that you get from these features make getting an iPiccy account worth it.
From the Advanced functions, you can dodge, burn, and draw on your image as well as adjust the RGB levels. You can also erase parts of your image, say the background of an object or the object itself using the Erase Background tool. You can access all of these even without signing in, making iPiccy an amazing online photo editor. The tools that would need an account are Curves, Clone, Extract Details, Shadows/Highlights, and Liquify.
To use any of these, go to the Basic Editor option and scroll down to the Advanced functions. Click the editing option you want to apply and adjust the settings according to your liking. If you want to pucker or bloat an object from your image, you can use the Liquify tool. You can also clone an object or any element from your image using the Clone tool, so there are many things you can do.
Adjustments
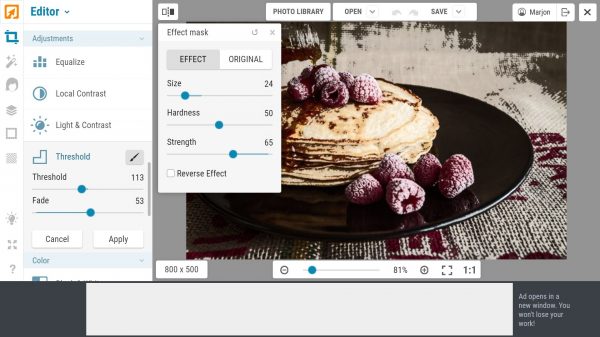
There are only a few tools under this function, but you might want to explore them so you know when you can use some. The Adjustments function from the Editor Mode lets you Equalize, adjust the Light and Contrast, and apply Threshold. If you want to redistribute the tones on your image, you may use the Equalize tool. If your concern is the brightness and contrast of your image, the Light & Contrast tool is your best option.
Another tool under Adjustments is the Threshold, which lets you turn the colors of an image into black and white to analyze easier. You can do these functions by going to the Basic Editor option and scrolling down on the Adjustments. Click on the tool you want to use, adjust it according to how you want it to be, and click Apply.
Color Tools

Another set of tools that you will find under the Basic Editor option from Photo Editor mode is the Color. This is where you can adjust the colors of your image, obviously, as well as add a color tint. These color tools would help you add more life to the image that you will edit, so using them would benefit your project. You can also reverse the colors on your image using the Invert tool to see more details on your photo with precision. You will also find two effects under this set of color tools that you can use to have a Black and White or Sepia image.
To find out what these tools are, go to the Color option from the Basic Editor and click the tool you want to use. You will see a preview as you click on a specific tool and once it aligns with your preference, click Apply. You can also pick an area to apply the color settings by clicking the Effect mask beside each tool. Check the Reverse Effect so you can see the original photo and click on the part of the image where you want to apply the settings. You may change the size, hardness, and strength of the effect so you can customize it however you want.
Filters
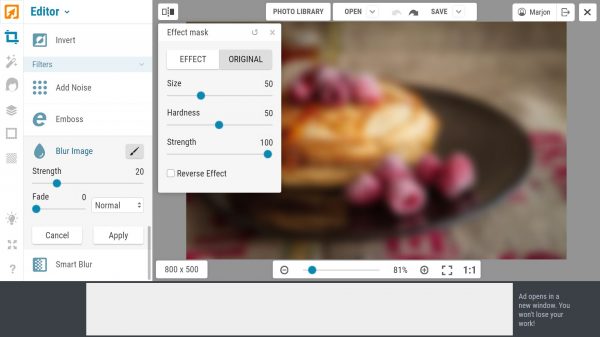
The last set of tools from the Basic Editor options is the Filters, where you will see a few tools to customize your image. With this, you can emboss your image, blur it in various ways, or add noise to create a grainy effect. You can also pick a part of the image where you want to apply any of these filters, giving you more customization options. This is perfect if you want to blur the faces of the people caught in your outstanding shot. This can also come in handy if you make a certain part of an image stand out.
To use these filters, go to Photo Editor mode and scroll down to Filters under the Basic Editor options. Choose what filter you want to use and adjust the strength, fade, or size, whichever applies. If you want to apply a filter on a specific part, click the Effect mask beside the tool you want to use and check the Reverse Effect. Change the settings accordingly and click on the part of the image where you want to apply the filter. Once done, click the Apply button.
Photo Effects
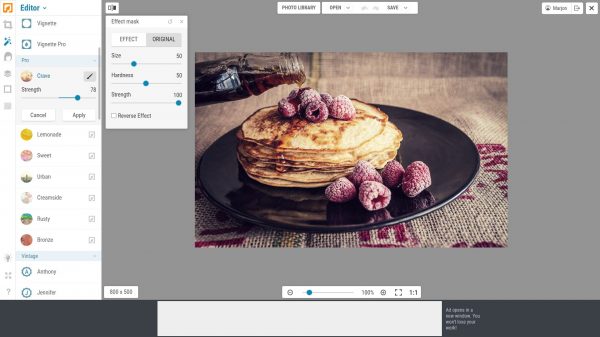
Another tool available from the Photo Editor mode is the Photo Effects where you can see effects to enhance your image’s total look. This is a common feature that you can find on different social media platforms such as Facebook, Twitter, and of course, Instagram. Users would apply effects to make their photos look less plain and to have a more artistic vibe. This said, if you’re looking for effects that could establish a mood in your image, iPiccy is the one for you.
There is a wide selection of photo effects ranging from the Basics like Sepia and Vignette to the Advanced ones like HDR. There are also different sets of photo effects you can use to achieve a vintage feel or a sketch-like image. If you want to play with colors, you can also try some Color effects such as Duotone, Rainbow, and Cross Process. There is also a set of effects under the Area option like Focal Zoom and Fancy Focus that lets you apply the effect on the area you assign. You can do this, too, with the rest of the photo effects using the Effect mask tool so you’ll have fun trying them all.
You will find these effects under the Photo Effects option on the left panel and you can choose whatever you want to apply to your image. If you want to apply a certain effect on a specific part only, click the Effect mask beside the effect and check the Reverse Effect. It will show the original look of the image, so all you need to do is click on the part where you want to apply the effect. Once you finish, click the Apply button.
Retouch
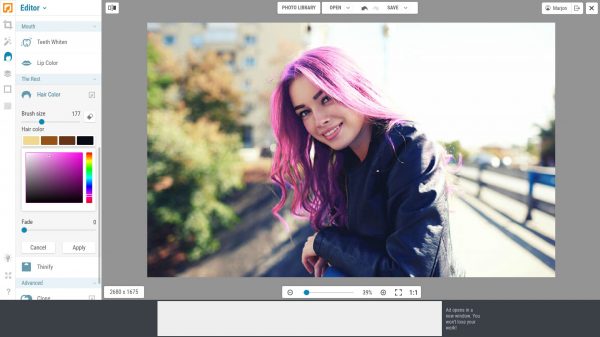
There might have been a time when you took a selfie and your skin seemed a little pale or your cheeks didn’t look pink enough. Or maybe you had sore eyes, and you wanted to do something to make it look like you didn’t have it from the images you took. Lucky you, because this online photo editing software offers features to help you with that. iPiccy has a Retouch option that includes several tools to make a little enhancement for your selfie.
The tools under the Retouch option are grouped according to their specific functions and purposes. To do some retouch on your skin, say remove wrinkles or put a blush to your cheeks, you can find tools under the Skin option. If you want to make some changes to your eyes, say fix red eyes or change eye color, the tools are under the Eyes option. There are also tools from the Mouth option to whiten teeth or change lip color, while the tool to change hair color is under the Rest option. You may want to zoom in on the image to apply the effect perfectly.
A little reminder that although you want to use some of these features to enhance your looks, remember that you are beautiful even without them. However, if applying any of these gives you more confidence, do it because there is nothing wrong with wanting to look better. Let no one say otherwise as long as it makes you happy.
Frames

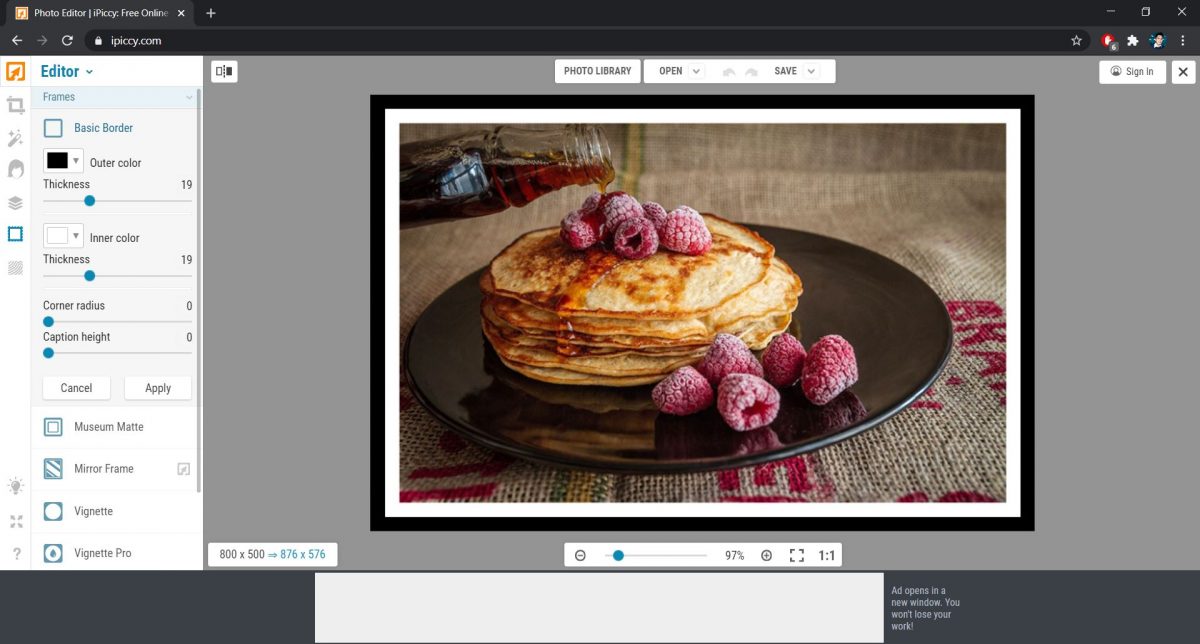
Adding a frame to your image can sometimes give more aesthetic to it as well as create more impact than the ones without one. This also allows you to express your creativity more so you can explore what else you can do with your image. With only a few yet amazing frames available in iPiccy, you wouldn’t have a hard time picking which suits your image.
You can use the Basic Border to have an inner and outer frame on your image with the color you prefer. There are also Vignette frames to help further establish the subject at the center of the image. You can choose between the Dark and Light Vignette effect in the Vignette Pro tool. From the Frames option, you can also add a drop shadow that you can overlay with a plain color or transparent background. It is also possible to make the corners of your image rounded or you can choose which corner you only want to be rounded.
A Mirror Frame is also available to let you mirror the edges of the image and turn it into a frame. You should note, however, that this needs you to sign in before you can apply it to your image. All the mentioned frames are customizable so you can change the size, color, effect strength, and many more. You can find these on the Frames option from the left panel.
Textures
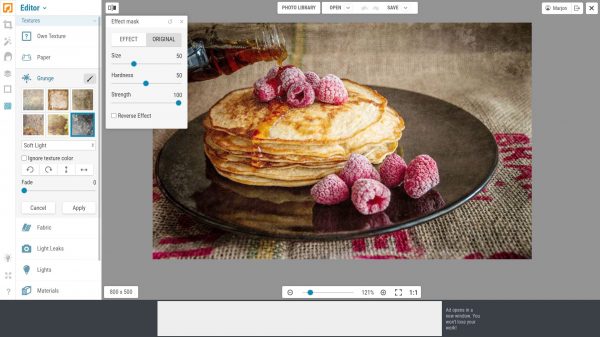
The last editing option from the Photo Editor mode of iPiccy is the Textures. This is where you can find various textures that would seem as though it was on the canvas. There are various kinds of textures you can apply to your image, and they are available in different categories.
There are Paper textures where you can see different selections such as vintage and crumpled paper and the one with writings, too. You can also use some Fabric, Lights, and Material textures to give your image the desired effect. There is also the Nature category where you can find textures such as grass, fire, and clouds. You can also upload an image and turn it into a texture using the Own Texture tool. With this, you can have whatever texture and texture effect you prefer.
What’s great about iPiccy is you can also pick an area where you want to apply any of the mentioned textures. You can also rotate the texture or flip it to get the position that fits well with your photo. That said, you have all the customization options you need to make your image a masterpiece.
iPiccy Collage Maker Tools
Another thing you can do with iPiccy is to make a photo collage and exploring it is easy. You can only do a few things in this mode so you wouldn’t get lost while putting your images together. To see what options you have, here are the tools you’ll need to make a wonderful collage.
Collage Templates
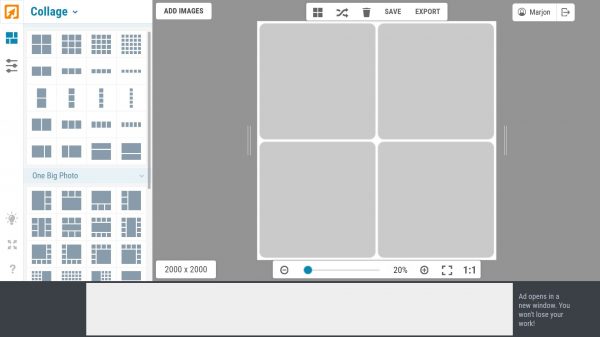
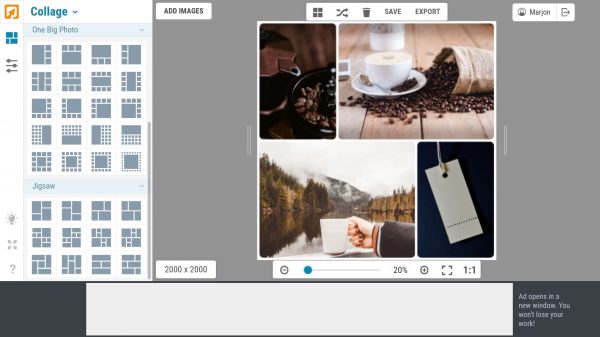
Having a lot of wonderful photos and wanting to put them together can be a great idea. To turn that idea into a real thing, you can make a photo collage so you can see and appreciate multiple photos all at once. The good thing is iPiccy offers various photo templates, so all you need to do is prepare all your images to get started. The collage templates will open by default when you choose to make a collage so you wouldn’t have to find it.
These templates from iPiccy have three different groups which are the Basic, One Big Photo, and Jigsaw. The Basic templates have a layout with equal size for all photos while the One Big Photo, well, has a spot for one photo bigger than the rest. There are also Jigsaw collage templates where you will see different layouts for photos with different sizes. You can start adding images as soon as you pick a template.
Add Images
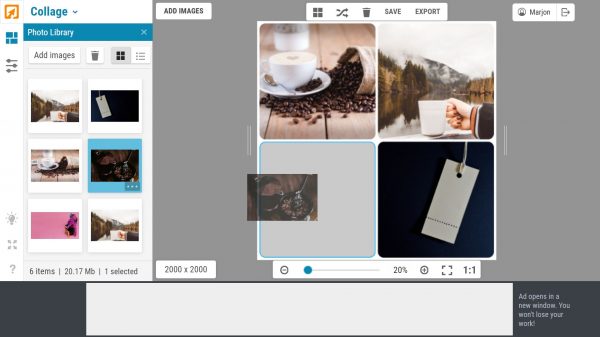
When making a collage, of course, you would need photos to bring together and iPiccy lets you do this without a sweat. You can add your photos by clicking the Add Images button and importing some image files to iPiccy. Again, there is no stock library, so your only option is to get files from your computer. The images you import will go straight to the Photo Library so you can simply drag and drop each file onto the template. There is also an Auto-fill option on the upper part of the editor, allowing you to transfer the images onto the template with ease.
If you want to rotate, flip, or enlarge your image, you can click on the pencil button on its upper-right part. You can switch the placement of the images you put by dragging the image onto the part where you want to place it. You can also shuffle images in the collage to put images in different places using the shuffle tool beside the Auto-fill tool. If you want to remove a photo from the collage, you can move the cursor over the image and click the X button. You can also remove all the images from the collage by clicking the trash icon on the upper part of the editor.
Collage Settings
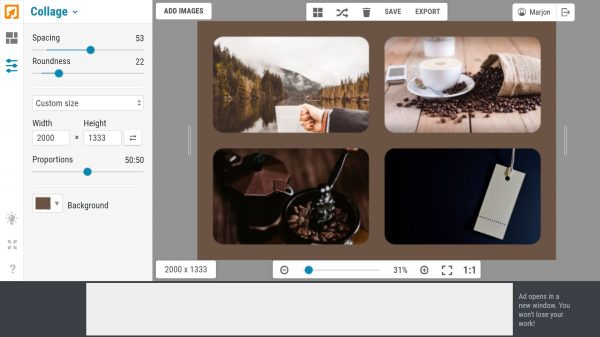
Now that you are done with setting up your images, we will move on to the collage settings. Here you will adjust the spacing, roundness, background, and size of your photo collage. You would still have the power to customize everything using the sliders for each tool. The first thing you would want to do is pick your preferred size so you wouldn’t have to readjust the rest.
You will have various options for the size of your collage such as Square, Wide 16:9”, and even Facebook Cover ratio. You can also customize the size to get the exact size you want by adjusting the Width and Height settings or the Proportions sliders. If you want to change the orientation, you can swap the width and height using the Swap tool.
After that, you can now set the Spacing and Roundness according to how you want the images to turn out. You can also set whatever background color you want using the Advanced Mode under the Background color options. If you want a specific color from the images on your collage, you may use the Eyedropper Tool. Once you finish, you can download your photo collage to your computer by clicking the Save button.
iPiccy Graphic Designer Tools
As mentioned earlier, you can also do graphic designing in iPiccy, aside from photo editing and collage making. While this mode only has a few tools, you can do a lot more to your image than you thought. To give you a better understanding of its functions, here are the things you can do in Designer mode.
Add Image

Creating a graphic design includes adding a lot of elements to make an exceptional output. One of those elements that you can add is the image which this part is all about. It is one of the most vital components as it helps clarify the information that the layout is trying to present. This can also help establish a clearer message to the audience, making the design more effective. iPiccy lets you add an image with ease, so it is not one of the things that you should worry about.
To add an image, click the Add Image button and choose from the Photo Library that would slide in on the left panel. Move the cursor to the image you want to put on your project and click the three dots on its lower right. There will be three options that would appear so click the Add Item option to add it to the graphic design. You may also drag and drop the images from the Photo Library onto your project. If the Library is empty, you can click the Add Images option and import files from your computer.
If you add multiple image files, you can arrange the positioning of the images or do some customizations on each. You can fade, flip, or send the image back or forward as well as add some effects. To do any of these, go to the Layers option and click the image you want to edit, and adjust the settings you want to apply.
Add Text
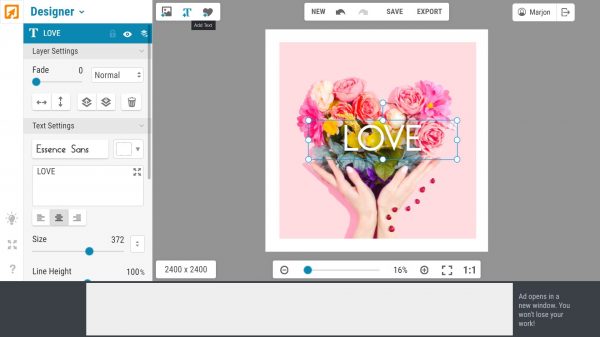
Another thing you can do to your image from the iPiccy Graphic Designer mode is to add text. The same with images, the text is a vital part of a design as it would also help you, as a designer, communicate with your audience. This is an element that you would most likely use since it is the direct way to explain the content. Text is also useful in designs such as infographics or announcements to give enough information aside from the visuals.
To add text to your design, click the Add Text option from the upper part of the editor. It will then show you all the options you have to customize your text settings according to your preference. You can type in your text on the Text Box and pick a font that matches your design from the various choices available in iPiccy. You can also change its size and color as well as adjust the letter spacing and the line’s height. There are also available Effects for the text such as Drop Shadow and Background, giving you full customization options.
If you want to flip and move your text to front or back, you can do this the same way you customize your image. The best part is you can upload your font on iPiccy so if there’s a certain font you want to use, you can add one.
Add Sticker

Aside from adding images and text to your design, you can also use a sticker to express more creativity. There are several stickers available in iPiccy that fall under different groups. There are Hearts, Arrows, and Speech Bubbles stickers from iPiccy that can contribute to your art. You may use some stickers from other authors for free, but you can also support them by purchasing their products.
To add a sticker, click the Add Sticker button and choose from the set of stickers available under different groups. You can change the color of stickers that are in full color, but you can’t do it with some objects. There are Drop Shadow and Gradient effects, though, so you can still customize it in more ways. If you want to resize the sticker, you may do so by dragging the edges or corners freely. You can also flip or send the sticker forward or behind any element, say a text or image, from the Layer Settings.
Switching Modes
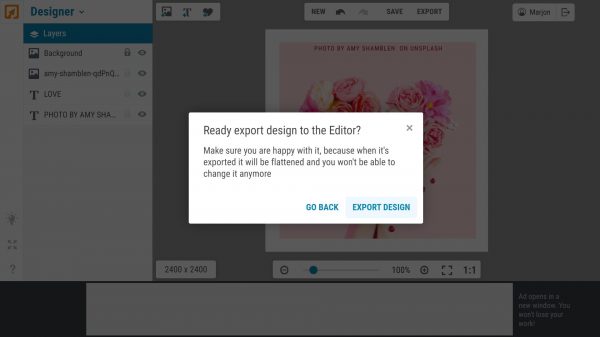
One of the questions you might have asked is if you can switch from one mode to another and continue your work. Fortunately, this is possible, however, you should note that once you switch to another mode, your image will be flattened. That said, you can no longer move or edit all the elements you added, such as images, text, and stickers. It will serve as a new image so any change in settings will apply to the base and the rest of the elements.
To switch to another mode, click the mode and choose from the drop-down where you want to continue your work. If you want to add more design to the image you edited from the Photo Editor, you can switch to Designer mode. If you want to include in a collage the design you finished, you can export it to Collage mode. You can switch from one mode to any mode, so the choice is yours to make.
Is iPiccy Worth Exploring?

This online photo editor is something you would appreciate as it offers various features for free. You wouldn’t need to install anything because all you need is an internet connection and a browser, saving you time and money. Although there is no list of the projects that you’ve worked on, it is still a great option for image editing. You can edit in full screen and in dark mode, too, so there is a lot to explore from the iPiccy.
Considering the fact that you can access everything by only creating an account, iPiccy is definitely worth it. It supports formats like JPEG and PNG but if you want to convert it to other formats, you can use some image converter. It is also easy to use so you will not have a hard time despite not having any photo editing experience. This said, go ahead and try its features because you will need nothing but time to enjoy it all.