Introduction
When it comes to web browsing, Firefox stands out as a popular choice for many users due to its user-friendly interface, robust features, and customizable options. One of the most cherished features of Firefox is its bookmarking functionality, which allows users to save and organize their favorite websites for easy access. However, have you ever wondered where these bookmarks are stored on your Windows 10 system? Understanding the location of Firefox bookmarks can be valuable, especially when it comes to backing up or transferring them to another device.
In this article, we will delve into the intricacies of Firefox bookmarks and explore their storage location within the Windows 10 operating system. Additionally, we will discuss how to access and manage these bookmarks, as well as the essential steps for backing up and restoring them. By the end of this guide, you will have a comprehensive understanding of where Firefox bookmarks are stored in Windows 10 and how to safeguard them effectively. Let's embark on this enlightening journey to unravel the mysteries behind Firefox bookmarks in Windows 10.
Location of Firefox Bookmarks in Windows 10
Firefox bookmarks in Windows 10 are stored within the user's profile directory. The profile directory contains various user-specific data, including bookmarks, browsing history, preferences, and other essential information. To locate the folder where Firefox bookmarks are stored, you need to navigate to the Firefox profile directory on your Windows 10 system.
By default, the Firefox profile directory is located in the following path:
C:\Users\YourUserName\AppData\Roaming\Mozilla\Firefox\Profiles\xxxxxxxx.default
In this path, "YourUserName" represents your Windows username, and "xxxxxxxx.default" denotes a unique alphanumeric string assigned to your Firefox profile. It's important to note that "AppData" is a hidden folder by default, so you may need to enable the option to view hidden files and folders in Windows File Explorer to access this directory.
Once you have located the Firefox profile directory, you will find a file named "places.sqlite." This file serves as the database where Firefox stores bookmarks and browsing history. While the "places.sqlite" file contains the bookmark data, it is not intended to be directly manipulated by users. Instead, Firefox provides built-in tools for managing bookmarks within the browser interface.
Understanding the location of Firefox bookmarks in Windows 10 is crucial for various purposes, such as creating backups, transferring bookmarks to another device, or troubleshooting issues related to bookmark data. With this knowledge, users can confidently navigate to the Firefox profile directory and access the underlying files that store their valuable bookmark information.
In the next section, we will explore how to access Firefox bookmarks within the browser interface on a Windows 10 system, providing insights into managing and organizing bookmarks effectively.
How to Access Firefox Bookmarks in Windows 10
Accessing Firefox bookmarks in Windows 10 is a straightforward process that allows users to conveniently manage and organize their saved websites. Whether you want to revisit your favorite pages, categorize bookmarks into folders, or delete outdated links, Firefox provides intuitive tools for accessing and manipulating your bookmark collection. Here's a step-by-step guide on how to access Firefox bookmarks within the browser interface on a Windows 10 system:
-
Open Firefox Browser: Launch the Firefox browser on your Windows 10 computer. You can do this by clicking on the Firefox icon in the taskbar, desktop, or Start menu. Once the browser is open, you will see the familiar Firefox interface with the address bar, tabs, and menu options.
-
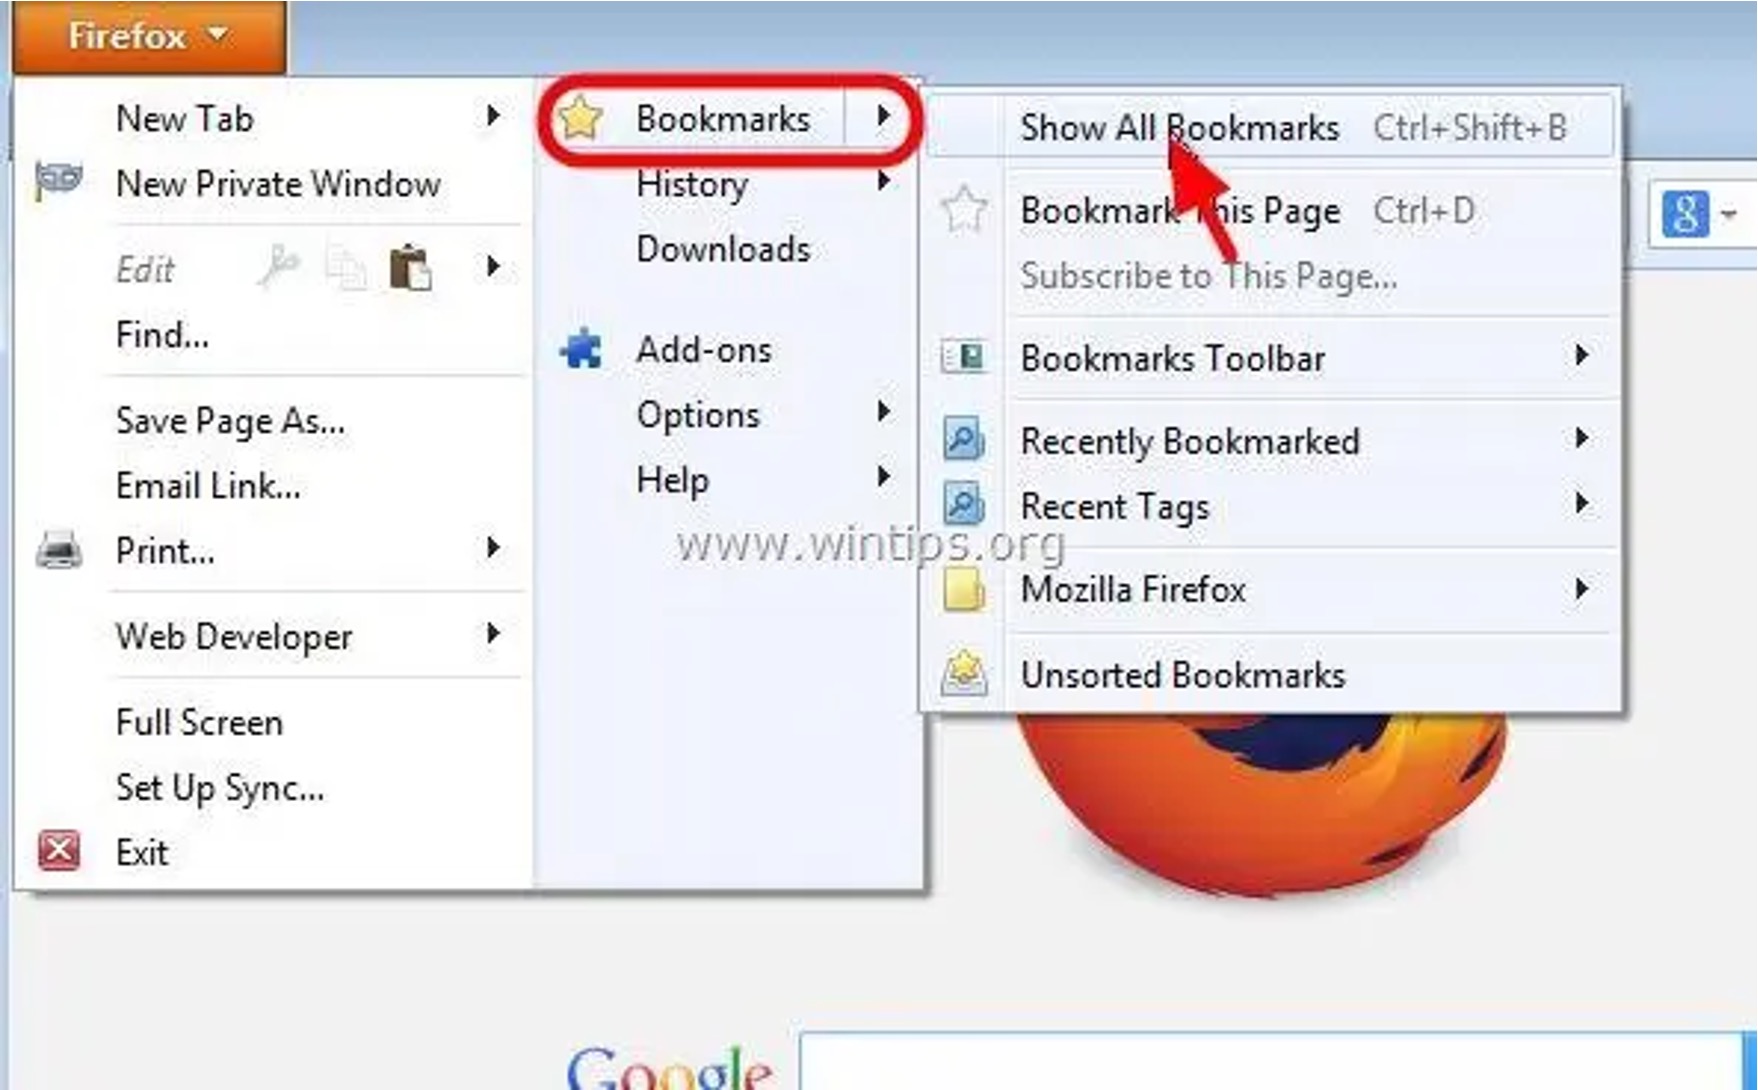
Navigate to the Bookmarks Menu: At the top of the Firefox window, you will find the bookmarks menu. Click on the "Bookmarks" option in the top navigation bar to reveal a drop-down menu. Here, you will see various options, including "Show All Bookmarks," "Bookmark This Page," and any bookmark folders you have created.
-
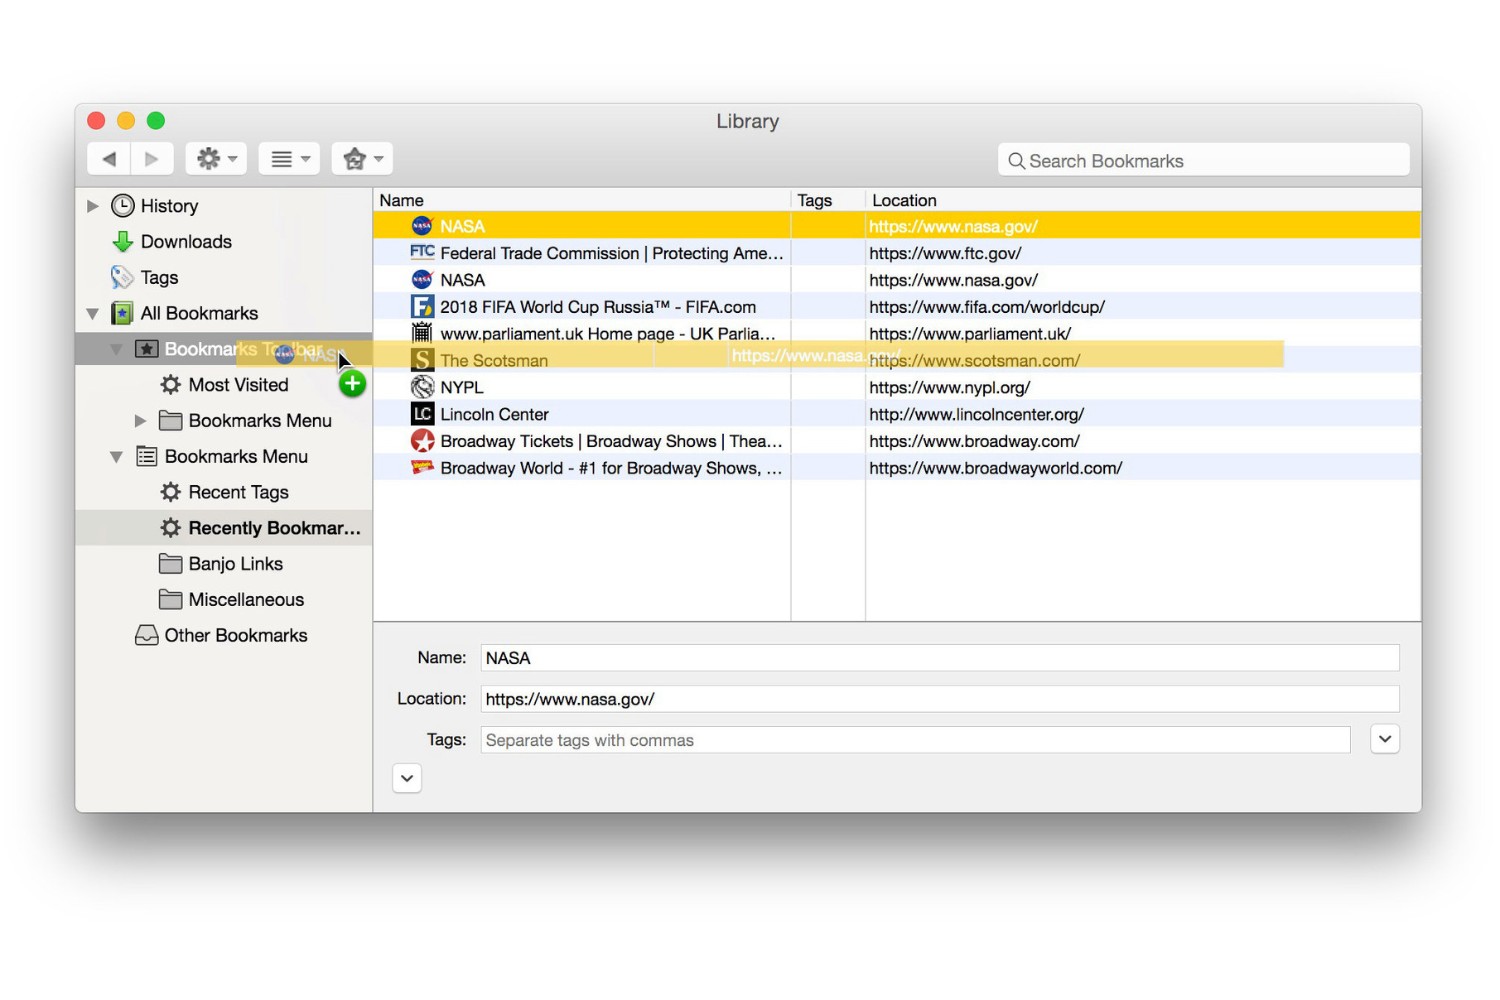
Select "Show All Bookmarks": From the bookmarks drop-down menu, click on the "Show All Bookmarks" option. This action will open the Firefox Library, which provides a comprehensive view of your bookmarks, bookmark folders, and browsing history.
-
Explore Bookmarks and Folders: Within the Firefox Library, you can explore your bookmarks and bookmark folders. The left-hand panel displays a hierarchical view of your bookmarks, allowing you to navigate through different folders and subfolders. You can click on individual bookmarks to open the corresponding web pages or manage them using the available options.
-
Manage Bookmarks: Firefox offers several options for managing bookmarks, such as creating new folders, organizing bookmarks into existing folders, editing bookmark properties, and deleting bookmarks. You can right-click on a bookmark to access these management options or use the toolbar at the top of the Library window.
-
Utilize Bookmark Tools: Firefox provides additional tools for managing bookmarks, including the bookmark sidebar, bookmark tags, and the bookmark search feature. These tools enable users to efficiently organize and locate specific bookmarks based on tags, keywords, or browsing history.
By following these steps, users can effortlessly access and manage their Firefox bookmarks within the browser interface on a Windows 10 system. Whether it's arranging bookmarks into folders, editing bookmark properties, or utilizing advanced bookmark management tools, Firefox empowers users to take full control of their bookmark collection for a personalized browsing experience.
Backing up and Restoring Firefox Bookmarks in Windows 10
Backing up and restoring Firefox bookmarks in Windows 10 is a critical aspect of safeguarding valuable web links and ensuring seamless access to bookmarked sites across devices. By creating backups of your Firefox bookmarks, you can mitigate the risk of data loss due to system failures, browser issues, or device transitions. Additionally, the ability to restore bookmarks from a backup provides peace of mind, especially when encountering unexpected data loss scenarios.
Backing Up Firefox Bookmarks
To back up your Firefox bookmarks in Windows 10, you can utilize the built-in bookmark backup feature within the Firefox browser. Follow these steps to create a backup of your bookmarks:
-
Open the Firefox Library: Launch the Firefox browser and navigate to the bookmarks menu. From the drop-down menu, select "Show All Bookmarks" to open the Firefox Library.
-
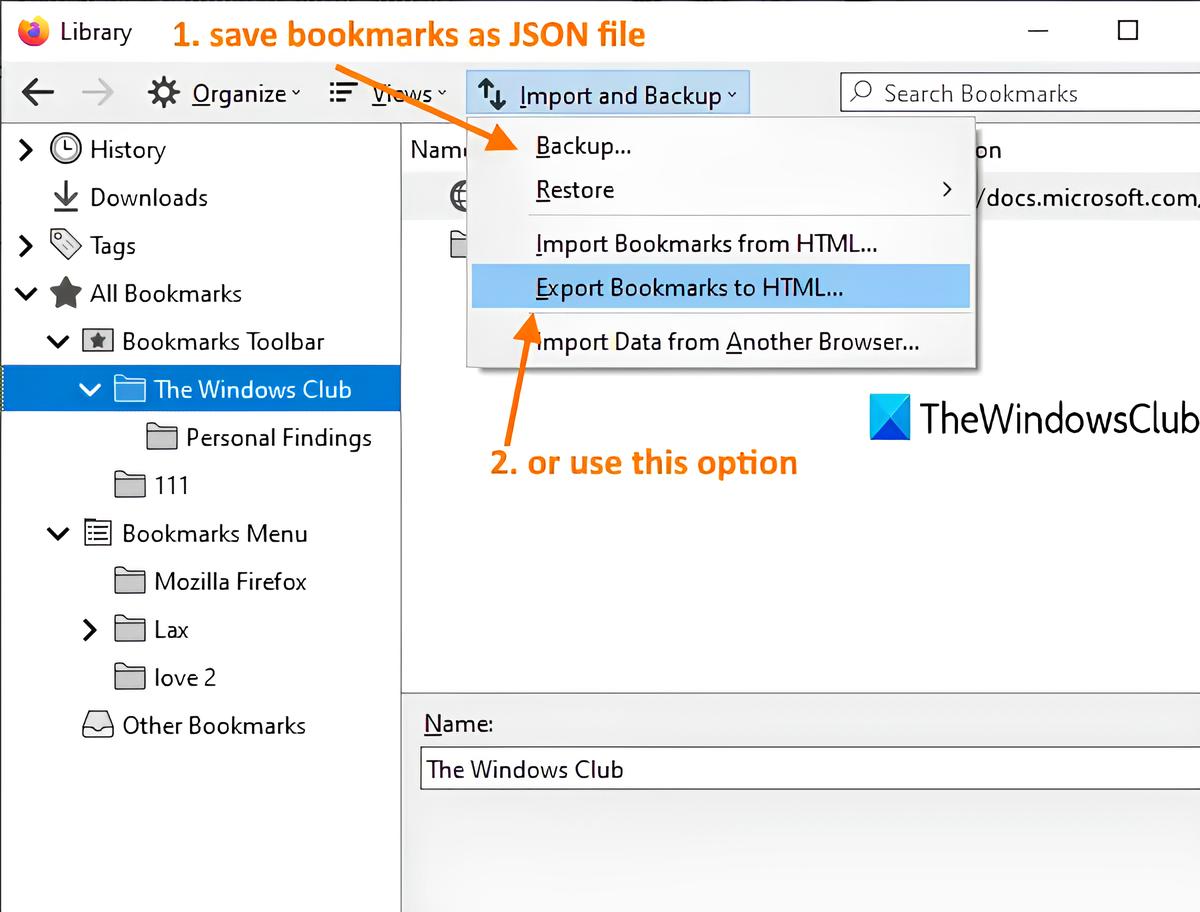
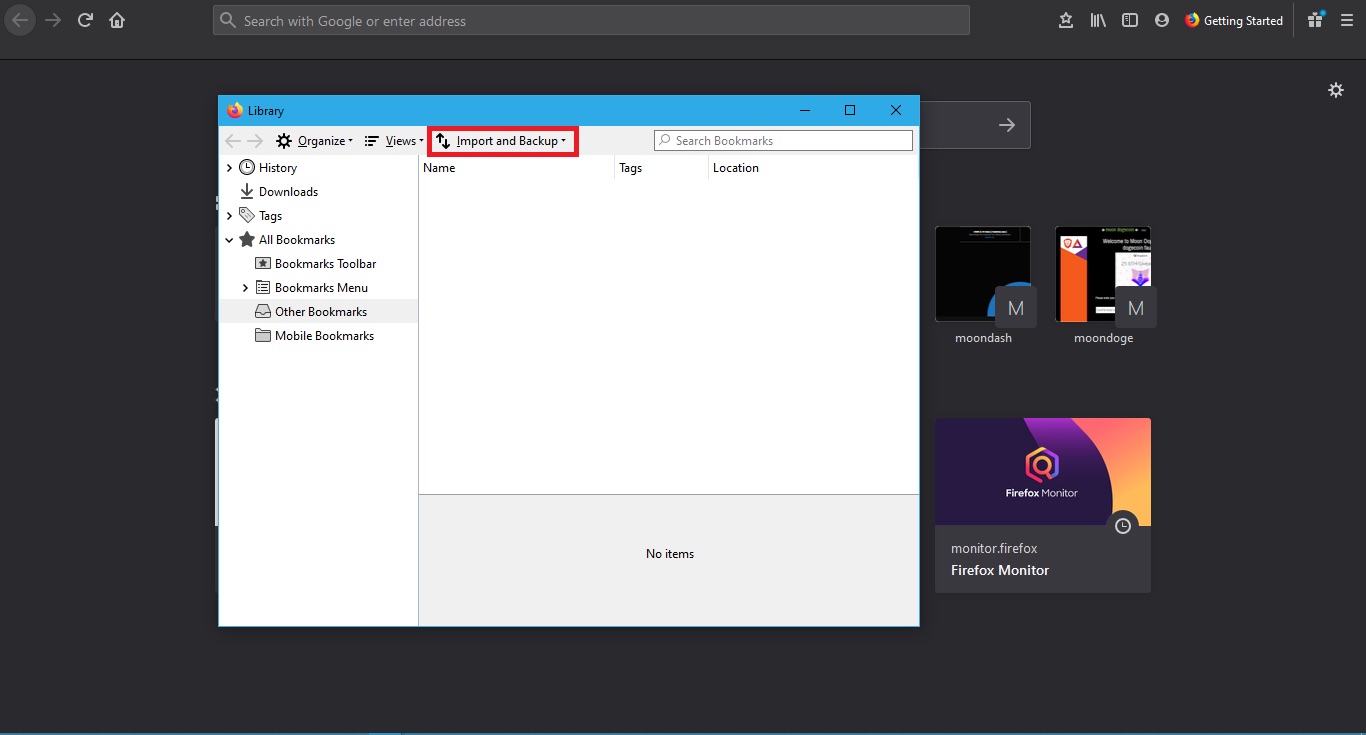
Access the Import and Backup Menu: Within the Firefox Library, click on the "Import and Backup" option located in the top menu bar. This will reveal a sub-menu with various backup and restore options.
-
Choose "Backup": From the "Import and Backup" sub-menu, select the "Backup" option. Firefox will prompt you to choose a location to save the bookmark backup file. Select a convenient location on your Windows 10 system, such as the desktop or a designated backup folder.
-
Save the Backup File: After selecting the backup location, Firefox will save your bookmarks as a compressed JSON file with a ".json" extension. This file contains all your bookmark data and can be used to restore bookmarks in the future.
Restoring Firefox Bookmarks
In the event of bookmark loss or when setting up a new Windows 10 system, you can easily restore your Firefox bookmarks using the backup file created earlier. Follow these steps to restore your bookmarks:
-
Open the Firefox Library: Launch the Firefox browser on your Windows 10 system and access the Firefox Library by clicking on the bookmarks menu and selecting "Show All Bookmarks."
-
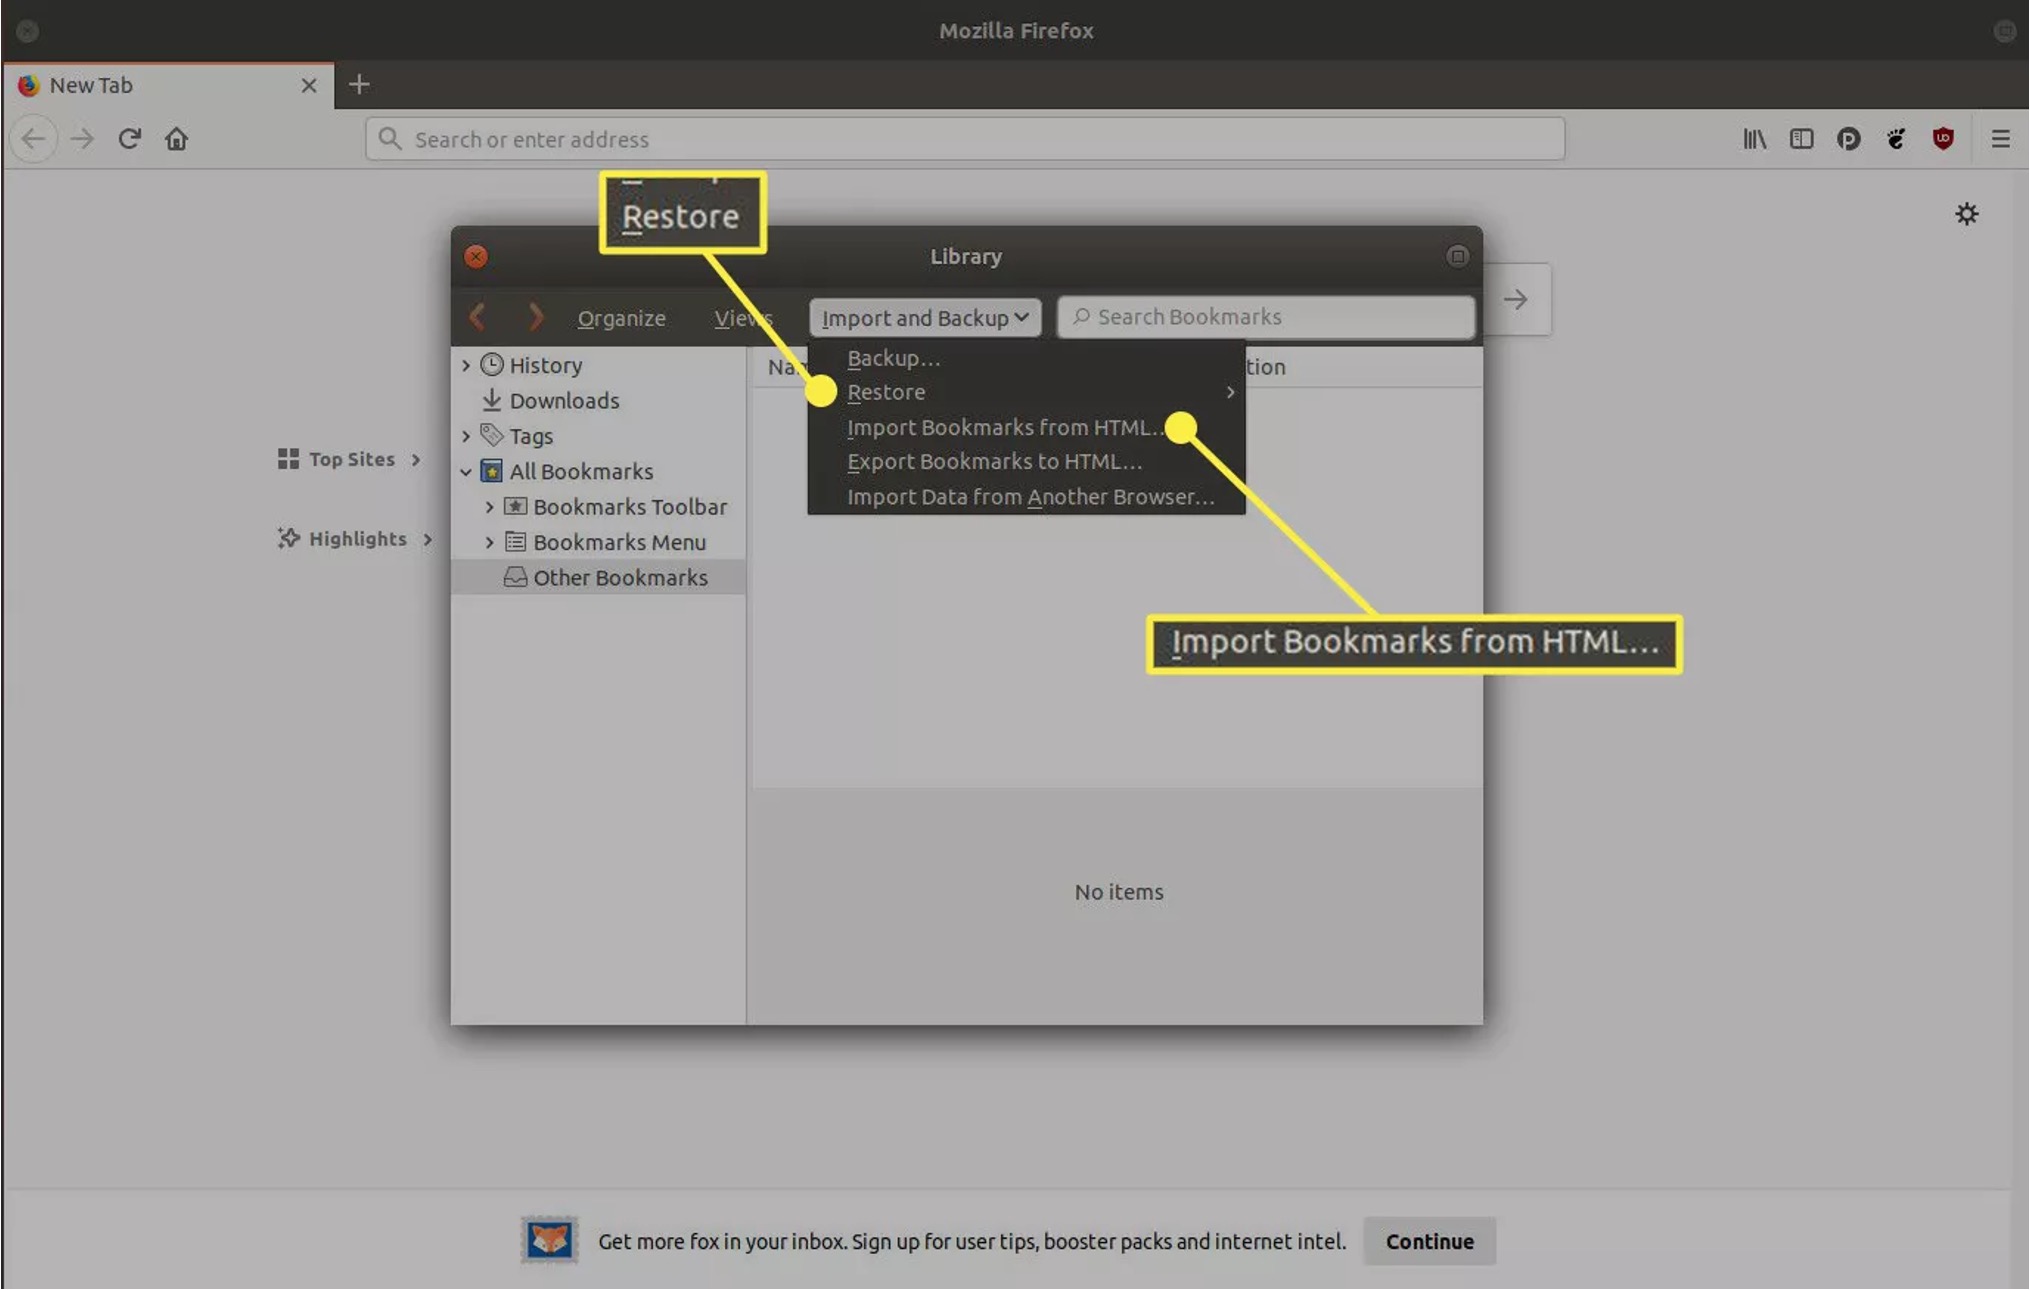
Access the Import and Backup Menu: Within the Firefox Library, click on the "Import and Backup" option in the top menu bar to reveal the sub-menu.
-
Choose "Restore": From the "Import and Backup" sub-menu, select the "Restore" option. Firefox will prompt you to locate the bookmark backup file on your Windows 10 system.
-
Select the Backup File: Navigate to the location where you saved the bookmark backup file, select the file, and click "Open." Firefox will then restore your bookmarks from the selected backup file, ensuring that your saved web links are reinstated within the browser.
By following these steps, you can effectively back up and restore your Firefox bookmarks in Windows 10, providing a safety net for your valuable bookmark collection and ensuring a seamless browsing experience across devices. With the ability to create backups and restore bookmarks as needed, users can confidently manage their bookmark data and enjoy uninterrupted access to their favorite websites.