Introduction
Are you tired of losing track of the websites you were browsing when switching between your computer, smartphone, or tablet? It can be frustrating to find yourself on a different device and unable to recall the webpage you were viewing moments ago. Fortunately, with the help of Chrome's syncing capabilities, you can seamlessly access the same tabs across all your devices. This means that you can start browsing on one device and pick up right where you left off on another, without missing a beat.
Chrome's tab syncing feature is a game-changer for anyone who uses multiple devices throughout the day. Whether you're researching a topic for work, catching up on the latest news, or simply browsing your favorite websites, having your tabs synced across devices ensures a smooth and uninterrupted browsing experience.
In this article, we'll delve into the intricacies of setting up Chrome sync, accessing synced tabs on other devices, and troubleshooting common sync issues. By the end of this guide, you'll be equipped with the knowledge and tools to seamlessly sync your browsing experience across all your devices, making it easier than ever to stay connected and productive in today's digital world. So, let's dive in and explore the wonders of Chrome tab syncing!
Setting Up Chrome Sync
Setting up Chrome sync is a straightforward process that allows you to seamlessly access your browsing data, including bookmarks, history, passwords, and open tabs, across all your devices. By following a few simple steps, you can ensure that your browsing experience remains consistent and uninterrupted, regardless of the device you're using. Here's how to set up Chrome sync:
-
Sign in to Chrome: To begin syncing your browsing data, sign in to your Google account within the Chrome browser on each of your devices. This ensures that your browsing data is securely linked to your account and can be accessed across all your devices.
-
Access Sync Settings: Once signed in, access the sync settings by clicking on the profile icon in the top-right corner of the Chrome browser window. From the dropdown menu, select "Turn on sync" to initiate the syncing process.
-
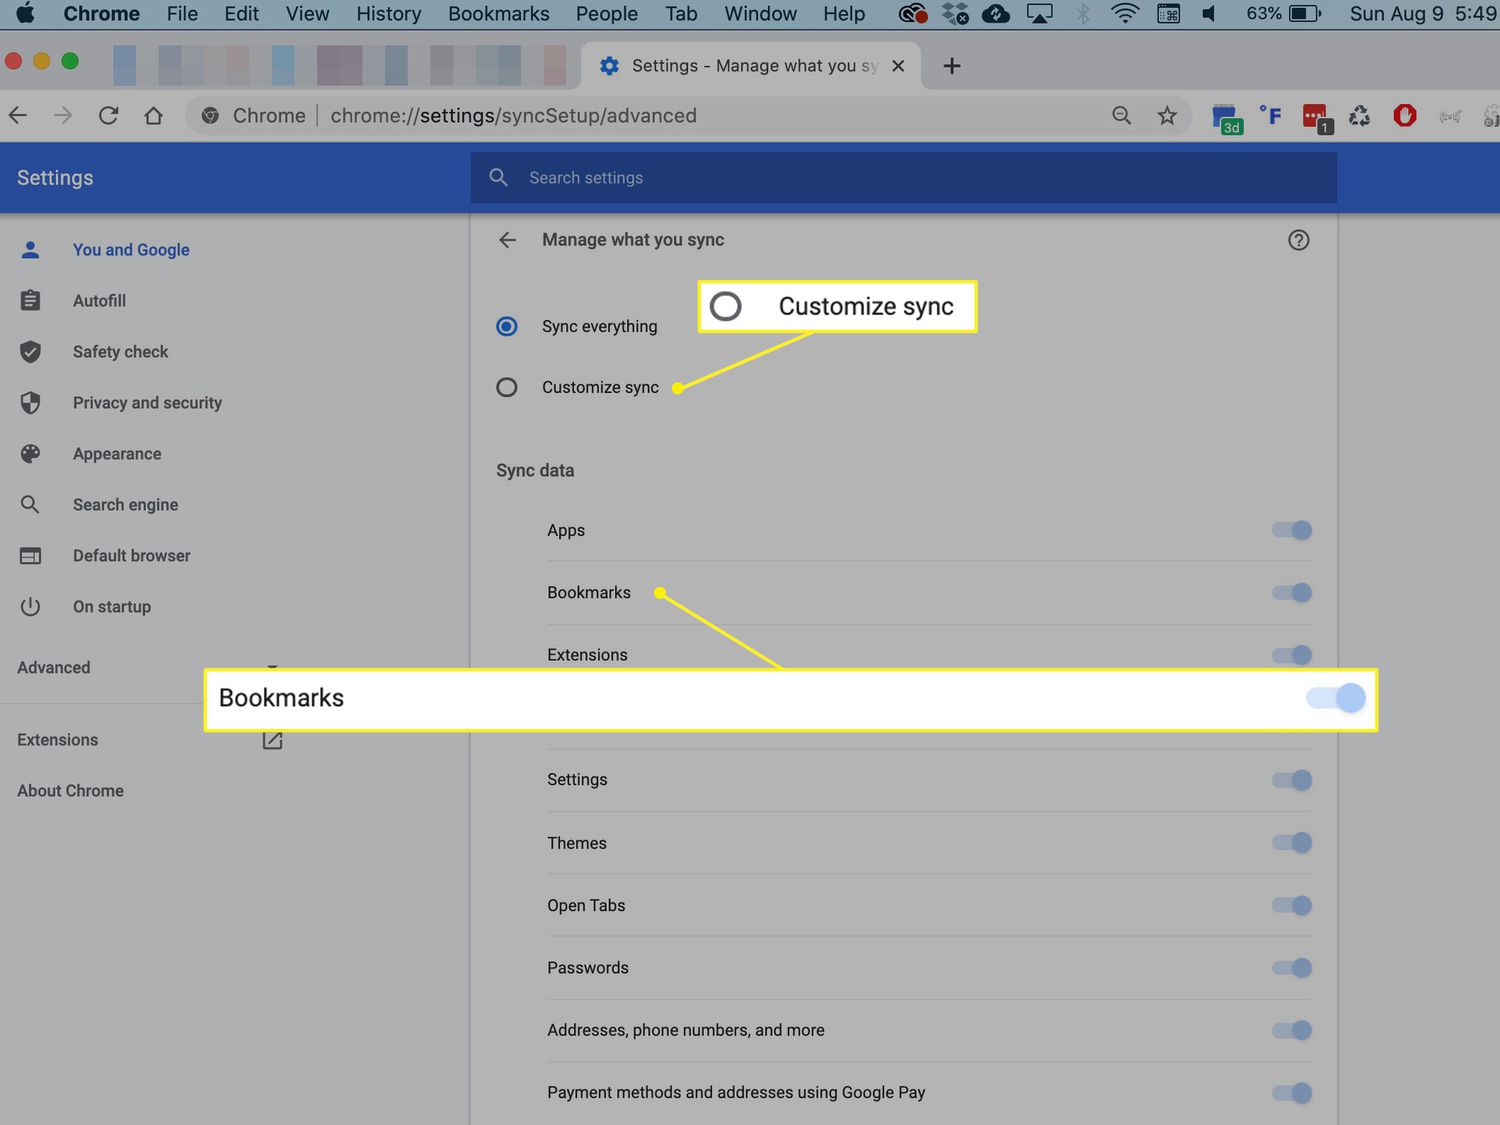
Customize Sync Options: Chrome provides the flexibility to customize which types of data you want to sync across your devices. You can choose to sync browsing history, bookmarks, passwords, and open tabs based on your preferences. This allows you to tailor the syncing process to suit your specific needs.
-
Encryption and Security: Chrome sync employs encryption to ensure the security and privacy of your synced data. This means that your browsing information is encrypted before being transmitted and stored, providing a secure and reliable syncing experience.
-
Verify Sync Status: Once you've completed the setup process, verify the sync status to ensure that your browsing data is being successfully synced across your devices. You can do this by accessing the sync settings and confirming that the desired data types are being synchronized.
By following these steps, you can effortlessly set up Chrome sync and enjoy a seamless browsing experience across all your devices. With your browsing data securely synced, you can transition between devices with ease, knowing that your tabs, bookmarks, and other browsing information are readily accessible whenever and wherever you need them. Chrome sync simplifies the way you interact with the web, empowering you to stay connected and productive across your digital ecosystem.
Accessing Synced Tabs on Other Devices
Once you have successfully set up Chrome sync across your devices, accessing synced tabs becomes a seamless and convenient process. Whether you're transitioning from your computer to your smartphone or vice versa, the ability to pick up where you left off on any device enhances your browsing experience. Here's how you can effortlessly access synced tabs on other devices:
1. Open Chrome Browser:
To access synced tabs on a different device, open the Chrome browser and ensure that you are signed in with the same Google account used to set up Chrome sync. This step is crucial as it establishes the connection between your browsing data and your account, enabling the seamless transfer of synced tabs.
2. Access the Tab Overview:
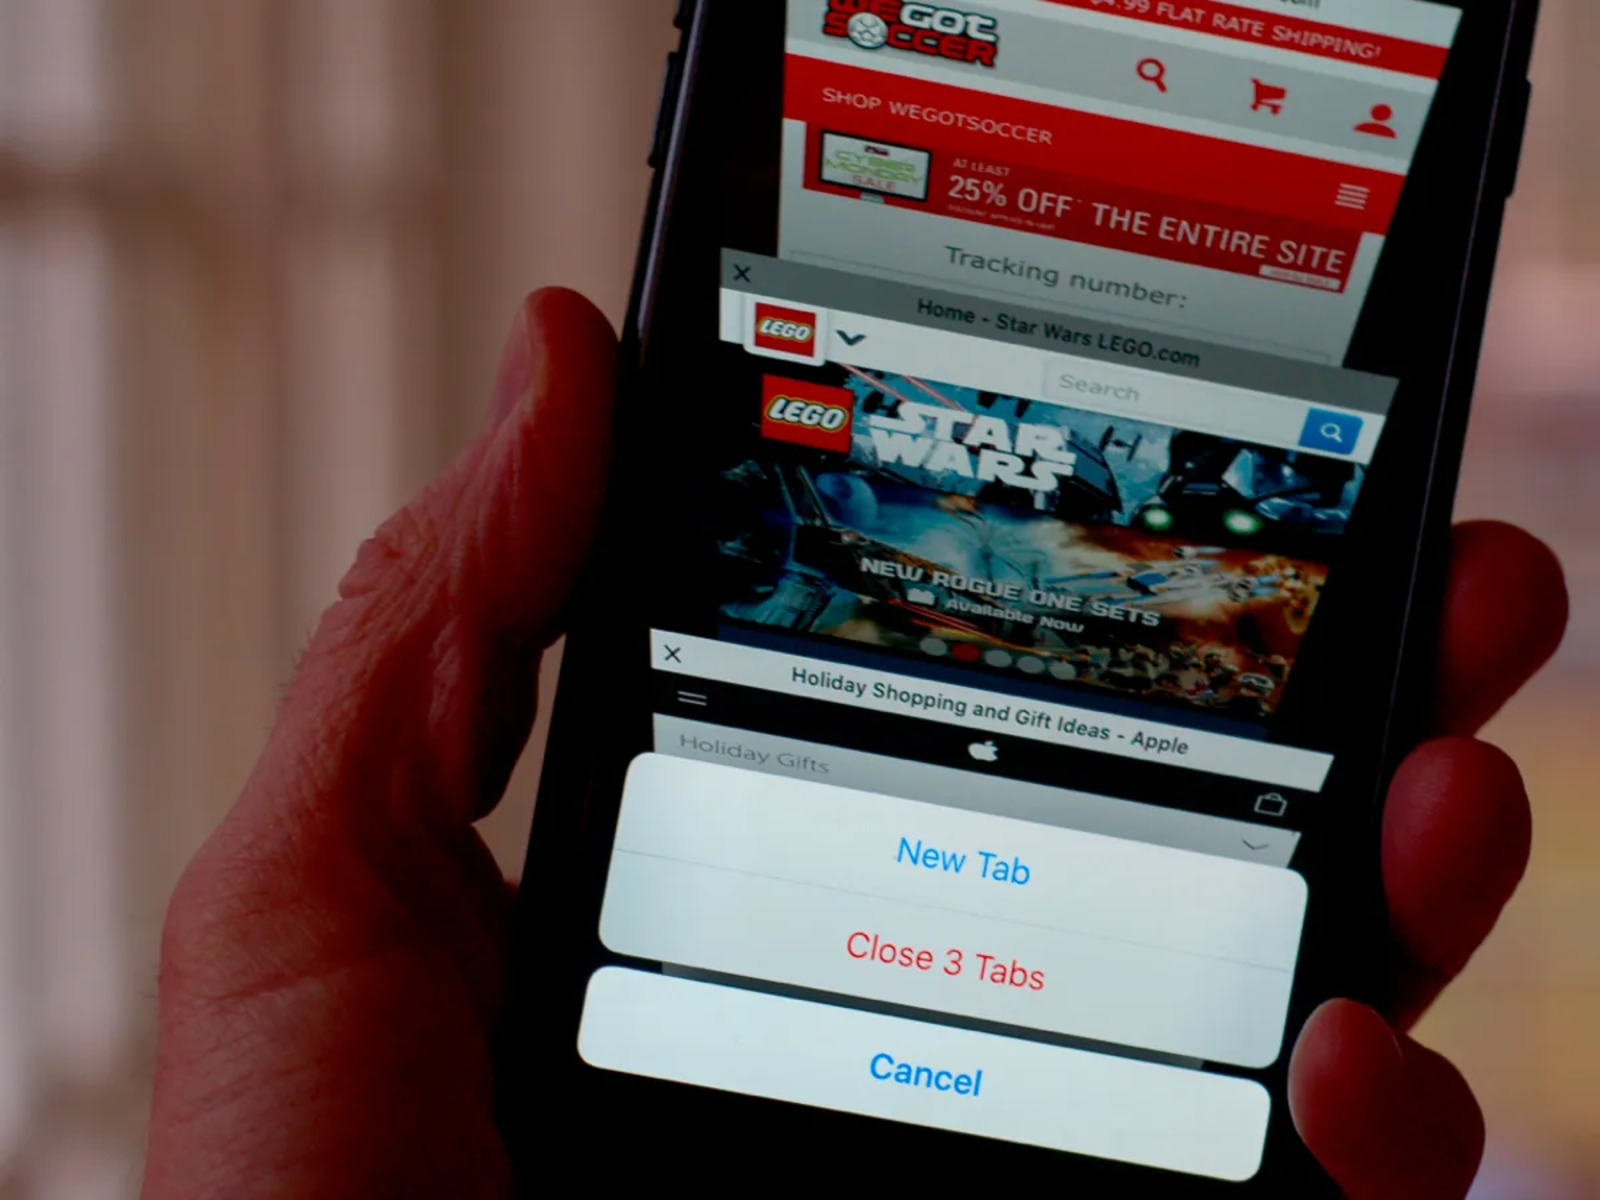
Once the Chrome browser is open, navigate to the tab overview interface. On desktop, this can be done by clicking the square icon located in the top-right corner of the browser window. On mobile devices, the tab overview can be accessed by tapping the square icon typically found in the top-right or bottom-right corner of the browser interface.
3. View Synced Tabs:
Within the tab overview interface, you will find a section dedicated to synced tabs. By selecting this option, you can instantly view the tabs that are open on other devices linked to your Google account. This provides a comprehensive overview of your browsing sessions across all synced devices, allowing you to seamlessly transition between tabs without losing your place.
4. Continue Browsing:
Once you have accessed the synced tabs, you can effortlessly continue browsing from where you left off on any of your devices. Whether it's an article you were reading, a website you were exploring, or a project you were working on, the synced tabs feature ensures that your browsing sessions remain uninterrupted, regardless of the device you are using.
By following these steps, you can easily access synced tabs on other devices, enabling a fluid and consistent browsing experience across your digital ecosystem. Whether you're switching between your computer, smartphone, or tablet, the ability to seamlessly access synced tabs ensures that you can stay connected and productive without missing a beat. With Chrome's tab syncing capabilities, the transition between devices becomes virtually seamless, empowering you to make the most of your browsing experience.
Troubleshooting Sync Issues
Despite the seamless nature of Chrome sync, occasional issues may arise that can disrupt the syncing process across your devices. When encountering sync issues, it's essential to troubleshoot and resolve them effectively to ensure a consistent and uninterrupted browsing experience. Here are some common sync issues and troubleshooting steps to address them:
1. Sync Not Working:
If you notice that your tabs, bookmarks, or browsing history are not syncing across your devices as expected, start by checking your internet connection. A stable internet connection is crucial for the syncing process to function properly. Additionally, ensure that you are signed in to Chrome with the same Google account on all devices and that sync is enabled in the browser settings.
2. Conflicting Data:
In some instances, conflicting data may occur when syncing across multiple devices. This can lead to discrepancies in bookmarks, open tabs, or browsing history. To address conflicting data, consider resetting sync to clear any inconsistencies. This can be done by accessing the sync settings and choosing the option to reset sync. Keep in mind that this action will clear your synced data from Google's servers, so it's advisable to back up any important information beforehand.
3. Clearing Synced Data:
If you encounter persistent sync issues, clearing the synced data on a specific device and re-syncing it can help resolve the problem. This involves accessing the sync settings on the affected device and choosing the option to clear synced data. Once the data is cleared, re-enable sync to initiate a fresh syncing process, which may alleviate any underlying issues.
4. Update Chrome:
Outdated versions of the Chrome browser can sometimes lead to sync issues. Ensure that you are using the latest version of Chrome on all your devices to take advantage of the most recent bug fixes and improvements related to syncing. Updating Chrome to the latest version can often resolve underlying sync issues and enhance the overall syncing experience.
5. Check Google Account Status:
Occasionally, sync issues may be attributed to the status of your Google account. Verify that your Google account is in good standing and that there are no account-related issues affecting the syncing process. This can be done by accessing your Google account settings and reviewing any notifications or alerts that may indicate account issues.
By addressing sync issues through these troubleshooting steps, you can ensure that your browsing data remains consistently synced across all your devices. Chrome's syncing capabilities are designed to provide a seamless and reliable experience, and by troubleshooting and resolving any sync issues that arise, you can maintain a smooth and uninterrupted browsing experience across your digital ecosystem.