Introduction
Google Chrome is one of the most popular web browsers in the world, known for its speed, simplicity, and user-friendly interface. Whether you're experiencing technical issues, want to ensure you have the latest version, or need to troubleshoot a problem, reinstalling Google Chrome can be a straightforward solution. In this guide, we'll walk you through the step-by-step process of reinstalling Google Chrome on your computer. By following these instructions, you can ensure that you have a clean and updated installation of the browser, potentially resolving any issues you may have encountered.
Reinstalling Google Chrome can be beneficial for various reasons. It can help address performance issues, such as slow loading times or unresponsive tabs, and resolve compatibility problems with websites and extensions. Additionally, reinstalling the browser can ensure that you have the latest security updates and features, providing a more secure and seamless browsing experience.
Whether you're using a Windows, Mac, or Linux operating system, the process of reinstalling Google Chrome is relatively similar. However, it's essential to follow specific steps to ensure a successful reinstallation and to preserve your bookmarks, settings, and extensions. In the following sections, we'll guide you through the process of uninstalling Google Chrome, downloading the latest version, and installing it on your computer. We'll also cover how to restore your bookmarks and settings to ensure a smooth transition to the newly installed browser.
By the end of this guide, you'll have the knowledge and confidence to reinstall Google Chrome, empowering you to maintain a reliable and optimized browsing experience. Whether you're a casual internet user or a seasoned professional, having a well-functioning web browser is essential for accessing information, staying connected, and maximizing productivity. Let's dive into the step-by-step process of reinstalling Google Chrome and ensure that you're equipped with the latest version of this popular browser.
Uninstalling Google Chrome
Uninstalling Google Chrome is a straightforward process that can be completed using the built-in uninstallation tools on your computer. Whether you're experiencing technical issues with the browser or simply want to perform a clean reinstall, removing Google Chrome from your system is the first step in the process. Here's a detailed guide on how to uninstall Google Chrome from your Windows or Mac computer.
Uninstalling Google Chrome on Windows
-
Using the Control Panel:
- Click on the "Start" button and open the "Control Panel."
- Navigate to "Programs" and then click on "Programs and Features."
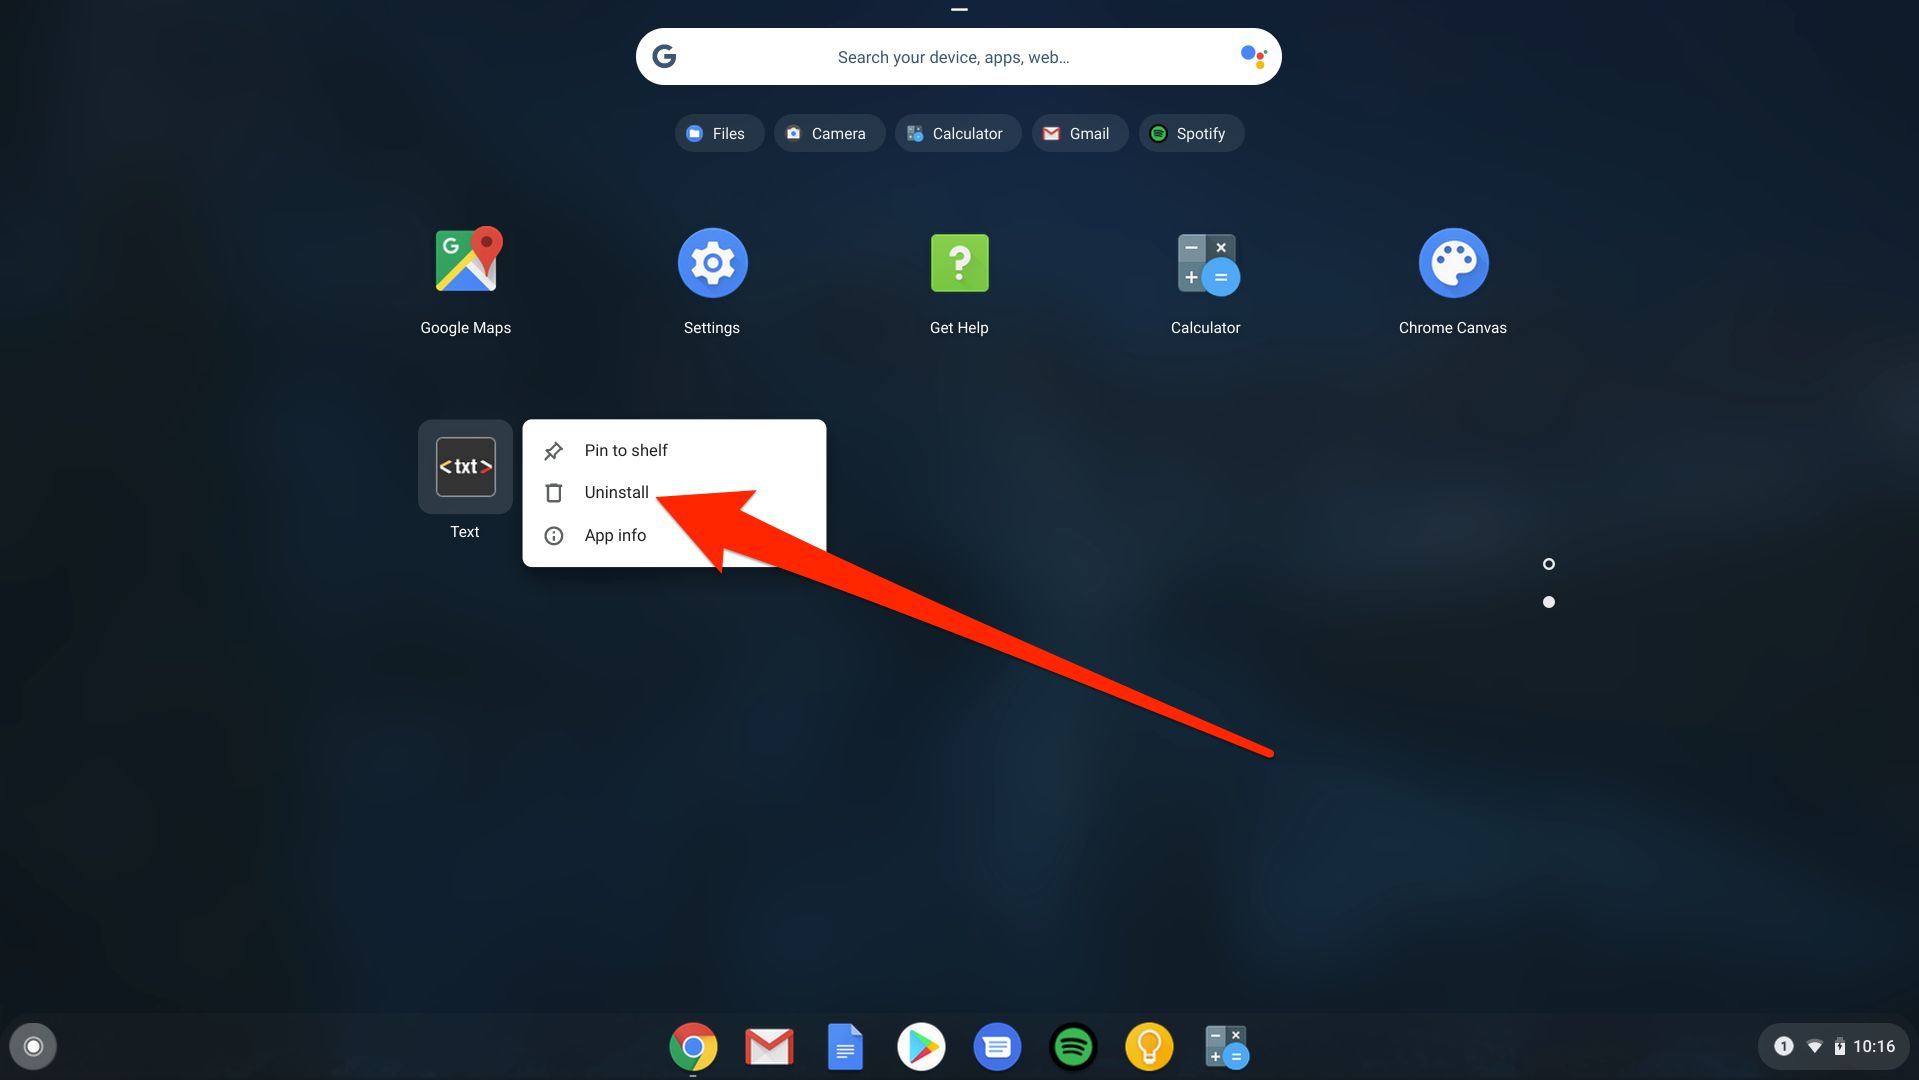
- Locate Google Chrome in the list of installed programs, right-click on it, and select "Uninstall."
-
Using the Settings App:
- Press the "Windows key + I" to open the Settings app.
- Go to "Apps" and then select "Apps & features."
- Scroll down to find Google Chrome, click on it, and select "Uninstall."
-
Using the Uninstaller Executable:
- Navigate to the installation directory of Google Chrome (usually in "C:\Program Files\Google\Chrome").
- Locate the "Uninstall" executable file and double-click on it to initiate the uninstallation process.
Uninstalling Google Chrome on Mac
-
Using the Trash:
- Open Finder and navigate to the "Applications" folder.
- Locate Google Chrome, drag its icon to the Trash in the dock, and drop it there. Alternatively, right-click on Google Chrome and select "Move to Trash."
-
Using the Uninstaller:
- Some applications, including Google Chrome, may come with an uninstaller program. Check the installation folder for an uninstaller and follow the on-screen instructions to remove the browser.
Once you have successfully uninstalled Google Chrome from your computer, you can proceed to download the latest version of the browser and perform a clean installation. This process ensures that any underlying issues with the previous installation are resolved, and you can start afresh with a clean, updated version of Google Chrome.
Uninstalling Google Chrome is a simple yet essential step in the process of reinstalling the browser. By following these instructions, you can effectively remove the existing installation and prepare your system for a fresh installation of Google Chrome, ensuring a smooth and optimized browsing experience.
Downloading the latest version of Google Chrome
Downloading the latest version of Google Chrome is a crucial step in the process of reinstalling the browser, as it ensures that you have access to the most up-to-date features, security enhancements, and performance improvements. Whether you're reinstalling Chrome due to technical issues or simply want to ensure that you're using the latest version, obtaining the browser's latest iteration is essential for a seamless and secure browsing experience.
To download the latest version of Google Chrome, follow these steps:
-
Open Your Current Browser: Regardless of the browser you're currently using, open it and navigate to the official Google Chrome website. The website's URL is straightforward: www.google.com/chrome.
-
Access the Download Page: Once you're on the Google Chrome website, locate and click on the "Download Chrome" button. This action will direct you to the download page, where you'll find the latest version of the browser tailored to your operating system.
-
Select Your Operating System: On the download page, Google Chrome automatically detects your operating system and presents the appropriate download link. If you're using a Windows computer, the download button will display "Download Chrome." For Mac users, it will show "Download Chrome for Mac," and for Linux users, it will offer the relevant download option.
-
Review the Terms of Service: Before initiating the download, take a moment to review Google's Terms of Service and Privacy Policy. These documents outline the terms and conditions of using Google Chrome and provide insights into how your data is handled. Once you've reviewed the terms, proceed to the next step.
-
Initiate the Download: Click on the download button to start the process. Depending on your browser settings, you may be prompted to confirm the download location or the installation of the downloaded file. Follow the on-screen instructions to proceed with the download.
-
Wait for the Download to Complete: The download time varies based on your internet connection speed and the size of the installation file. Once the download is complete, you're ready to proceed to the next step of installing Google Chrome on your computer.
By following these steps, you can successfully download the latest version of Google Chrome, ensuring that you have access to the most recent features and security updates. This process sets the stage for a smooth and optimized browsing experience, allowing you to benefit from the latest enhancements and improvements offered by Google Chrome.
Installing Google Chrome
Once you have successfully downloaded the latest version of Google Chrome, the next step is to install the browser on your computer. The installation process is relatively straightforward and varies slightly depending on your operating system. Whether you're using a Windows, Mac, or Linux computer, the following steps will guide you through the installation of Google Chrome.
Installing Google Chrome on Windows
-
Locate the Downloaded File: After the download is complete, navigate to the folder where the installation file is saved. This is typically the "Downloads" folder unless you specified a different location during the download.
-
Initiate the Installation: Double-click on the downloaded file to initiate the installation process. You may be prompted by the User Account Control (UAC) to confirm the action. Click "Yes" to proceed.
-
Follow the Setup Wizard: The Google Chrome setup wizard will launch. Follow the on-screen instructions to proceed with the installation. You may be presented with options to customize the installation, such as choosing the installation location and creating desktop shortcuts. Make your selections and proceed to the next step.
-
Complete the Installation: Once you've confirmed your preferences, the setup wizard will begin installing Google Chrome on your computer. The process may take a few moments to complete, depending on your system's performance. Once the installation is finished, you'll receive a confirmation message.
-
Launch Google Chrome: After the installation is complete, you can launch Google Chrome by double-clicking its desktop shortcut or searching for it in the Start menu. The browser will open, and you can proceed to customize its settings and start browsing the web.
Installing Google Chrome on Mac
-
Open the Installation Disk Image: After downloading Google Chrome, locate the installation file, which is typically a disk image file (.dmg). Double-click on the file to open the disk image.
-
Drag Chrome to Applications: In the disk image window, you'll see the Google Chrome icon. Drag the icon to the "Applications" folder to begin the installation process. This action copies the Chrome application to your Applications folder.
-
Confirm the Installation: Once the copying process is complete, navigate to your Applications folder and locate Google Chrome. Double-click on the Chrome icon to launch the browser. You may be prompted to confirm that you want to open the application downloaded from the internet. Click "Open" to proceed.
-
Start Browsing: Google Chrome will open, and you can begin using the browser to access your favorite websites, customize settings, and explore its features.
Installing Google Chrome on Linux
The installation process for Google Chrome on Linux varies based on the distribution you're using. However, it generally involves downloading the appropriate package file and using the package manager to install it. Specific instructions for different Linux distributions can be found on the official Google Chrome website.
By following these steps, you can successfully install Google Chrome on your computer, ensuring that you have access to a modern, feature-rich web browser that provides a seamless and secure browsing experience. Once the installation is complete, you can customize Chrome's settings, sign in with your Google account to sync your bookmarks and preferences, and start exploring the web with confidence.
Restoring bookmarks and settings
Restoring bookmarks and settings is a crucial step after reinstalling Google Chrome, as it allows you to seamlessly transition to the newly installed browser while retaining your personalized preferences and saved website links. By restoring your bookmarks and settings, you can ensure that your browsing experience remains familiar and tailored to your needs. Whether you've accumulated a collection of important bookmarks or customized Chrome's settings to suit your workflow, preserving this data is essential for a smooth transition.
Here's how you can restore your bookmarks and settings in Google Chrome:
Restoring Bookmarks
-
Accessing Bookmarks Manager: Open Google Chrome and click on the three-dot menu icon in the top-right corner. From the dropdown menu, select "Bookmarks" and then click on "Bookmark Manager." Alternatively, you can use the keyboard shortcut
Ctrl + Shift + O(Windows/Linux) orCommand + Option + B(Mac) to access the Bookmark Manager directly. -
Importing Bookmarks: In the Bookmark Manager, click on the three-dot menu icon and select "Import Bookmarks." Choose the option to import from the browser where you previously exported your bookmarks. If you had exported your bookmarks before reinstalling Chrome, you can select the exported HTML file to import your bookmarks back into the browser.
-
Syncing Bookmarks: If you had previously synced your bookmarks with your Google account, signing in to Chrome after reinstalling the browser will automatically sync your bookmarks back to the browser. This seamless integration ensures that your bookmarks are readily available across devices.
Restoring Settings
-
Signing in to Chrome: Signing in to your Google account within Chrome is the most efficient way to restore your settings. Click on the profile icon in the top-right corner of the browser and select "Sign in to Chrome." Enter your Google account credentials, and Chrome will sync your settings, including themes, extensions, and preferences.
-
Customizing Settings: If you prefer to manually customize your settings, navigate to the Chrome Settings by clicking on the three-dot menu icon and selecting "Settings." From here, you can personalize your browsing experience by adjusting various settings, such as search engine preferences, privacy and security options, and appearance settings.
By following these steps, you can effectively restore your bookmarks and settings in Google Chrome, ensuring that your browsing experience remains consistent and tailored to your preferences. Whether you rely on a carefully curated collection of bookmarks or have specific browser settings that enhance your productivity, preserving this data allows you to seamlessly transition to the reinstalled Google Chrome with minimal disruption.