Introduction
Chrome OS, developed by Google, is a lightweight, secure, and user-friendly operating system designed for Chromebooks. Over time, you may encounter issues with your Chromebook that necessitate a reset of the operating system. Whether you're experiencing performance issues, encountering persistent errors, or simply want to start afresh, knowing how to reset Chrome OS can be invaluable.
Resetting Chrome OS can help resolve software glitches, improve system performance, and restore your Chromebook to its original state. There are several methods to achieve this, including powerwashing your Chromebook, performing a hard reset, and reinstalling Chrome OS. Each method serves a specific purpose and can be utilized based on the nature of the issue you're facing.
In this guide, we will explore the step-by-step process of resetting Chrome OS, ensuring that you can effectively address any issues that may arise. Before proceeding with any reset method, it's crucial to back up your data to prevent any loss of important files and settings. By following the instructions outlined in this guide, you'll be equipped with the knowledge to confidently reset Chrome OS and optimize the performance of your Chromebook.
Backing Up Your Data
Before initiating any process to reset Chrome OS, it is essential to safeguard your important files, documents, and settings by backing them up. This precautionary step ensures that you can restore your data after the reset, preventing any potential loss. Chrome OS offers convenient methods to back up your data, including files, photos, and settings, providing a seamless transition during the reset process.
Backing Up Files and Documents
-
Google Drive: Utilize Google Drive, a cloud storage service integrated with Chrome OS, to securely store your files and documents. Simply drag and drop the files you want to back up into the Google Drive folder on your Chromebook, ensuring that they are safely stored in the cloud.
-
External Storage Devices: If you prefer to back up your data offline, you can use external storage devices such as USB flash drives or external hard drives. Connect the storage device to your Chromebook and transfer your important files to the device, creating a physical backup of your data.
Backing Up Photos and Media
-
Google Photos: Take advantage of Google Photos, a cloud-based service that automatically backs up your photos and videos. Ensure that your media is synced with Google Photos to preserve your precious memories and media files.
-
External Storage: Similar to backing up files and documents, you can also transfer your photos and media to external storage devices for an additional layer of backup.
Backing Up Settings and Preferences
-
Sync Settings: Chrome OS offers a seamless synchronization feature that backs up your settings, preferences, and Chrome browser data to your Google account. This ensures that your personalized settings are preserved and can be easily restored after the reset.
-
Chrome Sync: Take advantage of Chrome Sync to back up your bookmarks, browsing history, and extensions. This feature synchronizes your Chrome browser data across devices, allowing for a smooth transition after the reset.
By diligently backing up your data using the aforementioned methods, you can proceed with confidence knowing that your important files, photos, and settings are securely preserved. This proactive approach ensures that your data remains intact and accessible, facilitating a seamless restoration process after resetting Chrome OS.
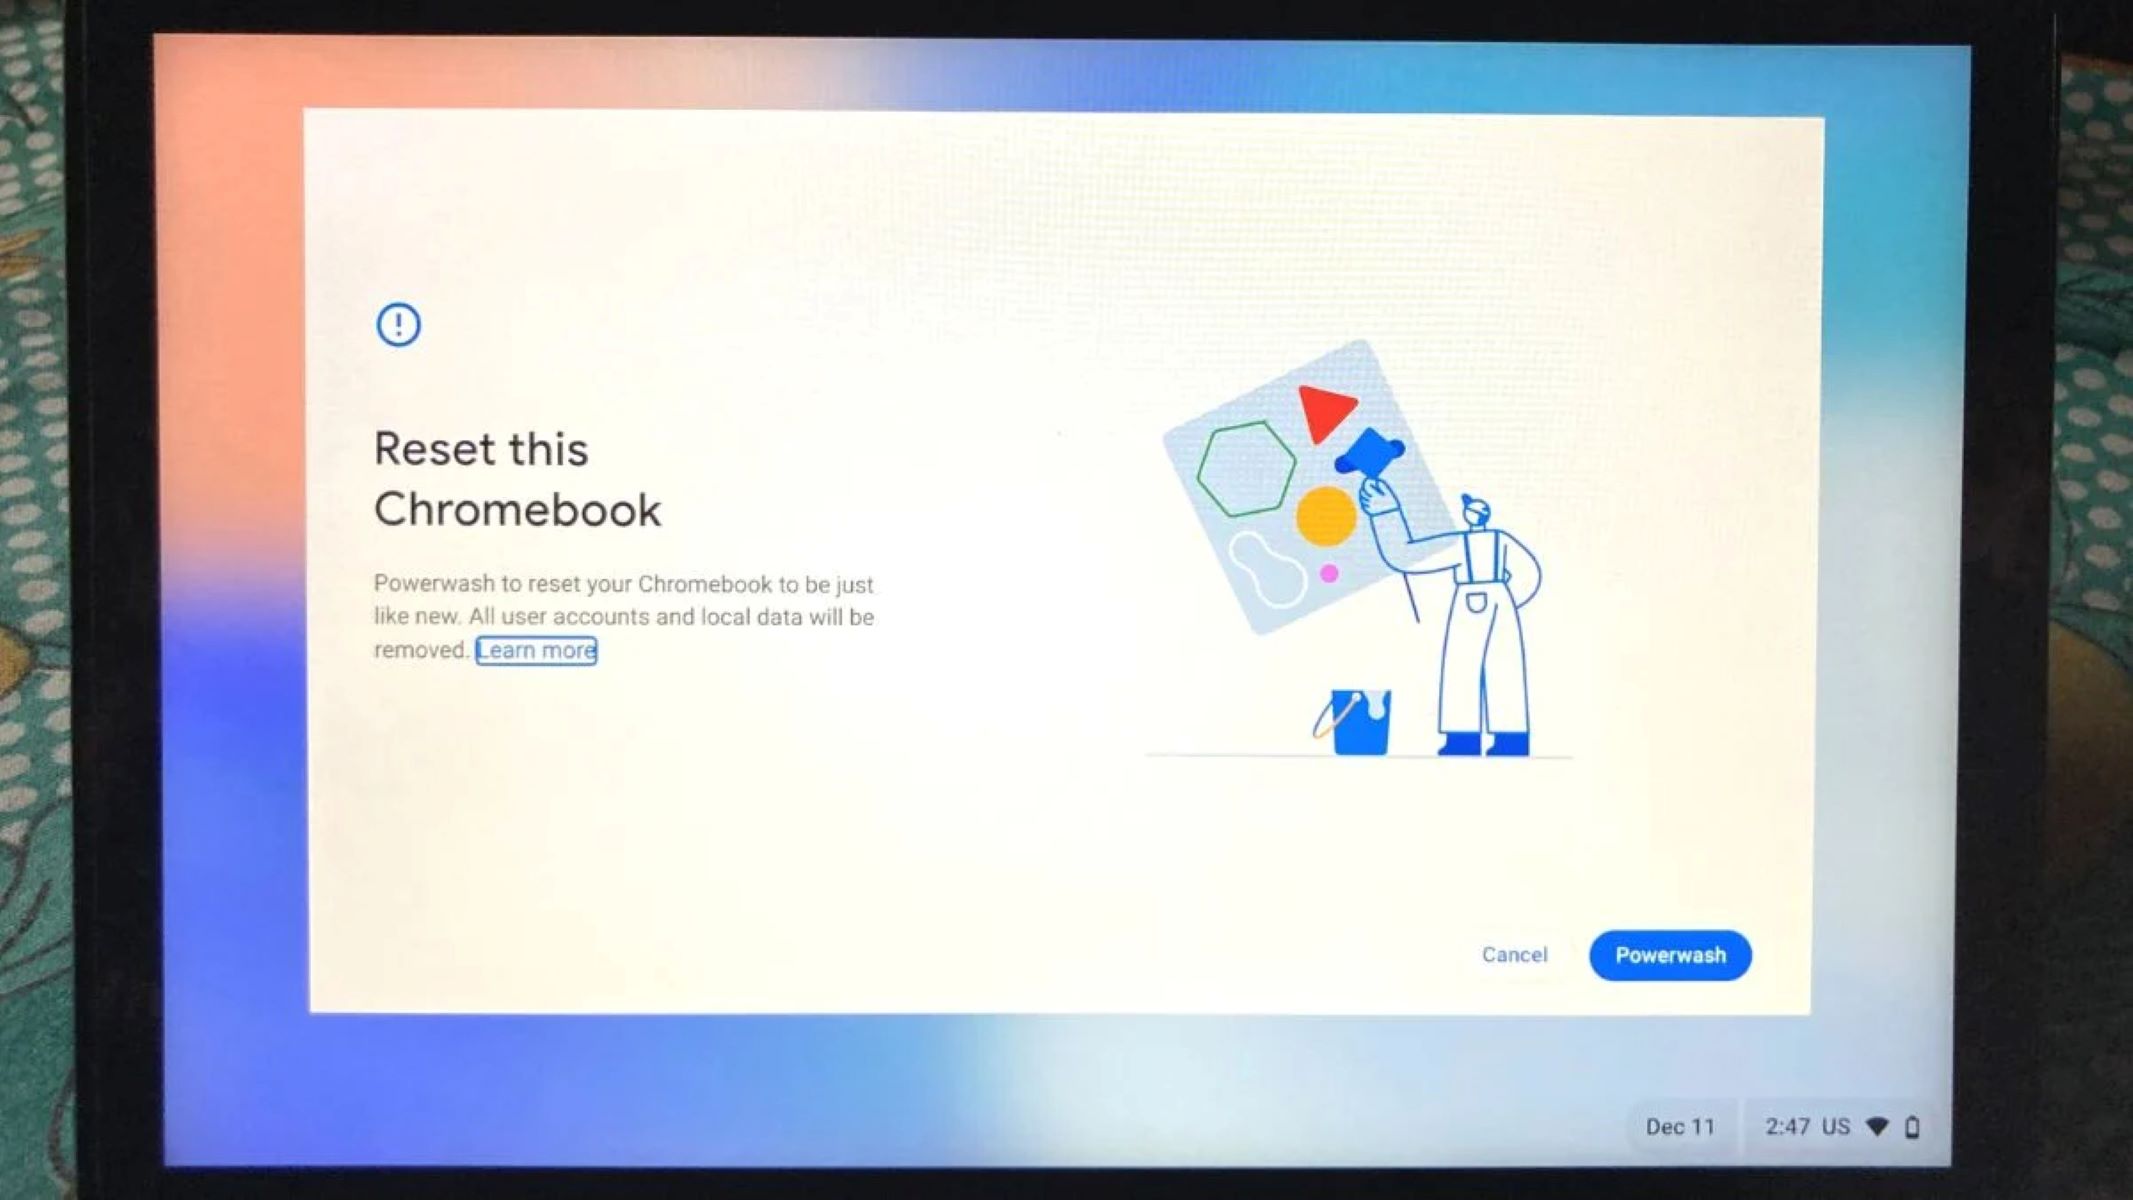
Powerwashing Your Chromebook
Powerwashing your Chromebook is a straightforward yet effective method to reset Chrome OS to its factory state, erasing all local data and settings. This process is particularly useful when you want to refresh your Chromebook, resolve persistent software issues, or prepare the device for a new user. Powerwashing ensures that your Chromebook returns to its original state, akin to the day you first unboxed it.
To initiate the powerwashing process, follow these step-by-step instructions:
-
Accessing Settings: Begin by clicking on the system tray located in the bottom-right corner of the screen. From there, select the gear-shaped icon to access the Settings menu.
-
Navigating to Advanced Settings: Within the Settings menu, scroll down and click on "Advanced" to reveal additional options.
-
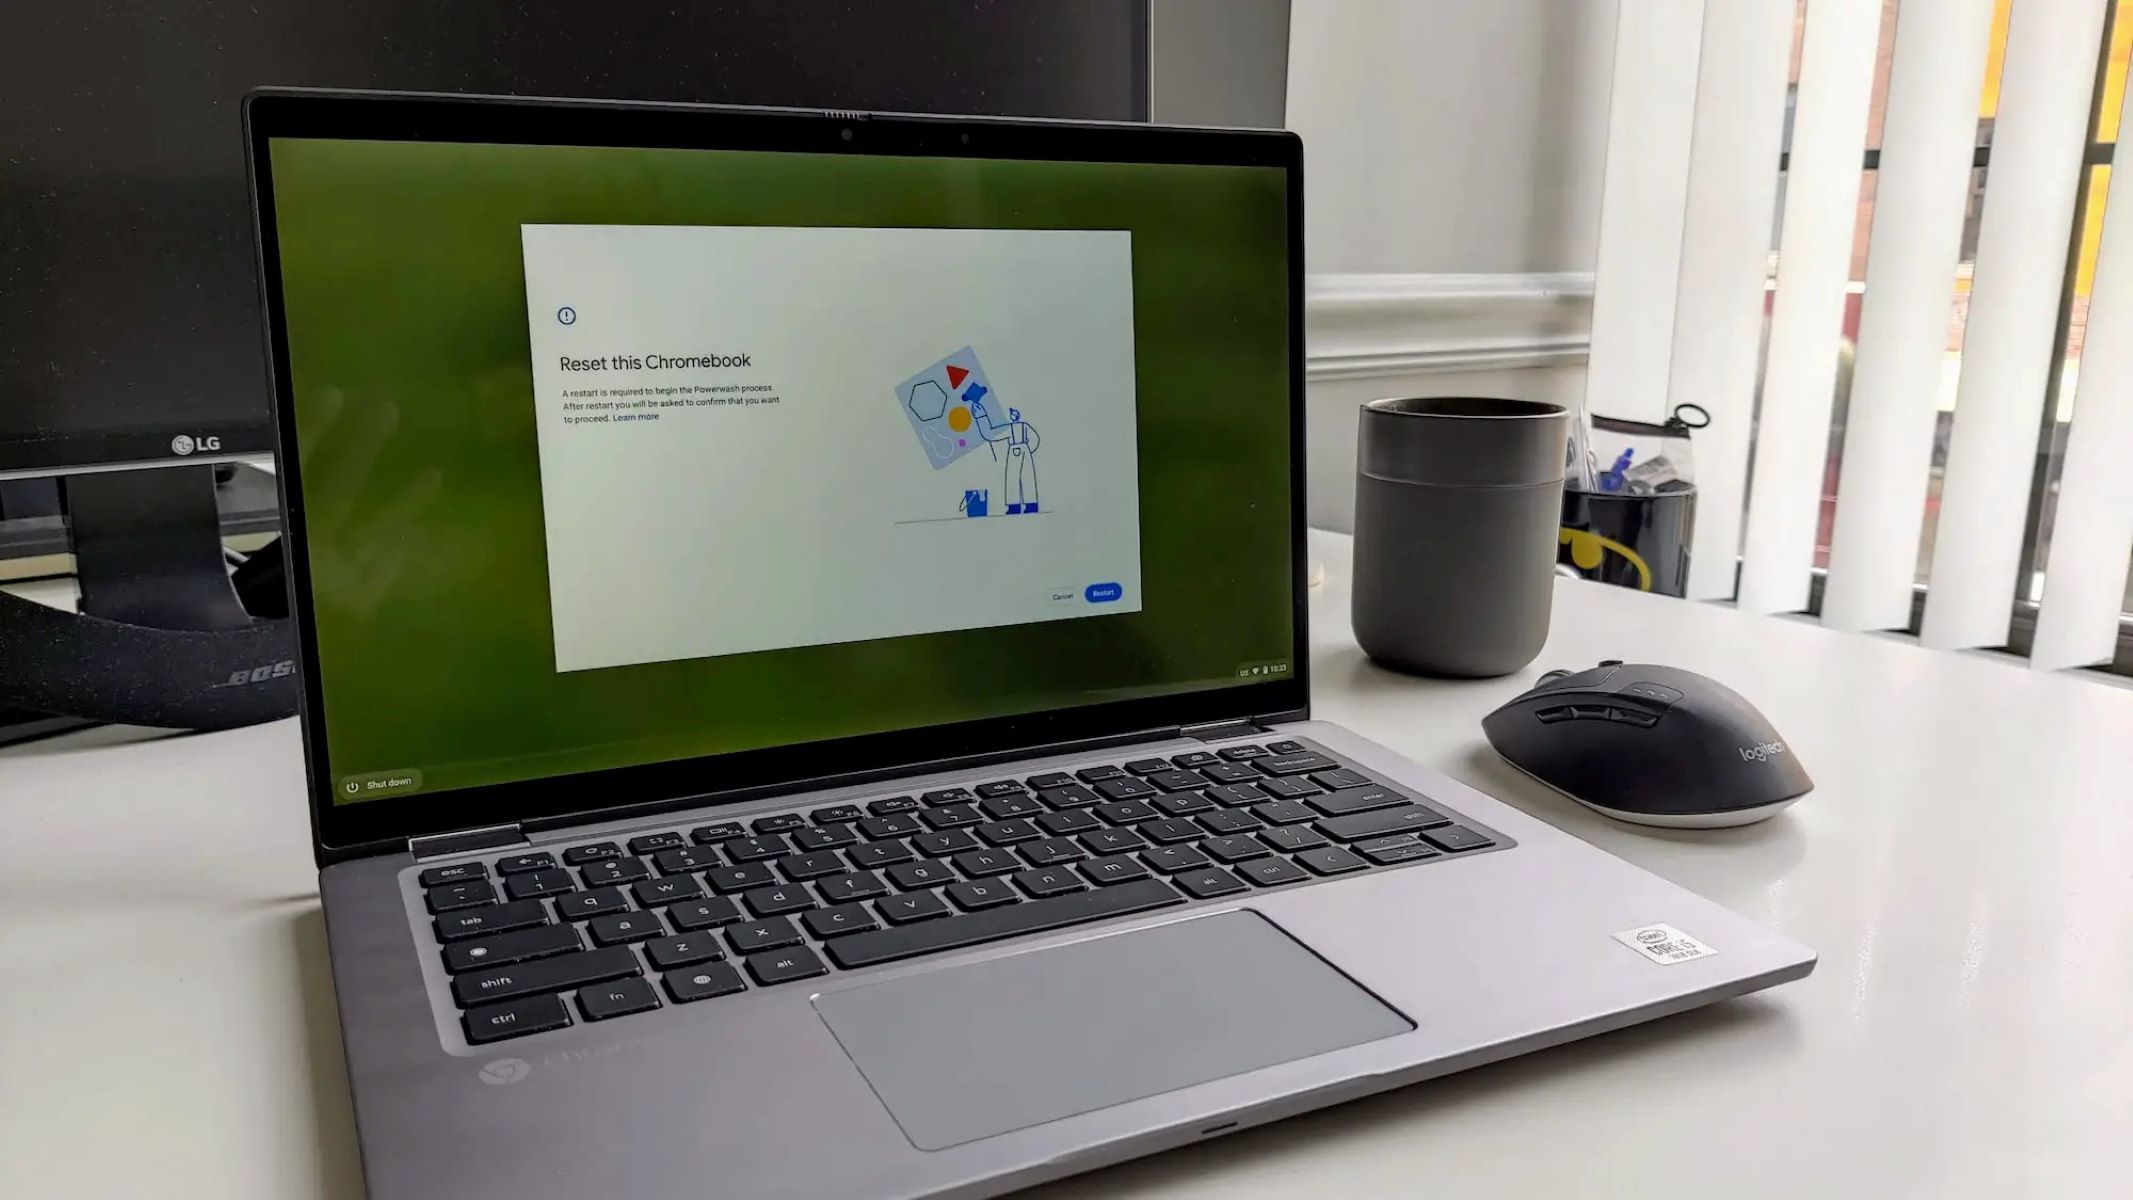
Selecting Powerwash: Under the "Reset settings" section, click on "Powerwash." A confirmation dialog will appear, outlining the implications of the powerwashing process.
-
Initiating Powerwash: To proceed, click on "Powerwash" and follow the on-screen prompts to confirm the action. Your Chromebook will then begin the powerwashing process, erasing all local data and settings.
-
Completing the Process: Once the powerwashing process is complete, your Chromebook will restart and prompt you to set it up as a new device. Follow the on-screen instructions to configure your Chromebook according to your preferences.
It's important to note that powerwashing your Chromebook will erase all locally stored data, including downloaded files, settings, and installed applications. Therefore, it's crucial to back up any important data using the methods outlined earlier in this guide.
By powerwashing your Chromebook, you can effectively reset Chrome OS, eliminate software-related issues, and ensure that your device is optimized for a seamless user experience. This method offers a convenient way to refresh your Chromebook, making it an ideal solution for troubleshooting and preparing the device for a new user.
Remember, powerwashing is a reversible process, and your Chromebook can be easily reconfigured and personalized after the reset. With these simple steps, you can confidently powerwash your Chromebook, rejuvenating its performance and restoring it to its original state.
Performing a Hard Reset
Performing a hard reset on your Chromebook can be a valuable troubleshooting method when encountering persistent software issues or unresponsive behavior. Unlike powerwashing, which resets the operating system to its factory state, a hard reset focuses on addressing system-level issues and restoring functionality to your Chromebook. This method can help resolve frozen screens, unresponsive applications, and other software-related challenges that may hinder the device's performance.
To perform a hard reset on your Chromebook, follow these step-by-step instructions:
-
Power Off Your Chromebook: Begin by ensuring that your Chromebook is powered off. If the device is unresponsive, press and hold the power button until it shuts down completely.
-
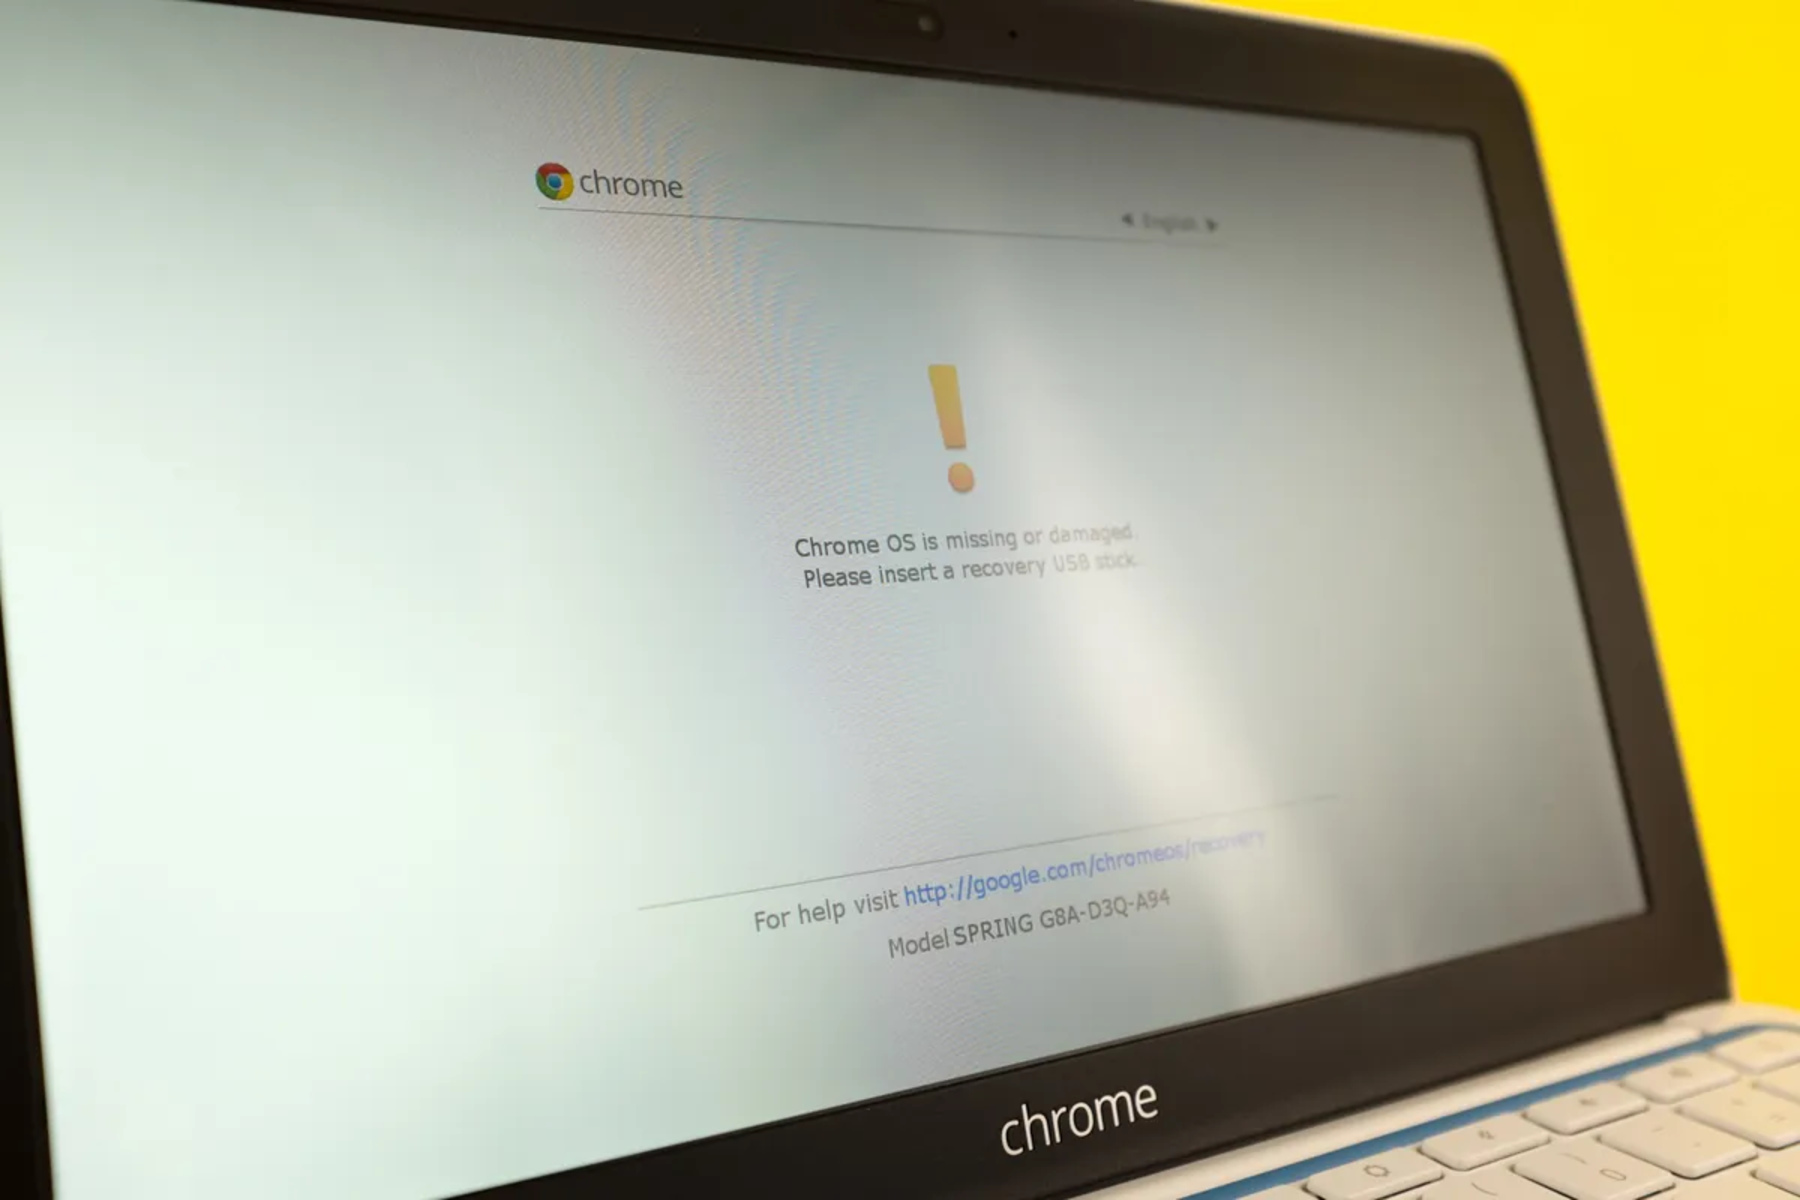
Enter Recovery Mode: Once the Chromebook is powered off, press and hold the 'Refresh' key (circular arrow) and tap the 'Power' button to enter recovery mode. This combination of keys initiates the recovery mode, allowing you to access additional troubleshooting options.
-
Accessing Recovery Mode: Upon entering recovery mode, you will be presented with a screen displaying a yellow exclamation mark. From this screen, press and hold the 'Ctrl' key and tap the 'D' key to access the Chrome OS recovery menu.
-
Initiate the Hard Reset: Within the Chrome OS recovery menu, select the option to perform a hard reset. This action will prompt the Chromebook to reset and restore the operating system to a functional state, addressing any underlying software issues.
-
Follow On-Screen Prompts: Throughout the hard reset process, follow any on-screen prompts or instructions to ensure that the reset is completed successfully. The Chromebook will undergo the reset procedure, resolving software-related issues and restoring functionality.
Performing a hard reset on your Chromebook can effectively address software-related challenges and restore the device to a functional state. It is important to note that a hard reset may result in the loss of locally stored data and settings, emphasizing the importance of backing up your data beforehand.
By following these steps, you can confidently perform a hard reset on your Chromebook, leveraging this troubleshooting method to overcome software-related issues and ensure the optimal performance of your device.
Reinstalling Chrome OS
Reinstalling Chrome OS is a comprehensive method to address persistent software issues, restore the operating system to its original state, and ensure the optimal performance of your Chromebook. This process involves creating a recovery media, initiating the reinstallation, and configuring the device to seamlessly integrate with the reinstalled operating system. Whether you're encountering critical system errors, performance degradation, or the need for a clean slate, reinstalling Chrome OS offers a robust solution to rejuvenate your Chromebook.
Creating Recovery Media
Before proceeding with the reinstallation, it's essential to create a recovery media, which serves as a bootable source for reinstalling Chrome OS. To create the recovery media, follow these steps:
-
Accessing the Chromebook Recovery Utility: Install the Chromebook Recovery Utility from the Chrome Web Store on a separate, functional computer.
-
Selecting Your Chromebook Model: Launch the Chromebook Recovery Utility and select your specific Chromebook model from the list of supported devices.
-
Creating Recovery Media: Insert a USB flash drive or SD card into the computer and follow the on-screen instructions to create the recovery media. This process will download the necessary Chrome OS files and create a bootable recovery drive.
Initiating Reinstallation
Once the recovery media is created, you can proceed with the reinstallation of Chrome OS on your Chromebook. Follow these steps to initiate the reinstallation process:
-
Power Off Your Chromebook: Ensure that your Chromebook is powered off before proceeding with the reinstallation.
-
Entering Recovery Mode: Insert the recovery media into your Chromebook and press and hold the 'Esc' and 'Refresh' keys simultaneously. While holding these keys, press the 'Power' button to enter recovery mode.
-
Selecting Recovery Option: Upon entering recovery mode, select the option to reinstall Chrome OS from the recovery media. Follow the on-screen prompts to confirm the reinstallation process.
-
Completing the Reinstallation: The Chromebook will begin the reinstallation process, which may take some time to complete. Once the process is finished, your Chromebook will restart, and you can proceed with the initial setup.
Configuring the Reinstalled Chrome OS
After the reinstallation is complete, you will need to configure your Chromebook to ensure a seamless integration with the reinstalled Chrome OS. Follow these steps to configure the reinstalled operating system:
-
Setting Up Your Chromebook: Follow the on-screen instructions to set up your Chromebook, including language preferences, Wi-Fi connectivity, and Google account sign-in.
-
Restoring Data and Settings: If you backed up your data before the reinstallation, you can now restore your files, photos, and settings from the backup sources, ensuring a smooth transition to the reinstalled Chrome OS.
-
Updating Chrome OS: After the reinstallation, it's advisable to check for and install any available updates for Chrome OS to ensure that your Chromebook is running the latest version of the operating system.
By following these detailed steps, you can effectively reinstall Chrome OS on your Chromebook, addressing software-related issues and restoring the device to its optimal state. This method provides a comprehensive solution to troubleshoot and rejuvenate your Chromebook, ensuring a seamless user experience and improved system performance.