Introduction
Are you tired of being bombarded with constant notifications while browsing the web on Google Chrome? Whether it's incessant pop-ups, distracting banners, or intrusive alerts, the barrage of notifications can disrupt your workflow and hinder your browsing experience. Fortunately, there's a simple solution to regain control and restore peace to your browsing environment. By disabling Chrome notifications on your Windows 10 device, you can reclaim your online sanctuary and browse the web without unnecessary interruptions.
In this comprehensive guide, we'll walk you through the step-by-step process of disabling Chrome notifications on Windows 10. By following these instructions, you'll be able to customize your browsing experience and eliminate the distractions caused by unwanted notifications. Whether you're seeking a more focused work environment, a seamless browsing experience, or simply a break from the constant stream of alerts, taking control of your Chrome notifications is the first step towards a more tranquil and undisturbed online experience.
So, if you're ready to take back control of your browsing environment and bid farewell to the incessant interruptions, let's dive into the process of disabling Chrome notifications on Windows 10. With just a few simple steps, you'll be able to tailor your browsing experience to suit your preferences and enjoy a more serene and uninterrupted online journey.
Step 1: Open Chrome Settings
To begin the process of disabling Chrome notifications on your Windows 10 device, the first step is to access the Chrome settings. This straightforward process allows you to navigate to the specific section where you can manage and customize your notification preferences.
-
Launch Google Chrome: Start by opening the Google Chrome browser on your Windows 10 device. You can easily locate the Chrome icon on your desktop or in the taskbar, or simply search for it in the Start menu.
-
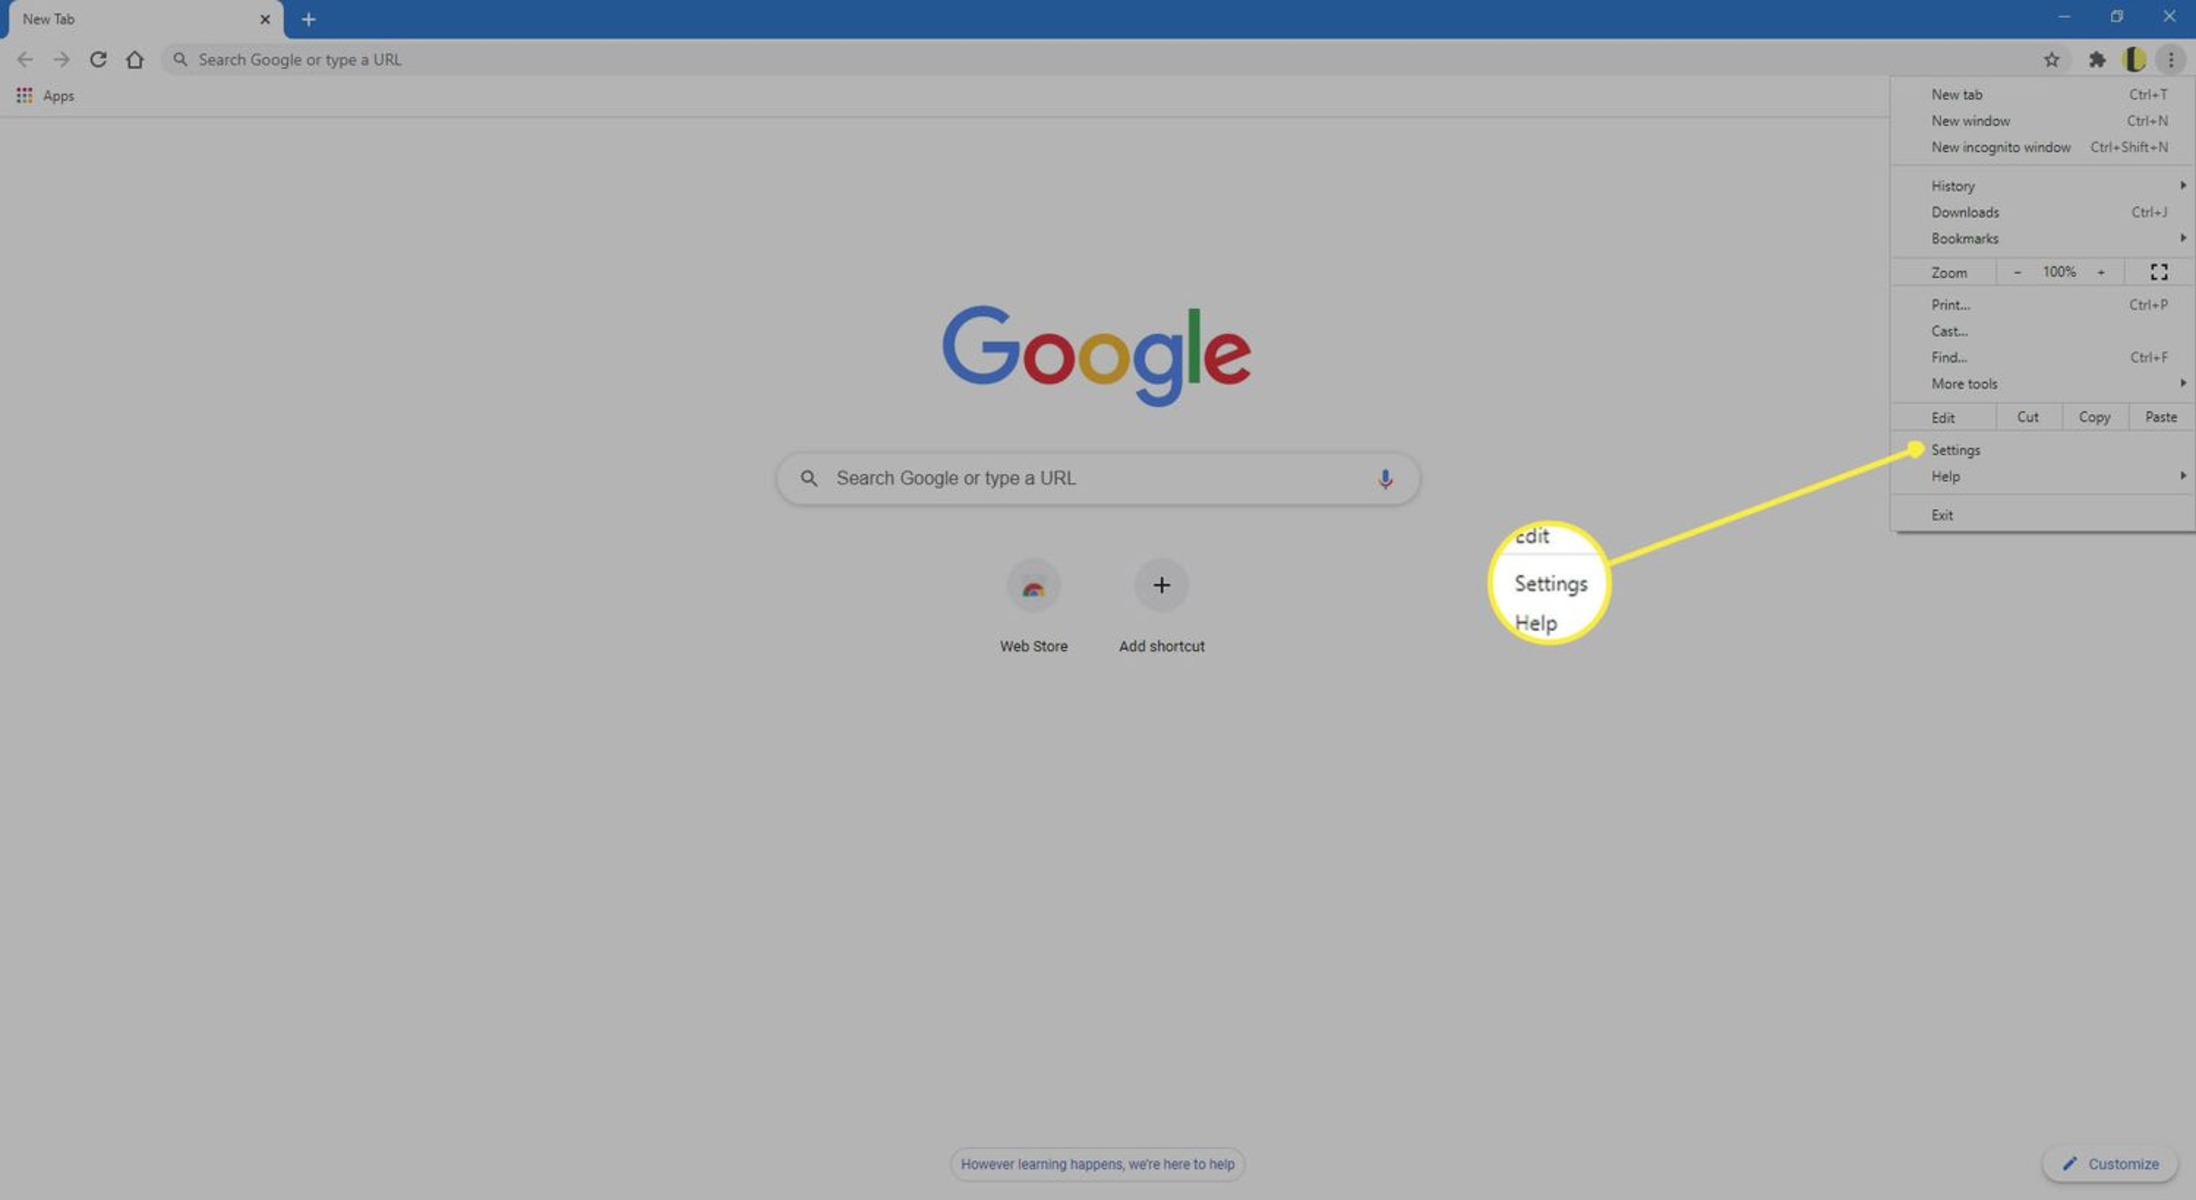
Access the Menu: Once Chrome is open, look to the top-right corner of the browser window for the three vertical dots, which represent the Chrome menu. Click on these dots to reveal a dropdown menu containing various options and settings.
-
Open Settings: Within the dropdown menu, locate and click on the "Settings" option. This action will redirect you to the Chrome settings page, where you can explore and customize a wide range of browser preferences and features.
By following these simple steps, you can successfully access the Chrome settings, setting the stage for the subsequent actions required to disable notifications. With the settings page now open, you're ready to proceed to the next step and delve into the advanced settings to further customize your Chrome browsing experience.
Now that you've successfully accessed the Chrome settings, you're one step closer to regaining control over your browsing environment. The journey to disabling Chrome notifications continues as we move on to the next step, where we'll explore the advanced settings to manage notifications effectively.
Step 2: Go to Advanced Settings
With the Chrome settings page open, the next crucial step in the process of disabling notifications involves navigating to the advanced settings. This section provides access to a myriad of customizable options, including the ability to manage notifications and fine-tune your browsing experience to align with your preferences.
To proceed to the advanced settings in Chrome, follow these steps:
-
Locate and click on the "Advanced" option: Within the Chrome settings page, scroll down to the bottom and click on the "Advanced" option. This action will expand the settings menu, unveiling additional features and customization options that are not readily visible in the standard settings view.
-
Explore the Advanced Settings: Once the "Advanced" option is selected, you'll gain access to a wealth of advanced settings that enable you to delve deeper into the customization of your Chrome browser. From privacy and security preferences to site settings and content controls, the advanced settings serve as a comprehensive toolbox for tailoring your browsing experience.
-
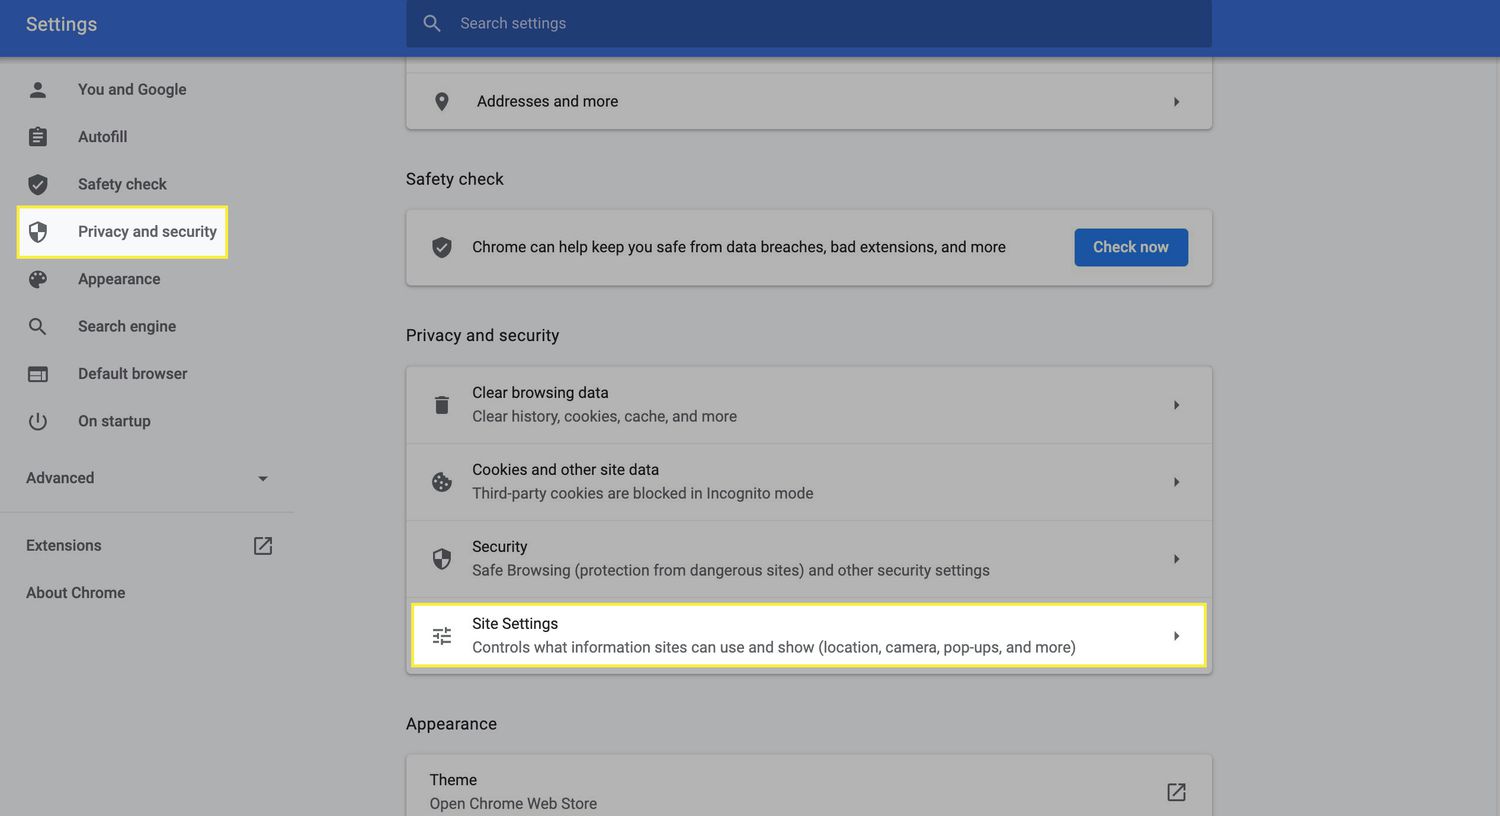
Select "Privacy and Security": Within the advanced settings menu, locate and click on the "Privacy and Security" section. This pivotal step will lead you to a range of privacy and security-related options, including the essential feature for managing site settings and notifications.
By navigating to the advanced settings in Chrome, you're empowered to take control of your browsing environment and customize your experience to suit your preferences. The ability to access advanced settings provides a gateway to a wealth of customization options, allowing you to fine-tune your browsing experience with precision and efficiency.
As you proceed to the advanced settings, you're one step closer to effectively managing and disabling Chrome notifications on your Windows 10 device. The journey towards a more tranquil and uninterrupted browsing experience continues as we delve into the next step, where we'll focus on managing notifications within the advanced settings to regain control over your browsing environment.
Step 3: Manage Notifications
Upon reaching the "Privacy and Security" section within Chrome's advanced settings, you'll encounter the pivotal feature for managing site settings and notifications. This section serves as the gateway to a range of customizable options that allow you to take control of your browsing experience, including the ability to manage and disable notifications effectively.
To proceed with managing notifications, follow these steps:
-
Access Site Settings: Within the "Privacy and Security" section, locate and click on the "Site Settings" option. This action will direct you to a comprehensive view of site permissions and settings, empowering you to customize how websites interact with your browser.
-
Navigate to Notifications: Once within the Site Settings, scroll down to find the "Notifications" section. Click on this option to access the specific settings related to notifications, where you can manage and customize the behavior of notification prompts from various websites.
-
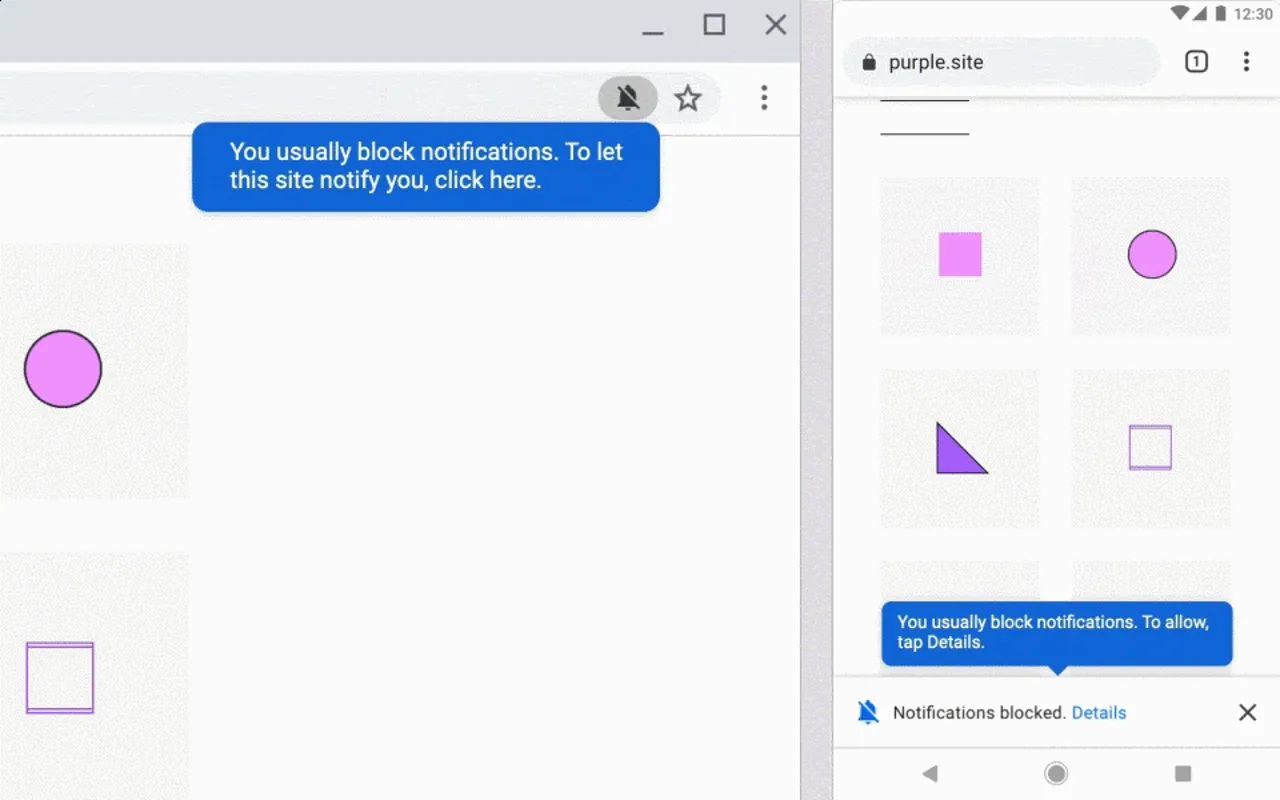
Manage Notification Preferences: Within the Notifications settings, you'll find a list of websites that have requested to send you notifications. Here, you have the flexibility to individually manage the notification preferences for each site, including the option to block or allow notifications as per your preference.
-
Block Unwanted Notifications: To disable notifications from a specific website, simply click on the website's entry in the list and adjust the notification permissions accordingly. By choosing to block notifications, you can effectively prevent the website from sending you any further notification prompts, thereby reducing unnecessary interruptions during your browsing sessions.
-
Customize Notification Settings: Additionally, Chrome provides the option to customize notification settings on a broader scale. By clicking on the "Notifications" section, you can toggle the overall notification permissions for all websites, allowing you to tailor your browsing experience to align with your preferences.
By following these steps to manage notifications within the advanced settings of Chrome, you gain the ability to customize your browsing experience and regain control over the influx of notification prompts. Whether you seek to block notifications from specific websites or fine-tune your overall notification preferences, the process of managing notifications empowers you to curate a more focused and uninterrupted browsing environment.
As you navigate through the intricacies of managing notifications within Chrome, you're one step closer to achieving a personalized and distraction-free browsing experience. With the ability to tailor your notification preferences to suit your needs, you can navigate the web with enhanced tranquility and efficiency, free from the disruptions caused by unwanted notifications.
Step 4: Disable Chrome Notifications
After successfully navigating through the advanced settings and managing notifications within Chrome, the final step in the process involves disabling Chrome notifications to ensure a seamless and uninterrupted browsing experience on your Windows 10 device.
To disable Chrome notifications, follow these straightforward steps:
-
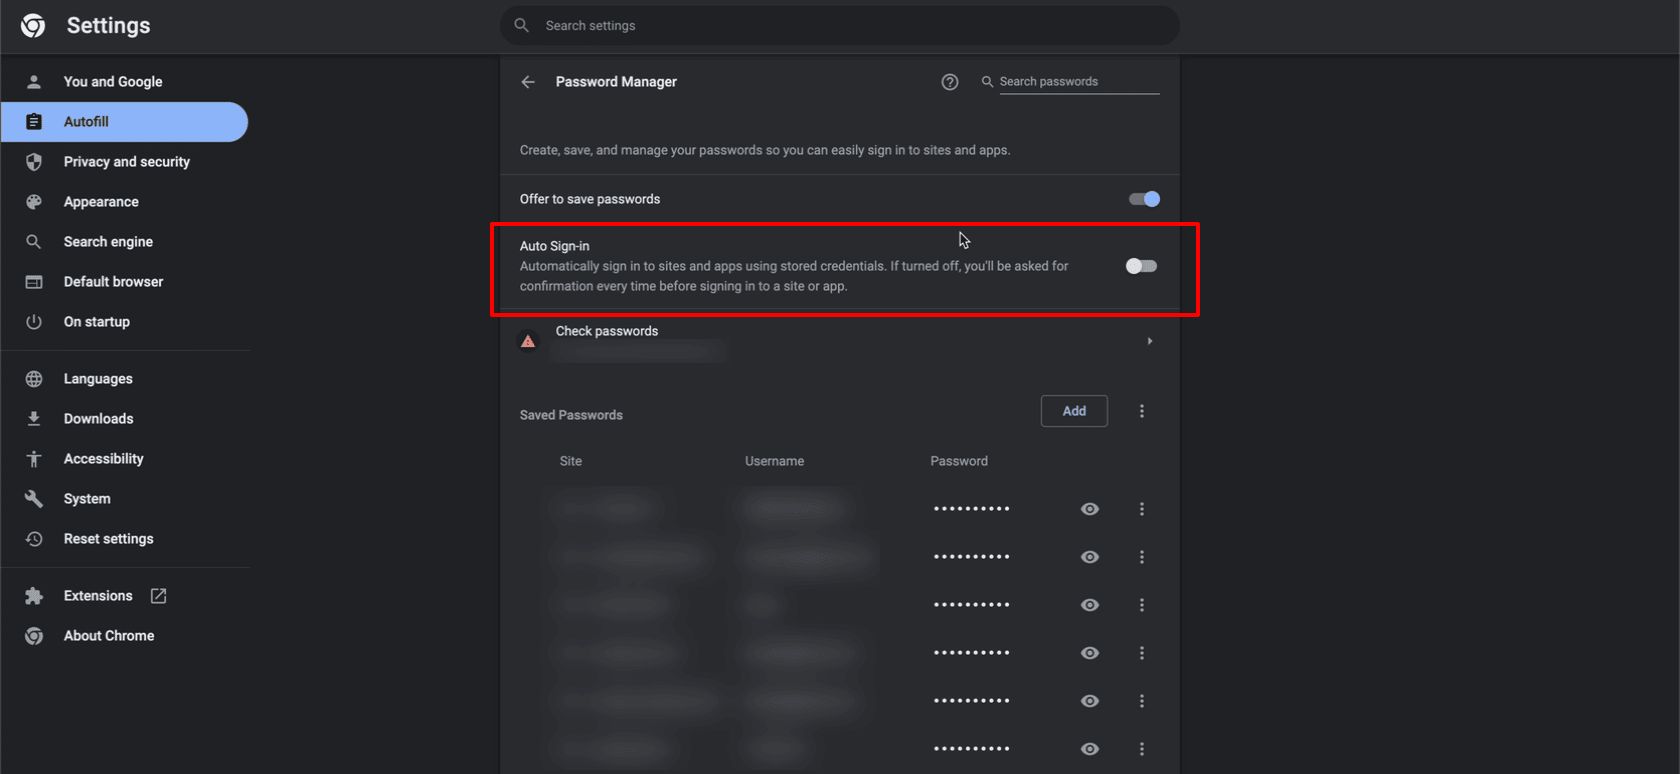
Toggle Off Notification Permissions: Within the "Notifications" section of the Site Settings, you'll find the option to toggle the overall notification permissions for all websites. By simply clicking on the toggle switch, you can effectively disable all notification prompts from websites, providing you with a tranquil and distraction-free browsing environment.
-
Review and Adjust Individual Site Settings: In addition to the global notification toggle, you have the option to review and adjust the notification settings for individual websites. By revisiting the list of websites that have requested to send you notifications, you can further customize your preferences by blocking notifications from specific sites, thereby eliminating unwanted interruptions during your browsing sessions.
-
Confirm the Changes: Once you've adjusted the notification settings to align with your preferences, it's essential to confirm the changes to ensure that the disabled notifications take effect. By saving the updated settings, you can rest assured that your browsing experience will be free from the distractions caused by unnecessary notification prompts.
By following these steps to disable Chrome notifications, you can take full control of your browsing environment and tailor your notification preferences to suit your needs. Whether you seek a more focused work environment, a serene browsing experience, or simply a break from the constant stream of alerts, the process of disabling notifications empowers you to curate a personalized and uninterrupted online journey.
With Chrome notifications successfully disabled on your Windows 10 device, you can navigate the web with enhanced tranquility and efficiency, free from the disruptions caused by unwanted notifications. By reclaiming control over your browsing environment, you can enjoy a seamless and undisturbed online experience, allowing you to focus on what matters most without the interference of incessant notification prompts.
As you complete the final step of disabling Chrome notifications, you've taken a significant stride towards customizing your browsing experience and creating a tranquil online sanctuary where interruptions are minimized, and focus is maximized. With notifications effectively disabled, you can revel in the freedom of uninterrupted browsing, allowing you to immerse yourself in the online world with enhanced clarity and concentration.
Conclusion
In conclusion, the process of disabling Chrome notifications on Windows 10 empowers users to reclaim control over their browsing environment and curate a personalized and uninterrupted online experience. By following the step-by-step guide outlined in this comprehensive walkthrough, users can effectively manage and disable notifications, thereby minimizing unnecessary interruptions and fostering a more focused and tranquil browsing environment.
Through the journey of accessing Chrome settings, navigating to advanced settings, and managing notifications, users gain the ability to fine-tune their browsing experience with precision and efficiency. The flexibility to block notifications from specific websites, adjust global notification settings, and disable notifications altogether provides users with the autonomy to tailor their browsing environment to align with their preferences.
By successfully disabling Chrome notifications, users can navigate the web with enhanced tranquility and efficiency, free from the disruptions caused by unwanted notification prompts. Whether seeking a more focused work environment, a serene browsing experience, or simply a break from the constant stream of alerts, the process of disabling notifications allows users to curate a personalized and uninterrupted online journey.
The ability to customize notification preferences and eliminate unwanted interruptions fosters an environment where users can immerse themselves in the online world with enhanced clarity and concentration. With notifications effectively disabled, users can revel in the freedom of uninterrupted browsing, allowing them to focus on what matters most without the interference of incessant notification prompts.
In essence, the process of disabling Chrome notifications on Windows 10 serves as a pivotal step towards regaining control over one's browsing environment and creating a tranquil online sanctuary. By taking charge of notification preferences and minimizing distractions, users can enjoy a seamless and undisturbed online experience, allowing them to focus on their tasks, projects, or leisure activities with enhanced peace of mind and efficiency.
Ultimately, the journey towards disabling Chrome notifications culminates in the empowerment of users to curate a browsing experience that aligns with their preferences, fostering a digital space where interruptions are minimized, and focus is maximized. With notifications effectively managed and disabled, users can navigate the web with enhanced clarity, productivity, and serenity, creating an online sanctuary tailored to their individual needs and preferences.