Introduction
Connecting a hotspot to a router can significantly expand your network's reach and provide internet access to a wider area. Whether you're setting up a home network or establishing connectivity in a small business, linking a hotspot to a router can enhance your internet experience. This user guide will walk you through the process of seamlessly integrating your hotspot with a router, allowing you to enjoy uninterrupted internet connectivity across multiple devices.
By combining the capabilities of a hotspot and a router, you can create a robust network that offers reliable internet access to various devices, including smartphones, laptops, smart home devices, and more. This integration enables you to extend your network's coverage, making it ideal for larger homes, outdoor spaces, or small businesses where a single router may not provide adequate coverage.
In this user guide, we will provide step-by-step instructions to help you seamlessly connect your hotspot to a router. By following these simple yet effective steps, you can optimize your network's performance and ensure that all connected devices enjoy a stable and high-speed internet connection.
Whether you're a tech-savvy individual looking to expand your home network or a small business owner seeking to improve connectivity for your customers or employees, this user guide will empower you to bridge the gap between your hotspot and router. By the end of this guide, you will have the knowledge and confidence to create a seamless and efficient network that meets your specific connectivity needs.
Now, let's dive into the step-by-step process of connecting your hotspot to a router, allowing you to harness the full potential of your network and enjoy uninterrupted internet access across all connected devices.
Step 1: Check the Compatibility of Your Devices
Before embarking on the process of connecting your hotspot to a router, it is crucial to ensure that both devices are compatible with each other. Compatibility plays a pivotal role in establishing a seamless connection and optimizing the performance of your network. Here's a detailed overview of the key aspects to consider when checking the compatibility of your devices:
Hotspot Compatibility
- Wireless Standard: Verify that your hotspot supports the same wireless standard as your router. Common wireless standards include 802.11n, 802.11ac, and 802.11ax. Ensuring compatibility in this aspect is essential for achieving optimal performance and seamless connectivity between the hotspot and the router.
- Frequency Bands: Check if your hotspot operates on the same frequency bands as your router. Most routers support both 2.4GHz and 5GHz bands, so it's important to confirm that your hotspot is compatible with these frequency bands to enable versatile connectivity options.
- Security Protocols: Ensure that the security protocols supported by your hotspot align with the security settings of your router. Common security protocols include WPA2, WPA3, and WEP. Matching these protocols enhances network security and facilitates a secure connection between the hotspot and the router.
Router Compatibility
- Network Standards: Confirm that your router is compatible with the network standards supported by your hotspot. This includes verifying support for the same wireless standards, frequency bands, and security protocols to ensure seamless integration with the hotspot.
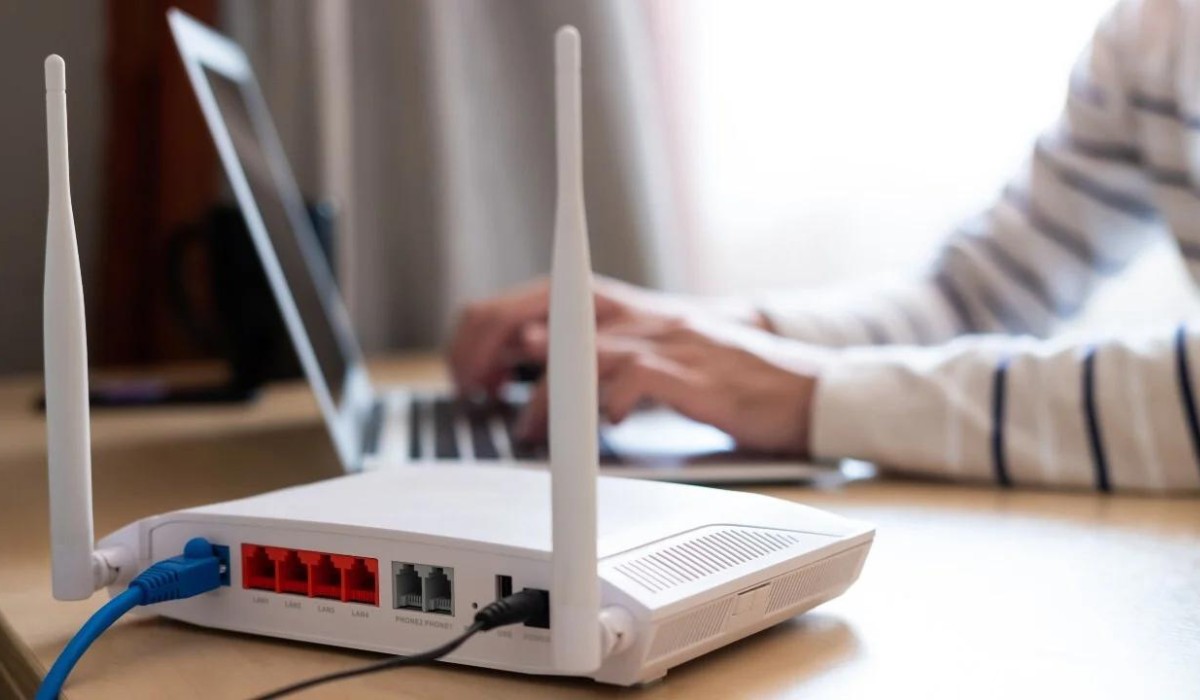
- Ethernet Ports: If you plan to connect the hotspot to the router using an Ethernet cable, ensure that the router has available Ethernet ports. This is essential for establishing a direct wired connection between the devices, which can be beneficial in certain network configurations.
Interoperability
- Firmware Updates: Check for firmware updates for both the hotspot and the router. Keeping the devices' firmware up to date can address compatibility issues and improve overall performance.
- Vendor Recommendations: Refer to the manufacturer's guidelines and recommendations for integrating hotspots with routers. Manufacturers often provide specific instructions or compatibility guidelines to streamline the connection process.
By meticulously evaluating the compatibility of your hotspot and router, you can lay a solid foundation for a successful integration that maximizes network performance and ensures seamless connectivity. This proactive approach minimizes the risk of compatibility-related issues and sets the stage for a smooth and efficient connection process.
With the compatibility check completed, you are now ready to proceed to the next step of turning on the hotspot, bringing you one step closer to establishing a robust and interconnected network.
Step 2: Turn on the Hotspot
Turning on the hotspot is a fundamental step in the process of connecting it to a router. The hotspot serves as a gateway to the internet, allowing devices to connect and access the web over a cellular network. Whether you're using a dedicated mobile hotspot device or leveraging the hotspot feature on your smartphone, activating this functionality is essential for establishing a reliable internet connection that can be seamlessly integrated with a router.
Here's a detailed walkthrough of the steps to turn on the hotspot:
Dedicated Mobile Hotspot Device
If you're using a standalone mobile hotspot device, follow these steps to activate the hotspot functionality:
-
Power On the Device: Press and hold the power button on the mobile hotspot device to turn it on. Once powered on, the device will initiate its startup sequence, preparing to broadcast a Wi-Fi signal for internet connectivity.
-
Access the Settings Menu: Navigate to the settings menu on the mobile hotspot device. Depending on the device model, the settings menu may be accessible through physical buttons or a touchscreen interface.
-
Enable the Hotspot Feature: Locate the option to enable the hotspot feature within the settings menu. This may be labeled as "Mobile Hotspot," "Wi-Fi Hotspot," or a similar designation. Activate the hotspot functionality to initiate the broadcasting of a Wi-Fi signal.
-
Customize Hotspot Settings (Optional): Depending on the device, you may have the option to customize hotspot settings such as network name (SSID), password, and security protocols. Adjust these settings as needed to align with your network preferences.
-
Verify Connectivity: Once the hotspot is activated and the Wi-Fi signal is being broadcast, verify that devices can detect the hotspot network in their available Wi-Fi networks list. This confirms that the hotspot is operational and ready for connection.
Smartphone Hotspot Feature
If you're using the hotspot feature on your smartphone, the process may vary slightly based on the device's operating system. However, the general steps to enable the hotspot feature are as follows:
-
Access Hotspot Settings: Navigate to the "Settings" or "Network" menu on your smartphone. Look for the option related to "Hotspot," "Tethering," or "Portable Wi-Fi Hotspot."
-
Enable Hotspot Functionality: Activate the hotspot feature to begin broadcasting a Wi-Fi signal from your smartphone. This enables other devices to connect and utilize the smartphone's cellular data for internet access.
-
Configure Hotspot Settings (Optional): Depending on your smartphone's settings, you may have the ability to customize hotspot settings such as network name, password, and security protocols. Adjust these settings to suit your preferences and enhance network security.
-
Verify Accessibility: After activating the hotspot, ensure that other devices can detect the Wi-Fi network being broadcast by your smartphone. This confirmation indicates that the hotspot is operational and ready for connection.
By following these steps to turn on the hotspot, you establish the foundation for extending internet connectivity to a broader range of devices. With the hotspot activated and broadcasting a Wi-Fi signal, you are now prepared to proceed to the next step of connecting the router to the hotspot, further expanding your network's reach and capabilities.
Step 3: Connect the Router to the Hotspot
Connecting the router to the hotspot is a pivotal stage in expanding your network's coverage and integrating the hotspot's internet connectivity with the router's capabilities. This process enables the router to leverage the internet access provided by the hotspot, effectively extending the network's reach and enhancing connectivity for all connected devices. Here's a comprehensive guide on how to seamlessly connect the router to the hotspot, ensuring a robust and interconnected network:
Wireless Connection
-
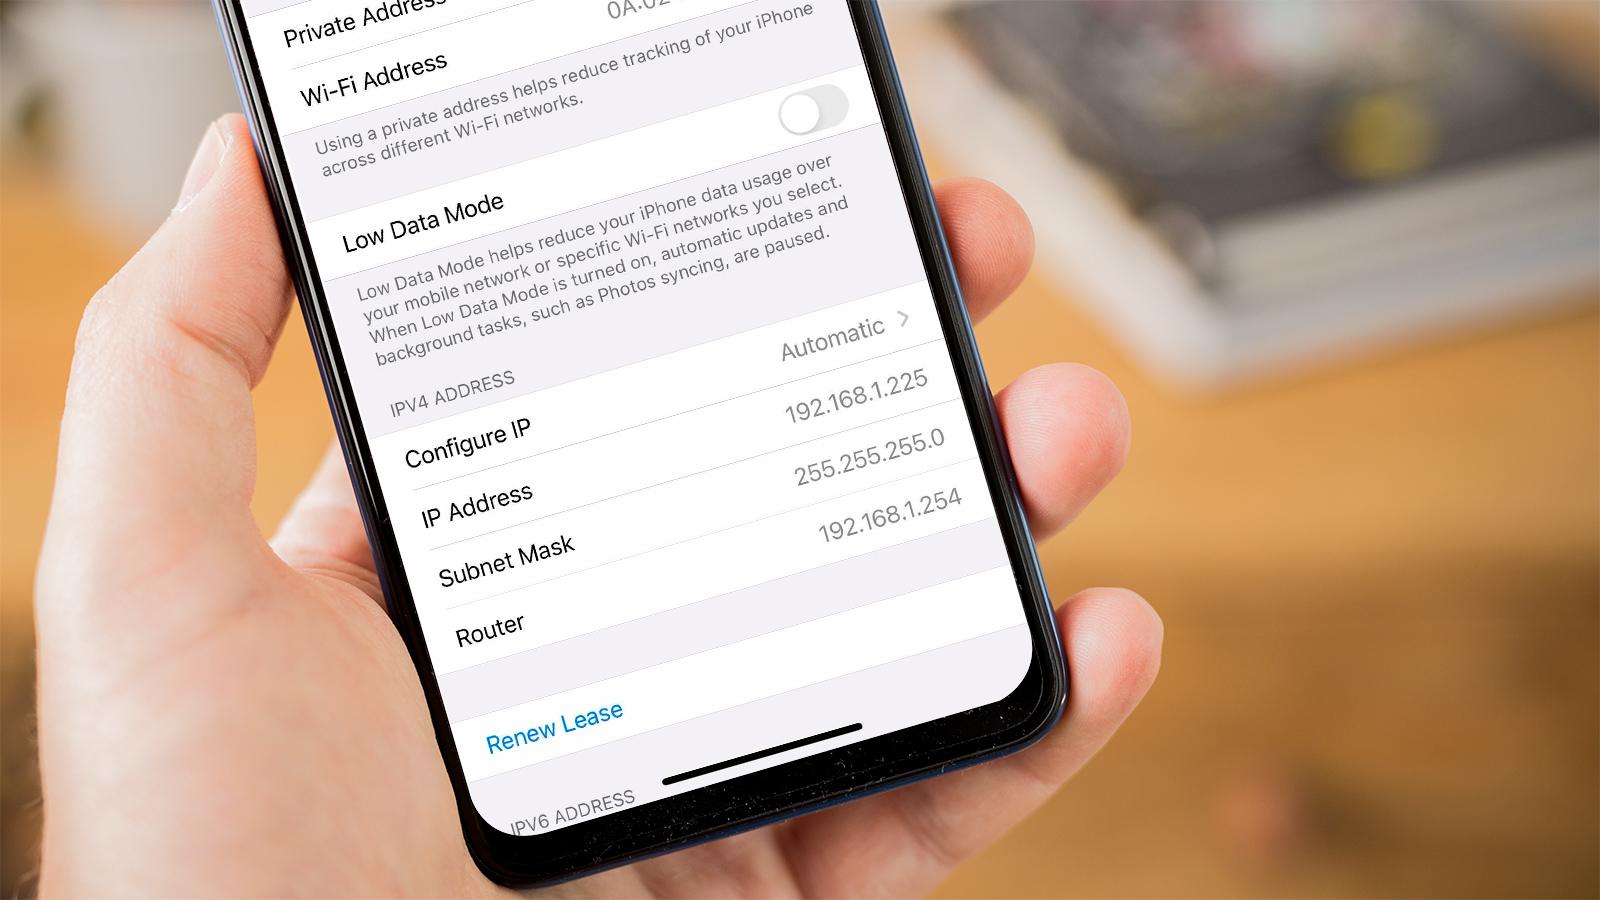
Access Router Settings: Begin by accessing the settings interface of your router. This is typically done by entering the router's IP address into a web browser and logging in with the appropriate credentials. Once inside the router's settings, navigate to the wireless or Wi-Fi configuration section.
-
Scan for Hotspot Network: Within the wireless settings, initiate a scan for available Wi-Fi networks. This allows the router to detect the Wi-Fi signal being broadcast by the hotspot. Once the hotspot network is identified, select it from the list of available networks.
-
Enter Hotspot Credentials: If the hotspot network is secured with a password, you will be prompted to enter the credentials to authenticate the connection. Input the correct password associated with the hotspot network to establish a secure connection between the router and the hotspot.
-
Establish Connection: After entering the hotspot credentials, initiate the connection process. The router will attempt to establish a wireless connection with the hotspot, allowing it to access the internet through the hotspot's cellular data connection.
Wired Connection (Optional)
-
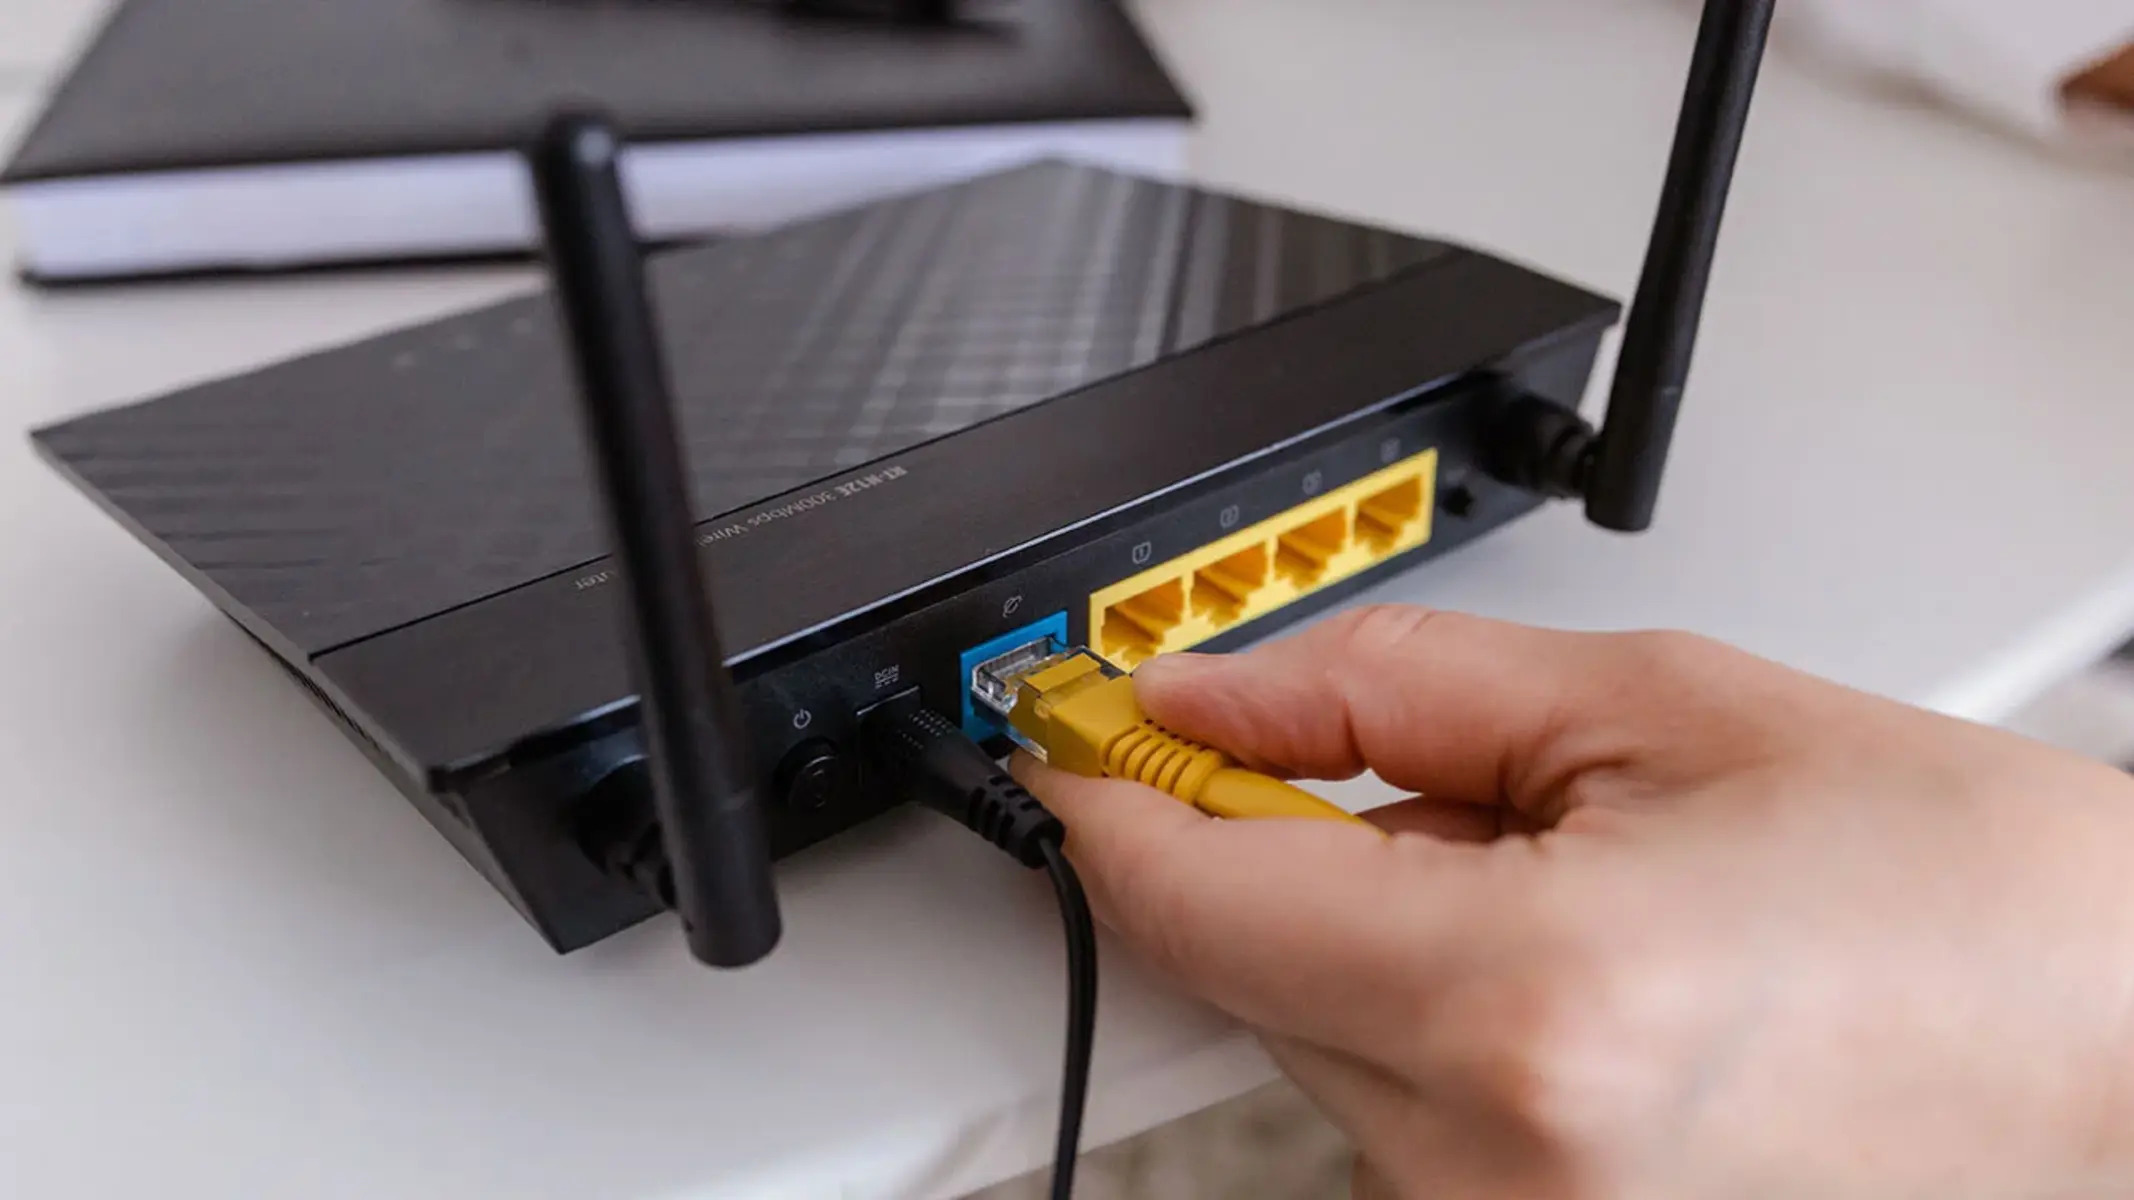
Utilize Ethernet Port: Some routers offer the option to connect to a hotspot using an Ethernet cable. If your router has available Ethernet ports and supports this functionality, you can establish a direct wired connection between the hotspot and the router.
-
Connect Ethernet Cable: Using an Ethernet cable, connect the Ethernet port on the hotspot device to an available Ethernet port on the router. This physical connection enables the router to access the internet through the hotspot's network connection, providing an alternative to wireless connectivity.
-
Configure Router Settings (If Applicable): In certain cases, you may need to adjust specific settings within the router's configuration interface to enable and optimize the wired connection to the hotspot. This may involve specifying the Ethernet port for hotspot connectivity and configuring related parameters.
By following these steps, you can seamlessly connect the router to the hotspot, leveraging the hotspot's internet connectivity to enhance the network's capabilities. Whether opting for wireless or wired connectivity, this integration facilitates a cohesive network infrastructure that optimizes internet access and expands coverage, ultimately benefiting all devices connected to the network. With the router successfully linked to the hotspot, you are now poised to configure the router settings to ensure seamless operation and optimal performance.
Step 4: Configure the Router Settings
Configuring the router settings is a crucial step in the process of integrating a hotspot with a router. By customizing the router's settings to align with the hotspot's internet connectivity, you can optimize network performance, enhance security, and ensure seamless operation across all connected devices. Here's a detailed exploration of the key aspects involved in configuring the router settings:
Network Configuration
Upon connecting the router to the hotspot, it's essential to configure the network settings to establish a cohesive and efficient network environment. Within the router's settings interface, you can customize network parameters such as the network name (SSID), security protocols, and password. By aligning these settings with the hotspot's network configuration, you create a unified network identity that simplifies connectivity for all devices.
DHCP Settings
Dynamic Host Configuration Protocol (DHCP) settings play a pivotal role in assigning IP addresses to devices within the network. By accessing the router's DHCP settings, you can specify the range of IP addresses to be dynamically allocated to connected devices. It's important to ensure that the DHCP settings are optimized to accommodate the expanded network coverage facilitated by the hotspot, allowing seamless IP address assignment for all devices.
Quality of Service (QoS)
Configuring Quality of Service (QoS) settings within the router enables you to prioritize internet traffic based on specific criteria. This functionality is particularly beneficial in network environments where multiple devices are competing for bandwidth. By implementing QoS rules, you can prioritize critical activities such as video streaming, online gaming, or VoIP calls, ensuring a consistent and reliable internet experience for all connected devices.
Security Enhancements
Enhancing network security is paramount in a connected environment, and configuring the router's security settings is essential to safeguard the network against potential threats. This involves enabling robust encryption protocols, such as WPA2 or WPA3, to secure the wireless network. Additionally, you can implement firewall rules, access controls, and intrusion detection measures to fortify the network's defenses and protect against unauthorized access.
Firmware Updates
Regular firmware updates are integral to maintaining the router's performance, security, and compatibility with external devices such as hotspots. Within the router's settings, you can check for firmware updates and apply the latest patches and enhancements provided by the manufacturer. Keeping the router's firmware up to date ensures optimal functionality and addresses any potential compatibility or security vulnerabilities.
By meticulously configuring the router settings to harmonize with the hotspot's internet connectivity, you establish a resilient and efficient network infrastructure that caters to the diverse connectivity needs of modern devices. With the router settings fine-tuned to complement the integrated hotspot, you can ensure a seamless and reliable internet experience for all devices within the network.
Step 5: Test the Connection
After completing the integration of your hotspot with the router and configuring the necessary settings, it's imperative to conduct a comprehensive test of the connection to ensure that all components are functioning as intended. Testing the connection allows you to validate the seamless integration of the hotspot's internet connectivity with the router, confirming that all connected devices can access the internet without any issues.
Here's a detailed overview of the steps involved in testing the connection:
Wireless Connectivity Verification
Initiate a thorough check of the wireless connectivity between the router and the integrated hotspot. This involves confirming that all devices within the network can detect and connect to the router's Wi-Fi network, which is now powered by the hotspot's internet access. Ensure that devices can seamlessly join the network and access the internet without encountering connectivity disruptions.
Internet Speed and Stability Assessment
Conduct speed and stability tests to evaluate the performance of the integrated network. Utilize online speed testing tools or applications to measure the internet speed provided by the hotspot through the router. Assess the consistency and reliability of the internet connection, ensuring that it meets the expected performance standards and delivers a seamless browsing experience across devices.
Device Roaming and Handoff Evaluation
If your network encompasses multiple access points or extends across a large area, assess the effectiveness of device roaming and handoff capabilities. Move devices between different Wi-Fi access points within the network while monitoring the seamless transition of internet connectivity. This evaluation ensures that devices can smoothly transition between access points without experiencing interruptions in internet access.
Multi-Device Load Testing
Simulate a multi-device usage scenario to gauge the network's ability to handle concurrent internet traffic. Connect multiple devices to the integrated network and initiate activities such as streaming, online gaming, video conferencing, and web browsing. Monitor the network's performance under load, verifying that all devices receive consistent and reliable internet access without degradation in speed or stability.
Security and Access Control Validation
Verify that the security measures and access controls implemented within the router's settings are effectively safeguarding the network. Test the effectiveness of encryption protocols, firewall rules, and access restrictions to ensure that the network remains secure from unauthorized access and potential threats. Confirm that all connected devices adhere to the specified security standards.
By meticulously testing the connection, you can validate the successful integration of the hotspot with the router and ensure that the network delivers a seamless and reliable internet experience across all connected devices. This comprehensive assessment allows you to identify and address any potential connectivity or performance issues, ultimately establishing a robust and efficient network infrastructure that caters to your diverse connectivity needs.
Conclusion
In conclusion, the process of connecting a hotspot to a router offers a transformative opportunity to expand network coverage, enhance internet connectivity, and create a seamless digital environment for all connected devices. By following the user guide's step-by-step instructions, you can effectively bridge the gap between your hotspot and router, unlocking the full potential of your network infrastructure.
The compatibility check serves as a foundational step, ensuring that your hotspot and router align in terms of wireless standards, frequency bands, and security protocols. This proactive approach minimizes the risk of compatibility-related issues, setting the stage for a smooth and efficient connection process.
Turning on the hotspot marks the initiation of extended internet connectivity, whether through a dedicated mobile hotspot device or the hotspot feature on a smartphone. Activating this functionality lays the groundwork for expanding internet access to a broader range of devices, setting the stage for seamless integration with the router.
Connecting the router to the hotspot, whether through wireless or wired means, facilitates the leveraging of the hotspot's internet connectivity, effectively extending the network's reach and enhancing connectivity for all connected devices. This integration creates a cohesive network infrastructure that optimizes internet access and expands coverage, ultimately benefiting all devices within the network.
Configuring the router settings is a pivotal step that allows you to harmonize the router's parameters with the hotspot's internet connectivity, optimizing network performance, enhancing security, and ensuring seamless operation across all connected devices. This meticulous customization creates a resilient and efficient network environment that caters to the diverse connectivity needs of modern devices.
Finally, testing the connection validates the successful integration of the hotspot with the router, ensuring that the network delivers a seamless and reliable internet experience across all connected devices. This comprehensive assessment allows you to identify and address any potential connectivity or performance issues, ultimately establishing a robust and efficient network infrastructure that caters to your diverse connectivity needs.
By following this user guide and embracing the seamless integration of your hotspot with a router, you can create a dynamic and interconnected network environment that empowers you to harness the full potential of your internet connectivity. Whether for personal use or within a business setting, this integration opens doors to enhanced productivity, seamless connectivity, and a truly interconnected digital experience.