An effective OBS audio setup for headset starts by telling OBS to use your headset for both system sounds and your microphone, then avoiding the common echo trap. This guide will walk you through configuring your headset microphone and headphones in OBS Studio for clear streaming or recording, preventing issues like echo and distorted audio.
Your OBS audio setup for headset: a quick-start guide
Configuring your headset in OBS is straightforward once you understand the core rules. The goal is to capture your microphone clearly, hear your system audio (like game sounds or music) through your headset, and avoid audio loops that cause echo. You will achieve clear audio by setting your headset as the global device, adjusting levels in the mixer, and testing your setup with a recording.
Step 1: Set your headset as the global audio device
To capture all system sounds (like game audio or music) that play through your headset, go to Settings > Audio and set Desktop Audio to your headset's playback device or "Default". This ensures OBS captures everything you hear. Next, in the same menu, set Mic/Auxiliary Audio to your headset's microphone. This is the simplest way to capture both your voice and your computer's audio without adding extra sources.
Step 2: Avoid the echo trap with scene sources
To avoid an echo effect, do not add the same audio device globally in Settings > Audio and also as an Audio Input/Output Capture source within a scene. If you add your headset microphone as a global device in Settings, you cannot also add it as an "Audio Input Capture" source in a scene, or you will hear a delayed, echoing version of your own voice. If you need per-scene control over your audio devices, disable global devices in Settings > Audio first, then add them individually using the + button in the Sources panel and selecting "Audio Input Capture" or "Audio Output Capture".
Step 3: Adjust levels in the Audio Mixer
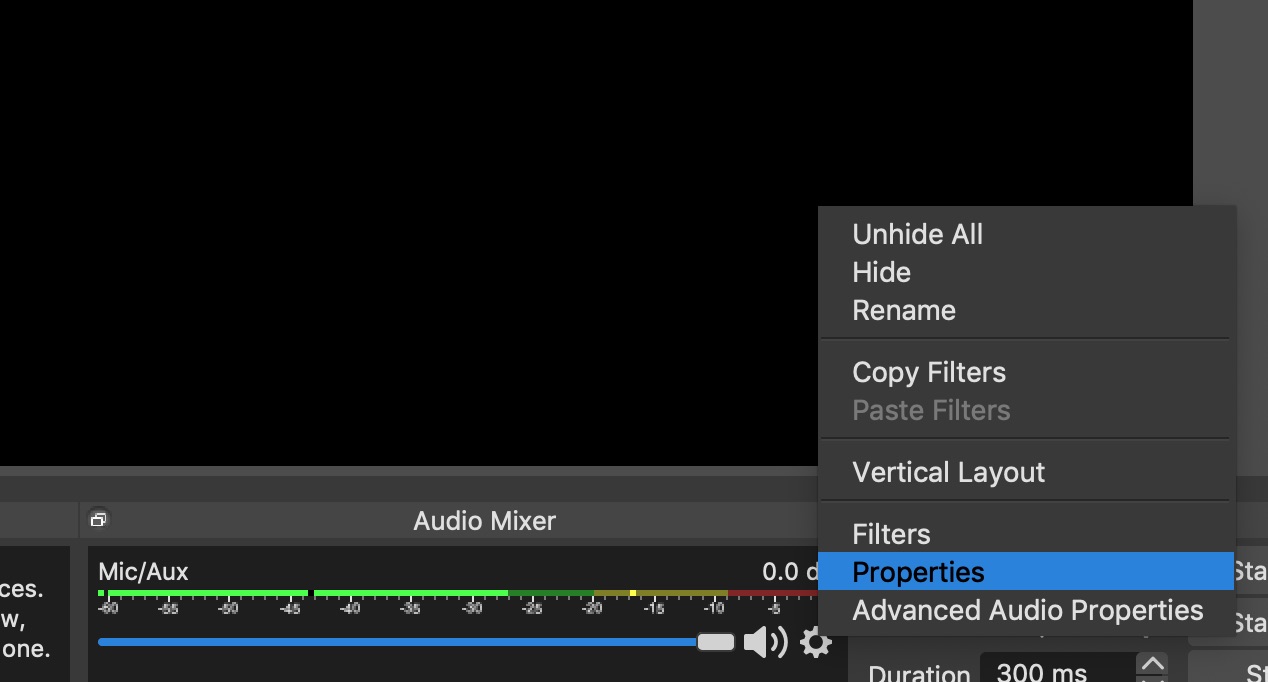
The Audio Mixer is located at the bottom of the main OBS Studio window and displays volume meters. Adjust audio levels in the Audio Mixer, aiming for your voice to peak around -12 dB (within the green zone) to avoid clipping. The volume meter has three primary sections: Green Zone (background music, alerts), Yellow Zone (speech, gameplay), and Red Zone (close to clipping). Speech should sit in the upper range of the yellow zone. You can adjust gain by dragging the volume slider up or down in the Audio Mixer, or by right-clicking the source and opening its Properties for more precise control. Getting your mic levels right here is essential if you later record webcam and gameplay separately using OBS, as it prevents your commentary from being baked into the game track.
Step 4: Monitor your own voice
To hear yourself while streaming or recording, use the Monitor Button (speaker icon) in the Audio Mixer. The Monitoring Device can be configured in Settings > Audio, ensure this is set to your headset so you hear your own voice through your headphones, not your speakers. This prevents feedback loops and lets you hear exactly how you sound to your audience.
Step 5: Test with a recording
Perform a quick test recording in OBS to check for balance, clarity, and sync between game audio and voice. Verify that your voice is clear, not distorted, and that the game audio does not overpower your speech. If something sounds off, return to the Audio Mixer to adjust levels or check your monitoring settings. A short test recording is the fastest way to confirm everything works before going live.
Going further: multi-track recording
For individual control over audio sources, navigate to Edit > Advanced Audio Properties. In Advanced Audio Properties, you can adjust monitoring settings, track routing, and channel format for each audio source. For multi-track recording, switch to "Advanced Output Mode" in Settings > Output to gain full control over settings and enable up to six separate audio tracks. You can assign different audio sources to different tracks in the Advanced Audio Properties for post-editing, allowing you to adjust your voice and game audio independently after recording.
\nRelated reading: Jabra Mic Troubles: Fixing Microphone Issues On Your Headset and How To Stop PS5 Game Audio Playing Through Discord.