Introduction
Downloading videos on your MacBook can be a convenient way to enjoy your favorite videos offline, whether it’s a tutorial, a music video, a movie, or a funny clip. However, finding the right methods and tools to download videos can be a bit challenging for some users.
In this article, we will guide you through the process of downloading videos on your MacBook, step by step. Whether you are a beginner or an experienced user, by the end of this article, you will have the knowledge and tools to successfully download videos onto your Macbook.
Before diving into the steps, it’s important to note that downloading videos from certain platforms may be against their terms of service or copyright regulations. Make sure to have the necessary permissions and respect legal boundaries when downloading videos.
Fortunately, there are various reliable video downloading software available that make the process simple and straightforward. These tools allow you to download videos from popular platforms like YouTube, Vimeo, Facebook, and many more, and save them directly to your MacBook for offline viewing.
So, if you’re ready to expand your offline video library and learn how to download videos on your MacBook, let’s get started with the step-by-step process!
Step 1: Choose a reliable video downloader
The first step in downloading videos on your MacBook is to choose a reliable video downloader software. With numerous options available, it’s essential to select one that meets your needs and provides a seamless downloading experience.
When choosing a video downloader, consider the following factors:
- Compatibility: Ensure that the downloader is compatible with your MacBook’s operating system. Look for software that supports macOS.
- User-friendly interface: Opt for a downloader with an intuitive interface and easy-to-understand functionality. This will make the downloading process straightforward, especially for beginners.
- Wide platform support: Check if the downloader supports various video streaming platforms such as YouTube, Vimeo, Dailymotion, Facebook, Instagram, and more. This will allow you to download videos from a wide range of sources.
- Download options: Look for a downloader that offers different download options, including the ability to choose video quality, format, and resolution. This flexibility enables you to tailor your downloads to suit your preferences.
- Batch downloading: Consider whether the downloader supports batch downloading, allowing you to download multiple videos simultaneously. This feature can save you time and effort when downloading multiple videos.
By considering these factors, you can narrow down your options and find a reliable video downloader that suits your specific requirements. Take some time to read reviews and compare features to make an informed decision.
In the next step, we will guide you through the process of installing the selected video downloader software on your MacBook. So, let’s move on to Step 2!
Step 2: Install the video downloader software
Once you have chosen a reliable video downloader for your MacBook, the next step is to install the software onto your device. Installing the video downloader allows you to access its features and start downloading videos effortlessly.
Follow these steps to install the video downloader software on your MacBook:
- Download the software: Visit the official website of the video downloader software you have selected. Look for a “Download” or “Get” button to initiate the downloading process.
- Choose the appropriate version: Most video downloader software offers versions for different operating systems. Make sure to select the macOS version to ensure compatibility with your MacBook.
- Save the installer: After initiating the download, you will be prompted to save the installer file. Choose a location on your MacBook where you want to save the installer file, such as the Downloads folder.
- Locate the installer file: Once the download is complete, navigate to the location where you saved the installer file. It is often found in the Downloads folder unless you specified a different location.
- Launch the installer: Double-click on the installer file to launch the installation process. This will begin the installation wizard.
- Follow the on-screen instructions: The installation wizard will guide you through the installation process. Follow the on-screen instructions, such as agreeing to the terms and conditions and choosing the installation location.
- Wait for the installation to complete: The software installation may take a few moments. Be patient and let the installation process complete. Avoid interrupting or closing the installer window until the installation is finished.
- Launch the video downloader: Once the installation is complete, you can launch the video downloader software either from the installer window or by locating it in your Applications folder.
After following these steps, you should have successfully installed the video downloader software on your MacBook. In the next step, we will guide you on how to launch the video downloader software and get ready to download your desired videos. Let’s move on to Step 3!
Step 3: Launch the video downloader software
After successfully installing the video downloader software on your MacBook, it’s time to launch the application and get ready to start downloading your favorite videos. Launching the video downloader will provide you with access to its features and functions.
Follow these steps to launch the video downloader software on your MacBook:
- Locate the video downloader: The video downloader software should now be available in your Applications folder. Open the Applications folder by clicking on the Finder icon in your Dock and navigating to the Applications section.
- Find the video downloader icon: Look for the icon of the video downloader software among the applications listed in the Applications folder. The icon typically represents the software’s brand or name.
- Launch the video downloader: Double-click on the video downloader icon to launch the application. Alternatively, you can click and drag the icon to your Dock for easy access in the future.
- Wait for the software to load: After launching the video downloader, give it a moment to load and initialize. Depending on the software and your MacBook’s performance, this may take a few seconds.
- Explore the interface: Once the video downloader software has launched, take some time to explore its interface. Look for the different tabs, buttons, and options available, as these will be used in the upcoming steps.
By following these steps, you should have successfully launched the video downloader software on your MacBook. Now you’re ready to move on to the next step, where we’ll guide you through the process of copying the video URL. Let’s proceed to Step 4!
Step 4: Copy the video URL
In order to download a video using the video downloader software on your MacBook, you will need to copy the URL (Uniform Resource Locator) of the video you want to download. The URL contains the unique web address of the video, which the downloader software will use to fetch and save the video file.
Follow these steps to copy the video URL:
- Open the web browser: Launch the web browser on your MacBook. You can use Safari, Google Chrome, Mozilla Firefox, or any other browser of your choice.
- Navigate to the video: Using the search bar or by clicking on bookmarks, visit the webpage where the video you want to download is located. This could be a video sharing platform like YouTube or any other website hosting the video.
- Find the video: Once you are on the webpage, locate the video you wish to download. Ensure that the video is playable on the webpage.
- Copy the video URL: Right-click on the video and select “Copy Video URL” or “Copy Video Address” from the context menu. Alternatively, you can copy the URL from the address bar of the web browser by highlighting the entire URL and using the “Copy” command.
After following these steps, you should have successfully copied the video URL. The URL is now saved to your clipboard and ready to be pasted into the video downloader software. In the next step, we will guide you through the process of pasting the video URL into the downloader software. Let’s proceed to Step 5!
Step 5: Paste the video URL into the video downloader
Now that you have copied the URL of the video you want to download, the next step is to paste the video URL into the video downloader software on your MacBook. This will allow the software to fetch the video and prepare it for downloading.
Follow these steps to paste the video URL into the video downloader:
- Open the video downloader: Launch the video downloader software on your MacBook by locating it in the Applications folder and double-clicking on the icon.
- Navigate to the download tab: Within the video downloader software, locate the download tab or section. This is where you can input the video URL for downloading.
- Paste the video URL: Right-click in the URL input field of the video downloader software and select “Paste” from the context menu. Alternatively, you can use the keyboard shortcut “Command + V” (on Mac) to paste the video URL.
- Verify the URL: Double-check the pasted URL to ensure it matches the intended video. Make sure there are no extra spaces, characters, or mistakes in the URL.
Once you have pasted the video URL into the video downloader software, the software will begin processing the URL and preparing the video for download. In the next step, we will guide you through the process of selecting the desired video quality and format. Let’s move on to Step 6!
Step 6: Select the desired video quality and format
After pasting the video URL into the video downloader software, it’s time to select the desired video quality and format for the download. The video downloader software provides options for customizing the download based on your preferences.
Follow these steps to select the desired video quality and format:
- Access the download settings: Within the video downloader software, navigate to the settings or options section specifically related to the download process.
- Select the video quality: Look for the video quality options provided by the video downloader software. Typically, you will find options such as 720p, 1080p, or even higher resolutions, depending on the quality of the original video. Choose the desired video quality for your download.
- Choose a video format: Additionally, the video downloader software may give you the option to select a specific video format. Common formats include MP4, AVI, FLV, and MKV. Choose the format that is compatible with your media player or device.
- Set other preferences (if available): Depending on the video downloader software, you may have additional settings or preferences to customize the download process. These could include selecting a download location, specifying the output file name, or enabling batch downloads. Adjust these settings according to your requirements.
Once you have selected the desired video quality, format, and any other preferences, you are ready to proceed with the video download. In the next step, we will guide you through the process of starting the video download. Let’s move on to Step 7!
Step 7: Start the video download
With the video quality and format settings configured in the video downloader software, you are now ready to initiate the video download. Starting the download process will prompt the software to fetch the video from the provided URL and save it to your MacBook.
Follow these steps to start the video download:
- Confirm the download settings: Double-check that you have selected the desired video quality, format, and any other necessary settings in the video downloader software.
- Click the “Download” or “Start” button: Look for a prominent button in the video downloader software that is specifically labeled for starting the download process. This button is usually located near the video URL input field or within the download settings section.
- Wait for the download to complete: Once you click the “Download” or “Start” button, the video downloader software will begin fetching the video from the provided URL. The download progress will be displayed either as a percentage or a progress bar. Wait for the download to complete.
- Monitor the download speed: Depending on the size of the video and your internet connection speed, the download time may vary. Monitor the download speed to ensure that the video is downloading at an acceptable rate.
- Pause or cancel the download (if necessary): Some video downloader software allows you to pause or cancel the download process at any time. If you need to pause or stop the download, locate the corresponding button or option within the software.
Once the video download is complete, you can move on to the next step to locate the downloaded video file on your MacBook. Let’s proceed to Step 8!
Step 8: Monitor the video download progress
As you initiate the video download using the video downloader software on your MacBook, it is important to monitor the download progress. This allows you to ensure that the video is being downloaded successfully and keeps you informed about the remaining download time.
Follow these steps to monitor the video download progress:
- Check the download progress indicator: Most video downloader software provides a progress indicator that shows the current status of the download. Look for a percentage completed, a progress bar, or a visual representation that depicts the download progress.
- Observe the download speed: Monitor the download speed displayed in the video downloader software. This indicates how quickly the video is being downloaded from the source. A higher download speed indicates faster download progress.
- Ensure network stability: It is advisable to ensure a stable internet connection to optimize the download speed and minimize interruptions. Check your Wi-Fi or Ethernet connection and make sure it remains stable throughout the download process.
- Avoid interrupting the download: It is important to refrain from closing the video downloader software or shutting down your MacBook while the video is still downloading. Doing so may interrupt the download process and cause incomplete or corrupted video files.
- Patience is key: Depending on various factors such as the video size, internet speed, and server capacity, the video download may take some time. Exercise patience and allow the video downloader software to complete the download process.
By monitoring the video download progress, you can ensure that the download is proceeding smoothly and address any issues that may arise promptly. Once the download is complete, proceed to the next step to locate the downloaded video file on your MacBook. Let’s move on to Step 9!
Step 9: Locate the downloaded video file
After the video download is complete using the video downloader software on your MacBook, the next step is to locate the downloaded video file. Once you find the file, you can move, rename, or play it using your preferred media player.
Follow these steps to locate the downloaded video file:
- Open the video downloader software: If the video downloader software is still open, navigate to the download section or library within the software interface.
- Find the downloaded video: Look for the downloaded video in the list or grid view of the video downloader software. The file may be represented by a thumbnail image or an icon.
- Note the download location: Take note of the download location mentioned in the video downloader software. This is the folder where the video file is saved on your MacBook.
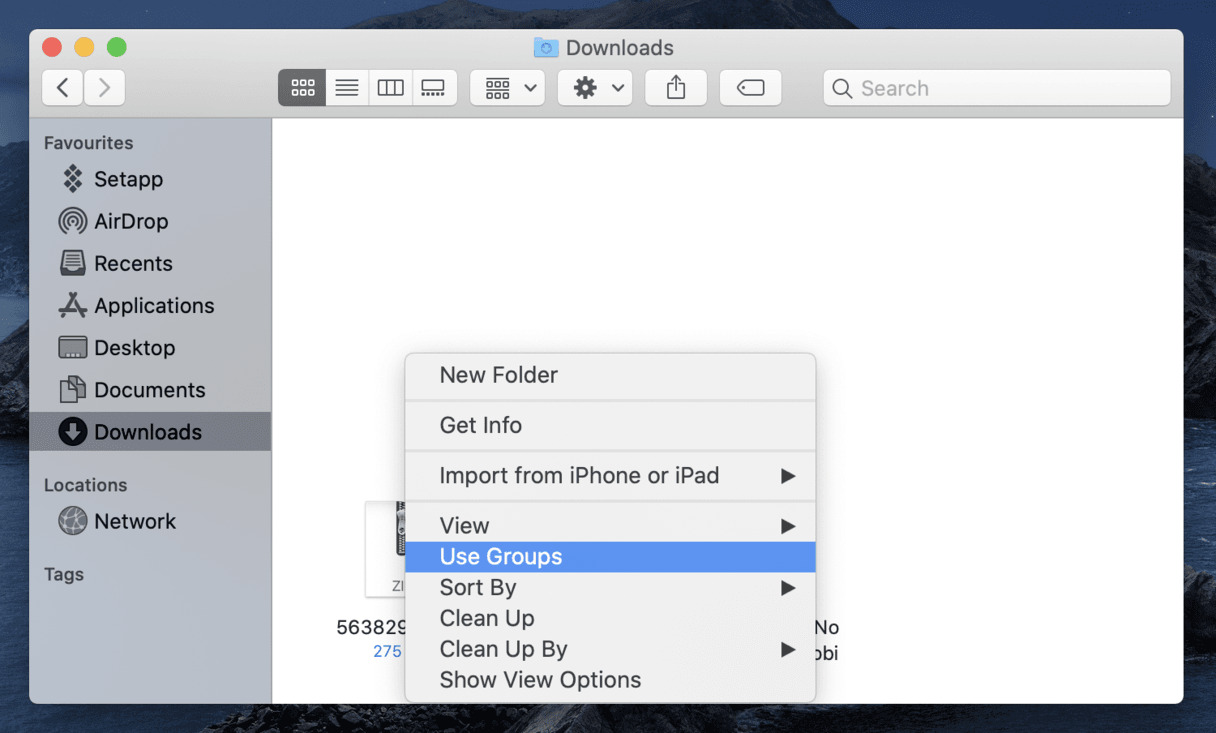
- Open the download location: Launch the Finder on your MacBook by clicking on the Finder icon in the Dock. Navigate to the download location mentioned by the video downloader software.
- Search for the video file: Within the download location, search for the video file using the appropriate file name or format. You can also sort the files by date modified to locate the recently downloaded video.
Once you have located the downloaded video file on your MacBook, you can perform various actions, such as moving it to a different folder, renaming it, or playing it using your preferred media player. Congratulations! You have successfully downloaded and located the video file. In the final step, we will guide you on how to enjoy your downloaded video on your MacBook. Let’s proceed to Step 10!
Step 10: Enjoy your downloaded video on MacBook
Congratulations on successfully downloading the video on your MacBook! Now it’s time to sit back, relax, and enjoy watching your downloaded video offline. With the video file on your MacBook, you have the flexibility to watch it at your convenience, even without an internet connection.
Follow these steps to enjoy your downloaded video on your MacBook:
- Launch your preferred media player: Open the media player application of your choice on your MacBook. You can use built-in players like QuickTime or popular third-party applications like VLC Media Player or IINA.
- Locate the downloaded video file: Use the media player’s open or import feature to locate and select the downloaded video file. Navigate to the folder where the video is saved and choose the file.
- Start playing the video: After selecting the video file, click the play button within the media player to start playing the video. Adjust the volume, screen size, or other playback settings as desired.
- Enjoy offline viewing: Sit back and enjoy watching the video on your MacBook. You can now watch it without the need for an internet connection, at any time and as many times as you like.
- Customize playback options: Depending on the media player you are using, you may have additional options to customize the playback experience. These options can include subtitles, audio tracks, playback speed, and more.
Remember, the downloaded video is stored on your MacBook, allowing you to access and watch it even when you’re offline. You can organize your video library by creating folders or playlists to conveniently manage and access your downloaded videos.
So, grab your popcorn, sit back, and enjoy your downloaded video on your MacBook. You’ve successfully completed all the steps to download and watch videos offline. Happy viewing!


