Introduction
Welcome to the world of Roku, a popular streaming platform that allows you to access a wide variety of entertainment channels and content. Whether you’re a movie buff, sports enthusiast, or simply looking for interesting documentaries, Roku offers a range of options to cater to your diverse interests. In this article, we will guide you through the process of downloading Roku and setting up your device.
Roku is a compact and user-friendly streaming device that connects to your television, transforming it into a smart TV. With Roku, you can stream movies, TV shows, music, and more from popular streaming services such as Netflix, Hulu, Amazon Prime Video, and Disney+. Additionally, Roku provides access to free channels, news, sports, and international content, making it a versatile entertainment hub.
Before diving into the download process, it’s important to note that Roku offers different models to choose from, including streaming sticks, streaming boxes, and smart TVs with built-in Roku capabilities. These options cater to various preferences and budget considerations, ensuring that you find the perfect Roku device to meet your needs.
Setting up Roku is a seamless process that requires a stable internet connection, an HDMI-compatible television, and a Roku account. In just a few simple steps, you’ll be able to enjoy an array of entertainment options right from the comfort of your own home.
In the following sections, we will discuss each step in detail, providing you with the necessary guidance to successfully download Roku and start streaming your favorite content. Let’s get started!
Step 1: Create a Roku Account
Before you can begin downloading channels and streaming content on your Roku device, you need to create a Roku account. This account serves as your gateway to the Roku ecosystem and allows you to add channels, personalize your preferences, and manage your device.
To create a Roku account, follow these simple steps:
- Using a computer or mobile device, open a web browser and go to the Roku website at www.roku.com.
- Click on the “Sign In” button located at the top-right corner of the page.
- If you don’t already have an account, select “Create Account” and enter the required details, including your name, email address, and password. Make sure to choose a secure password to protect your account.
- Read and agree to Roku’s terms and conditions, as well as their privacy policy.
- Complete the reCAPTCHA validation to confirm that you’re not a robot.
- Click on the “Continue” button to proceed.
- Verify your email address by clicking on the link sent to your registered email. This step is essential for account validation and security purposes.
- Once your email address is verified, you can then continue with the account setup process.
During the account setup process, Roku may ask for additional information, such as payment details, for subscribing to premium channels or making in-app purchases. However, this step is optional, and you can skip it if you prefer to only access free content.
Once your Roku account is created and set up, you’re ready to move on to the next step: connecting your Roku device. This step will enable you to start enjoying the vast selection of streaming channels Roku has to offer.
Step 2: Connect your Roku Device
After creating your Roku account, the next step is to connect your Roku device to your television. This will allow you to stream content directly to your TV screen and unlock the full potential of Roku’s entertainment offerings.
Here’s how you can connect your Roku device:
- Find an available HDMI port on your television and insert one end of the HDMI cable into the port.
- Connect the other end of the HDMI cable to the corresponding HDMI port on your Roku device.
- If your Roku device requires external power, connect one end of the power adapter to the Roku device and the other end to a power outlet.
- Turn on your television and select the appropriate HDMI input channel for the Roku device.
Once your Roku device is connected to your television, you will see the Roku logo displayed on your TV screen. This indicates that the connection has been successful and you are ready to proceed with the setup process.
It’s important to note that different Roku models may have slightly different connectivity options. Some models may use a power cord instead of a power adapter, while others may offer options for composite or component video connections. Be sure to refer to the specific instructions provided with your Roku device for the most accurate connection guidance.
Now that your Roku device is successfully connected to your TV, it’s time to move on to the next step: setting up your Roku device.
Step 3: Set up your Roku Device
Now that you have connected your Roku device to your television, it’s time to set it up and customize it to your preferences. Setting up your Roku device involves a few easy steps, including selecting the language, connecting to your Wi-Fi network, and updating the device’s software.
Follow these steps to set up your Roku device:
- On your TV screen, you will see the Roku logo. Press the power button on the Roku remote to start the setup process.
- Select your preferred language from the displayed options using the remote’s arrow keys and press “OK” to confirm.
- On the next screen, you will see a list of available Wi-Fi networks. Choose your Wi-Fi network from the list and enter the password when prompted. If you have an ethernet connection available, you can also connect your Roku device directly to the router using an ethernet cable.
- Your Roku device will now connect to the Wi-Fi network and perform a software update if necessary. This update ensures that you have the latest features and enhancements for your device.
- Once the software update is completed, your Roku device will restart.
- After the restart, you will see a screen prompting you to activate your Roku device. Follow the on-screen instructions to activate it by entering the provided activation code on the Roku website and linking it to your Roku account.
- Upon successful activation, your Roku device will display a congratulatory message, indicating that you are ready to proceed.
Once you have completed the setup process, your Roku device is ready to use. You can now explore the Roku Channel Store, download your favorite channels, and start streaming exciting content.
It’s worth mentioning that in some cases, you may encounter problems during the setup process such as network connectivity issues or software update failures. If you encounter any such issues, refer to Roku’s troubleshooting resources or contact their customer support for assistance.
With your Roku device set up, you can now move on to the next step: accessing the Roku Channel Store and finding the channels you want to download.
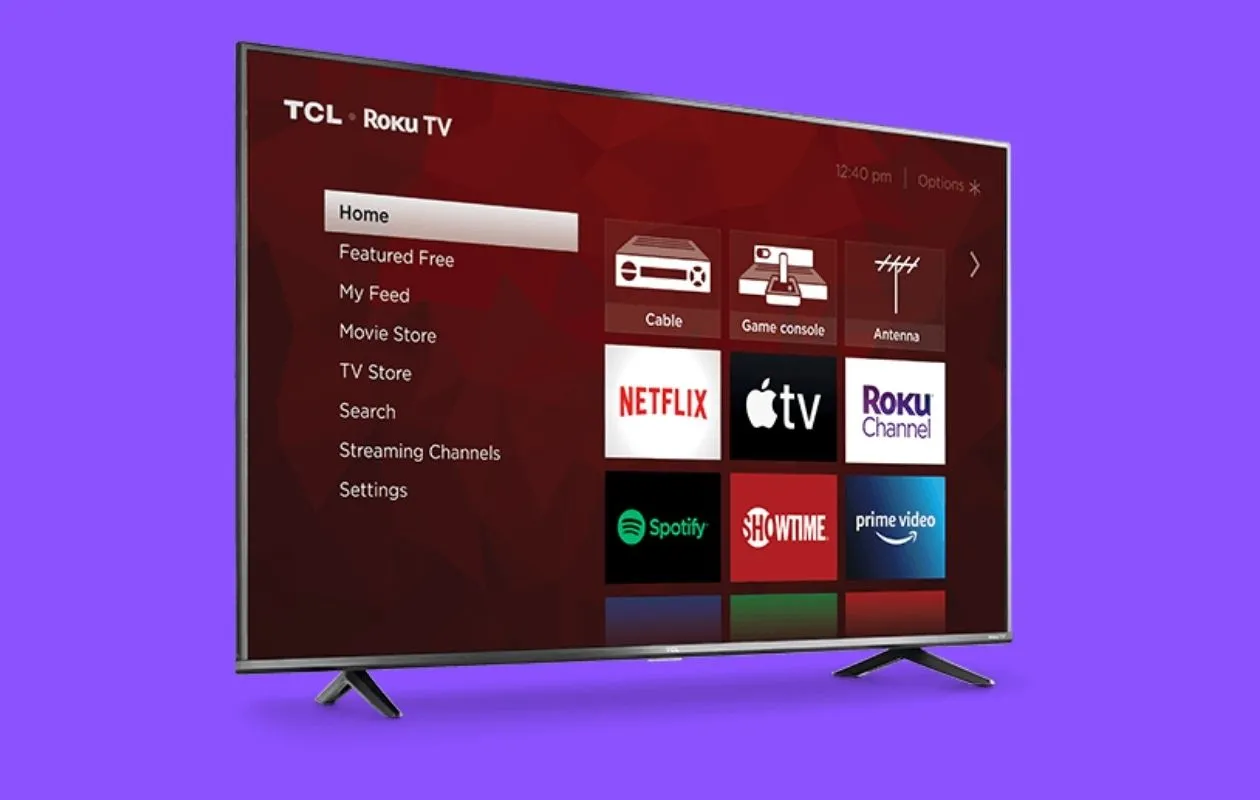
Step 4: Access the Roku Channel Store
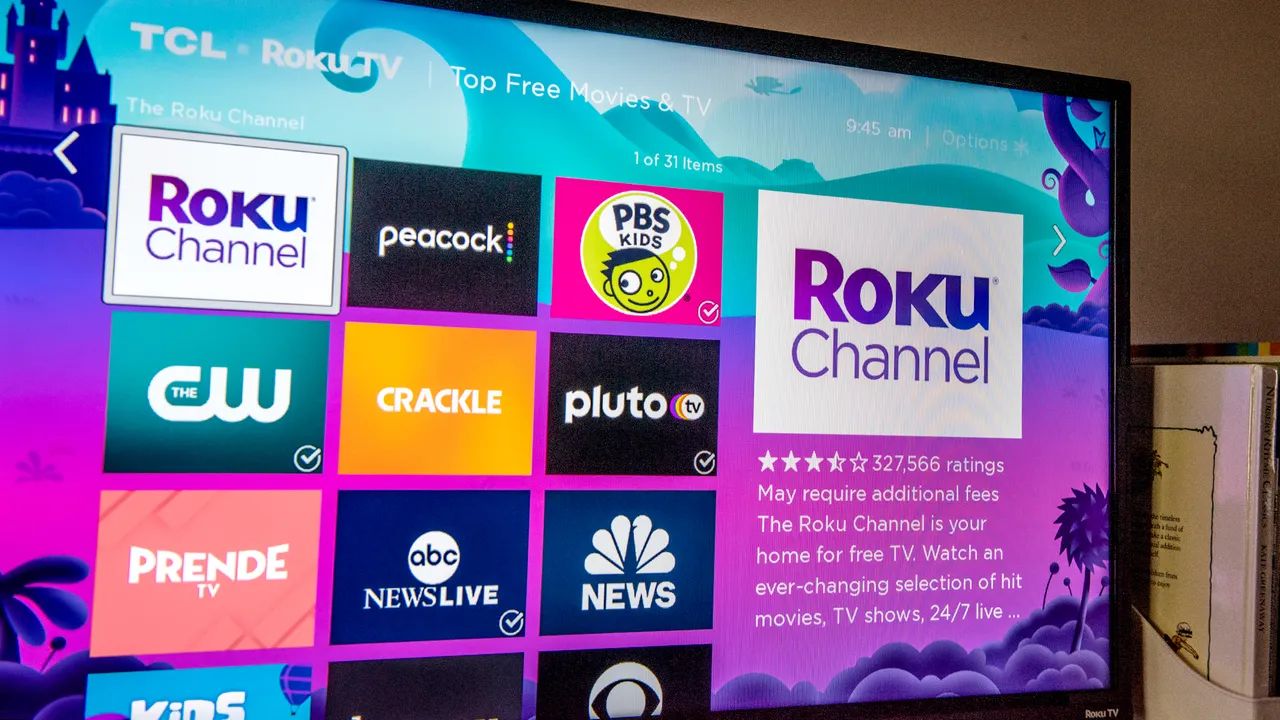
Now that your Roku device is set up, it’s time to access the Roku Channel Store and discover a wide range of channels to enhance your streaming experience. The Roku Channel Store is a digital marketplace where you can find and download various channels, including popular streaming services, free content, live TV, games, and more.
Here’s how you can access the Roku Channel Store:
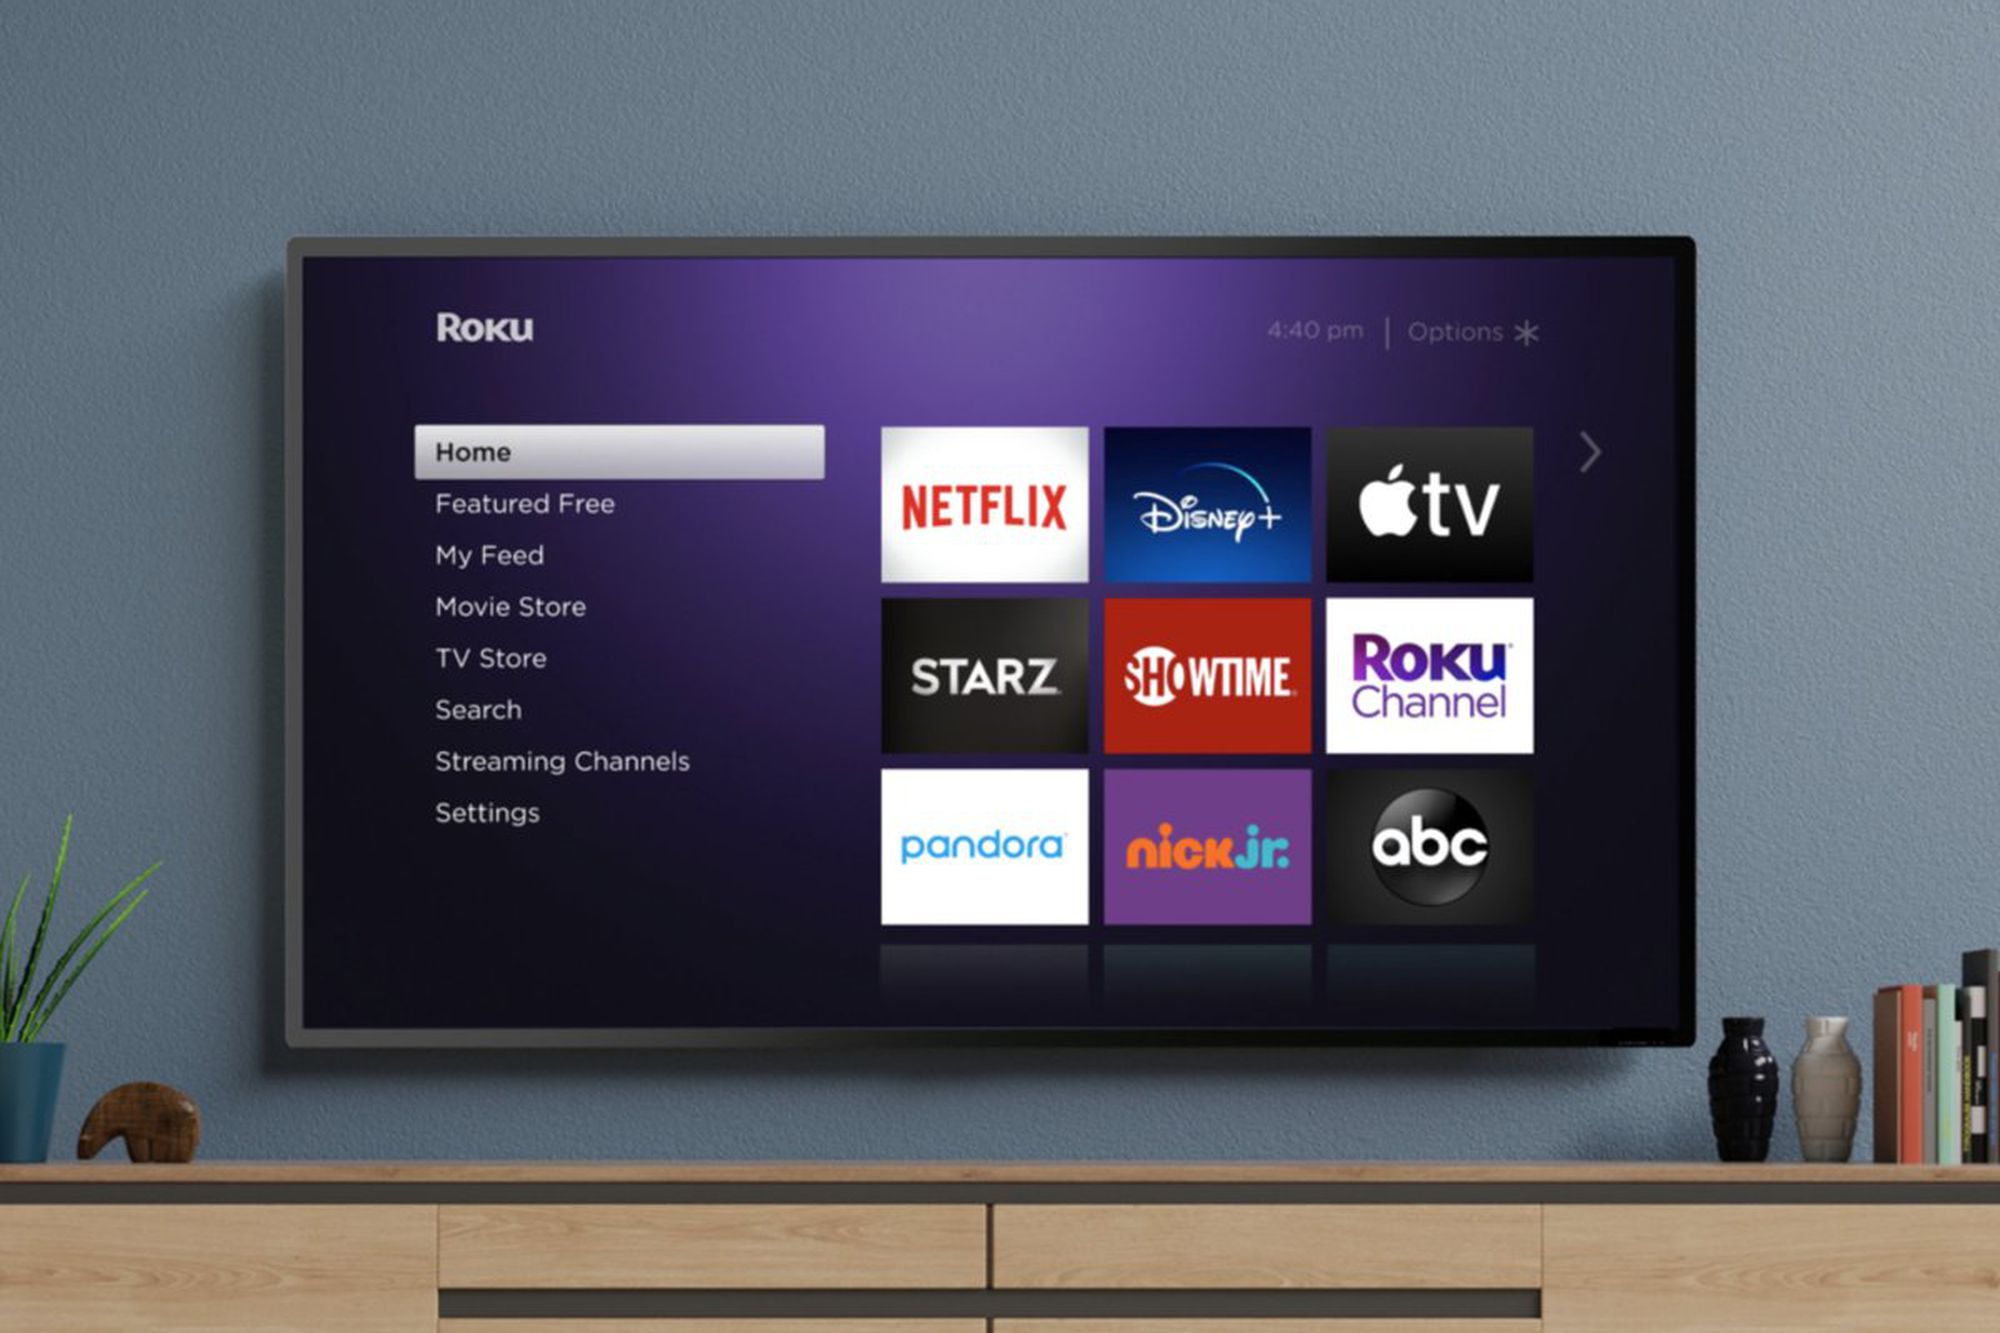
- On your Roku home screen, navigate to the left sidebar using the arrow keys on your remote.
- Scroll up or down and highlight the “Streaming Channels” option, then press the OK button.
- You will be taken to the Roku Channel Store, where you can explore different categories, such as Movies & TV, News & Weather, Sports, Kids & Family, and more.
- To browse through the available channels, scroll left or right, or use the search function to find specific channels by name or category.
- When you find a channel you want to download, highlight it and press the OK button to view more details.
- On the channel details page, you can read a description, see user ratings and reviews, and access additional information about the channel’s content and features.
- To download the channel, select the “Add channel” or “Install” option, and follow the on-screen instructions.
- Once the channel is downloaded, it will appear on your Roku home screen, ready to be accessed and enjoyed.
It’s important to note that while many channels are free to download and use, some may require a subscription or offer in-app purchases for access to premium content. Make sure to read the channel description and any associated costs before downloading.
The Roku Channel Store offers a vast selection of channels to cater to various interests and preferences. From blockbuster movies to popular TV shows, from live sports to educational programs, you’re sure to find channels that align with your entertainment preferences.
With access to the Roku Channel Store, you’re one step closer to unlocking a world of entertainment. In the next step, we will explore how to search for specific channels within the Roku Channel Store.
Step 5: Search for the Desired Channels
Now that you have access to the Roku Channel Store, it’s time to search for the specific channels you want to download and add to your Roku device. Whether you’re looking for a particular streaming service, a sports channel, or a specific genre of content, Roku makes it easy to find and add your desired channels.
Here’s how you can search for the channels you want:
- On your Roku home screen, navigate to the left sidebar and select the “Search” option using the arrow keys on your remote.
- Using the on-screen keyboard, enter the name of the channel you’re looking for. You can also search by keywords, genres, or specific categories.
- As you type, Roku will display matching results in real-time. This helps you quickly find the channel you’re looking for.
- Highlight the desired channel from the search results and press the OK button to view more details.
- On the channel details page, you can read a description, see user ratings and reviews, and access additional information about the channel’s content and features.
- To download the channel, select the “Add channel” or “Install” option, and follow the on-screen instructions.
- Once the channel is downloaded, it will appear on your Roku home screen, ready to be accessed and enjoyed.
Roku’s search functionality is powerful and efficient, making it easy for you to find the channels that align with your preferences. You can search for specific channels, explore channels by categories or genres, or even discover new channels recommended by Roku based on your viewing habits.
Whether you’re looking for popular streaming services like Netflix, Hulu, or Amazon Prime Video, or you want to explore niche channels catering to specific interests, Roku’s search feature will help you find the channels that offer the content you desire.
Now that you know how to search for and download channels on Roku, it’s time to move on to the next step: downloading the channels to your Roku device.
Step 6: Download Channels to Your Roku Device
Once you have found the desired channels in the Roku Channel Store, it’s time to download them and add them to your Roku device. By downloading channels, you can access a wide variety of content, including movies, TV shows, live sports, news, and more.
Follow these steps to download channels to your Roku device:
- On your Roku home screen, navigate to the left sidebar and select “Streaming Channels” using the arrow keys on your remote.
- In the Roku Channel Store, browse through the available channels or use the search function to find specific channels as mentioned in the previous step.
- When you find a channel you want to download, highlight it and press the OK button to view more details.
- On the channel details page, select the “Add channel” or “Install” option to initiate the download process.
- Wait for the channel to download and install on your Roku device. The download time may vary depending on the size of the channel and your internet connection speed.
- Once the download is complete, you will see a confirmation message, and the newly downloaded channel will appear on your Roku home screen.
- Repeat the process for any additional channels you want to download.
It’s important to note that some channels may require additional authentication or activation before you can start streaming their content. This is usually done by signing in with your credentials or entering an activation code provided by the channel. Follow the on-screen instructions for each specific channel to complete the activation process.
By downloading channels to your Roku device, you can create a personalized content library tailored to your interests. Whether you prefer watching movies, catching up on TV shows, or exploring niche channels, Roku offers a multitude of options to cater to your preferences.
With channels downloaded and available on your Roku device, you’re ready to manage and organize them for easy access and an optimized entertainment experience. We’ll explore this in the next step.
Step 7: Manage and Organize Your Channels
Now that you have downloaded and added channels to your Roku device, it’s time to manage and organize them for convenient access and a streamlined viewing experience. Roku provides several features to help you customize the order of your channels, move them to different locations, and even remove channels you no longer need.
Follow these steps to manage and organize your channels on Roku:
- On your Roku home screen, navigate to the channel you want to manage using the arrow keys on your remote.
- Once you have highlighted the desired channel, press the options (*) button on your remote to access the channel options.
- In the options menu, you will find various actions you can perform on the channel, such as moving it, removing it, or accessing additional settings (if available for that specific channel).
- To move a channel, select the “Move channel” option and use the arrow keys to navigate to your desired location. Press the OK button to confirm the new position.
- To remove a channel, select the “Remove channel” option and follow the on-screen prompts to confirm the removal.
- If you want to access additional settings for a channel, select the “Options” or “Settings” option in the channel options menu. This will vary depending on the channel and the options it offers.
- Repeat these steps for each channel you want to manage or organize.
Organizing your channels allows you to prioritize your most frequently accessed channels, making it easier to find and navigate through your preferred content. You can arrange your channels based on your viewing habits, genre preferences, or any other criteria that suit your needs.
Furthermore, if you have multiple Roku devices, you can ensure that the channel order remains consistent across all devices by enabling the “My linked devices” feature in your Roku account settings. This helps to maintain a unified experience across all your Roku devices.
Now that you have successfully managed and organized your channels, you’re all set to enjoy a seamless streaming experience on your Roku device. However, in the event of any issues or troubleshooting needs, we’ll cover some common solutions in the next step.
Step 8: Troubleshooting Common Issues
While Roku devices are designed to provide a smooth and hassle-free streaming experience, you may occasionally encounter some common issues. These can range from connectivity problems and playback issues to channel-specific glitches. Knowing how to troubleshoot these issues can help you quickly resolve them and get back to enjoying your favorite content.
Here are some common Roku troubleshooting tips:
- Check your internet connection: Ensure that your Roku device is properly connected to your Wi-Fi network or ethernet connection. Verify that your internet service is active and running smoothly.
- Restart your Roku device: Sometimes, a simple restart can resolve temporary glitches. Go to the Roku settings, select “System,” and choose the “System restart” option.
- Update the software: Outdated software can cause compatibility issues. Go to the Roku settings, select “System,” and choose “System update” to check for and install any available updates.
- Check for channel-specific updates: Some channels may require updates to fix bugs or improve performance. Go to the Roku settings, select “System,” and choose “Check for updates” under the “Software update” section to ensure all channels are up-to-date.
- Check for signal strength: If you’re experiencing buffering or playback issues, check the signal strength of your Wi-Fi network. Ensure that your Roku device is within range of the router or consider moving the router closer to your device.
- Clear cache and data: Some channels may accumulate cached data over time, leading to performance issues. To clear cache and data for a specific channel, go to the Roku settings, select “System,” choose “Advanced system settings,” and select “Clear cache” or “Clear data” under the “Manage storage” option.
- Reset your Roku device: If all else fails, you can perform a factory reset to restore your Roku device to its original settings. This should be considered as a last resort, as it will erase all your customized settings and downloaded channels. Go to the Roku settings, select “System,” choose “Advanced system settings,” and select “Factory reset” under the “Factory reset” option.
If you have followed these troubleshooting steps and are still experiencing issues with your Roku device, it’s recommended to visit Roku’s official support website or contact their customer support for further assistance. They have a wealth of resources available to help you resolve any persistent issues and ensure a seamless streaming experience.
By knowing how to tackle common issues, you can overcome any hurdles that may arise and continue enjoying the vast array of content available on your Roku device.
Conclusion
Congratulations! You have successfully learned how to download Roku, create a Roku account, connect your Roku device, set it up, access the Roku Channel Store, search for desired channels, download channels, manage and organize them, and troubleshoot common issues. With these steps mastered, you can now fully immerse yourself in the world of entertainment that Roku has to offer.
Roku provides a user-friendly streaming experience, allowing you to access a plethora of channels, including popular streaming services, live TV, free content, and more. With the ability to personalize your Roku device by organizing channels to your preference, you can easily navigate through your favorite content and discover new and exciting shows, movies, and sports events.
Remember to keep your Roku device and channels updated by regularly checking for software updates and channel updates. This ensures that you have the latest features, bug fixes, and security enhancements for a seamless and secure streaming experience.
If you encounter any difficulties along the way, don’t hesitate to refer to Roku’s comprehensive support resources, such as their website and customer support. They are dedicated to assisting users and can provide guidance to resolve any issues you may face.
Now that you have the knowledge to download Roku and make the most out of your streaming experience, sit back, relax, and enjoy a world of entertainment at your fingertips.