Introduction
Downloading DVDs to your computer has become a popular method for enjoying your favorite movies, TV shows, or video content. Whether you want to preserve your DVD collection digitally or simply have the convenience of accessing your movies without needing a physical DVD, the process of downloading DVDs to your computer is relatively straightforward.
In this step-by-step guide, we will walk you through the process of downloading a DVD to your computer. By following these instructions, you will be able to enjoy your favorite DVDs anytime, anywhere, without the need for a DVD player.
Before we dive into the details, it’s important to note that downloading DVDs may be subject to copyright laws in your country. Ensure that you have the right to download and make personal copies of DVDs before proceeding.
In this guide, we will be using DVD ripper software, which allows you to extract the contents of a DVD and save them as digital files on your computer. These files can then be played using media players, stored on external storage devices, or streamed to other devices such as smartphones or tablets.
With that said, let’s get started with the first step: choosing the right DVD ripper software.
Step 1: Choose the Right DVD Ripper Software
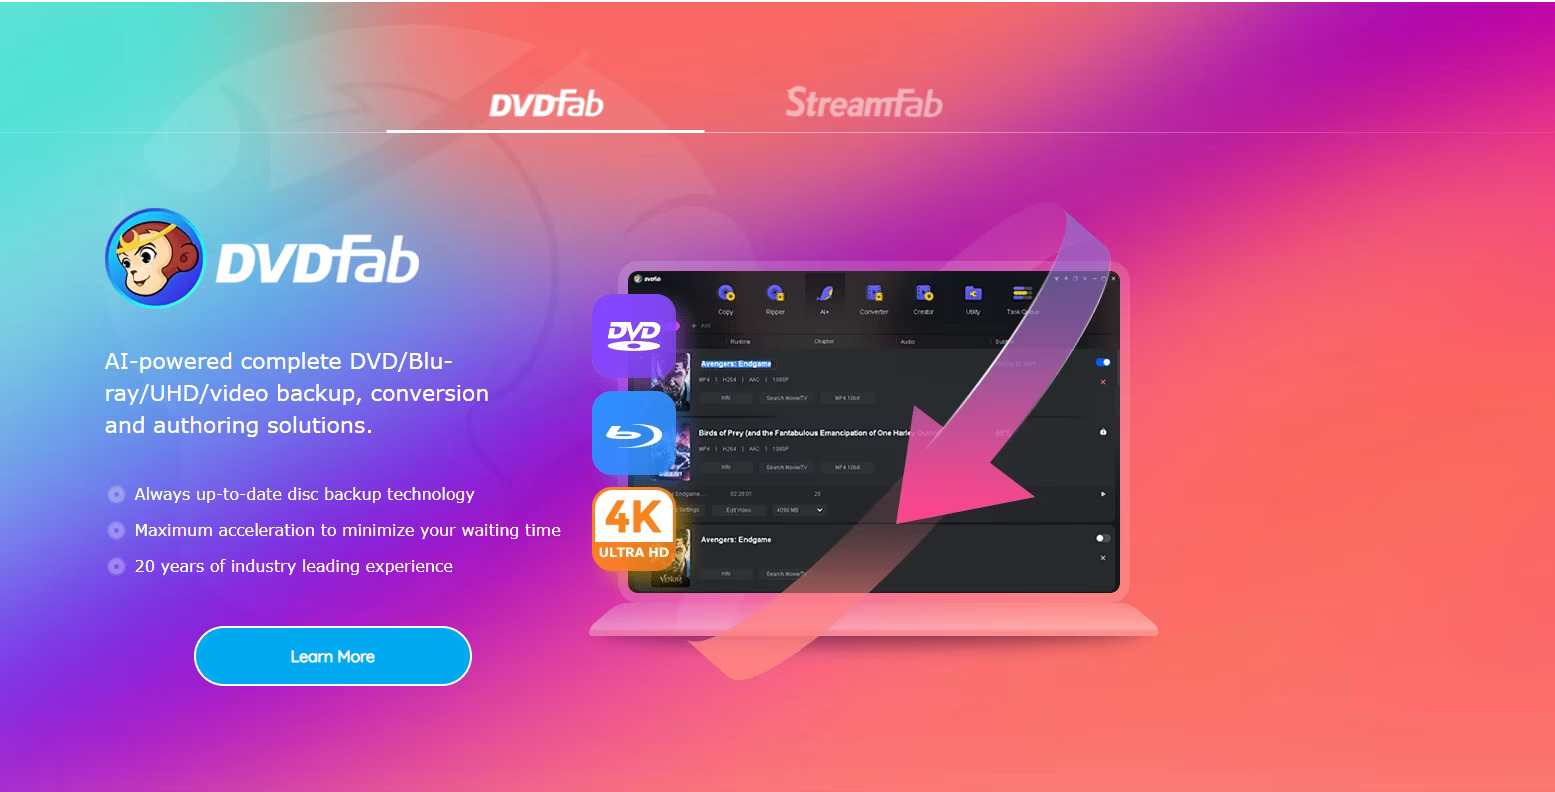
When it comes to downloading DVDs to your computer, the first and most crucial step is selecting the right DVD ripper software. DVD ripper software allows you to extract the content from your DVD and convert it into a digital format that can be saved on your computer. But with so many options available, how do you choose the right one?
First, consider your specific needs and requirements. Do you want a DVD ripper software that is easy to use with a user-friendly interface? Are you looking for advanced features such as customization options or support for different output formats? Understanding your needs will help you narrow down your choices.
Next, read reviews and compare different DVD ripper software options. Look for software that has a good reputation for quality, reliability, and security. Take note of the user ratings, feedback, and testimonials before making your decision.
Additionally, check the software’s compatibility with your operating system. Make sure it works well with the version of Windows or macOS you are using. Some DVD ripper software may also have specific system requirements that need to be met, so it’s important to check these as well.
Consider the level of technical expertise required to use the software. If you’re a beginner, you may want to choose a DVD ripper software that has a simple and intuitive interface, with step-by-step instructions. On the other hand, if you’re more experienced and comfortable with advanced settings, you may opt for software that offers more customization options.
Finally, consider your budget. While some DVD ripper software options are available for free, they may have limitations or lack certain features. Paid software often offers more functionality and support. Assess your budget and choose the software that provides the best value for your money.
By taking these factors into consideration, you will be able to choose the right DVD ripper software that meets your needs and ensures a smooth and hassle-free process for downloading DVDs to your computer.
Step 2: Install the DVD Ripper Software
Once you have chosen the DVD ripper software that suits your needs, the next step is to install it on your computer. Follow these simple steps to install the DVD ripper software:
- Locate the downloaded software file on your computer. It is usually in your Downloads folder unless you specified a different location during the download process.
- Double-click on the software file to begin the installation process. You may be prompted to confirm your action by granting permission to make changes to your computer.
- Follow the on-screen instructions provided by the installer. This usually involves accepting the software’s terms and conditions, choosing an installation location, and selecting any additional options or features you want to include.
- Click ‘Install’ or ‘Next’ to initiate the installation. Depending on the software, it may take a few seconds or several minutes to complete the process. Be patient and avoid interrupting the installation.
- Once the installation is complete, you may be prompted to restart your computer. If so, save any important work and click ‘Restart’ to allow the changes to take effect.
- After your computer restarts, launch the DVD ripper software from your desktop or Start menu. Familiarize yourself with the software’s interface and layout to make the ripping process easier.
It is important to note that some DVD ripper software may require additional steps during the installation process. This may include installing additional codecs or plugins for compatibility with various audio and video formats. Follow the instructions provided by the software installer carefully to ensure a successful installation.
By following these steps, you will have the DVD ripper software installed on your computer and be ready to proceed to the next step: inserting the DVD into your computer.
Step 3: Insert the DVD into Your Computer
With the DVD ripper software installed on your computer, it’s time to insert the DVD that you want to download into your computer’s DVD drive. Follow these steps to insert the DVD:
- Ensure that your computer is powered on and not in sleep mode or hibernation.
- Locate the DVD disc that you want to download and ensure it is free from any visible scratches or damage.
- Locate the DVD drive on your computer. It is usually located on the front panel of desktop computers or the side of laptops. The DVD drive is typically labeled with a DVD symbol.
- Gently push the DVD tray to open it. If your computer has an auto-loading mechanism, the DVD tray may automatically open once you press the eject button.
- Place the DVD disc onto the tray with the readable side facing up. Align the disc with the circular indentation in the center of the tray.
- Gently push the DVD tray back into the DVD drive until it is fully inserted. Make sure the tray locks securely into place.
Once the DVD is inserted into your computer, the DVD ripper software should automatically detect the inserted disc and display its contents. If the software doesn’t launch automatically, open it manually and locate the option to load or import the DVD contents.
It’s important to note that some computers may require additional steps to play DVDs or recognize them in the DVD drive. If your computer does not automatically detect the DVD or the DVD ripper software fails to recognize it, ensure that your DVD drive’s drivers are up to date and check your computer’s settings to enable DVD playback.
With the DVD successfully inserted into your computer, you’re now ready to proceed to the next step: selecting the DVD files to rip.
Step 4: Select the DVD Files to Rip
After inserting the DVD into your computer, the next step is to select the specific files or content that you want to rip from the DVD. Here’s how to do it:
- Open the DVD ripper software that you previously installed on your computer.
- Click on the option to load or import the DVD contents. This may be labeled as “Load DVD”, “Add Disc”, or something similar.
- The software will then analyze the DVD and display a list of the available files and content on the DVD.
- Browse through the list of files and select the ones you want to rip. You can usually select individual files or choose to rip the entire DVD.
- If you’re ripping multiple files, you may have the option to select the output format and settings for each file. You can typically choose from popular formats such as MP4, AVI, MKV, or others.
- Once you have selected the desired files and adjusted any necessary settings, confirm your choices and proceed to the next step.
It’s important to note that some DVD ripper software may automatically select the main feature or video on the DVD. If you want to rip the entire DVD, including special features or bonus content, make sure to choose the appropriate option.
Remember to consider the available storage space on your computer when selecting the DVD files to rip. DVDs can contain a large amount of data, so ensure that you have enough space to accommodate the ripped files.
By following these steps, you will be able to select the specific DVD files to rip, tailor the output format and settings if desired, and move on to the next step: choosing the output format for the ripped DVD.
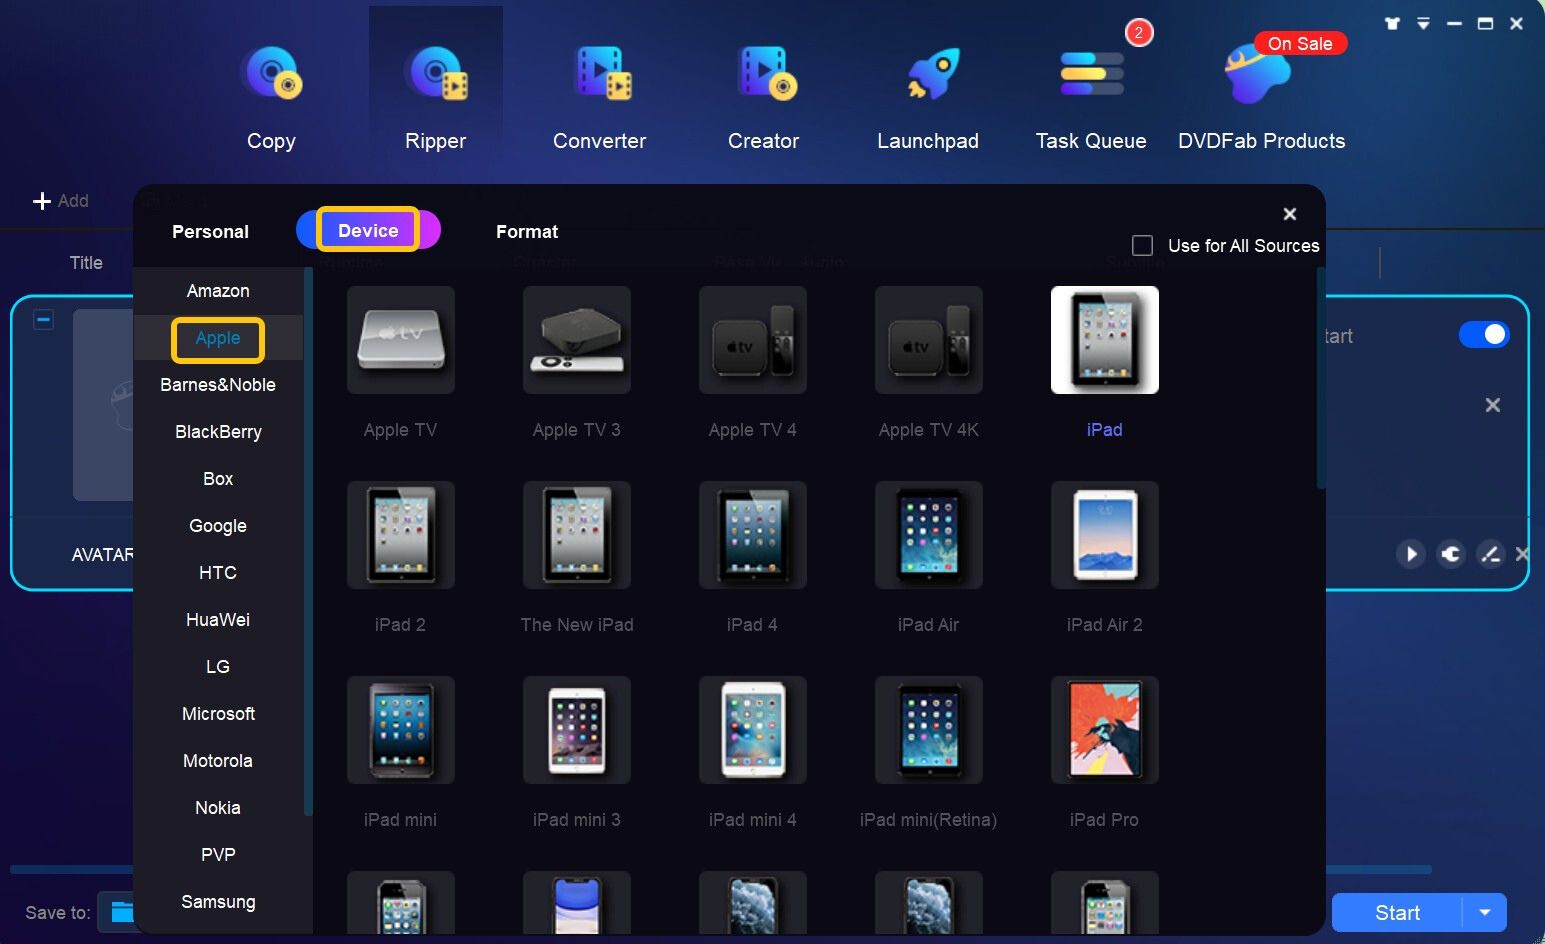
Step 5: Choose the Output Format for the Ripped DVD
Once you have selected the DVD files to rip, the next step is to choose the output format for the ripped DVD. The output format determines how the ripped files will be saved on your computer and the compatibility of the files with different devices and media players. Follow these steps to choose the output format:
- Within the DVD ripper software, locate the options or settings related to the output format.
- You will typically see a list of available formats, such as MP4, AVI, MKV, or others.
- Consider the compatibility of the output format with the devices or media players you plan to use. For example, MP4 is widely supported and can be played on various devices, while AVI may be better for certain media players.
- Take into account the quality and file size of the output format. Formats like MP4 with H.264 compression can offer a good balance between quality and file size.
- If desired, you may have additional options to customize the output format, such as selecting the resolution, bit rate, or aspect ratio.
- Choose the output format that best suits your needs and preferences.
When choosing the output format, it’s important to consider the specific requirements of your intended playback devices or media players. Research the supported formats and codecs for your devices to ensure compatibility.
Additionally, keep in mind the storage capacity of your computer. Higher quality output formats may result in larger file sizes, so make sure you have enough storage space available.
By following these steps and selecting the appropriate output format for the ripped DVD files, you will be ready to proceed to the next step: setting the output folder for the ripped DVD.
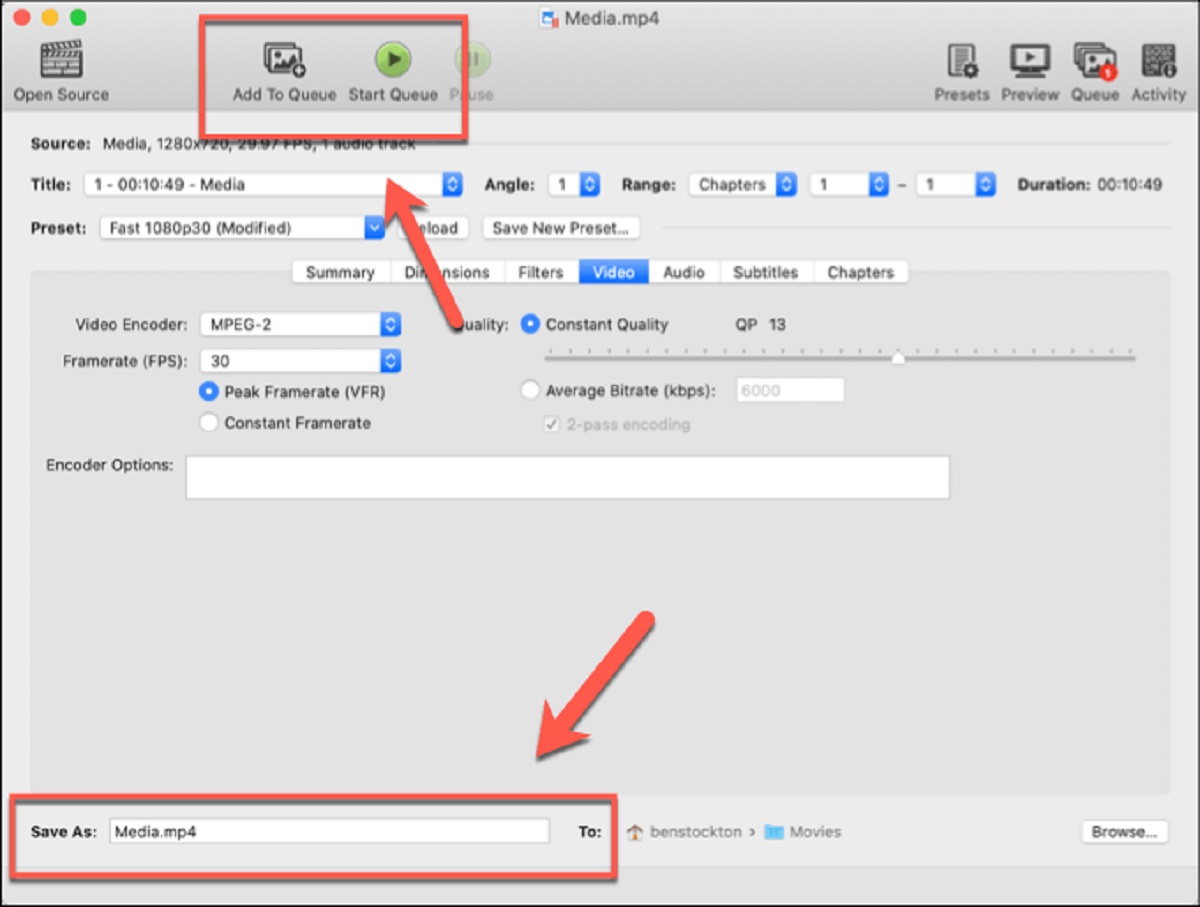
Step 6: Set the Output Folder
After choosing the output format for the ripped DVD, the next step is to set the output folder where the ripped files will be saved on your computer. The output folder is the location where the DVD ripper software will store the extracted content. Here’s how to set the output folder:
- Within the DVD ripper software, locate the option to set the output folder or destination.
- Click on the folder icon or browse button to browse through your computer’s file system and select a suitable location to save the ripped DVD files.
- You can choose to create a new folder specifically for the ripped DVD files or select an existing folder.
- Ensure that the selected output folder has enough free space to accommodate the ripped files.
- Confirm your selection and proceed to the next step.
It’s important to choose a location for the output folder that is easily accessible and organized. Consider creating a dedicated folder for your ripped DVDs to keep them well-organized and easily manageable.
When selecting the output folder, consider the storage capacity of your computer and the size of the ripped DVD files. Make sure you have enough free space in the chosen output folder to store the files without running into storage constraints.
By following these steps and setting the appropriate output folder for the ripped DVD files, you will be ready to move on to the next step: starting the process of ripping the DVD.
Step 7: Start Ripping the DVD
With the output folder set, you are now ready to begin the process of ripping the DVD. Follow these steps to start ripping the DVD:
- Review your settings and ensure that the DVD ripper software is configured as desired, including the selected DVD files, output format, and output folder.
- Click on the “Start” or “Rip” button within the software to initiate the ripping process.
- The software will begin extracting the content from the DVD and converting it into the selected output format.
- Depending on the size of the DVD and the processing power of your computer, the ripping process may take some time. Be patient and avoid interrupting the process.
- You may have the option to monitor the progress of the ripping process within the software. This could include a progress bar or percentage completion indicator.
- Once the ripping process is complete, you will receive a notification or the software will indicate that the process has finished.
It’s important to note that the time required to rip a DVD can vary depending on factors such as the speed of your DVD drive, the size of the DVD, and the processing power of your computer. Larger DVDs or those with complex encryption may take longer to rip.
During the ripping process, make sure not to interrupt or turn off your computer. Interruptions could lead to incomplete or corrupted ripped files.
By following these steps, you will successfully start the process of ripping the DVD. Once the process is complete, you can move on to the next step: verifying the ripped DVD files.
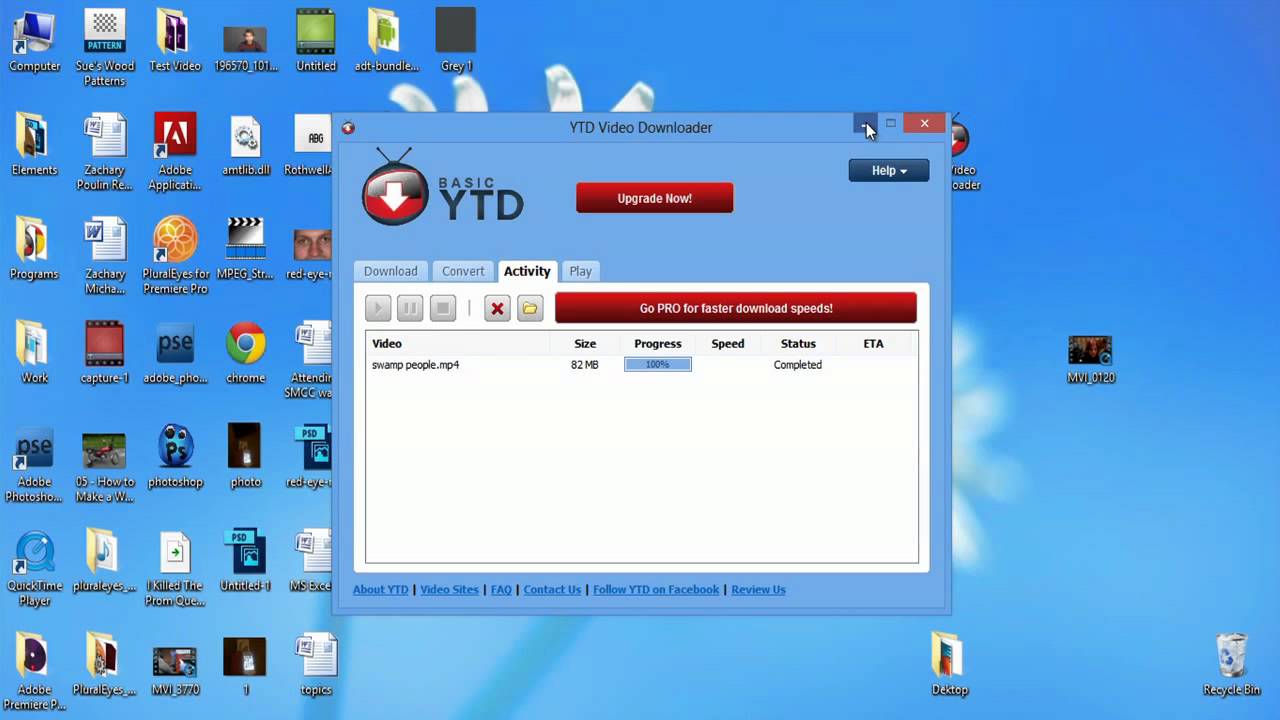
Step 8: Monitor the Ripping Progress
While the DVD is being ripped, it is important to monitor the progress to ensure that the process is running smoothly and to estimate the remaining time. Here’s how you can monitor the ripping progress:
- Within the DVD ripper software, locate the area where the ripping progress is displayed.
- Depending on the software, you may see a progress bar, a percentage completed indicator, or an estimated time remaining.
- Keep an eye on the progress indicators to see the advancement of the ripping process.
- If the software provides an estimated time remaining, it can give you an idea of how much longer the process will take.
- Avoid interrupting the process or shutting down your computer while the ripping is in progress to prevent any potential issues or incomplete files.
- Take note that the ripping speed can vary depending on various factors, including the speed of your DVD drive and the processing power of your computer.
It’s important to be patient as the ripping process can take some time, especially for larger DVDs or those with complex encryption. The time required to complete the ripping process will depend on the size of the DVD and the performance of your computer.
By monitoring the ripping progress, you can closely track the advancement of the process and ensure that it is proceeding smoothly. This will allow you to estimate the remaining time and plan accordingly.
Once the ripping process is complete, you can move on to the next step: verifying the ripped DVD files and ensuring that they have been successfully saved to the specified output folder.
Step 9: Verify the Ripped DVD Files
After the ripping process is complete, it is important to verify the ripped DVD files to ensure they have been successfully saved to the specified output folder. Follow these steps to verify the ripped DVD files:
- Open the output folder where the ripped DVD files were saved on your computer.
- Check if all the selected DVD files are present in the folder.
- Verify the file names, extensions, and sizes to ensure they match the original DVD content.
- If the DVD contained multiple video titles or chapters, confirm that each video file has been ripped correctly.
- Play a few minutes of each video file using a media player to ensure that the quality and playback are satisfactory.
- Listen to the audio tracks and check the subtitles, if applicable, to ensure they have been ripped accurately.
If you find any issues or missing files during the verification process, you may need to revisit the DVD ripper software settings and re-rip the DVD to ensure all desired content is captured correctly.
It’s important to note that the ripped DVD files may have different file formats or extensions compared to the original DVD. This is normal, as the DVD ripper software converts the DVD content into a digital format that is compatible with your computer and other devices.
By verifying the ripped DVD files, you can confirm that the ripping process was successful and that the content is accurately saved on your computer. This allows you to proceed to the final step: enjoying the ripped DVD on your computer.
Step 10: Enjoy the Ripped DVD on Your Computer
After successfully ripping the DVD and verifying the ripped files, you are now ready to enjoy the ripped DVD on your computer. Follow these steps to enjoy your newly ripped DVD:
- Launch your preferred media player on your computer.
- Navigate to the output folder where the ripped DVD files are saved.
- Select the desired video file to start playing it.
- Adjust the playback settings such as volume, subtitles, or video quality according to your preferences.
- Sit back, relax, and enjoy watching your favorite movie or TV show from the ripped DVD.
You can also transfer the ripped DVD files to other devices like smartphones, tablets, or media servers for playback on the go or on a bigger screen.
Remember to always respect copyright laws and only use ripped DVDs for personal use or in accordance with the applicable regulations in your country. Sharing or distributing ripped DVDs without permission may infringe upon the rights of content owners and lead to legal consequences.
By following these steps, you can enjoy the convenience of having your DVDs stored digitally on your computer and access them whenever you want without relying on physical discs or DVD players.
Now that you have successfully ripped and enjoyed your DVD on your computer, you can explore other possibilities such as creating backups, organizing your digital library, or exploring other ways to enhance your media consumption experience.