Introduction
Welcome to the world of action-packed gaming! If you’re a proud owner of a MacBook and a passionate fan of the renowned Call of Duty series, you might be wondering how to download and play Call of Duty on your MacBook. Look no further, as we’ve got you covered with a step-by-step guide on how to seamlessly enjoy the thrill of this popular game on your Apple device.
Before we dive into the nitty-gritty, it’s important to note that macOS is not directly compatible with Windows games like Call of Duty. However, with the help of Boot Camp, a built-in utility within macOS, you can install Windows on your MacBook and unlock the opportunity to experience this exhilarating game.
This guide will walk you through setting up Boot Camp, installing Windows, downloading Call of Duty, and launching the game on your MacBook. So, grab your MacBook, fasten your seatbelt, and get ready to embark on an action-packed gaming adventure!
Whether you’re battling it out in the gritty trenches of World War II or engaging in intense multiplayer warfare, Call of Duty offers an immersive and adrenaline-fueled gaming experience. From its top-notch graphics and engaging storylines to its multiplayer modes that keep you coming back for more, this game has captivated millions of avid gamers around the world.
So, without further ado, let’s jump right into the process of downloading and playing Call of Duty on your MacBook. But before we get into the technical steps, let’s ensure your MacBook meets the system requirements necessary to run the game smoothly.
System Requirements
Before delving into the process of downloading and playing Call of Duty on your MacBook, it’s important to ensure that your device meets the necessary specifications to run the game smoothly. Here are the system requirements you need to fulfill:
- Operating System: macOS High Sierra or later
- Processor: Intel Core i5 or higher
- Memory: 8GB RAM
- Storage: Minimum of 60GB of available storage space
- Graphics: Dedicated graphics with at least 2GB of VRAM
- Internet Connection: Required for game updates and multiplayer features
It’s crucial to note that these are the minimum system requirements, and for optimal performance, it’s recommended to have a more powerful MacBook configuration. Additionally, the available storage space should be sufficient to accommodate the game files and any future updates.
If your MacBook meets the necessary system requirements, then you’re ready to proceed with the next steps. However, if your device falls short in any of these aspects, you might want to consider upgrading or looking into alternative options, such as playing Call of Duty on a different device that meets the requirements.
With the system requirements covered, it’s time to move on to the first step of the process – setting up Boot Camp on your MacBook to install Windows.
Step 1: Set up Boot Camp
The first step in downloading and playing Call of Duty on your MacBook is to set up Boot Camp, a utility provided by Apple that allows you to install Windows on your MacBook. Here’s how you can do it:
- Open the “Applications” folder on your MacBook and navigate to the “Utilities” folder.
- Locate and open the “Boot Camp Assistant” application.
- Once the Boot Camp Assistant launches, click on the “Continue” button.
- Choose the destination where you want to install Windows. Make sure you have enough available disk space for the Windows installation.
- Select the “Download the latest Windows support software from Apple” option to ensure your MacBook has all the necessary drivers for Windows.
- Click on the “Continue” button.
- The Boot Camp Assistant will automatically download the Windows support software and create a partition for Windows on your MacBook’s hard drive.
- Follow the on-screen instructions to complete the Boot Camp setup.
- Once the setup is complete, your MacBook will restart, and you’ll be prompted to select the desired boot device. Choose the Windows option to proceed.
- Windows will start up, and you can now move on to the next step of installing Windows on your MacBook.
Setting up Boot Camp may take some time, so be patient and ensure that you have a stable internet connection. Once the setup is complete, you’ll have Windows running on your MacBook, giving you access to a whole new world of gaming possibilities.
With Boot Camp successfully set up, it’s time to move on to the next step – installing Windows on your MacBook.
Step 2: Install Windows on your MacBook
Now that you have set up Boot Camp on your MacBook, the next step is to install Windows. Follow the steps below to install Windows on your MacBook:
- Restart your MacBook and hold down the Option (⌥) key as it boots up. This will bring up the boot menu.
- Select the Windows option to boot into the Windows setup.
- Choose your preferred language, time, and currency format, then click “Next.”
- Click on the “Install Now” button to begin the Windows installation process.
- Read and accept the license terms, then click “Next.”
- On the next screen, select “Custom: Install Windows only (advanced)” option.
- Now, you’ll see a list of available partitions. Select the partition labeled “BOOTCAMP” or the partition you created using Boot Camp Assistant.
- Click on the “Next” button to start the Windows installation on the selected partition.
- Follow the on-screen prompts to complete the Windows installation process.
- Once the installation is complete, your MacBook will restart, and you’ll be prompted to set up Windows.
- Proceed with the setup by following the on-screen instructions, including creating a user account and setting up Windows preferences.
After the setup process, you will have Windows installed on your MacBook. Now, it’s time to move on to the exciting part – downloading Call of Duty on your MacBook.
Note: It’s important to keep your MacBook connected to a reliable power source during the Windows installation process to ensure smooth completion.
Step 3: Download Call of Duty on your MacBook
Now that you have Windows installed on your MacBook using Boot Camp, it’s time to download Call of Duty and get ready to immerse yourself in thrilling gameplay. Follow these steps to download Call of Duty on your MacBook:
- Launch the Windows operating system on your MacBook by restarting and selecting the Windows option from the boot menu.
- Connect your MacBook to a stable internet connection. You’ll need a reliable internet connection to download the game files.
- Open your preferred web browser on the Windows operating system.
- Visit the official website of the digital game store where Call of Duty is available for purchase and download.
- Create an account on the website if you don’t already have one. This may involve providing necessary personal information and payment details.
- Search for Call of Duty in the store’s search bar or navigate to the Call of Duty game page.
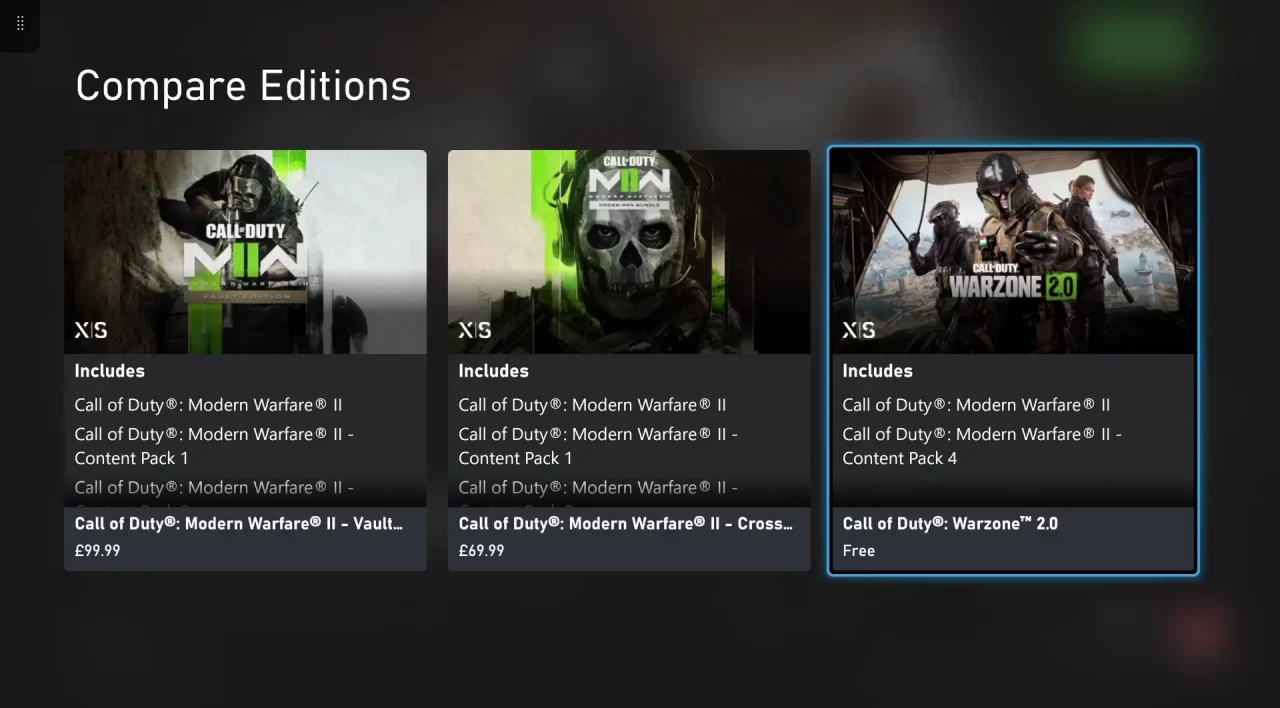
- Select the specific version or edition of Call of Duty that you wish to download and add it to your cart.
- Proceed to the checkout process and complete the purchase. Ensure that you are purchasing the version compatible with Windows.
- Once the purchase is complete, you’ll be provided with a link or an option to download the game directly to your MacBook.
- Click on the download link or option, and the game files will begin to download onto your MacBook.
- Depending on the size of the game and the speed of your internet connection, the download may take some time. Patience is key!
Once the download is complete, you are one step closer to experiencing the thrill of Call of Duty on your MacBook. The next step is to install the game on your MacBook, which we will cover in the following section.
Step 4: Install Call of Duty on your MacBook
With the Call of Duty game files successfully downloaded onto your MacBook, it’s time to install the game and prepare for action-packed gameplay. Follow these steps to install Call of Duty on your MacBook:
- Navigate to the folder where the Call of Duty game files were downloaded. This is usually the default “Downloads” folder unless you chose a different location during the download.
- Locate the downloaded game file, which is typically in the form of a compressed file (e.g., a .zip or .rar file).
- Extract or unzip the game file using a file extraction utility like WinRAR or 7-Zip. Right-click on the file and select the appropriate option from the context menu.
- Once the game files are extracted, open the extracted folder to access the installation files.
- Look for an executable file with a name like “setup.exe” or “install.exe.” Double-click on this file to initiate the game installation process.
- Follow the on-screen prompts and instructions provided by the game installer to proceed with the installation. This may involve accepting the game’s license agreement, selecting an installation location, and choosing additional components or options.
- Click on the “Install” or “Next” button to start the installation process.
- Wait for the installation process to complete. The progress may be displayed on-screen, and you may see a progress bar indicating the status of the installation.
- Once the installation is finished, you may be prompted to restart your MacBook. If prompted, go ahead and restart your MacBook to finalize the installation process.
- After your MacBook has restarted, you can now move on to the final step – launching Call of Duty on your MacBook and indulging in thrilling gameplay.
With Call of Duty successfully installed on your MacBook, get ready to experience the adrenaline rush of intense battles and captivating storylines. The next section will guide you through launching Call of Duty on your MacBook so that you can dive into the action.
Step 5: Launch Call of Duty on your MacBook
Now that you have Call of Duty installed on your MacBook, it’s time to launch the game and jump into the gripping world of intense warfare and immersive multiplayer battles. Follow these steps to launch Call of Duty on your MacBook:
- Ensure that your MacBook is running the Windows operating system. Restart your MacBook if necessary and select the Windows option from the boot menu.
- Navigate to the desktop or the Start menu in Windows and locate the shortcut or icon for Call of Duty.
- Double-click on the Call of Duty shortcut or icon to launch the game.
- Wait for the game to load. This may take a few moments depending on the performance of your MacBook and the game’s system requirements.
- Once the game has launched, you will be greeted with the main menu. From here, you can choose to play the campaign mode, multiplayer, or explore other game modes and options.
- Take a moment to adjust the in-game settings, such as graphics quality, audio settings, and control preferences, to ensure the best gaming experience on your MacBook.
- Once you have customized the settings to your liking, select your desired game mode and dive into the heart-pounding action of Call of Duty.
Congratulations! You have successfully launched Call of Duty on your MacBook and are now ready to unleash your skills and embark on thrilling missions or battle it out with other players in the multiplayer mode. Immerse yourself in the intense gameplay, stunning visuals, and captivating storylines that have made Call of Duty a beloved franchise worldwide.
Remember to save your progress regularly and enjoy the gaming experience to the fullest. Strap on your virtual gear, lock and load, and get ready for an adrenaline-fueled adventure!
Conclusion
Congratulations on successfully downloading and playing Call of Duty on your MacBook! By following the steps outlined in this guide, you have unlocked the thrilling world of intense warfare, captivating storylines, and immersive multiplayer battles right on your Apple device.
From setting up Boot Camp and installing Windows on your MacBook to downloading Call of Duty and launching the game, you have taken the necessary steps to enjoy this popular gaming franchise. Remember to ensure that your MacBook meets the minimum system requirements, have a stable internet connection during the download and installation process, and customize the in-game settings to optimize your gaming experience.
Call of Duty offers a diverse range of gameplay modes, including a gripping campaign, fast-paced multiplayer battles, and even cooperative multiplayer experiences. Explore the various game modes, unlock achievements, and compete with other players from around the world to prove your skills.
Remember to keep your MacBook updated with the latest Windows and game updates to ensure smooth gameplay, and consider connecting with fellow gamers through online communities and forums to enhance your gaming experience.
Now that you have the knowledge and the steps to install and play Call of Duty on your MacBook, get ready to embark on an unforgettable gaming adventure. Strap in, grab your controller or keyboard, and prepare to experience the adrenaline rush of intense battles, gripping narratives, and endless hours of excitement. So, step into the shoes of a soldier, make your mark on the battlefield, and enjoy the thrilling world of Call of Duty on your MacBook!