Introduction
Welcome to this handy guide on how to download a CSV file on your Mac. CSV (Comma-Separated Values) files are widely used for organizing and storing data in a simple and flexible format. Whether you need to download a CSV file for work or personal use, it’s important to know the proper steps to ensure a seamless and successful download process.
Downloading a CSV file on a Mac is a straightforward process that can be accomplished in just a few simple steps. In this guide, we will walk you through the process from start to finish, so you can quickly and easily download the CSV files you need.
CSV files can contain various types of information, such as names, email addresses, product details, financial data, and much more. They are often used in applications like spreadsheets, databases, and data analysis tools. By following the steps outlined in this guide, you will be able to download CSV files and access their valuable information on your Mac.
Whether you are a business professional, a data analyst, or simply someone who needs to download a CSV file, this guide is designed to help you navigate the process with ease. So, let’s get started and learn how to download a CSV file on your Mac.
Step 1: Find the CSV file you want to download
The first step in downloading a CSV file on your Mac is to locate the file you want to download. This could be a file that you’ve received via email, a file on a website, or a file stored on your computer.
If you received the CSV file via email, open your email application and navigate to the email containing the attachment. Look for any indications that the email includes a CSV file, such as a file name extension or a description in the email body.
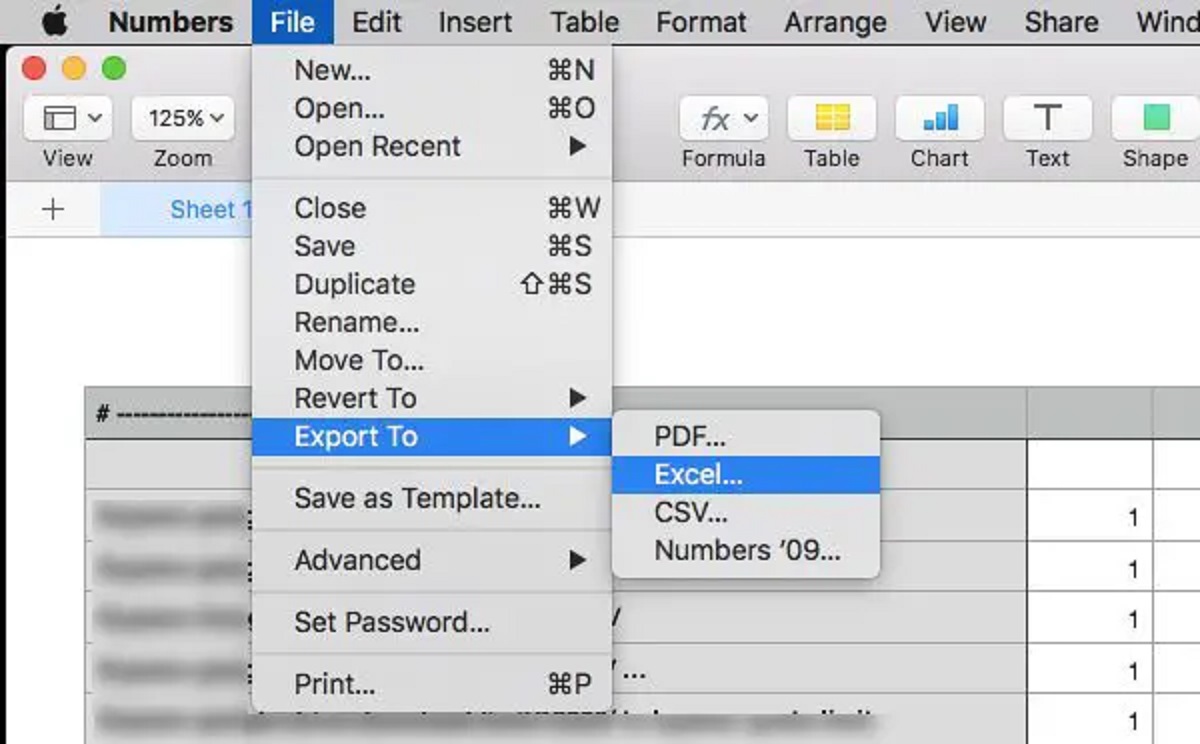
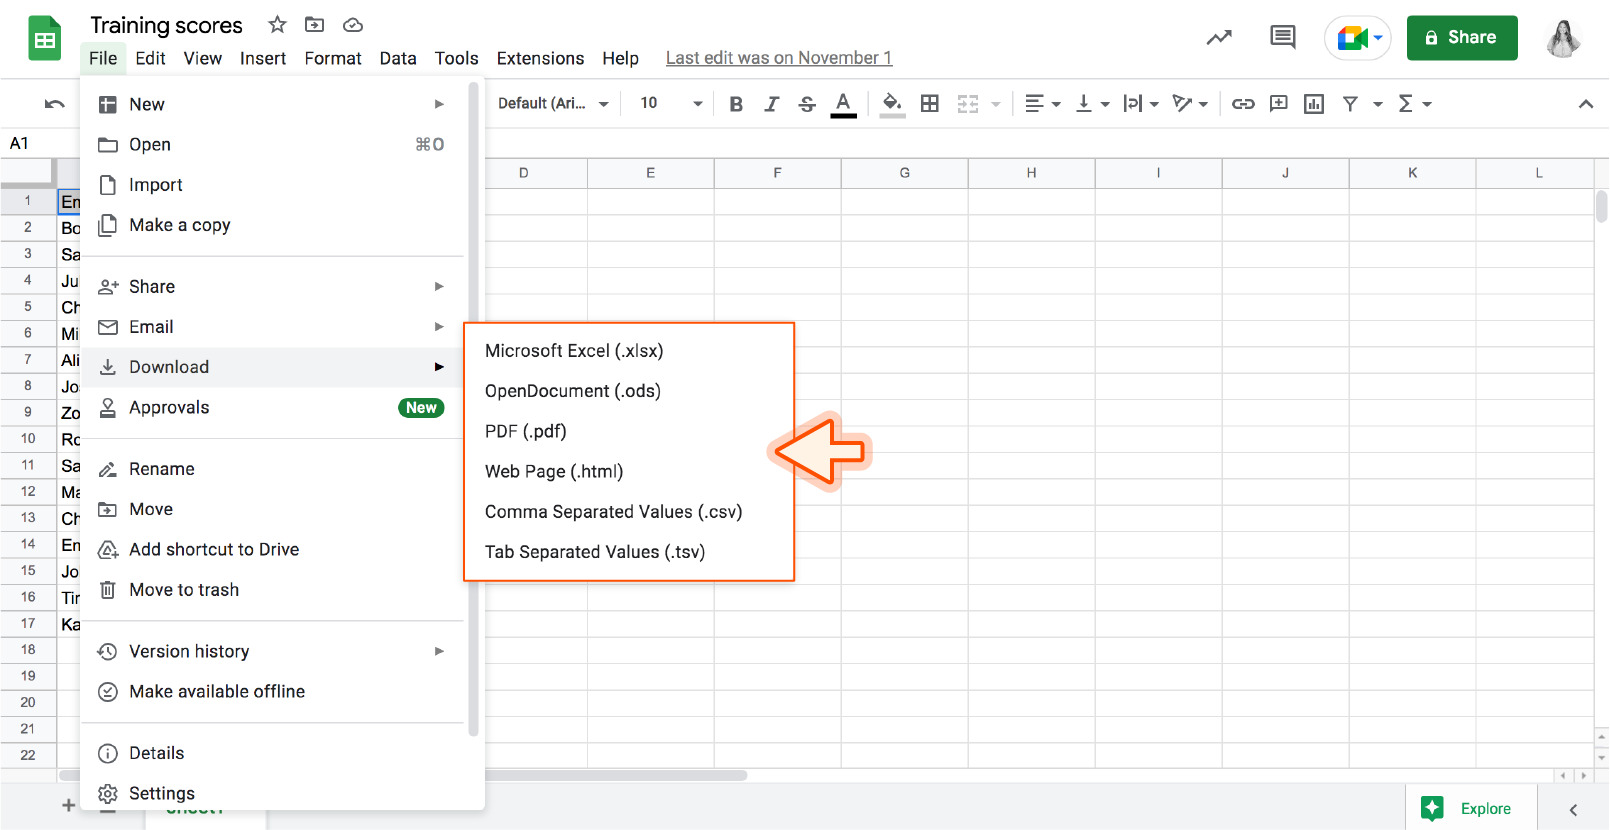
If the CSV file is on a website, open your preferred web browser and navigate to the webpage where the file is located. Look for a link or button that indicates the CSV file download option. It might be labeled as “Download CSV,” “Export Data,” or something similar. If you’re unsure, you can also use the browser’s search function to search for the file name or keywords related to the file you’re looking for.
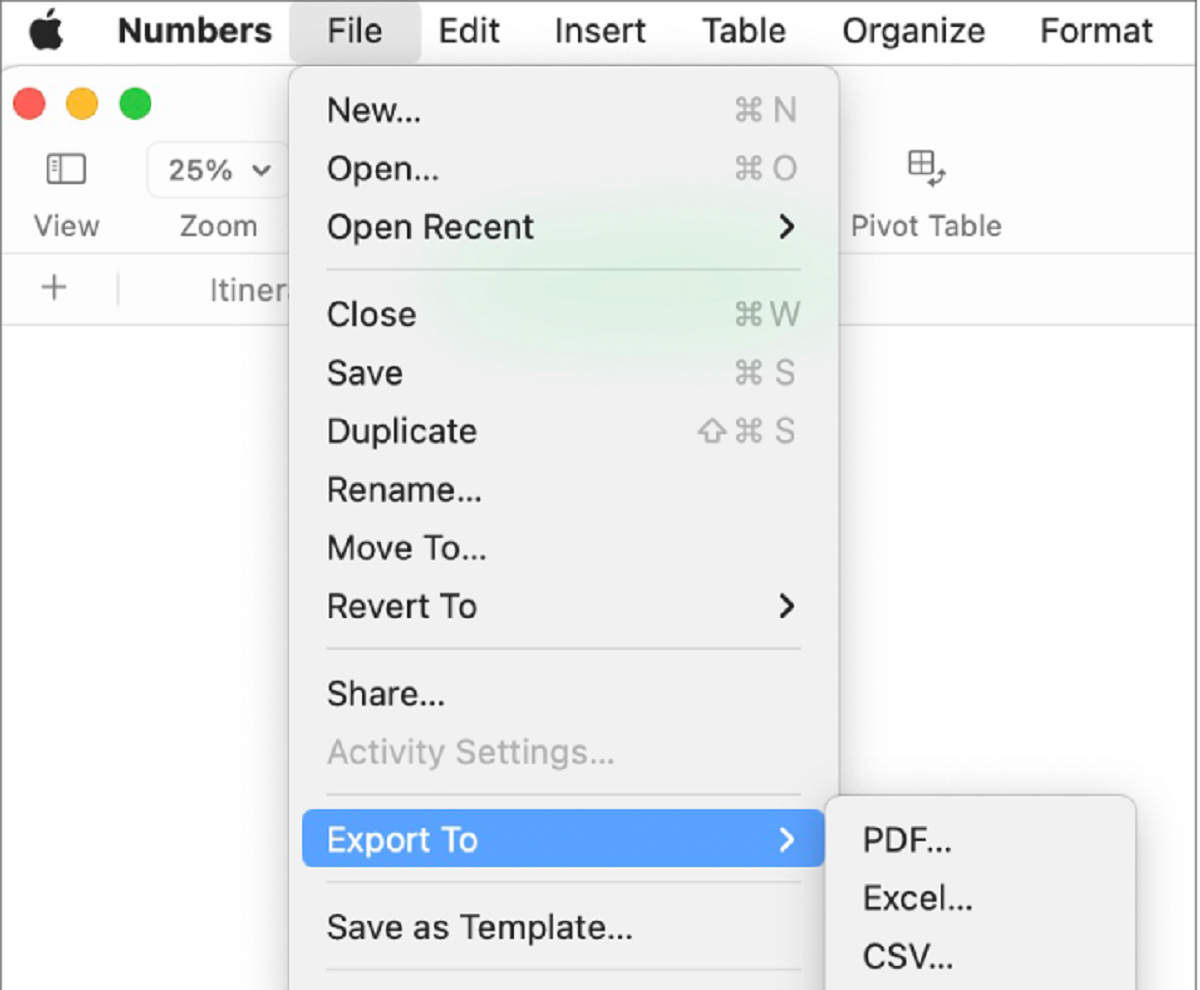
If the CSV file is stored on your computer, open Finder and navigate to the location where the file is saved. Use the search bar in Finder to search for the file by name or file type (e.g., “*.csv”). This will help you quickly locate the desired CSV file.
Once you have located the CSV file you want to download, proceed to the next step to initiate the download process.
Step 2: Right-click on the CSV file
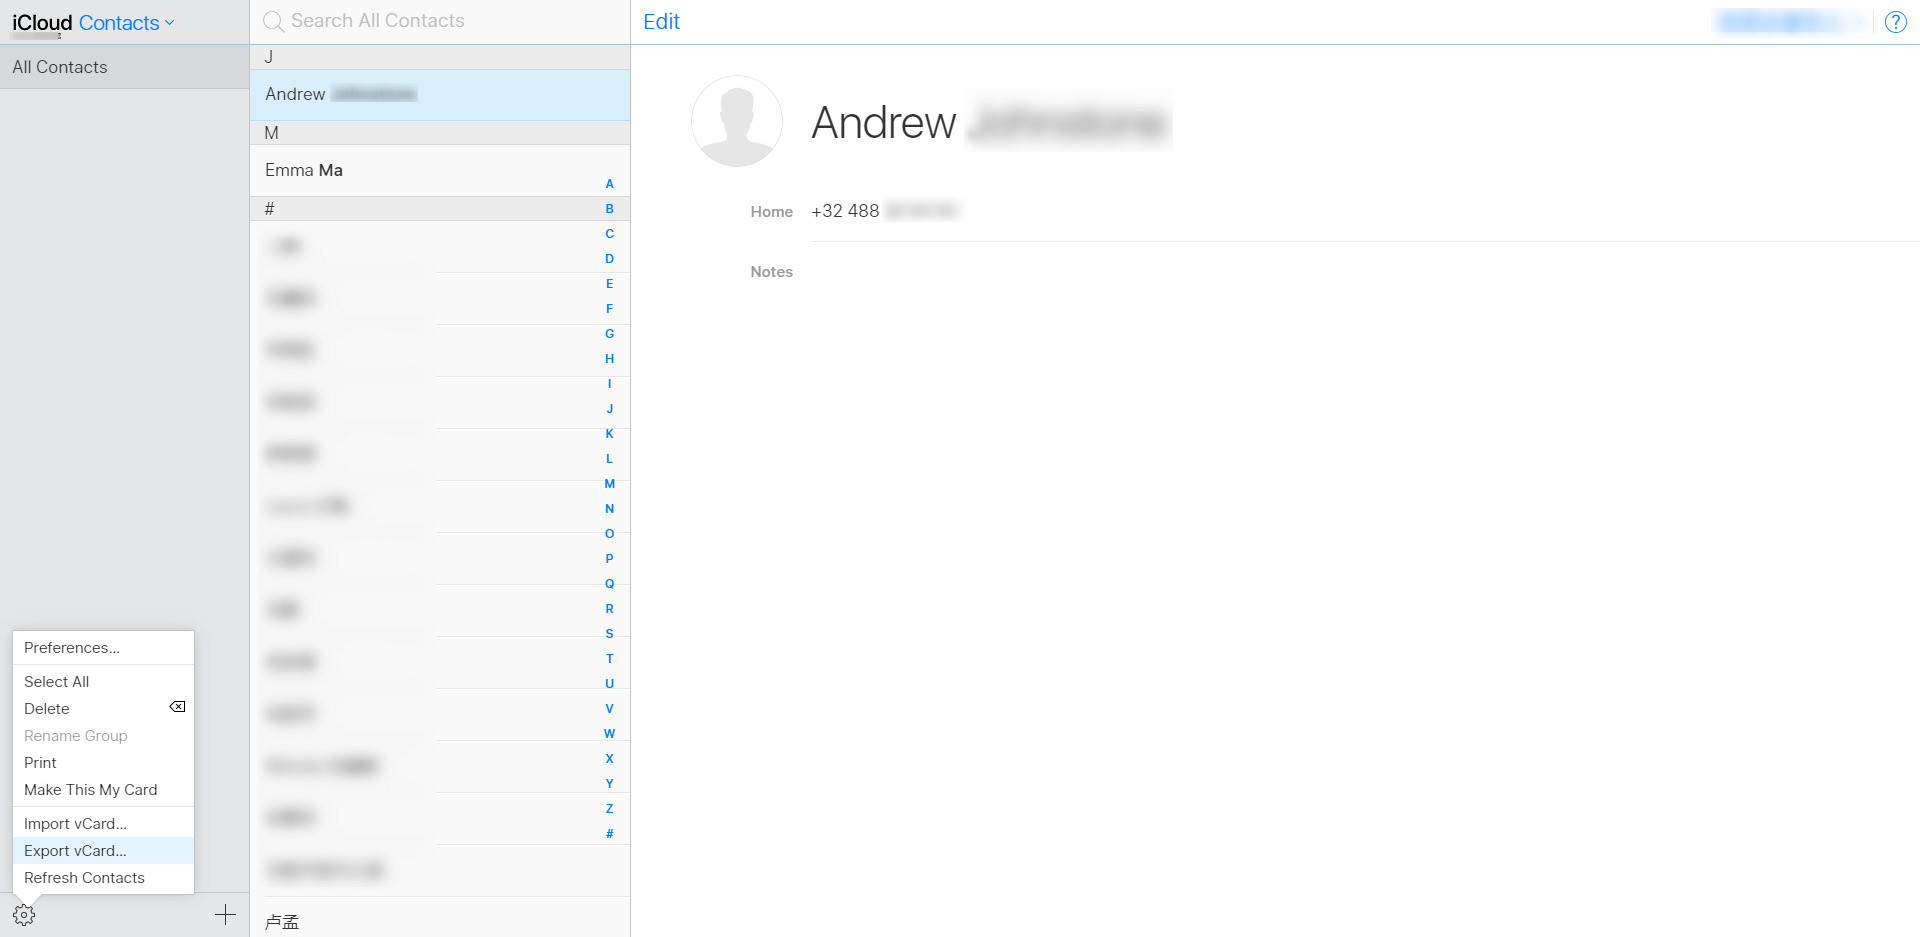
After you have found the CSV file you want to download on your Mac, the next step is to right-click on the file. Right-clicking allows you to access a context menu that provides various options for managing files and performing specific actions.
Position your cursor over the CSV file, then click the right mouse button (or use a two-finger click on a trackpad) to activate the context menu. This will reveal a list of options related to the file.
In the context menu, you should see several options such as “Open,” “Open With,” “Copy,” and more. Look for an option that is related to downloading the file. The specific option may vary depending on your web browser, email client, or file management software.
If you are using a web browser to download the CSV file, the context menu option to download the file may be labeled as “Save Link As” or “Download Linked File.” This is typically the option you want to choose to initiate the download process.
If you are using an email client to download the CSV file, the context menu option may be labeled as “Save Attachment,” “Download Attachment,” or something similar. Select this option to start the download process.
If you are downloading a CSV file saved on your computer, the context menu options may vary depending on your operating system and file management software. Look for an option that allows you to export or download the file.
Once you have identified the appropriate option in the context menu, proceed to the next step to select the location for saving the downloaded CSV file.
Step 3: Select “Save Link As” or “Download Linked File” option
After right-clicking on the CSV file, a context menu will appear on your screen. In this step, you will need to select the appropriate option to initiate the download process. The specific wording of the option may vary depending on the browser or application you are using.
If you are using a web browser to download the CSV file, look for the option labeled “Save Link As” or “Download Linked File.” This option is commonly used to save files from webpages. By selecting this option, you are indicating that you want to save the linked CSV file to your computer.
If you are using an email client to download the CSV file, the option might be labeled as “Save Attachment,” “Download Attachment,” or something similar. Select this option to save the attached CSV file to a location of your choice on your computer.
When you select the “Save Link As” or “Download Linked File” option, a file explorer or a save dialog box will appear on your screen. This dialog box will allow you to choose the location on your computer where you want to save the downloaded CSV file.
Browse through your computer’s directories and choose a folder or location where you want the CSV file to be saved. Consider selecting a location that is easily accessible and organized to help you locate the file later. You can also create a new folder specifically for CSV files if you prefer.
Once you have selected the desired location, proceed to the next step to finalize the download and save the CSV file.
Step 4: Choose the location to save the downloaded CSV file
After selecting the “Save Link As” or “Download Linked File” option in the previous step, a file explorer or save dialog box will appear on your screen. In this step, you will need to choose the location on your computer where you want to save the downloaded CSV file.
The file explorer or save dialog will display a list of folders and directories on your computer. You can navigate through the folders by clicking on them or using the navigation pane on the left side of the window. If you prefer, you can also create a new folder by selecting the option to create a new folder within the file explorer or save dialog.
Consider selecting a location that is easily accessible and organized to help you locate the CSV file later. It’s recommended to choose a folder that you can easily remember or one that is relevant to the content or purpose of the CSV file.
For example, if you are downloading a CSV file for work-related data, you could save it in a folder named “Work” or within a specific project folder. If the CSV file contains personal finance information, you could save it in a folder named “Personal Finances” or within a budgeting folder.
Once you have chosen the desired location for the downloaded CSV file, click on the “Save” or “Ok” button within the file explorer or save dialog. This will finalize the download process and save the CSV file to the selected location on your computer.
Keep in mind that the specific wording and appearance of the file explorer or save dialog may vary depending on your operating system and the application you are using.
With the location selected and the download process completed, you are now ready to access the downloaded CSV file on your Mac.
Step 5: Click “Save” or “Ok” to start the download
In the previous step, you selected the location on your Mac where you want to save the downloaded CSV file. Now, in this final step, you simply need to click the “Save” or “Ok” button to initiate the download process and save the CSV file to your chosen location.
After clicking the “Save” or “Ok” button, the download process will begin, and you will see a progress indicator showing the status of the download. Depending on the size of the CSV file and the speed of your internet connection, the download may take a few seconds to complete.
While the download is in progress, it’s essential to avoid closing the browser, email client, or any application you used to initiate the download. If you accidentally close the application or browser, the download may be interrupted, and you might have to start the process over again.
Once the download is complete, the CSV file will be saved to the location you specified in earlier steps. You can now safely close the file explorer or save dialog, as well as the browser or email client if you wish.
To access the downloaded CSV file, navigate to the location where you saved it on your Mac. You can do this by opening Finder and browsing through the directories, or by accessing the specific application where you want to use or open the CSV file.
Remember to keep your downloaded CSV files organized and backed up regularly to prevent data loss and ensure easy access whenever you need them.
Congratulations! You have successfully downloaded a CSV file on your Mac. Now you can utilize the valuable data contained within the file for your specific needs, such as analyzing data, importing data into a spreadsheet, or any other purpose you require.
Conclusion
Downloading a CSV file on your Mac is a straightforward process that can be achieved in just a few simple steps. By following the steps outlined in this guide, you can quickly and easily download CSV files for work or personal use.
We began by emphasizing the importance of finding the CSV file you want to download. Whether it’s an email attachment, a file on a website, or a file stored on your computer, locating the file is the first step towards downloading it.
Next, we discussed the process of right-clicking on the CSV file to access the context menu. By right-clicking, you can choose the option that initiates the download, such as “Save Link As” or “Download Linked File,” depending on the application or browser you are using.
After selecting the appropriate option, you navigated through the file explorer or save dialog to choose the location where you want to save the downloaded CSV file. Selecting a relevant and easily accessible location ensures that you can find and utilize the file effectively.
Finally, you clicked the “Save” or “Ok” button to start the download. Once the download process completed, you were able to access the downloaded CSV file on your Mac and use it for your specific needs.
Remember, maintaining an organized file structure and regularly backing up your downloaded CSV files will help prevent data loss and ensure easy access in the future.
Now that you have mastered the art of downloading CSV files on your Mac, you are equipped to handle various data-related tasks with ease and efficiency. Whether it’s analyzing data, importing data into spreadsheets, or any other application, the ability to download CSV files opens up a wide range of possibilities for managing and utilizing valuable information.
Happy downloading!