Introduction
Calibrating your mouse pad on Windows 8 can significantly enhance your computing experience. A properly calibrated mouse pad ensures precise cursor movement, optimal sensitivity, and improved overall usability. Whether you're a casual user or a professional requiring accuracy for design or gaming, calibrating your mouse pad can make a noticeable difference in your daily activities.
In this guide, we will walk you through the step-by-step process of calibrating your mouse pad on a Windows 8 system. From checking your current mouse settings to adjusting sensitivity and performing the calibration, we've got you covered. By the end of this tutorial, you'll have a finely-tuned mouse pad that complements your preferences and maximizes your productivity.
So, let's dive in and explore the methods to calibrate your mouse pad on Windows 8, ensuring that your mouse movements are smooth, accurate, and tailored to your needs. Whether you're navigating through documents, editing images, or engaging in high-paced gaming, a properly calibrated mouse pad can make all the difference. Let's get started!
Checking Mouse Settings
Before diving into the calibration process, it’s essential to ensure that your mouse settings are optimized for the calibration procedure. Windows 8 provides a range of customizable settings that can impact the performance and responsiveness of your mouse. Here’s how to check your mouse settings:
- Accessing Mouse Settings: To begin, navigate to the Control Panel on your Windows 8 system. From there, locate the “Mouse” or “Hardware and Sound” section, where you can access the mouse settings.
- Pointer Speed: Check the pointer speed settings to ensure that it aligns with your preferences. If the pointer speed is too fast or too slow, it can affect the accuracy of the calibration process.
- Enhance Pointer Precision: Windows 8 offers an option called “Enhance pointer precision,” which, when enabled, can improve the accuracy of mouse movements. Ensure that this setting is adjusted according to your preference.
- Additional Settings: Explore additional mouse settings, such as double-click speed and wheel settings, to ensure that they are configured to your liking.
By reviewing and adjusting these settings, you can create an optimal foundation for calibrating your mouse pad. Taking the time to fine-tune these settings can significantly impact the overall performance and responsiveness of your mouse, setting the stage for a successful calibration process.
Adjusting Mouse Sensitivity
Mouse sensitivity plays a crucial role in determining the responsiveness and precision of your cursor movements. Before calibrating your mouse pad, it’s important to ensure that the sensitivity settings are optimized for your specific requirements. Here’s how to adjust the mouse sensitivity on Windows 8:
- Accessing Mouse Properties: Begin by accessing the “Mouse” properties through the Control Panel. Here, you can fine-tune the sensitivity settings to match your preferences.
- Pointer Options: Within the Mouse properties, navigate to the “Pointer Options” tab. Here, you can adjust the pointer speed using a slider, allowing you to increase or decrease the sensitivity based on your needs.
- Enhance Pointer Precision: The “Enhance pointer precision” option, found within the Pointer Options tab, can further refine the mouse sensitivity. Experiment with enabling or disabling this option to determine the setting that best suits your usage.
- Testing Sensitivity: After making adjustments, test the sensitivity by moving the mouse across the screen. Ensure that the cursor movement feels natural and responsive, indicating that the sensitivity is aligned with your preferences.
By fine-tuning the mouse sensitivity settings, you can tailor the responsiveness of your mouse to your specific needs, whether you require precise control for design tasks or swift movements for gaming. A well-adjusted sensitivity setting sets the stage for an effective mouse pad calibration, ensuring that the cursor responds accurately to your movements.
Calibrating Mouse Pad
Now that you’ve checked and adjusted the mouse settings and sensitivity, it’s time to proceed with calibrating your mouse pad on Windows 8. The calibration process fine-tunes the interaction between your mouse and the surface of your mouse pad, ensuring optimal tracking and responsiveness. Follow these steps to calibrate your mouse pad:
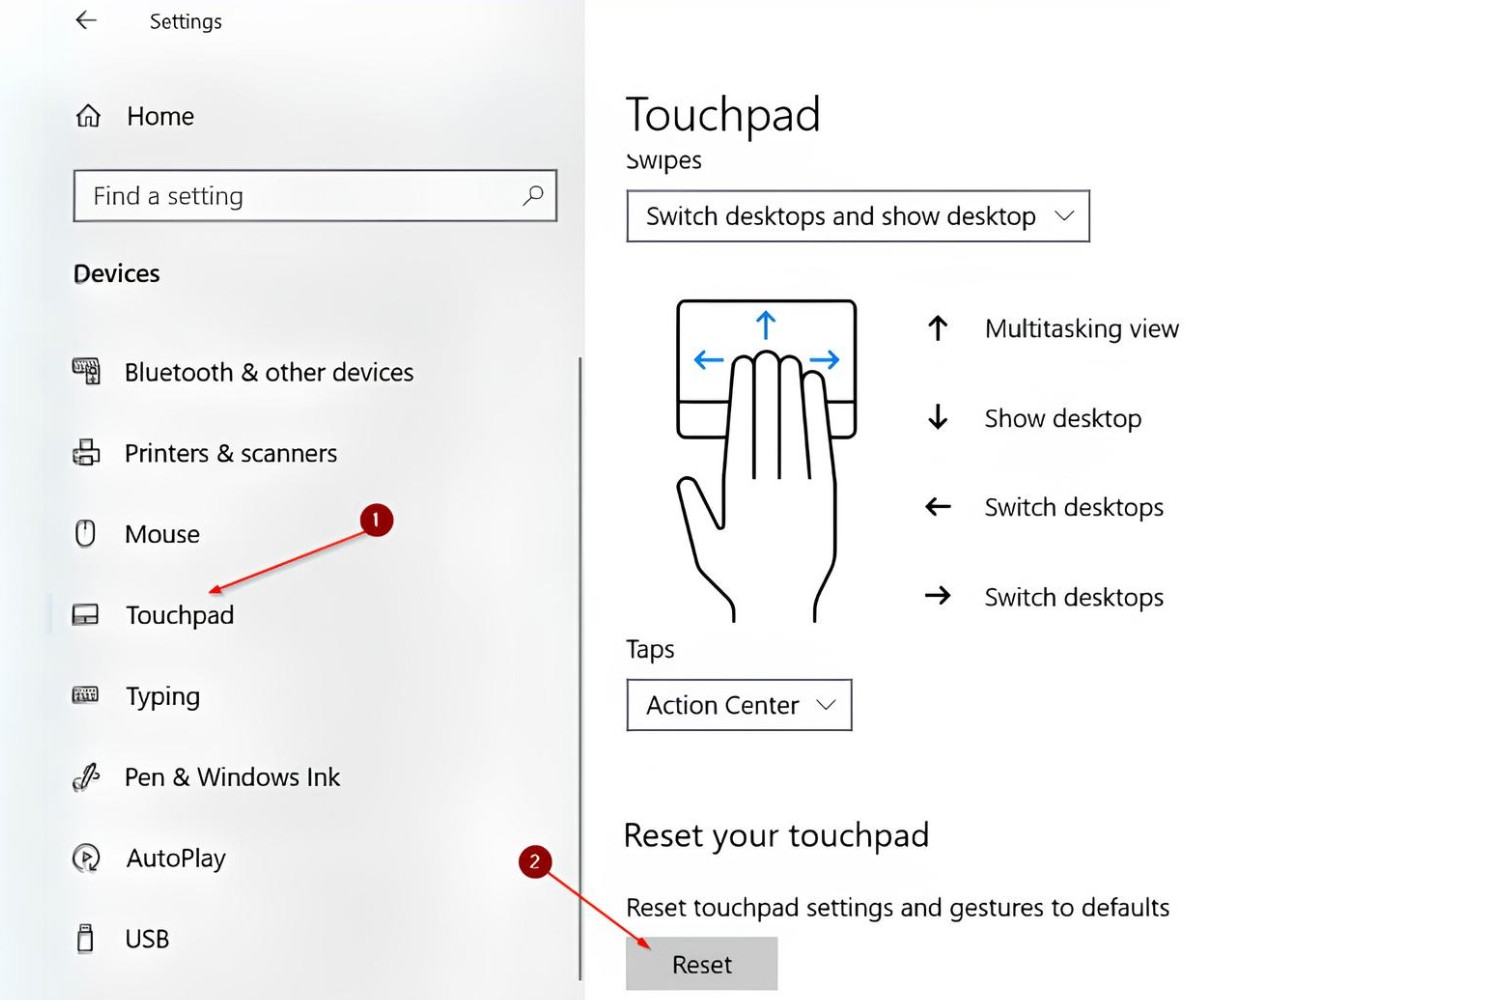
- Accessing Calibration Settings: In the Control Panel, navigate to the “Hardware and Sound” section and select “Calibrate the mouse for a different surface” under the “Devices and Printers” category. This will launch the calibration utility.
- Starting the Calibration: Click on “Next” to begin the calibration process. Ensure that your mouse pad is clean and free of any obstructions to obtain accurate calibration results.
- Following On-Screen Instructions: The calibration utility will guide you through a series of steps, prompting you to move your mouse in specific patterns and directions. Follow the on-screen instructions carefully to ensure precise calibration.
- Completing the Calibration: Once the calibration process is complete, review the results to ensure that the mouse pad has been calibrated successfully. The utility may provide recommendations or adjustments based on the calibration results.
Calibrating your mouse pad optimizes the tracking and responsiveness of your mouse, allowing for smoother and more accurate cursor movements. By tailoring the calibration to the specific surface of your mouse pad, you can enhance the overall usability and performance of your mouse, whether you’re working on intricate design tasks or engaging in fast-paced gaming sessions.
Testing the Mouse Pad Calibration
After completing the calibration process, it’s essential to test the effectiveness of the calibration to ensure that your mouse pad is optimized for accurate and responsive cursor movements. Here’s how to test the calibration of your mouse pad on Windows 8:
- Cursor Movement: Move the mouse across the calibrated pad and observe the cursor movement on the screen. The movements should feel smooth, precise, and directly responsive to your mouse actions.
- Accuracy Check: Test the accuracy of the cursor by performing tasks that require precision, such as selecting small icons or navigating intricate design elements. The calibrated mouse pad should allow for accurate and effortless cursor control.
- Speed and Responsiveness: Assess the speed and responsiveness of the cursor movements. Whether you’re navigating through documents, browsing the web, or engaging in gaming, the calibrated mouse pad should provide a seamless and natural user experience.
- Gaming Performance: If you’re a gamer, test the calibration by engaging in gaming sessions that demand quick and precise mouse movements. The calibration should enhance your gaming performance by providing accurate tracking and responsiveness.
By thoroughly testing the mouse pad calibration, you can ensure that your mouse movements are optimized for your specific tasks and preferences. The calibration process aims to provide an ideal interaction between your mouse and the pad’s surface, resulting in improved accuracy, responsiveness, and overall usability.
With the calibration successfully tested and confirmed, you can enjoy a tailored and optimized mouse pad experience, empowering you to accomplish tasks with enhanced precision and efficiency.