Introduction
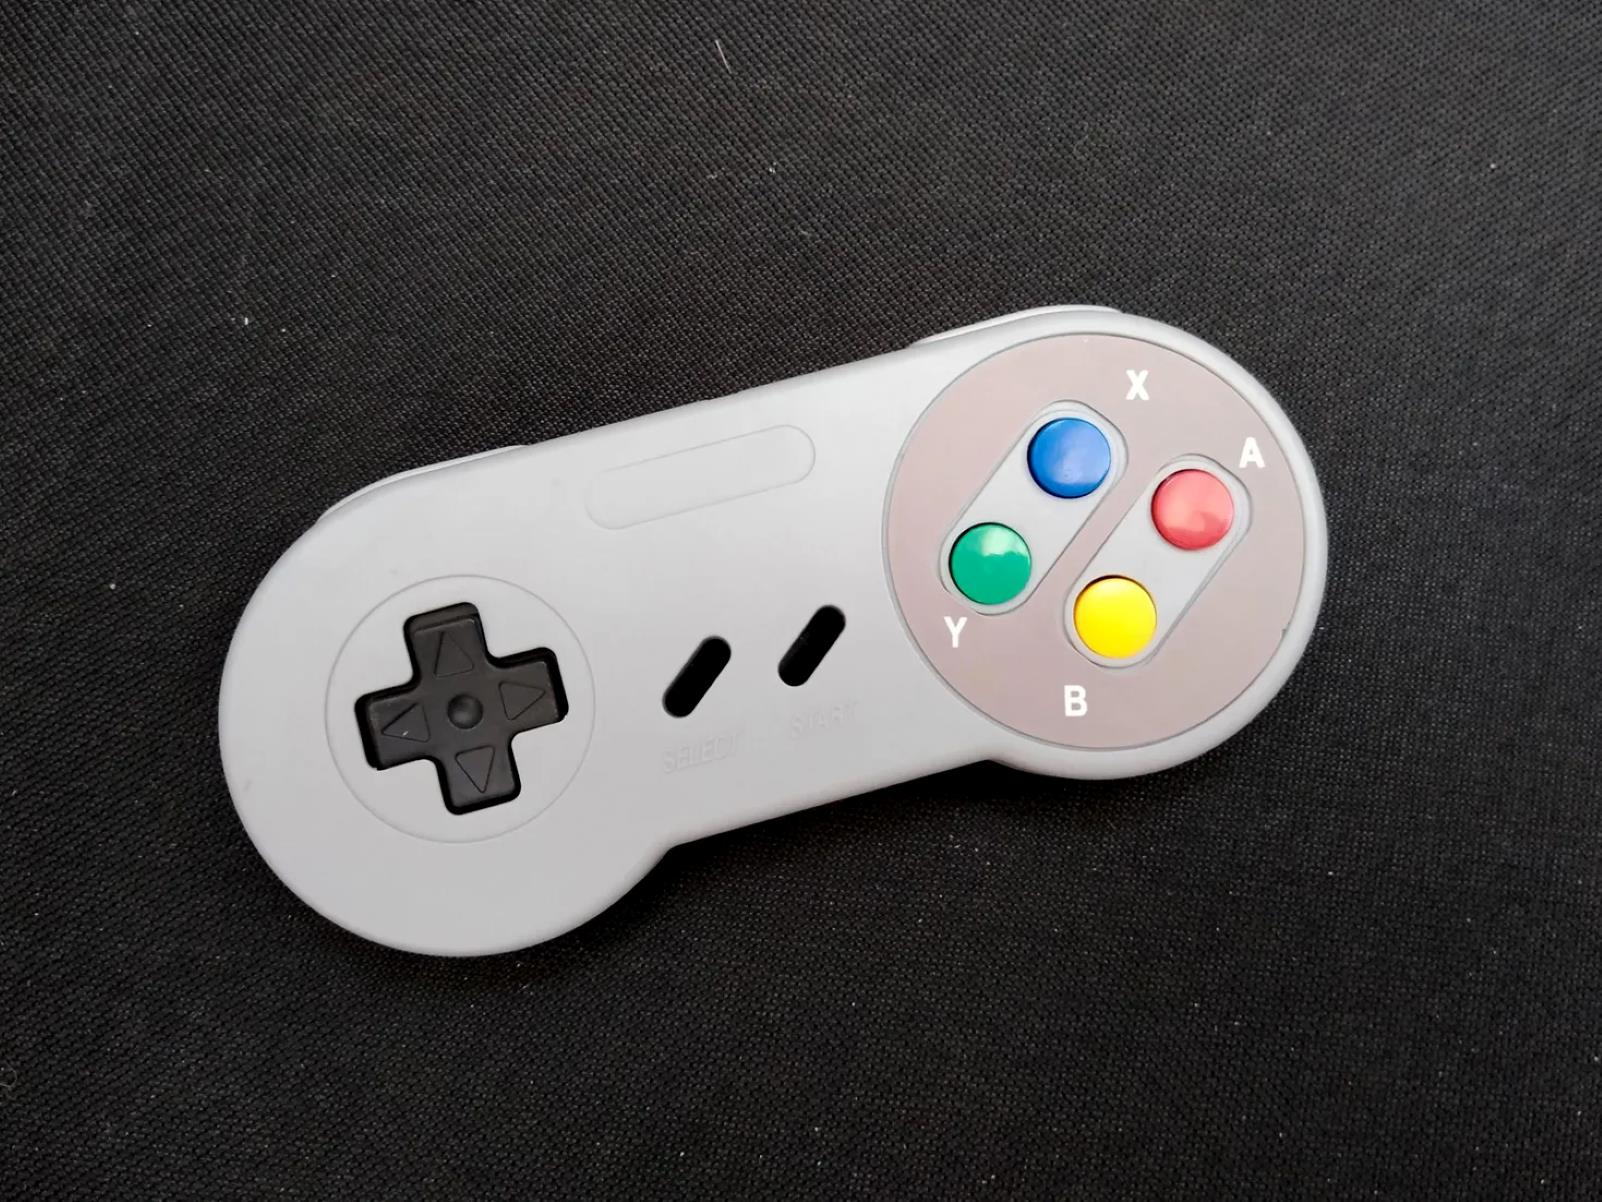
The Super Nintendo Entertainment System (SNES) holds a special place in the hearts of many gaming enthusiasts. Its iconic rectangular controller with its purple buttons and ergonomic design is a beloved symbol of gaming nostalgia. While modern gaming consoles offer a wide array of controllers, there's something undeniably charming about the classic SNES controller. What if you could breathe new life into this iconic piece of gaming history by transforming it into a USB game controller for your computer? In this guide, we'll explore how to repurpose an SNES controller into a USB game controller without the need for soldering.
By undertaking this project, you'll not only create a unique and personalized gaming accessory but also gain hands-on experience in electronics and DIY crafting. Whether you're a seasoned tinkerer or a curious novice, this project offers an exciting opportunity to merge retro gaming nostalgia with modern technology.
The process of converting an SNES controller into a USB game controller is an engaging and rewarding endeavor. It involves disassembling the original controller, preparing a USB game controller kit, connecting the wires, and conducting thorough testing to ensure seamless functionality. Throughout this guide, we'll provide step-by-step instructions, helpful tips, and troubleshooting advice to support you in successfully completing this project.
As you embark on this creative journey, keep in mind that the skills and knowledge you acquire can be applied to future DIY electronics projects. Whether you're interested in customizing other gaming peripherals or exploring the world of hardware modification, this project serves as an excellent foundation for expanding your capabilities.
So, gather your tools, channel your inner innovator, and prepare to embark on a captivating adventure of repurposing a classic SNES controller into a fully functional USB game controller. Let's dive into the exhilarating world of DIY electronics and unleash the potential of this timeless gaming artifact.
Getting Started
Before delving into the intricacies of transforming your SNES controller into a USB game controller, it’s essential to gather the necessary materials and create a conducive workspace. Here’s what you’ll need to kickstart this exciting project:
- SNES Controller: Select a well-maintained SNES controller as the foundation for your USB game controller. Ensure that the controller is in good working condition, as this will form the basis of your modified device.
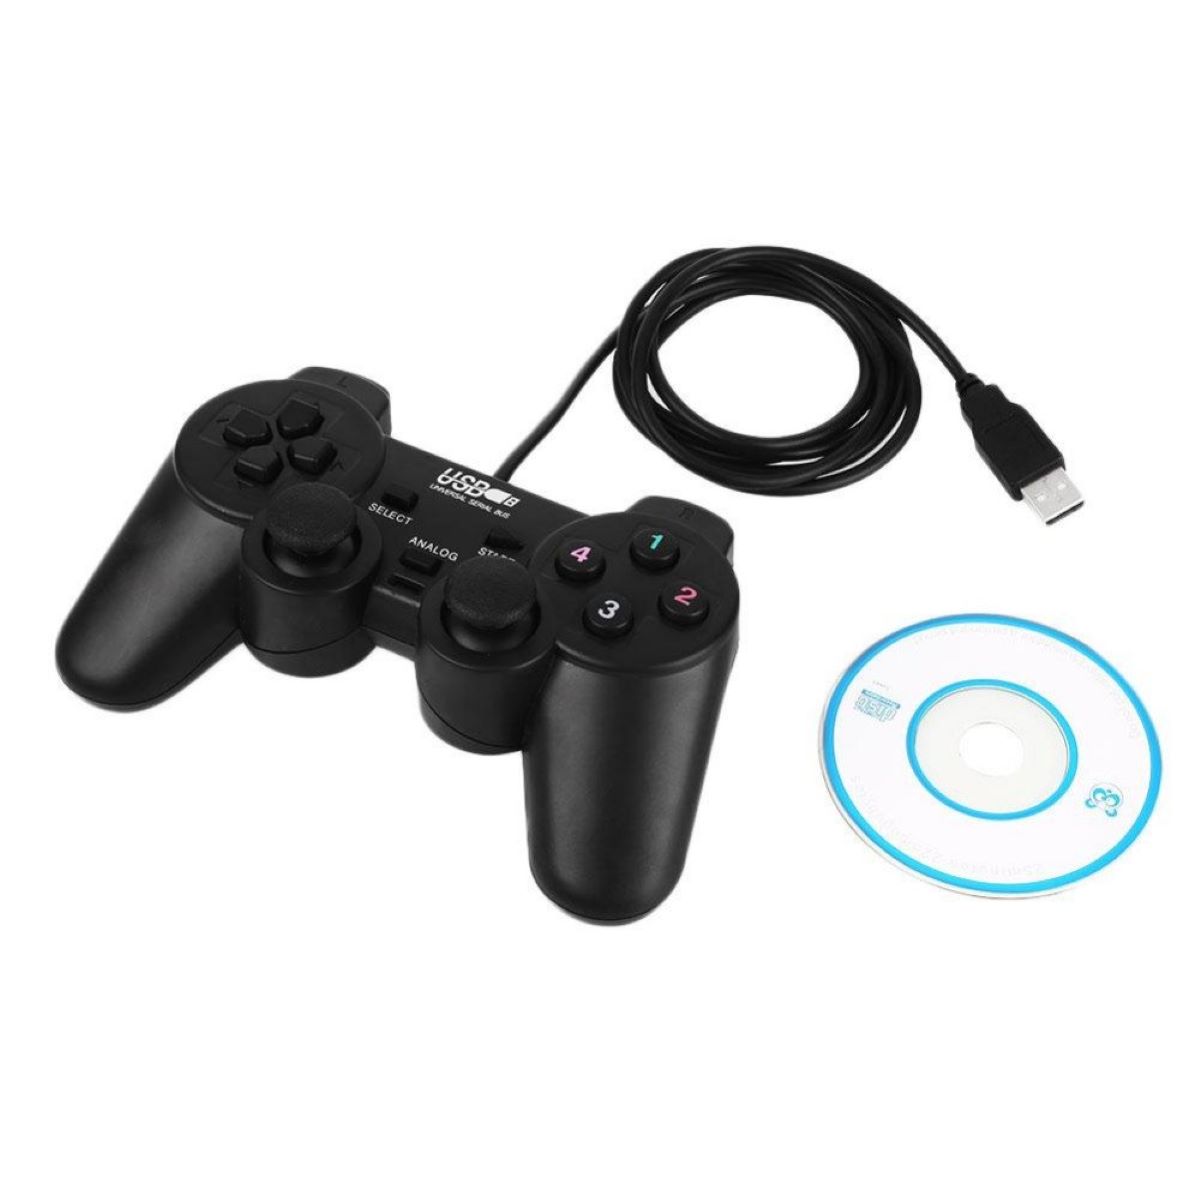
- USB Game Controller Kit: Acquire a USB game controller kit designed for DIY projects. These kits typically include a pre-assembled circuit board, USB cable, and connecting wires, providing the essential components for adapting your SNES controller to a USB interface.
- Small Screwdriver Set: Prepare a set of small screwdrivers to facilitate the disassembly of the SNES controller. The precise tools will enable you to carefully access the internal components without causing damage.
- Work Area: Set up a well-lit and organized workspace where you can comfortably work on the project. A clean, spacious surface with ample room to maneuver will enhance your efficiency and precision during the modification process.
- Safety Precautions: Prioritize safety by wearing appropriate protective gear, such as safety goggles and anti-static wrist straps, to safeguard yourself and the electronic components from potential hazards.
Once you have assembled these materials and established a conducive workspace, you’re ready to embark on this enthralling endeavor. The initial preparation phase sets the stage for a seamless and enjoyable modification experience, ensuring that you have all the essential resources at your disposal.
With your workspace primed and your materials at the ready, you’re poised to dive into the next phase: disassembling the SNES controller to unveil its inner workings and prepare it for integration with the USB game controller kit.
Disassembling the SNES Controller
As you commence the transformation of your SNES controller into a USB game controller, the first step involves carefully disassembling the original controller to access its internal components. This process requires precision and patience to avoid damaging the controller while gaining a comprehensive understanding of its internal layout. Follow these steps to disassemble the SNES controller:
- Prepare the Workspace: Lay a soft, clean cloth on your work surface to prevent the controller and its components from being scratched or damaged during disassembly. This protective measure ensures that the controller remains in optimal condition throughout the modification process.
- Remove the Screws: Using the appropriate small screwdrivers from your set, carefully remove the screws securing the back panel of the SNES controller. Place the screws in a secure container to prevent misplacement.
- Separate the Halves: Gently separate the front and back halves of the controller, taking note of any internal components or cables that may be connected between the two sections. Exercise caution to prevent any abrupt movements that could strain or damage these connections.
- Inspect the Internal Components: Once the controller is open, take a moment to familiarize yourself with the internal components, including the button contacts, circuit board, and cable connections. This visual inspection will provide valuable insights into the controller’s construction and aid in planning the integration of the USB game controller kit.
- Handle Components Carefully: Throughout the disassembly process, handle the controller’s internal components with care, avoiding excessive force or rough handling. By treating the components delicately, you minimize the risk of unintentional damage and ensure that the controller remains in optimal condition for the upcoming modifications.
By meticulously disassembling the SNES controller, you gain a deeper understanding of its internal structure and prepare the groundwork for integrating the USB game controller kit. With the controller’s components now accessible, you’re ready to proceed to the next phase: preparing the USB game controller kit for seamless integration with the SNES controller’s circuitry.
Preparing the USB Game Controller Kit
With the SNES controller disassembled, the next crucial step in this project involves readying the USB game controller kit for integration. This kit serves as the bridge between the original SNES controller and modern USB connectivity, enabling seamless interaction with your computer for an enhanced gaming experience. Follow these essential steps to prepare the USB game controller kit for integration:
- Review the Kit Components: Thoroughly inspect the contents of the USB game controller kit, ensuring that all essential components, such as the pre-assembled circuit board, USB cable, and connecting wires, are present and in optimal condition. Familiarize yourself with the layout and functionality of each component to facilitate the integration process.
- Understand the Circuit Board Layout: Take time to study the circuit board included in the kit, identifying key components such as the input terminals, USB interface, and connection points for the controller’s buttons and directional pads. This understanding will guide the subsequent wiring and ensure a cohesive integration with the SNES controller.
- Assess Compatibility: Verify that the USB game controller kit is compatible with the SNES controller’s button configuration and input mechanism. Ensuring compatibility is crucial for seamless functionality and an intuitive gaming experience once the modification is complete.
- Plan the Wiring Layout: Strategically plan the wiring layout, considering the placement of the circuit board within the SNES controller’s housing and the routing of connecting wires to establish secure and tidy connections. Visualizing the wiring layout in advance streamlines the integration process and minimizes the likelihood of errors during the wiring phase.
- Prepare the Tools: Gather the necessary tools, including wire strippers, soldering iron (if applicable), and electrical tape, to facilitate the wiring and connection process. Having the tools readily available ensures a smooth transition from preparation to the hands-on integration of the USB game controller kit.
By meticulously preparing the USB game controller kit and familiarizing yourself with its components and functionality, you establish a solid foundation for the subsequent phase: connecting the wires to seamlessly integrate the kit with the SNES controller’s interface. With careful planning and attention to detail, you’re well-equipped to embark on the next stage of this captivating DIY electronics project.
Connecting the Wires
As you transition from preparing the USB game controller kit to the integration phase, the meticulous process of connecting the wires becomes the focal point of this transformative project. This crucial step involves establishing secure and functional connections between the components of the USB game controller kit and the internal circuitry of the SNES controller. Follow these essential guidelines to seamlessly connect the wires and integrate the USB game controller kit:
- Identify Corresponding Connections: Match the input terminals on the USB game controller kit’s circuit board with the corresponding button contacts and directional pad connections within the SNES controller. This alignment ensures that each button and directional input is accurately linked to the USB interface for responsive functionality.
- Securely Affix the Circuit Board: Position the circuit board from the USB game controller kit within the SNES controller’s housing, ensuring a snug and secure fit. Carefully route the connecting wires to maintain a tidy and organized layout, minimizing the risk of tangling or interference with other components.
- Strip and Connect the Wires: Using wire strippers, carefully strip the insulation from the ends of the connecting wires, exposing the conductive metal strands. Securely connect each wire to its designated terminal on the USB game controller kit’s circuit board, exercising precision and attention to detail to establish reliable electrical connections.
- Verify Connection Integrity: After connecting each wire, perform a thorough visual inspection to ensure that the connections are secure and free from loose strands or exposed wiring. This verification process minimizes the likelihood of connectivity issues and promotes the overall durability of the modified controller.
- Utilize Secure Fastening Methods: Employ suitable fastening methods, such as cable ties or adhesive cable mounts, to neatly secure the connecting wires within the controller’s housing. Organizing and securing the wires prevents strain on the connections and maintains a clean and professional integration of the USB game controller kit.
By meticulously connecting the wires and integrating the USB game controller kit with the SNES controller’s internal circuitry, you establish the foundation for a seamlessly functioning USB game controller. This pivotal phase sets the stage for the upcoming testing process, where you’ll validate the controller’s functionality and address any potential issues before final assembly.
Testing the Controller
With the integration of the USB game controller kit and the SNES controller nearing completion, the testing phase assumes paramount importance in ensuring the functionality and responsiveness of the modified device. Thorough testing is essential to validate the successful integration of the components and address any potential issues before proceeding to the final assembly. Follow these comprehensive steps to rigorously test the controller:
- Visual Inspection: Conduct a visual inspection of the integrated components, ensuring that all wires are securely connected, and the USB game controller kit is properly positioned within the SNES controller’s housing. This initial assessment sets the stage for the subsequent functional testing.
- Connect to a Computer: Use the provided USB cable to connect the modified SNES controller to a computer with compatible gaming software. Ensure that the computer recognizes the controller and that it appears as a functional input device within the system settings.
- Test Button Functionality: Open a gaming application or software that accepts controller input and systematically test each button and directional pad on the modified controller. Verify that each input registers accurately and triggers the corresponding action within the software, indicating seamless functionality.
- Assess Responsiveness: Evaluate the responsiveness of the modified controller during gameplay, assessing the accuracy and consistency of button inputs and directional commands. This assessment provides valuable insights into the overall performance of the modified device in practical gaming scenarios.
- Address Any Issues: If any buttons or directional inputs exhibit irregular behavior or fail to register consistently, troubleshoot the specific connections and components associated with the affected controls. Addressing these issues promptly ensures a fully functional and reliable USB game controller.
Thoroughly testing the modified SNES controller guarantees that the integration of the USB game controller kit has been executed with precision and attention to detail. By validating the controller’s functionality and responsiveness, you pave the way for the final assembly and, ultimately, the immersive gaming experiences that await with your newly repurposed USB game controller.
Final Assembly and Troubleshooting
As the testing phase draws to a close, the final assembly and troubleshooting stage mark the culmination of your journey to transform the SNES controller into a fully functional USB game controller. This pivotal phase encompasses the meticulous reassembly of the modified controller and the resolution of any lingering issues to ensure a seamless and reliable gaming accessory. Follow these essential steps to complete the final assembly and address potential troubleshooting concerns:
- Secure the Components: Once testing is successfully completed, carefully position the internal components within the SNES controller’s housing, ensuring that the USB game controller kit is neatly arranged and securely affixed. Attention to detail during this phase contributes to the overall durability and aesthetics of the modified controller.
- Reassemble the Controller: Gently reattach the front and back halves of the SNES controller, aligning the screw holes and ensuring a snug fit. Securely fasten the screws to restore the controller to its original form while housing the integrated USB game controller kit within its familiar exterior.
- Conduct Final Functionality Checks: Perform a final round of functionality checks to verify that the reassembled controller retains its seamless operation. Test each button and directional pad to confirm that the modifications have been successfully integrated without compromising the controller’s responsiveness.
- Address Lingering Issues: If any residual issues persist during the final functionality checks, meticulously troubleshoot the affected components and connections. This troubleshooting process may involve revisiting specific wiring or connection points to rectify any remaining concerns and ensure the controller’s optimal performance.
- Refine the Aesthetic Presentation: Prior to concluding the assembly process, take the opportunity to refine the aesthetic presentation of the modified controller. Tidy any visible wiring, ensure that all components are neatly arranged, and consider any additional cosmetic enhancements to elevate the controller’s visual appeal.
By meticulously executing the final assembly and addressing potential troubleshooting considerations, you elevate the modified SNES controller into a polished and fully functional USB game controller. This transformative process not only breathes new life into a cherished gaming artifact but also showcases your ingenuity and technical prowess in merging retro nostalgia with contemporary gaming experiences.
Conclusion
Congratulations on successfully repurposing a classic SNES controller into a fully functional USB game controller without the need for soldering. This captivating DIY electronics project has not only revitalized a beloved gaming artifact but also equipped you with valuable hands-on experience in electronics integration and customization. As you reflect on the journey from disassembling the SNES controller to meticulously integrating the USB game controller kit, consider the skills and insights gained throughout this transformative endeavor.
By embarking on this project, you’ve delved into the realms of electronics modification, precision wiring, and functional testing, honing your abilities in a diverse array of technical disciplines. The meticulous process of aligning the USB game controller kit with the internal circuitry of the SNES controller has not only yielded a seamless gaming accessory but also expanded your proficiency in electronics integration and troubleshooting.
Furthermore, the successful transformation of the SNES controller into a USB game controller underscores your resourcefulness and adaptability in merging retro gaming nostalgia with modern technology. This project serves as a testament to your innovative spirit and the potential for repurposing and enhancing existing devices to suit contemporary needs and preferences.
As you revel in the accomplishment of creating a personalized USB game controller from a cherished SNES controller, consider the broader implications of this project. The skills and insights acquired can be applied to future DIY electronics endeavors, empowering you to explore and innovate in the realm of hardware modification and customization. Whether you’re drawn to crafting custom gaming peripherals or venturing into the realm of hardware tinkering, the foundation established through this project serves as a springboard for future creative pursuits.
As you integrate the modified USB game controller into your gaming setup, relish the immersive experiences that await, enriched by the fusion of retro charm and contemporary functionality. Your journey from disassembling the SNES controller to crafting a USB game controller exemplifies the boundless potential for innovation and creativity in the realm of DIY electronics, and it stands as a testament to your ingenuity and technical acumen.
With this newfound expertise and the satisfaction of a successful project, you’re poised to embark on future endeavors with confidence, creativity, and a profound appreciation for the art of merging the past with the present through innovative electronics customization.