Introduction
Welcome to this guide on how to transfer money from Cash App to a bank account. Cash App, a popular mobile payment service, offers a seamless way to send and receive money. However, you may have funds sitting in your Cash App account that you want to access from your bank account for various reasons. This tutorial will walk you through the step-by-step process to transfer money from Cash App to your bank account.
Whether you want to withdraw money to cover expenses, save, or simply have more flexibility with your funds, Cash App makes it easy to transfer money to your bank account. By following these simple steps, you can have your Cash App balance available in your bank account in no time.
Before we get into the details, it’s important to note that you need to have the Cash App downloaded and installed on your mobile device to proceed with the transfer. Additionally, you will need to link your bank account to your Cash App account. If you have not done so already, don’t worry, we will guide you through the process.
So, let’s get started on this journey of transferring money from Cash App to a bank account. By the end of this guide, you will have a clear understanding of how to initiate this transfer and confirm its completion.
Step 1: Download and Install Cash App
The first step in transferring money from Cash App to a bank account is to download and install the Cash App on your mobile device. Cash App is available for both iOS and Android devices and can be accessed through the respective app stores.
To download and install Cash App, follow these simple steps:
- Open the App Store on your iOS device or Google Play Store on your Android device.
- Search for “Cash App” in the search bar.
- Click on the app once you find it.
- Tap on the “Download” or “Install” button to begin the installation process.
- Once the installation is complete, locate the Cash App icon on your home screen and tap to open it.
- If you are a new user, you will need to sign up for a Cash App account. Simply follow the on-screen instructions to create your account.
- If you already have a Cash App account, log in using your registered email address or phone number.
Once you have successfully downloaded and installed Cash App, you are ready to proceed to the next step of linking your bank account.
It is worth noting that Cash App is a secure and trusted platform for money transfers. It utilizes encryption to protect your financial information and transactions. However, it is always recommended to exercise caution and ensure you are downloading the official Cash App from the authorized app store.
Step 2: Link Your Bank Account
After successfully downloading and installing Cash App, the next step is to link your bank account to your Cash App account. This will enable you to transfer money from Cash App to your bank account seamlessly.
To link your bank account, follow these steps:
- Open the Cash App on your mobile device.
- Tap on the “Banking” tab at the bottom of the screen.
- Click on “Add a Bank” or “Add a Card” (depending on your preference).
- Enter your bank account details, including the account number and routing number. If you prefer, you can also add a debit card associated with your bank account instead.
- Once you have entered the required information, tap “Add Bank” or “Add Card.”
- Cash App will then verify the details you provided. This process may take a few seconds or a couple of minutes.
- If the verification is successful, you will receive a notification confirming that your bank account or card has been added to your Cash App account.
It is important to ensure that the bank account information you provide is accurate to avoid any issues during the verification process. Double-check your account number and routing number to ensure they are entered correctly.
Linking your bank account to your Cash App account establishes a secure connection between the two, allowing you to easily transfer funds from Cash App to your bank account or vice versa. This connection ensures that your transactions are processed smoothly and securely.
Once you have successfully linked your bank account, you are now ready to move on to the next step of verifying your bank account.
Step 3: Verify Your Bank Account
After linking your bank account to your Cash App account, the next step is to verify your bank account. Verification is a crucial process to ensure the security and authenticity of your financial transactions.
To verify your bank account on Cash App, follow these steps:
- Open the Cash App on your mobile device.
- Tap on the “Banking” tab at the bottom of the screen.
- Select the linked bank account that you wish to verify.
- Click on “Verify Account.”
- At this point, Cash App may prompt you to enter additional information for verification purposes. This could include providing the last four digits of your Social Security number or answering security questions associated with your bank account.
- Follow the on-screen prompts to complete the verification process.
- Once your bank account is successfully verified, you will receive a notification confirming the verification.
Verification may take a few minutes or longer, depending on the information required by Cash App and your bank. It is essential to provide accurate information during the verification process to ensure a smooth and successful outcome.
Verifying your bank account adds an extra layer of security to your Cash App transactions. It helps to protect against unauthorized usage and ensures that the funds you transfer are sent to the correct recipient.
Now that your bank account is verified, you can proceed to the next step of adding money to your Cash App account.
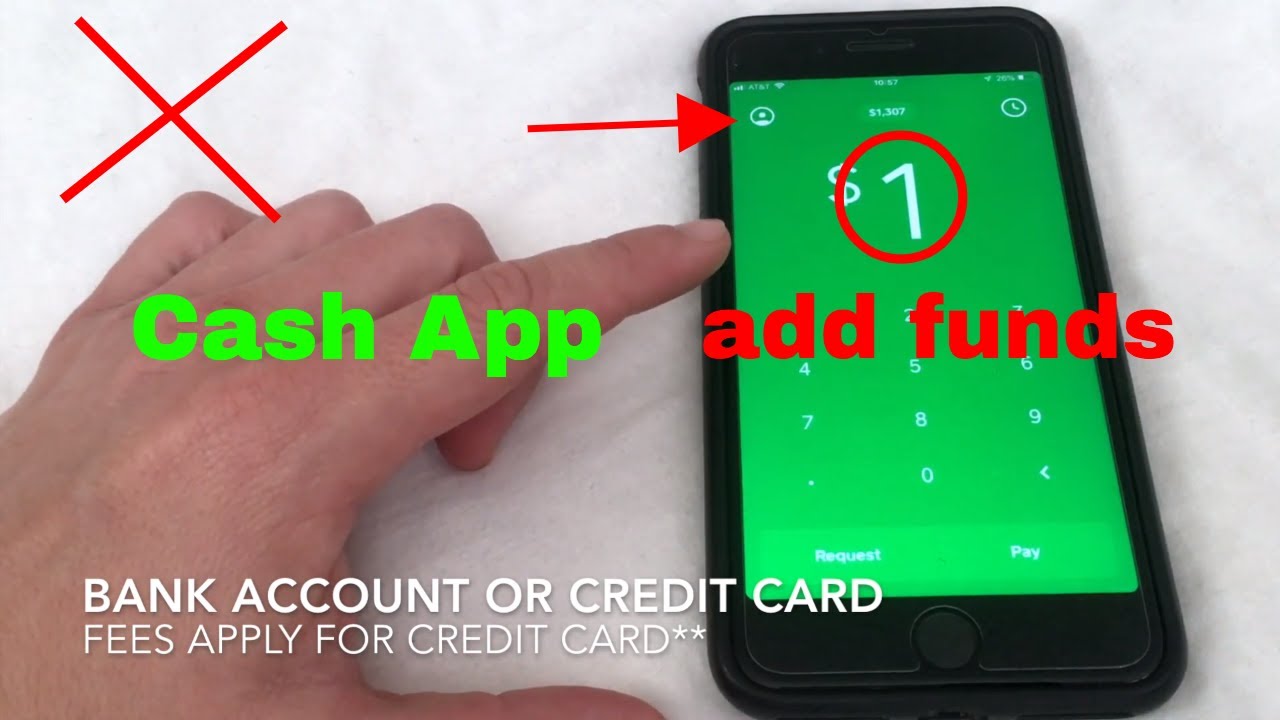
Step 4: Add Money to Cash App
Before you can transfer money from Cash App to your bank account, you need to have sufficient funds in your Cash App account. In this step, we will guide you on how to add money to your Cash App balance.
To add money to your Cash App account, follow these steps:
- Open the Cash App on your mobile device.
- Tap on the “Banking” tab at the bottom of the screen.
- Click on the “Add Cash” option.
- Enter the amount you want to add to your Cash App account.
- Tap on the “Add” or “Confirm” button to proceed.
- You will then have the option to add money using your linked bank account or debit card. Select the desired method.
- If you choose to add money using your linked bank account, you may be required to provide additional verification details.
- Follow the prompts and enter the necessary information to complete the transaction.
- Once the transaction is processed, the added money will be reflected in your Cash App balance.
It is important to note that Cash App may charge a fee for adding money using a linked bank account or debit card. Make sure to review the fee structure before proceeding with the transaction.
By adding money to your Cash App account, you have the flexibility to make payments, send money to others, and, most importantly, transfer funds to your bank account when needed.
Now that you have successfully added money to your Cash App balance, let’s move on to the next step of transferring money from Cash App to your bank account.
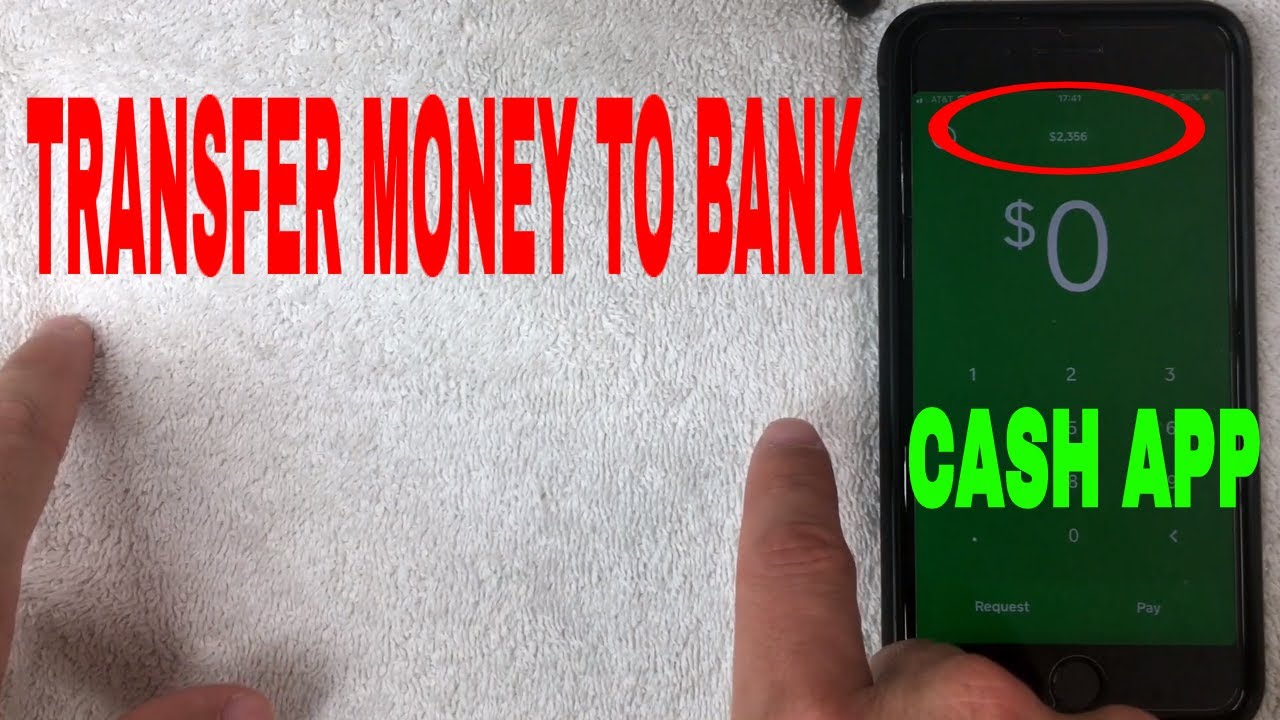
Step 5: Transfer Money from Cash App to Bank Account
Now that you have funds in your Cash App account, it’s time to transfer money from Cash App to your bank account. This step will allow you to access your Cash App balance and use it for various purposes through your bank account.
To transfer money from Cash App to your bank account, follow these steps:
- Open the Cash App on your mobile device.
- Tap on the “Banking” tab at the bottom of the screen.
- Select the linked bank account to which you want to transfer funds.
- Click on the “Transfer Out” option.
- Enter the amount you wish to transfer from your Cash App balance to your bank account.
- Review the details and ensure the accuracy of the transaction.
- Tap on the “Transfer” or “Confirm” button to initiate the transfer.
- The transfer process may take a few seconds or a couple of minutes to complete.
- Once the transfer is successful, you will receive a notification confirming the transaction.
It is important to note that Cash App may charge a fee for transferring money from Cash App to your bank account. Be sure to review the fee structure beforehand.
By transferring money from Cash App to your bank account, you can have access to your funds for various purposes, including making purchases, paying bills, or withdrawing cash.
Now that you have successfully transferred money from Cash App to your bank account, let’s move on to the next step of confirming the transfer.
Step 6: Confirm the Transfer
After initiating the transfer of funds from Cash App to your bank account, it is important to confirm the completion of the transfer to ensure that the money has been successfully deposited into your bank account.
To confirm the transfer, follow these steps:
- Open the Cash App on your mobile device.
- Tap on the “Banking” tab at the bottom of the screen.
- Select the linked bank account to which you transferred the funds.
- Review the transaction history for that specific bank account.
- Look for the recent transfer transaction and verify that it reflects the correct amount and details.
- If the transfer is successfully completed, you will see the transaction marked as “Completed” or “Success” in your transaction history.
- Additionally, you can also check your bank account statement to ensure that the transferred funds have been deposited.
Confirming the transfer is an important step to ensure the successful completion of the transaction and to have peace of mind that your funds are safely transferred to your bank account.
If you encounter any issues or discrepancies during the confirmation process, it is recommended to reach out to Cash App support for assistance. They can provide guidance and help resolve any concerns or questions you may have.
Now that you have confirmed the transfer of funds, let’s move on to the final step of this process: withdrawing money from your bank account.
Step 7: Withdraw Money from Bank Account
Now that you have successfully transferred money from Cash App to your bank account, you may want to withdraw some or all of the funds from your bank account.
To withdraw money from your bank account, follow these steps:
- Access your online or mobile banking platform provided by your bank.
- Login to your bank account using your credentials.
- Navigate to the “Transfer” or “Withdraw” section of your banking platform.
- Select the account from which you want to withdraw funds (if you have multiple accounts).
- Enter the withdrawal amount you desire.
- Choose the destination for the withdrawn funds. This could be a linked debit card, external bank account, or cashier’s check.
- Review the details, including the withdrawal amount and destination, before confirming the transaction.
- Click on the “Confirm” or “Submit” button to initiate the withdrawal.
- Depending on your bank’s policies and processing times, the withdrawn funds should be available in your chosen destination shortly.
It is important to keep in mind that different banks have varying withdrawal limits and fees. Make sure to review your bank’s terms and conditions regarding withdrawals to avoid any surprises or additional charges.
By withdrawing money from your bank account, you can access physical cash or transfer the funds to another account or card as needed.
Now that you have successfully withdrawn money from your bank account, you have completed the entire process of transferring money from Cash App to your bank account.
Remember to keep your financial information secure and be cautious when conducting online transactions. If you encounter any issues or require further assistance, contact your bank’s customer support for guidance.