Introduction
Welcome to our guide on how to send Litecoin from Coinbase to Bittrex! If you’re new to the world of cryptocurrencies, you might be wondering what Coinbase and Bittrex are and why you would need to transfer your Litecoin between these platforms. Well, Coinbase and Bittrex are both popular cryptocurrency exchanges that allow users to buy, sell, and trade different digital currencies, including Litecoin.
Coinbase is one of the most well-known and trusted cryptocurrency exchanges, offering a user-friendly interface and a wide range of supported cryptocurrencies. On the other hand, Bittrex is a popular exchange known for its extensive selection of altcoins and advanced trading features.
Now, you might be wondering why you would need to send your Litecoin from Coinbase to Bittrex. There could be several reasons for this. Perhaps you’re looking to take advantage of the wider range of altcoins available on Bittrex or engage in more advanced trading strategies. Or maybe you simply prefer the interface or features offered by Bittrex. Whatever the reason, the process of sending Litecoin from Coinbase to Bittrex is relatively straightforward.
In this guide, we will walk you through the step-by-step process of transferring your Litecoin from Coinbase to Bittrex. We’ll show you how to create accounts on both platforms, verify your accounts, fund your Coinbase account, find your Litecoin wallet on Coinbase, generate a receiving address on Bittrex, and finally, send your Litecoin from Coinbase to Bittrex. By the end of this guide, you’ll be able to seamlessly navigate the process and start trading or holding Litecoin on Bittrex.
So, let’s get started with creating accounts on Coinbase and Bittrex!
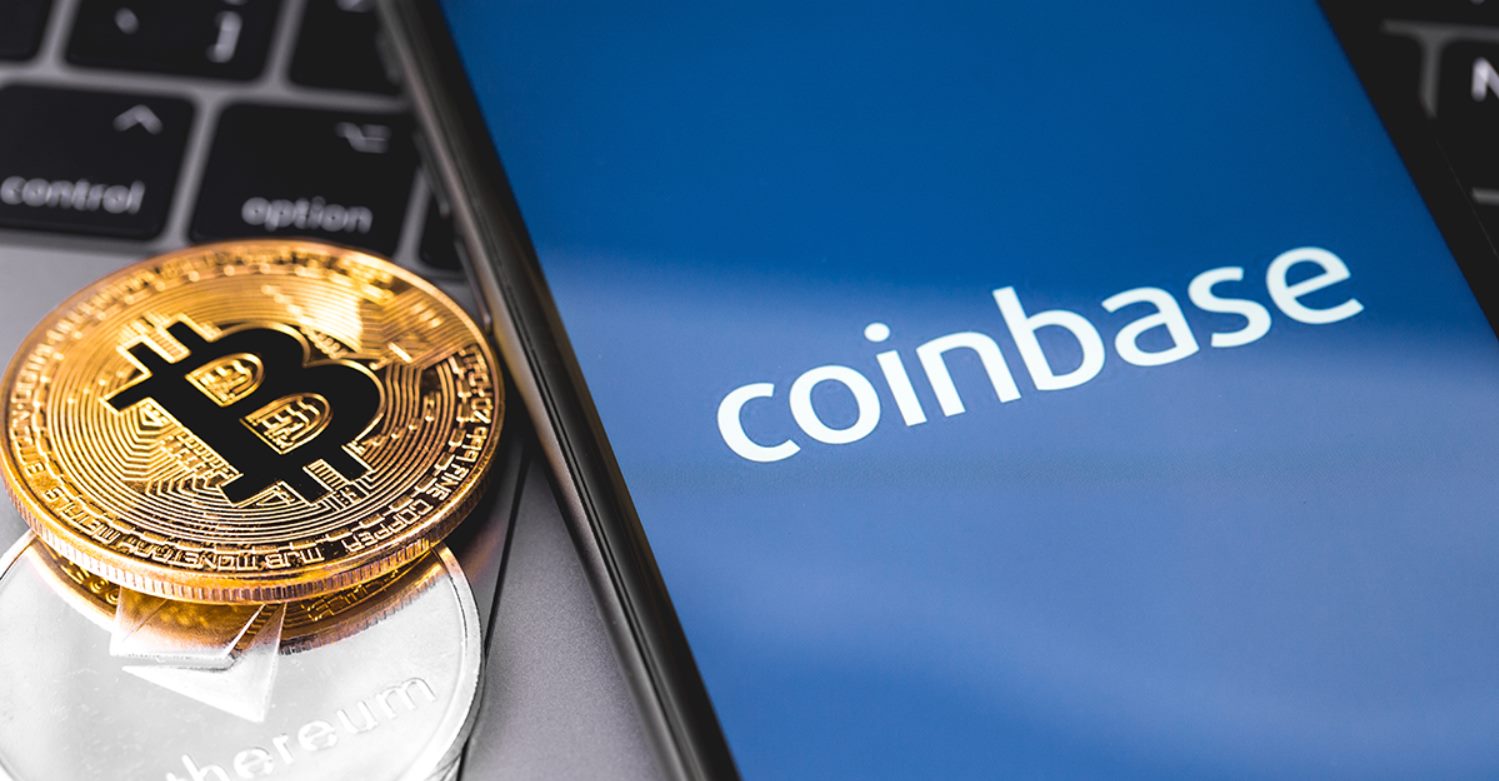
What is Coinbase?
Coinbase is one of the most popular and widely used cryptocurrency exchanges in the world. It was founded in 2012 and is based in San Francisco, California. Coinbase allows users to buy, sell, and store various cryptocurrencies, including Bitcoin, Ethereum, Litecoin, and more.
One of the main reasons for Coinbase’s popularity is its user-friendly interface, making it easy for beginners to navigate the world of cryptocurrencies. The platform offers a simple and straightforward way to trade digital currencies, whether you’re buying, selling, or converting one crypto to another.
Additionally, Coinbase provides a high level of security and has a strong reputation for safeguarding customer funds. The platform stores the majority of users’ funds in offline cold storage wallets, which greatly reduces the risk of hacking or theft. Coinbase also offers features like two-factor authentication, account activity monitoring, and insurance coverage for digital assets held on their platform.
Another notable aspect of Coinbase is its wide range of supported cryptocurrencies. While it initially started with Bitcoin, the platform has expanded over the years to include various altcoins. This allows users to diversify their crypto portfolio and take advantage of different investment opportunities.
In addition to its basic exchange functionality, Coinbase also offers other services. Coinbase Pro, previously known as GDAX, is a more advanced trading platform for experienced traders. Coinbase Wallet is a mobile app that allows users to manage their own private keys and store their cryptocurrencies securely.
Overall, Coinbase is an excellent choice for those looking to enter the world of cryptocurrencies, thanks to its user-friendly interface, strong security measures, and wide selection of supported digital assets. It provides a convenient and reliable platform for buying, selling, and storing various cryptocurrencies.
What is Bittrex?
Bittrex is a well-established cryptocurrency exchange that was founded in 2013 and is based in Seattle, Washington. It is known for its extensive selection of altcoins, making it a go-to platform for traders looking to access a wide range of cryptocurrencies.
One of the key features that sets Bittrex apart from other exchanges is its focus on security. The platform employs industry-leading security practices, including utilizing multi-stage wallet encryption and storing the majority of funds in offline cold storage wallets. This emphasis on security helps to instill trust and confidence among users.
Bittrex provides a user-friendly interface with a suite of advanced trading tools, making it suitable for both beginner and experienced traders. The platform offers a variety of trading options, including spot trading and margin trading, allowing users to engage in different trading strategies to maximize their profits.
One of the advantages of using Bittrex is its extensive selection of altcoins. While some exchanges have limited options outside of the major cryptocurrencies like Bitcoin and Ethereum, Bittrex offers an extensive list of altcoins for users to trade and invest in. This allows traders to diversify their portfolio and take advantage of emerging projects and technologies.
Bittrex also places a strong emphasis on regulatory compliance. The platform operates fully within the legal framework and adheres to the necessary Know Your Customer (KYC) and Anti-Money Laundering (AML) requirements. This focus on compliance helps to create a secure and trustworthy trading environment.
Additionally, Bittrex offers a seamless and intuitive API for developers who want to integrate their trading bots or create their own applications using Bittrex’s trading functionalities. This opens up opportunities for automation and customized trading experiences.
In summary, Bittrex is a reputable and secure cryptocurrency exchange that offers a wide range of altcoins for trading and investment. Its focus on security, user-friendly interface, and advanced trading features make it a popular choice among traders of all levels of experience.
Step 1: Creating Accounts on Coinbase and Bittrex
Before you can start sending Litecoin from Coinbase to Bittrex, you’ll need to have accounts on both platforms. Creating an account is a simple and straightforward process. Let’s walk through the steps for creating accounts on Coinbase and Bittrex.
1. Creating a Coinbase Account:
To create an account on Coinbase, follow these steps:
- Go to the Coinbase website (www.coinbase.com) and click on the “Get Started” button or “Sign Up” button.
- Provide the required information, including your name, email address, and password. Make sure to use a strong and unique password to enhance the security of your account.
- Agree to the terms of service and privacy policy, then click on the “Create Account” button.
- Verify your email address by clicking on the confirmation link sent to your registered email.
- Set up two-factor authentication (2FA) for added security. This can be done through an authentication app on your smartphone or by using SMS verification.
2. Creating a Bittrex Account:
To create an account on Bittrex, follow these steps:
- Go to the Bittrex website (www.bittrex.com) and click on the “Sign Up” button.
- Provide the necessary information, including your email address, full name, and password.
- Agree to the terms of service and click on the “Sign Up” button.
- Verify your email address by clicking on the confirmation link sent to your registered email.
After completing these steps, you will have successfully created accounts on both Coinbase and Bittrex. It’s important to note that you may need to go through additional verification processes on both platforms, depending on the level of access and functionality you require. This typically involves providing additional personal information and verifying your identity.
Now that you have your accounts set up, you’re ready to move on to the next step: verifying your Coinbase and Bittrex accounts.
Step 2: Verifying your Accounts
Once you have created your accounts on Coinbase and Bittrex, the next step is to verify your accounts. Verifying your accounts adds an extra layer of security and grants you access to additional features and higher trading limits. Let’s go through the process of verifying your Coinbase and Bittrex accounts.
1. Verifying Your Coinbase Account:
To verify your Coinbase account, follow these steps:
- Log in to your Coinbase account.
- Click on your profile icon at the top right corner of the screen and select “Settings” from the dropdown menu.
- Under “Account Settings,” you will find the “Verification” tab. Click on it.
- Follow the instructions provided to complete the verification process. This may involve verifying your identity by submitting a government-issued identification document, such as a passport or driver’s license.
- Once you have submitted the required documents, Coinbase will review and verify your account. This process may take some time, so be patient.
- Once your account is verified, you will receive a confirmation email, and you will have access to higher transaction limits and additional features.
2. Verifying Your Bittrex Account:
To verify your Bittrex account, follow these steps:
- Log in to your Bittrex account.
- Click on the “Settings” button located in the top right corner of the screen.
- From the dropdown menu, select “Basic Verification” or “Enhanced Verification” based on your desired level of account access.
- Follow the instructions provided to complete the verification process. This may include providing personal information, such as your name, address, and date of birth, as well as submitting identification documents.
- After submitting the required information and documents, Bittrex will review and verify your account. Verification times may vary, so please be patient.
- Once your account is verified, you will receive a notification, and you will have access to higher withdrawal limits and additional trading features.
By verifying your Coinbase and Bittrex accounts, you can enjoy increased security and unlock the full range of features and benefits these platforms have to offer. Once your accounts are verified, you’ll be ready to proceed with funding your Coinbase account.
Step 3: Funding your Coinbase Account
After successfully creating and verifying your Coinbase account, the next step is to fund it. Funding your Coinbase account will allow you to purchase Litecoin or any other supported cryptocurrency that you wish to transfer to Bittrex. Here’s how you can fund your Coinbase account:
- Log in to your Coinbase account.
- Click on the “Portfolio” tab to view your account overview.
- Under “Your Assets,” you will find a list of supported cryptocurrencies. Locate the “Litecoin” option.
- Click on the “Deposit” button next to Litecoin. This will take you to your Litecoin wallet address.
- Copy the wallet address or use the provided QR code to initiate the transfer of Litecoin from an external wallet or exchange.
- Once you have the Litecoin address, go to your external wallet or exchange where you hold Litecoin.
- Initiate a transfer of Litecoin from your external wallet or exchange to your Coinbase Litecoin wallet address.
- Enter the correct destination address and the amount you wish to transfer.
- Confirm the transaction and wait for the transfer to be processed. The time it takes for the transfer to complete may vary depending on network congestion and other factors.
- Once the transfer is complete, you will see the funds reflected in your Coinbase account balance.
It’s important to note that Coinbase may charge a small fee for depositing funds into your account, so be sure to review the fee structure on the Coinbase website. Additionally, always double-check the provided Litecoin wallet address when initiating a transfer to ensure accuracy and avoid any potential loss of funds.
With your Coinbase account funded, you are now ready to move on to the next steps of sending your Litecoin from Coinbase to Bittrex. In the following sections, we will guide you through the process of finding your Litecoin wallet on Coinbase and generating a receiving address on Bittrex.
Step 4: Finding your Litecoin Wallet on Coinbase
To send your Litecoin from Coinbase to Bittrex, you first need to locate your Litecoin wallet on Coinbase. Here’s how you can find your Litecoin wallet on Coinbase:
- Log in to your Coinbase account.
- Click on the “Portfolio” tab to view your account overview.
- Scroll down or search for “Litecoin” in the list of supported cryptocurrencies.
- Click on the “Send” button next to Litecoin. This will take you to the page for sending Litecoin from your Coinbase wallet.
- You will see a field where you can enter the recipient’s address.
- Keep this page open as you will need the recipient’s address when sending Litecoin to your Bittrex account in the next steps. Make sure to double-check the address to ensure it is accurate.
It’s important to note that each cryptocurrency on Coinbase has its own dedicated wallet. Therefore, it’s crucial to find the specific wallet for Litecoin, as sending Litecoin from any other wallet could result in the loss of your funds.
By following these steps, you will be able to locate your Litecoin wallet on Coinbase and prepare it for the transfer to your Bittrex account. In the next step, we will guide you through the process of generating a receiving address on Bittrex.
Step 5: Generating a Receiving Address on Bittrex
Now that you have located your Litecoin wallet on Coinbase, the next step is to generate a receiving address on Bittrex. This address will be used to send your Litecoin from Coinbase to Bittrex. Here’s how you can generate a receiving address on Bittrex:
- Log in to your Bittrex account.
- Click on the “Wallets” tab at the top of the screen.
- Search for “Litecoin” in the list of available cryptocurrencies or use the search bar to find it quickly.
- Click on the “Deposit” button next to Litecoin. This will take you to the page for generating a receiving address.
- A unique Litecoin address will be provided for you to receive your Litecoin. This address will be a long string of alphanumeric characters.
- Copy the receiving address or use the provided QR code for convenience.
It’s crucial to ensure the accuracy of the receiving address when generating it on Bittrex. Copying and pasting the address is recommended to avoid any typographical errors that could result in the loss of your funds.
Keep in mind that each cryptocurrency on Bittrex has its own unique receiving address. Therefore, it’s important to generate a Litecoin receiving address specifically for receiving your Litecoin transfer from Coinbase.
With the receiving address generated on Bittrex, you’re now ready to proceed with sending your Litecoin from Coinbase to Bittrex in the next step. Ensure that you keep the receiving address accessible for reference during the transfer process.
Step 6: Sending Litecoin from Coinbase to Bittrex
With your Coinbase account funded and the receiving address generated on Bittrex, it’s time to send your Litecoin from Coinbase to Bittrex. Follow the steps below to complete this process:
- Log in to your Coinbase account.
- Click on the “Portfolio” tab to view your account overview.
- Scroll down or search for “Litecoin” in the list of supported cryptocurrencies.
- Click on the “Send” button next to Litecoin. This will take you to the page for sending Litecoin from your Coinbase wallet.
- In the “Recipient” field, paste the Litecoin receiving address that you generated on Bittrex. Double-check the address to ensure it is accurate, as sending Litecoin to the wrong address could result in the loss of your funds.
- Enter the amount of Litecoin you wish to send to your Bittrex account. Alternatively, you can select the option to send your entire Litecoin balance.
- Review the details to ensure accuracy, such as the recipient address and the amount of Litecoin to be sent.
- If provided, include a transaction note or message for reference.
- Click on the “Send Now” or “Send Litecoin” button to initiate the transfer.
- Depending on network congestion and other factors, it may take some time for the transaction to be confirmed and completed. You can track the progress of your transaction on the Coinbase platform.
It’s important to note that Coinbase may charge a small fee for sending Litecoin, so be sure to review the fee structure on the Coinbase website before initiating the transfer.
After the transaction is confirmed and completed, your Litecoin will be sent from your Coinbase wallet to your Bittrex account. The duration of the transfer may vary depending on network conditions.
Now that you’ve successfully sent your Litecoin from Coinbase to Bittrex, you can proceed to the next step to confirm the transaction and wait for the deposit to appear in your Bittrex account.
Step 7: Confirming the Transaction and Waiting for the Deposit to Bittrex
After sending your Litecoin from Coinbase to Bittrex, the next step is to confirm the transaction and wait for the deposit to appear in your Bittrex account. Here’s what you need to do:
- Log in to your Bittrex account.
- Click on the “Wallets” tab at the top of the screen.
- Scroll down or use the search bar to find “Litecoin” in the list of available cryptocurrencies.
- Look for the “Pending Deposits” or “Deposit History” section, depending on the Bittrex interface.
- Locate the Litecoin deposit that you initiated from Coinbase.
- Take note of the “Pending” status of the deposit and the number of confirmations required for it to be completed.
- Typically, a certain number of confirmations on the Litecoin blockchain network are required before the deposit is considered complete and available for trading on Bittrex. The number of confirmations varies based on network conditions and Bittrex’s requirements.
- Keep an eye on the “Confirmations” column to track the progress of your deposit. As confirmations increase, the status will change from “Pending” to “Completed.”
- Once the deposit is marked as “Completed,” the Litecoin will be available in your Bittrex account, and you can start trading or holding it.
It’s important to note that the time it takes for the deposit to be completed can vary based on network congestion and other factors. Litecoin transactions typically require a few minutes to several hours to reach the required number of confirmations.
During this waiting period, it’s advisable to exercise caution and not attempt any further actions on the deposit until it is marked as “Completed” on Bittrex.
By confirming the transaction and patiently waiting for the deposit to appear in your Bittrex account, you will be able to securely transfer your Litecoin from Coinbase and have it readily available on Bittrex for trading or other purposes.
Step 8: Trading or Holding Litecoin on Bittrex
Once the deposit of your Litecoin from Coinbase has been completed and is available in your Bittrex account, you have the option to trade or hold your Litecoin on this platform. Here’s what you can do:
1. Trading Litecoin:
If you’re interested in actively trading your Litecoin on Bittrex, follow these steps:
- Log in to your Bittrex account.
- Click on the “Markets” tab in the top menu to access the trading markets on Bittrex.
- Search for the LTC trading pair you wish to trade with. For example, if you want to trade Litecoin for Bitcoin, search for the “LTC/BTC” trading pair.
- Once you’ve found the desired trading pair, you can place a market or limit order based on your trading strategy and preferences.
- Review the details of your trade, including the quantity, price, and order type, before confirming the trade.
- Keep track of your trades and monitor the market conditions to make informed decisions.
2. Holding Litecoin:
If you prefer to hold your Litecoin on Bittrex, you can simply leave it in your Bittrex account without actively engaging in trading activities. By holding Litecoin, you can potentially benefit from long-term price appreciation or use it as a store of value.
Bittrex provides a secure platform for storing your Litecoin. However, it’s important to note that it is generally recommended to store large amounts of cryptocurrencies in external wallets that offer enhanced security measures, such as hardware wallets or cold storage options.
Regardless of whether you choose to trade or hold your Litecoin on Bittrex, it’s important to stay informed about market trends, perform proper research, and consider your individual risk tolerance and investment goals.
It’s worth mentioning that Bittrex offers a variety of advanced trading features, including stop-limit orders, conditional orders, and trading charts with technical analysis tools. These features can be useful for experienced traders looking to implement specific strategies.
So, with your Litecoin now available on Bittrex, you have the freedom to explore trading opportunities or hold onto your Litecoin until you’re ready to take further action.
Conclusion
Congratulations! You have successfully learned how to send Litecoin from Coinbase to Bittrex. By following the step-by-step process outlined in this guide, you have gained the knowledge and skills to transfer your Litecoin safely and efficiently between these two popular cryptocurrency exchanges.
We began by introducing you to Coinbase and Bittrex, explaining their functions as cryptocurrency exchanges and highlighting their key features. Then, we walked you through the process of creating accounts on both platforms, verifying your accounts, and funding your Coinbase account. We also guided you in finding your Litecoin wallet on Coinbase and generating a receiving address on Bittrex.
Next, we covered how to send your Litecoin from Coinbase to Bittrex and provided instructions on confirming the transaction and waiting for the deposit to appear in your Bittrex account. Finally, we discussed the options of trading or holding your Litecoin on Bittrex, enabling you to make informed decisions based on your individual investment goals and preferences.
Remember, the world of cryptocurrencies can be dynamic and subject to market fluctuations. It’s essential to stay informed, conduct your own research, and make well-informed decisions when engaging in cryptocurrency transactions and investing.
We hope this guide has equipped you with the knowledge and confidence to navigate the process of sending Litecoin from Coinbase to Bittrex. As you gain more experience and familiarity with these platforms, you’ll be able to explore additional features and expand your cryptocurrency portfolio.
As always, please exercise caution and remember to prioritize security when dealing with cryptocurrencies. Safeguard your account credentials, enable two-factor authentication, and consider using external wallets for storing larger amounts of cryptocurrencies.
Thank you for choosing this guide as your resource, and we wish you success in your cryptocurrency endeavors!