Introduction
Welcome to the world of cryptocurrency trading! If you’re here, chances are you’ve decided to move your Litecoin from Coinbase to Binance. Whether you’re a seasoned trader or just starting out, this guide will walk you through the step-by-step process to ensure a smooth and successful transfer.
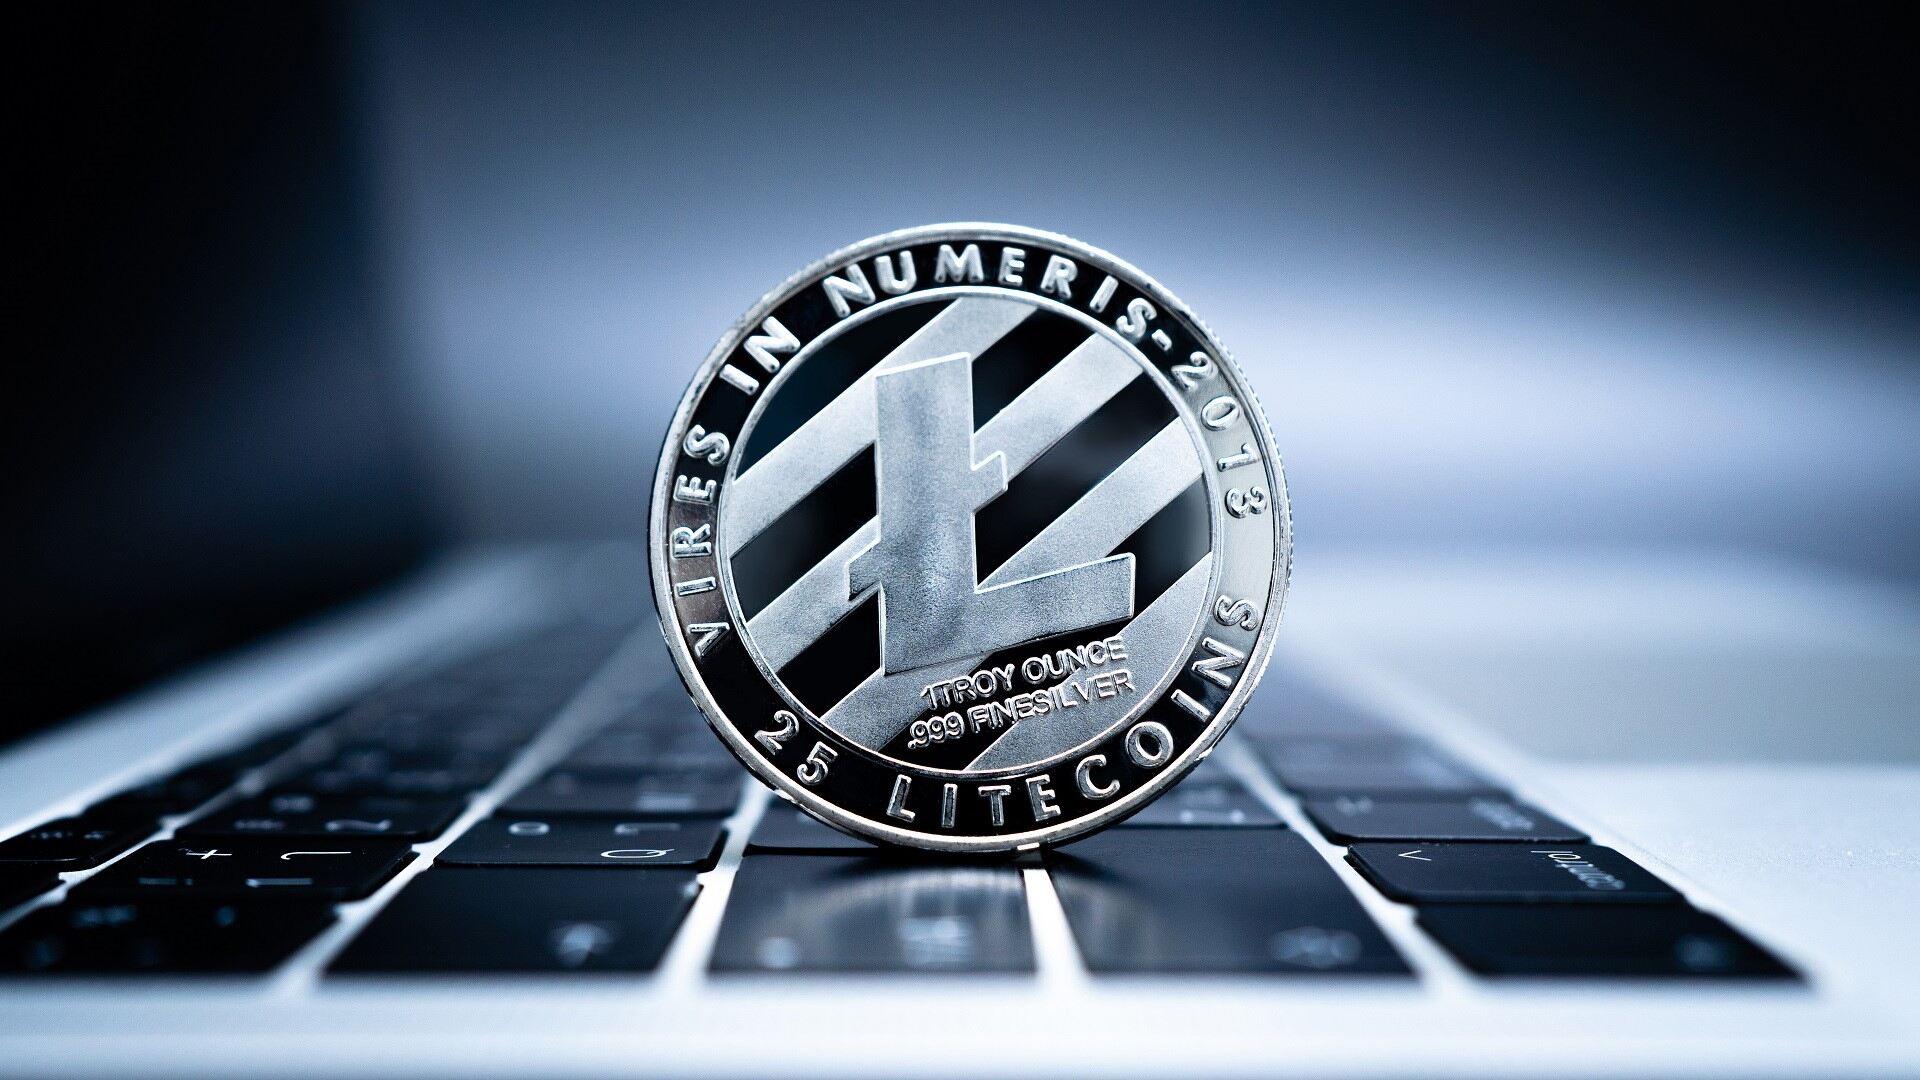
Litecoin, often referred to as the “silver to Bitcoin’s gold,” has become a popular cryptocurrency for its fast transaction time and low fees. Coinbase, one of the most trusted and user-friendly cryptocurrency exchanges, is a popular choice for buying, selling, and storing cryptocurrencies. Binance, on the other hand, offers a wider range of trading options and an extensive selection of altcoins.
While both Coinbase and Binance offer convenient ways to store and manage your Litecoin, you might decide to move your Litecoin from Coinbase to Binance for various reasons. Perhaps you’re looking to take advantage of Binance’s advanced trading features, or you simply want to diversify your cryptocurrency holdings.
Regardless of your reasons, transferring Litecoin between Coinbase and Binance is a relatively straightforward process. However, it’s important to take the necessary precautions and follow the right steps to ensure the safety of your funds. In this guide, we will walk you through each step, from signing up for accounts to completing the transfer.
Before we dive into the details, it’s essential to note that cryptocurrency transactions involve some degree of risk. While the steps outlined in this guide are designed to minimize potential issues, it’s always recommended to double-check the information, follow best security practices, and make sure you understand the risks involved in cryptocurrency trading.
Now that you have a general understanding of what to expect, let’s get started with the first step: signing up for accounts on both Coinbase and Binance. Don’t worry if you’re new to either platform – we’ll guide you through the process, ensuring that you’re ready to make the transfer confidently.
Step 1: Signing up for accounts on Coinbase and Binance
Before you can transfer your Litecoin from Coinbase to Binance, you’ll need to have accounts on both platforms. If you already have an account, feel free to skip this step and proceed to the next one.
To sign up for an account on Coinbase, visit their website at www.coinbase.com. Look for the “Get Started” or “Sign Up” button, usually located at the top right corner of the homepage. Click on it, and you’ll be directed to the account creation page.
On the account creation page, you’ll be asked to provide some basic information, including your name, email address, and password. Make sure to choose a strong and unique password to ensure the security of your account. Coinbase may also require you to verify your email address before proceeding.
Once you’ve filled in the required information and clicked on the “Create Account” button, you’ll be prompted to set up an additional layer of security known as two-factor authentication (2FA). Coinbase offers several options for 2FA, including SMS verification, authenticator apps, and hardware security keys. Choose the option that suits you best and follow the instructions to enable 2FA on your account.
After setting up 2FA, you may need to complete the identity verification process to increase your account limits and access additional features. Coinbase is committed to compliance with regulatory standards, and this step is necessary to ensure the security of your account and prevent fraud.
Verifying your identity on Coinbase usually involves providing a government-issued ID, such as a driver’s license or passport, and submitting a selfie for identity verification purposes. Follow the instructions on the Coinbase website to complete the identity verification process. It may take a few minutes or up to several days for your verification to be processed.
Once your Coinbase account is created and verified, it’s time to sign up for a Binance account. Visit www.binance.com and click on the “Register” button. You’ll be directed to the account creation page.
Similar to Coinbase, Binance will ask you to provide basic information, including your email address and a password. Choose a strong password and consider enabling two-factor authentication for added security. Binance also offers several options for 2FA, including SMS verification, Google Authenticator, and other third-party authenticator apps. Select your preferred method and follow the instructions to enable 2FA.
After completing the sign-up process, you may also need to verify your identity on Binance, depending on the level of withdrawal limits you wish to have. To verify your identity, go to your account settings and provide the required information, such as your full name and proof of identity.
Step 2: Verifying your identity on Coinbase and Binance
Once you’ve successfully signed up for accounts on Coinbase and Binance, the next step is to verify your identity. Identity verification is an important security measure implemented by both platforms to ensure the safety of your funds and comply with regulatory requirements.
First, let’s start with Coinbase. To verify your identity on Coinbase, log in to your account and navigate to your account settings. Look for the verification section, which may be labeled as “Identity Verification” or something similar.
Coinbase typically requires two levels of identity verification: level 1 and level 2. Level 1 verification involves providing basic personal information, such as your full name, address, and date of birth. You may also need to provide a valid government-issued ID, such as a driver’s license or passport. Follow the instructions on the Coinbase website to upload the required documents.
Level 2 verification, also known as “ID+,” is optional but highly recommended. This level of verification offers higher withdrawal limits and access to additional features on Coinbase. To complete level 2 verification, you’ll need to provide a selfie while holding your ID, as well as answering a few questions to verify your identity. Follow the instructions provided by Coinbase to complete this process.
Once your identity is verified on Coinbase, you’ll have increased account limits, allowing you to make larger transactions and withdrawals. It’s important to note that the verification process may take some time, ranging from a few minutes to several days, depending on Coinbase’s verification queue and workload.
Now, let’s move on to verifying your identity on Binance. Log in to your Binance account and navigate to your account settings. Look for the “Security” or “Verify” tab, where you’ll find the identity verification options.
Binance offers three levels of verification: basic, intermediate, and advanced. Basic verification typically involves providing your full name, gender, and date of birth. This level of verification allows you to make withdrawals equivalent to 2 BTC per 24-hour period.
If you wish to increase your withdrawal limits on Binance, you can proceed with intermediate or advanced verification. These levels of verification require additional information, such as a valid government-issued ID and a selfie for identity verification purposes. Follow the instructions provided by Binance to complete the verification process for the desired level.
Similar to Coinbase, the verification process on Binance may take some time to be processed. It’s important to double-check that you have provided accurate information and uploaded the required documents correctly to avoid any delays in the verification process.
Verifying your identity on both Coinbase and Binance is crucial for ensuring the security and legitimacy of your accounts. Once your identity is verified, you’ll have access to increased account limits, allowing you to make larger transactions and withdrawals as you engage in cryptocurrency trading.
Step 3: Adding Litecoin to your Coinbase wallet
Now that you have your Coinbase account set up and verified, it’s time to add Litecoin to your Coinbase wallet. Your Coinbase wallet serves as a secure digital storage for your Litecoin, allowing you to easily manage and send it to other wallets or exchanges, such as Binance.
To add Litecoin to your Coinbase wallet, log in to your Coinbase account and navigate to the dashboard or home page. Look for the “Accounts” tab, which will display a list of all the cryptocurrencies supported by Coinbase. Scroll down to find Litecoin (LTC) and click on it.
On the Litecoin page, you’ll see options such as “Receive” and “Send.” Click on the “Receive” button, which will generate a unique Litecoin address for your Coinbase wallet. This address is a combination of letters and numbers and acts as the destination for your Litecoin.
It’s important to note that the Litecoin address generated by Coinbase is specific to your account. To avoid any confusion or potential loss of funds, always double-check that you are providing the correct address when receiving Litecoin.
If you’re using the Coinbase mobile app, the process is similar. Open the app and navigate to the Litecoin section. Tap on “Receive” to generate your Litecoin wallet address.
Once you have your Litecoin wallet address, you can receive Litecoin from external sources, such as other wallets or cryptocurrency exchanges. Provide the generated Litecoin address when prompted for the recipient’s address, and the funds will be transferred to your Coinbase wallet.
It’s worth mentioning that there might be a delay in the appearance of your received Litecoin in your Coinbase wallet. This delay is normal and depends on various factors, including network congestion and the number of confirmations required for the transaction.
Additionally, Coinbase offers additional security features that you can enable to protect your Litecoin holdings. These options include setting up a passphrase, using biometric authentication on mobile devices, and adding an extra layer of security known as “Vault.” Consider exploring these options to enhance the security of your Coinbase wallet.
With your Litecoin successfully added to your Coinbase wallet, you’re now ready to proceed to the next step, which involves setting up a Binance account. This will allow you to transfer your Litecoin from Coinbase to Binance and start taking advantage of the trading opportunities available on the Binance platform.
Step 4: Setting up a Binance account
Now that you have Litecoin in your Coinbase wallet, it’s time to set up an account on Binance. Binance is one of the largest and most popular cryptocurrency exchanges in the world, offering a wide range of trading options and a diverse selection of altcoins.
To get started, go to the Binance website at www.binance.com. On the homepage, click on the “Register” button located at the top right corner of the screen.
On the registration page, you’ll be asked to provide some basic information to create your Binance account. This includes your email address and a password. Choose a strong and unique password to ensure the security of your account.
After filling in the required information, you’ll then need to complete the security verification process. Binance offers multiple options for security verification, including email verification, SMS authentication, and Google Authenticator. Select the verification method that you prefer and follow the instructions provided.
Once your registration and security verification are complete, you’ll have access to your Binance account. To enhance the security of your account, you can consider enabling additional security features such as two-factor authentication (2FA) and withdrawal whitelist, which allows you to specify which wallet addresses can receive funds from your Binance account.
Before moving on to the next step, it’s essential to familiarize yourself with the various features and trading options that Binance offers. Take some time to explore the user interface, the different trading markets, and the available order types. Binance provides comprehensive educational resources to help you understand how to trade different cryptocurrencies effectively.
Additionally, Binance also offers a mobile app for convenient trading on the go. You can download the Binance app from the iOS App Store or Google Play Store, depending on your device.
With your Binance account set up and ready to go, you’re now prepared to proceed to the next step, which involves finding your Litecoin wallet address on Binance. This address will be used to receive the Litecoin that you’ll be transferring from your Coinbase wallet.
Step 5: Finding your Litecoin wallet address on Binance
Now that you have your Binance account set up, the next step is to find your Litecoin wallet address on the exchange. Your Binance Litecoin wallet address serves as the destination for the Litecoin you’ll be transferring from your Coinbase wallet.
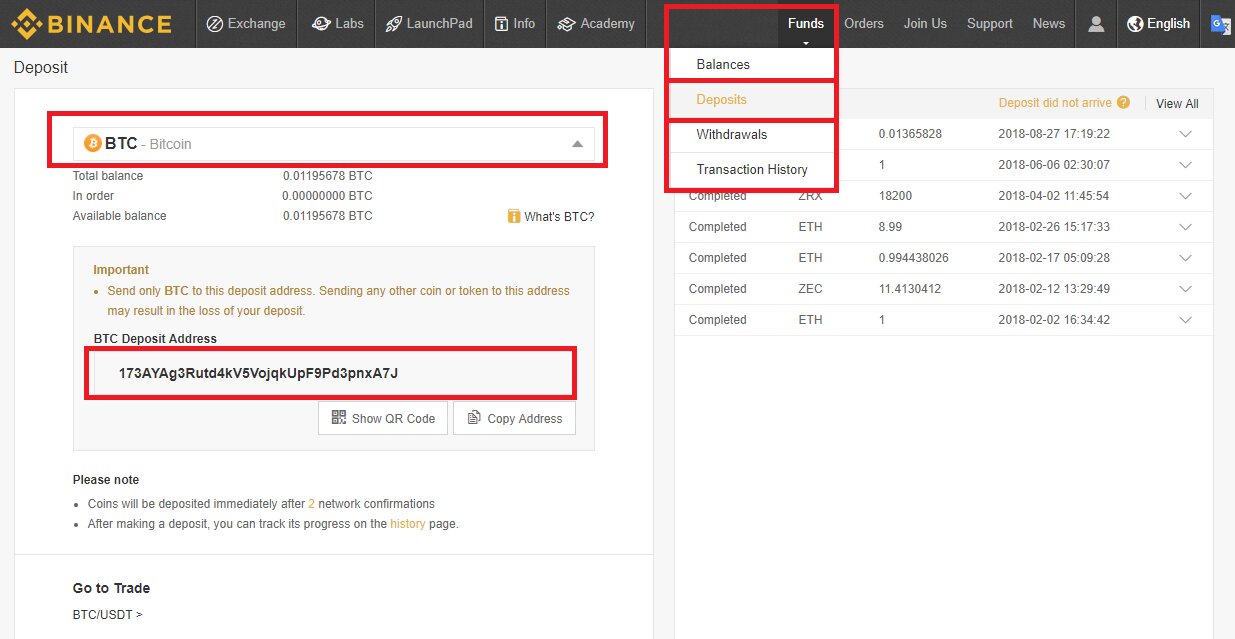
To find your Litecoin wallet address on Binance, log in to your Binance account and navigate to the Funds section. You can usually find this by clicking on the “Wallet” or “Funds” tab at the top of the page.
Once you’re in the Funds section, locate the “Balances” or “Deposits” tab. Here, you’ll find a list of all the cryptocurrencies supported by Binance, including Litecoin (LTC).
Scroll down or use the search function to find Litecoin (LTC) in the list. Click on the “Deposit” button next to Litecoin to proceed to the deposit page.
On the Litecoin deposit page, you’ll be able to see your Binance Litecoin wallet address. This address is a combination of letters and numbers unique to your Binance account. It’s important to note that each cryptocurrency on Binance has its own unique address, so make sure you select the correct cryptocurrency when transferring funds.
Before proceeding with the transfer, take a moment to double-check that you have copied the correct Litecoin wallet address from Binance. An incorrect address could result in the loss of your funds. It’s also recommended to use the “Copy Address” button provided by Binance to ensure accuracy.
If you’re using the Binance mobile app, finding your Litecoin wallet address is similar. Open the app, login to your account, and navigate to the Funds section. From there, you can find Litecoin in the list of supported cryptocurrencies and tap on the “Deposit” button to access your Litecoin wallet address.
Remember that your Litecoin wallet address on Binance is specific to your account. When transferring Litecoin from your Coinbase wallet to Binance, ensure that you provide the correct Binance Litecoin wallet address as the recipient address.
Now that you have your Binance Litecoin wallet address ready, it’s time to proceed to the next step, which involves transferring your Litecoin from Coinbase to Binance.
Step 6: Transferring Litecoin from Coinbase to Binance
With your Binance Litecoin wallet address in hand, you’re ready to transfer your Litecoin from your Coinbase wallet to Binance. The transfer process involves sending your Litecoin from one wallet to another, ensuring that you have control and access to your funds on the Binance exchange.
To initiate the transfer, log in to your Coinbase account and navigate to the dashboard or home page. Locate your Litecoin wallet and click on the “Send” or “Withdraw” button associated with it.
On the withdrawal page, you’ll be asked to enter the recipient address – your Binance Litecoin wallet address. Copy and paste the correct Binance address into the “Recipient” or “Destination” field. It’s crucial to double-check and ensure the accuracy of the address before proceeding.
In addition to the recipient address, Coinbase will require you to enter the amount of Litecoin you want to transfer. You can either input the specific amount or choose to transfer the entire balance of your Litecoin wallet.
Take a moment to review the transaction details, including the recipient address and the amount of Litecoin being transferred. Once you’ve verified that the information is correct, click on the “Send” or “Withdraw” button to initiate the transfer.
After confirming the transfer, Coinbase will process the transaction and send your Litecoin to the specified Binance wallet address. The transfer time can vary depending on network congestion and the confirmation speed of the Litecoin network. Generally, Litecoin transactions are relatively fast and can be completed within minutes.
It’s important to note that Coinbase may charge a network fee for transferring your Litecoin. This fee is required to validate and process the transaction on the Litecoin network. The fee amount will be deducted from the total amount being transferred, and the remaining balance will be sent to your Binance wallet.
Once the transfer is complete, you can monitor the progress of the transaction by checking the transaction details on Coinbase. You’ll be able to see the status of the transfer and the number of confirmations received by the Litecoin network.
It’s worth noting that while the transfer is in progress, it’s advisable to avoid making any changes to your Coinbase or Binance accounts. This includes updating account details or making additional transfers, as it could potentially interfere with the ongoing transaction.
Once the transfer is confirmed and the Litecoin appears in your Binance account balance, you have successfully completed the process of transferring Litecoin from Coinbase to Binance. Now, you can proceed to the final step of monitoring the transaction.
Step 7: Monitoring the transaction
After transferring your Litecoin from Coinbase to Binance, it’s essential to monitor the transaction to ensure its successful completion. Monitoring the transaction allows you to track the progress and confirm that your Litecoin has been securely transferred to your Binance wallet.
To monitor the transaction, you can start by checking the transaction details on Coinbase. Look for the transaction in your Coinbase account history or transaction list. Here, you’ll see information such as the transaction ID, the recipient address (your Binance Litecoin wallet address), and the status of the transaction.
The transaction status will provide updates on the number of confirmations received by the Litecoin network. Each confirmation represents a block of network data that validates the transaction. The more confirmations received, the more secure and irreversible the transaction becomes.
It’s important to note that the number of confirmations required for a transaction to be considered fully completed may vary depending on the policies of the cryptocurrency network. Generally, transfers with at least six confirmations are considered safe to assume the transaction is successful and finalized.
As you monitor the transaction, you can also track the progress by checking your Binance account. Once the Litecoin transfer is confirmed, you should see the Litecoin balance in your Binance wallet reflecting the transferred amount. You can navigate to your Binance wallet’s Litecoin section to confirm the arrival of your Litecoin and verify the correct balance.
During the monitoring process, it’s important to remain patient. Litecoin transactions typically confirm relatively quickly, but occasional network congestion or other factors may result in delays. If you encounter any issues or have concerns about the transaction’s status, you may want to contact customer support on either Coinbase or Binance for assistance.
Additionally, keep in mind that cryptocurrency transfers are irreversible. Once the transaction is confirmed and the Litecoin is in your Binance wallet, it cannot be reversed or canceled. Therefore, it’s crucial to double-check all addresses and transaction details before initiating the transfer.
With your Litecoin successfully transferred from Coinbase to your Binance wallet, you can now proceed to take full advantage of the trading opportunities available on the Binance platform. Whether you’re looking to trade Litecoin for other cryptocurrencies or explore the various markets, Binance offers a wide range of options to fulfill your trading needs.
Remember to exercise caution when engaging in cryptocurrency trading and always keep your account security a top priority. Regularly review and update your security settings, enable two-factor authentication, and stay informed about the latest security best practices.
By monitoring your transactions and remaining vigilant, you can safely and confidently navigate the world of cryptocurrency trading on platforms like Coinbase and Binance.
Conclusion
Congratulations! You’ve successfully navigated the process of transferring Litecoin from Coinbase to Binance. By following the steps outlined in this guide, you’ve ensured the safe and efficient transfer of your Litecoin between these two popular cryptocurrency platforms.
Throughout this process, you signed up for accounts on both Coinbase and Binance, verifying your identity to access the full features and benefits of these platforms. You added Litecoin to your Coinbase wallet, ensuring it’s securely stored and ready for transfer. Next, you set up a Binance account, empowering you to take advantage of the diverse range of trading options available on the platform.
You then found your Litecoin wallet address on Binance and successfully transferred your Litecoin from Coinbase to Binance using the wallet addresses provided. After completing the transfer, you monitored the transaction on both Coinbase and Binance to ensure its successful completion.
It’s important to note that the world of cryptocurrency trading comes with its own risks and uncertainties. Always exercise caution, stay informed about the latest security practices, and be diligent in safeguarding your accounts and funds.
Now that your Litecoin is safely in your Binance wallet, you have the opportunity to explore the various trading options, diversify your cryptocurrency portfolio, and take advantage of the dynamic cryptocurrency market on Binance.
Remember to keep track of market trends, conduct thorough research, and be mindful of your investment strategies. Utilize the available resources and educational materials provided by both Coinbase and Binance to enhance your trading knowledge and skills.
As the cryptocurrency market continues to evolve, staying informed and adaptable will be key to your success as a trader. Stay up to date with industry news, follow reputable sources, and engage with the vibrant cryptocurrency community to stay connected and learn from others.
We hope this guide has provided you with the necessary steps to confidently transfer your Litecoin from Coinbase to Binance. Whether you’re a seasoned trader or just starting out, may your cryptocurrency journey be filled with opportunities, growth, and success!