Introduction
Welcome to the fascinating world of HoloLens development! In this article, we will explore how to create touchable objects for HoloLens using Unity. The HoloLens is a cutting-edge mixed reality device developed by Microsoft that allows users to interact with virtual objects in the real world. By leveraging Unity, a powerful game development engine, we can bring these virtual objects to life and make them responsive to touch.
Building touchable objects for HoloLens opens up a whole new level of interactivity and immersion. Users can reach out and manipulate virtual objects as if they were physical objects in their environment. Whether you’re developing educational applications, training simulations, or immersive games, knowing how to create touchable objects will greatly enhance the user experience.
In this article, we will guide you through the process of setting up the HoloLens development environment, importing assets into Unity, configuring the HoloLens camera, adding collider components to objects, implementing touch input, adding visual feedback, and testing the final HoloLens application.
Whether you’re a seasoned Unity developer or new to HoloLens development, this article is designed to provide you with the necessary knowledge and skills to create touchable objects for HoloLens. So, let’s jump right in and dive into the exciting world of mixed reality development!
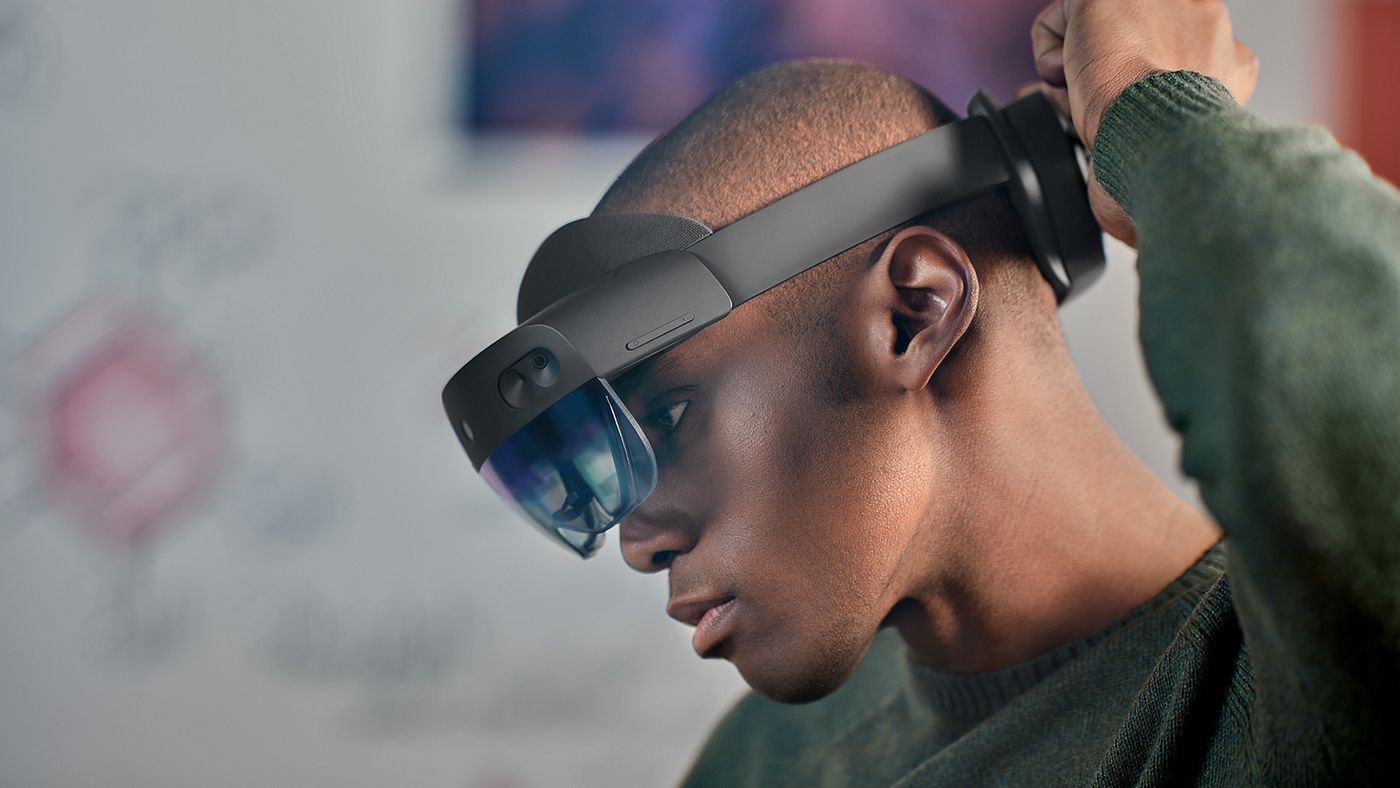
What is HoloLens?
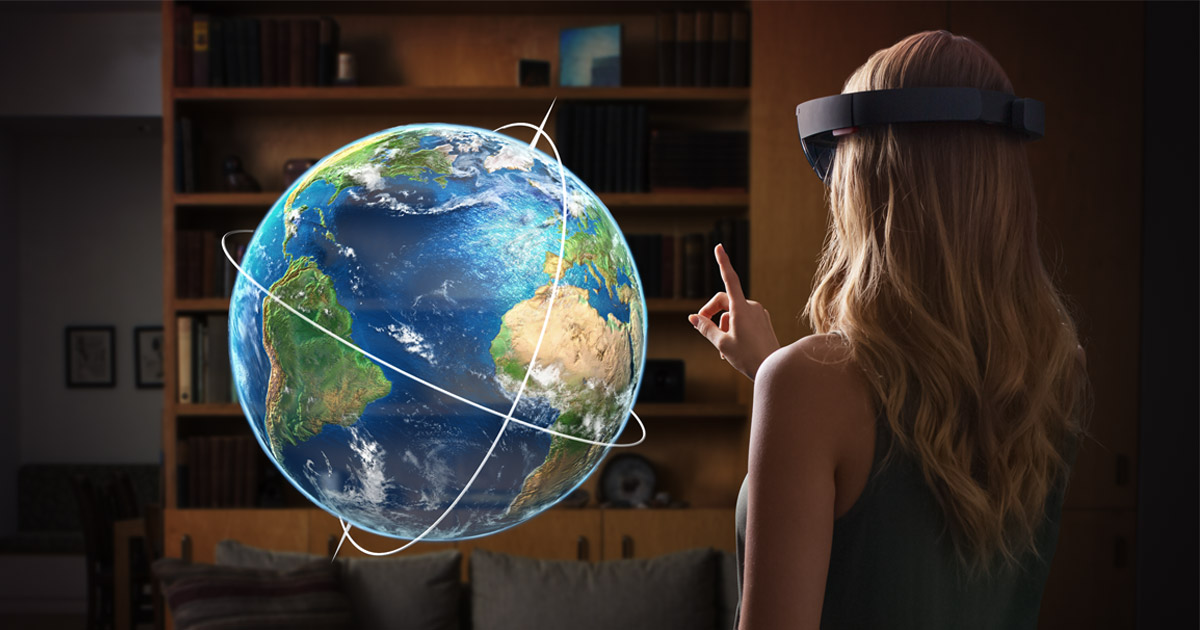
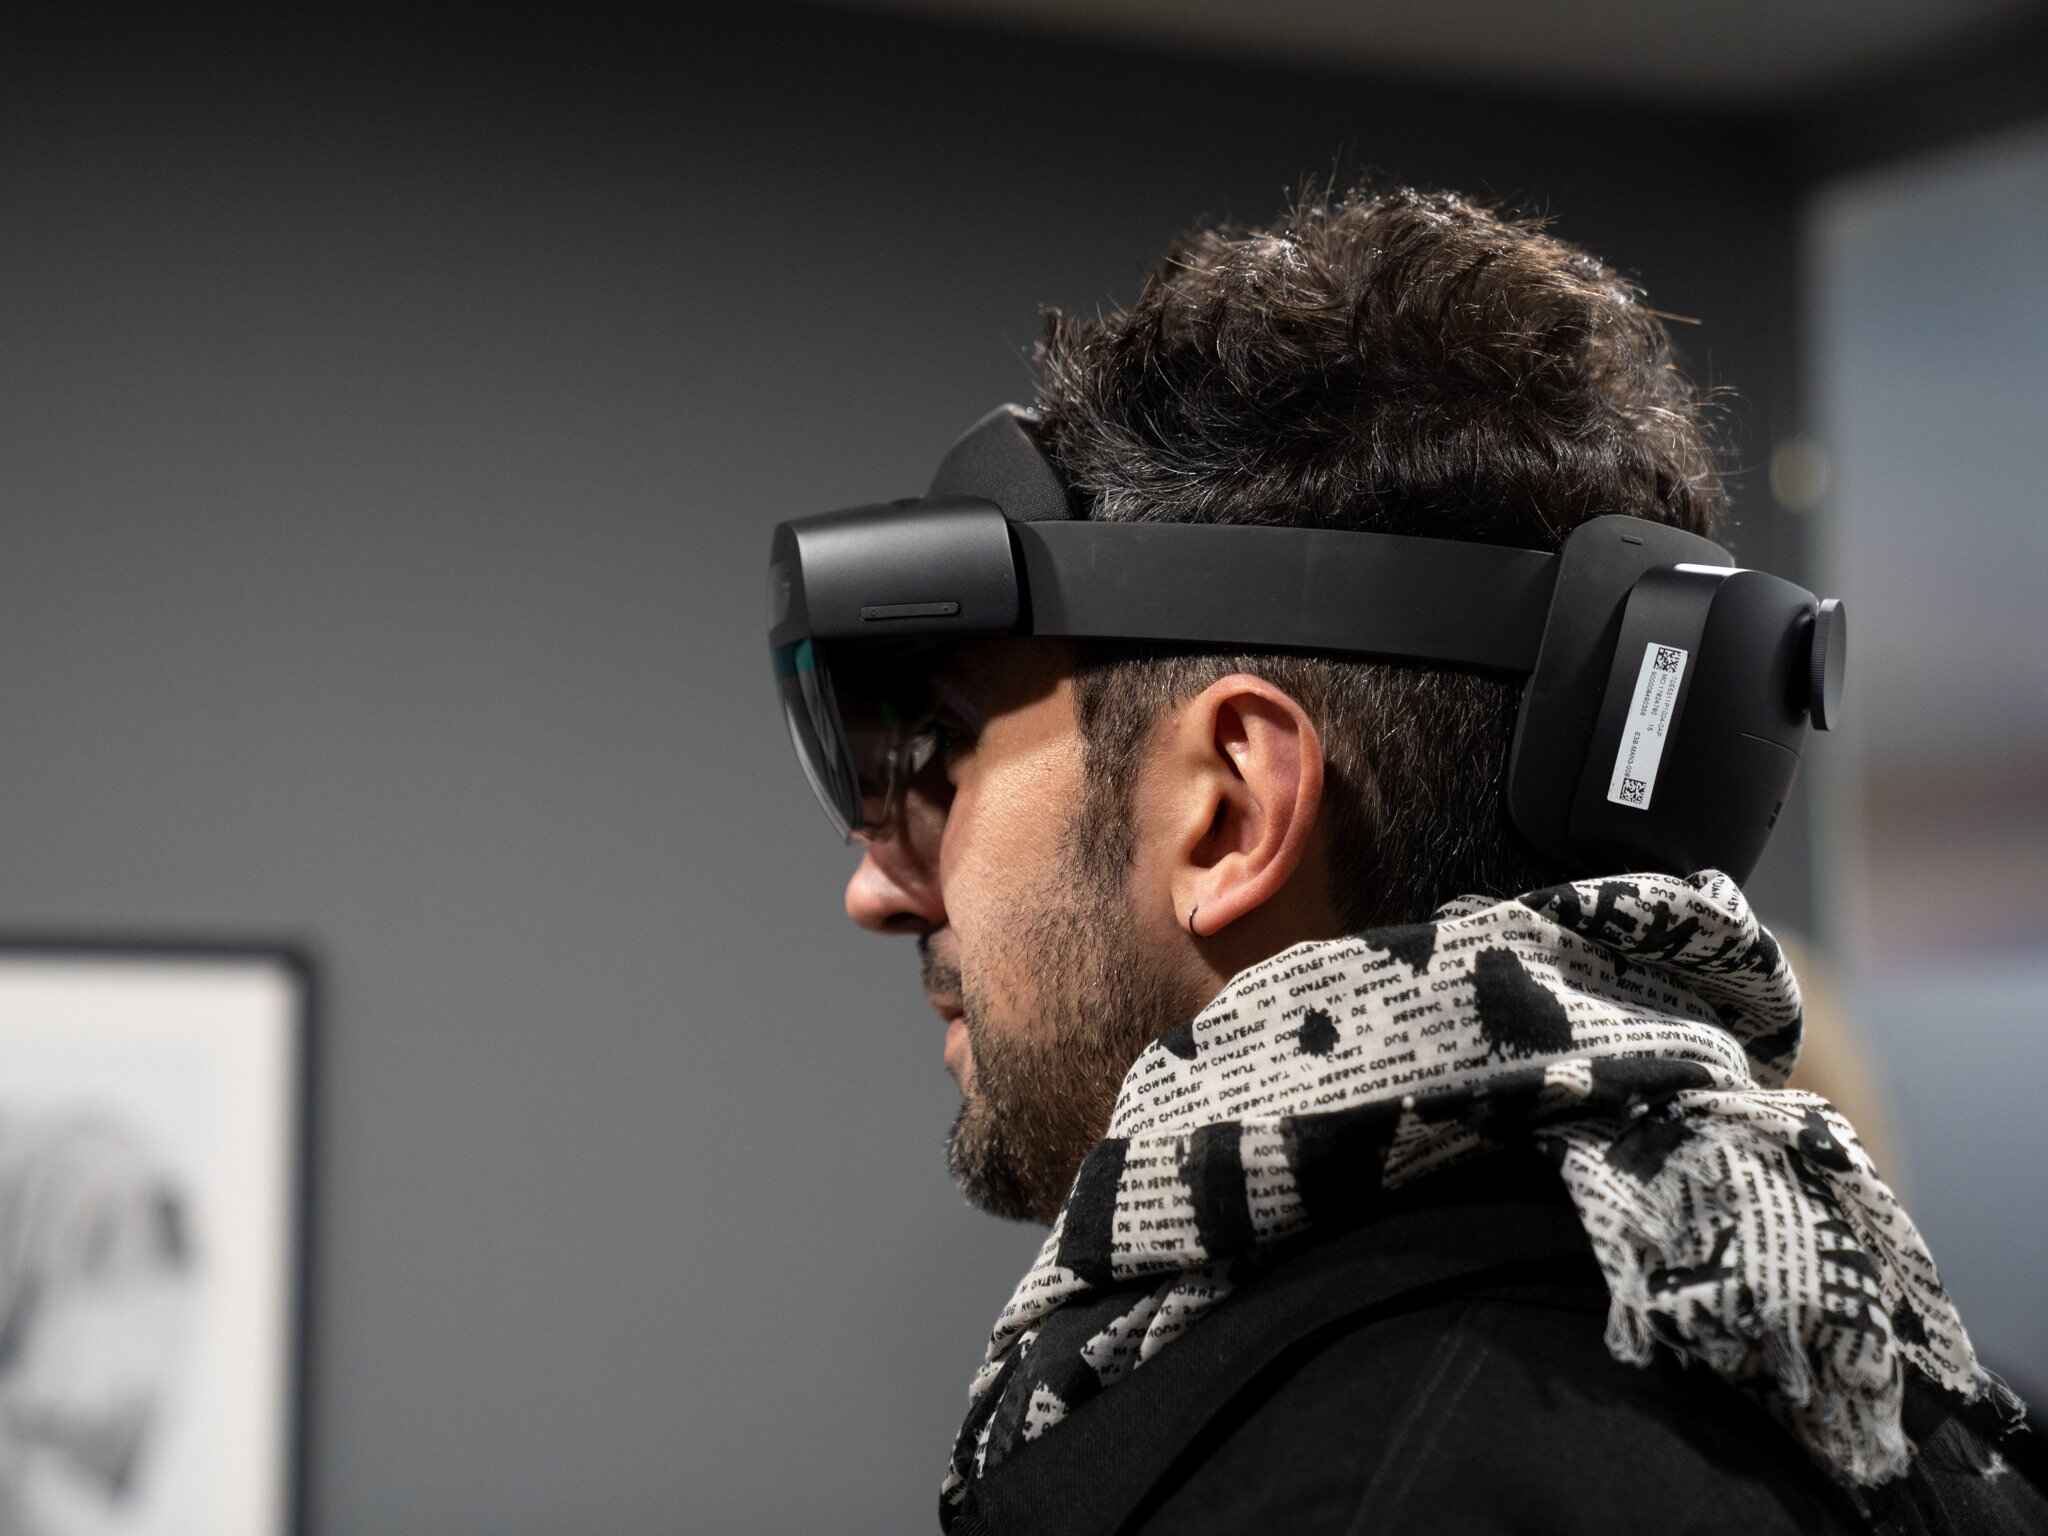
HoloLens is a cutting-edge, augmented reality (AR) device developed by Microsoft. It is a self-contained wearable holographic computer that allows users to interact with virtual objects and holograms in the real world. Unlike virtual reality (VR) devices that immerse users in a completely virtual environment, HoloLens combines the virtual and physical worlds, creating a mixed reality experience.
The HoloLens device consists of a head-mounted display unit that projects holographic images onto the user’s field of view, along with built-in sensors and cameras that track the user’s movements and environment. This enables the device to overlay three-dimensional virtual objects onto the real-world surroundings, allowing users to see and interact with them as if they were part of their physical environment.
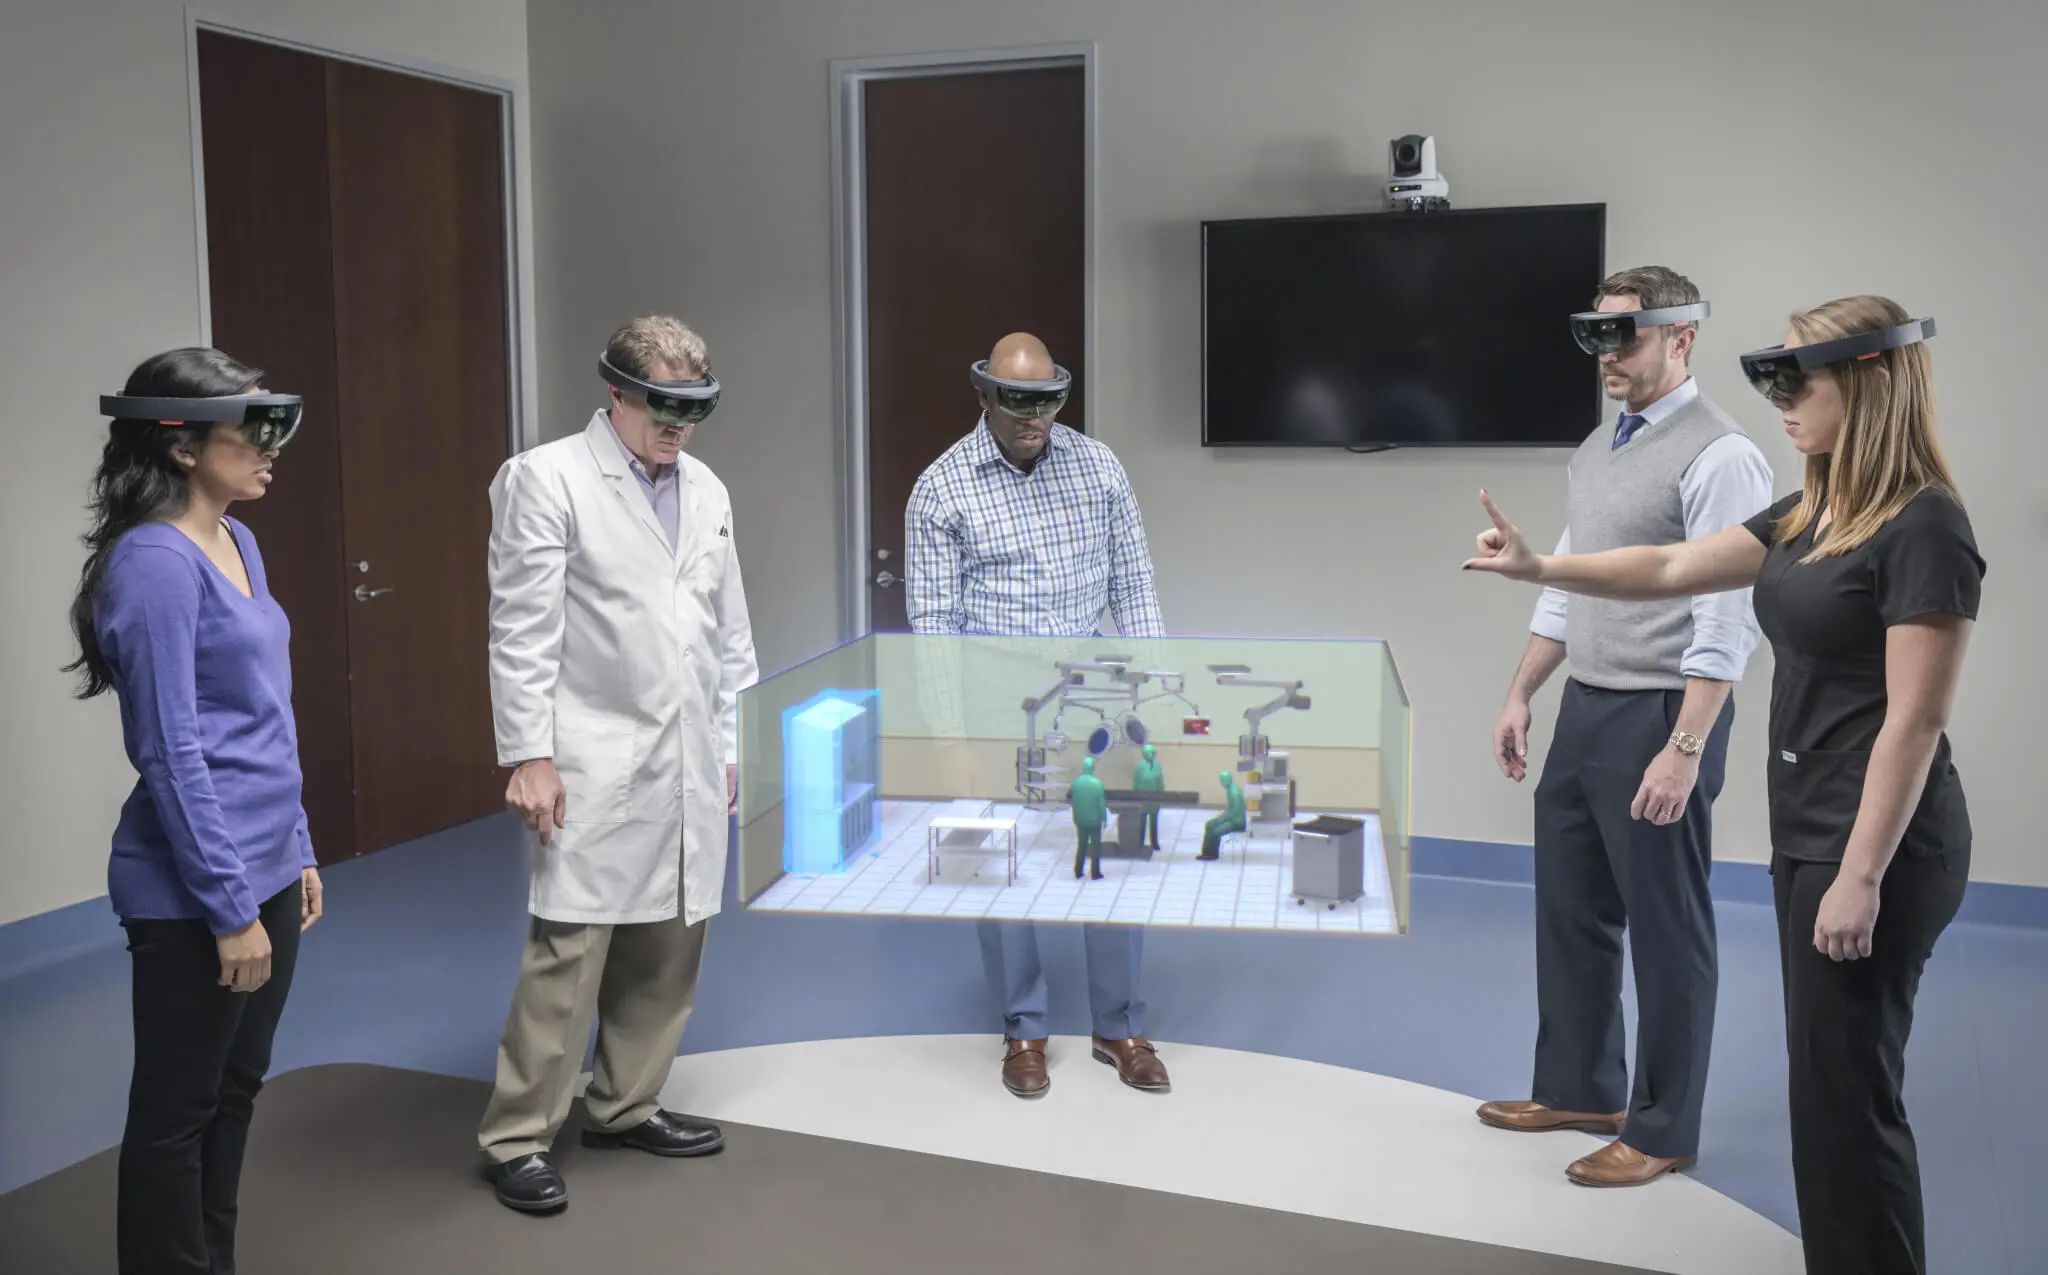
HoloLens opens up a wide range of possibilities for various industries and applications. It has been used in fields such as education, healthcare, architecture, engineering, and entertainment, to name a few. For example, in education, HoloLens can provide immersive learning experiences by allowing students to explore historical monuments or visualize complex scientific concepts in three dimensions.
With HoloLens, developers have the opportunity to create innovative and interactive applications that integrate virtual content seamlessly into the real world. By leveraging the power of Unity, developers can build compelling experiences that utilize gesture control, voice recognition, spatial mapping, and object recognition, among other functionalities.
HoloLens represents a significant leap forward in the world of augmented reality, bringing holographic computing into the hands of developers and users alike. With its advanced capabilities and potential for real-world applications, HoloLens is revolutionizing the way we interact with digital content and blurring the line between the virtual and physical realms.
Overview of Unity
Unity is a powerful and widely-used game development engine that provides a comprehensive set of tools and features for creating interactive and immersive experiences. It has gained popularity not only in the gaming industry but also in other fields like virtual reality (VR), augmented reality (AR), and mixed reality (MR) development.
One of the key strengths of Unity is its cross-platform compatibility, allowing developers to create applications for a wide range of devices and platforms, including PC, consoles, mobile devices, and even HoloLens. This makes it an ideal choice for creating HoloLens applications, as it provides flexibility and versatility in the development process.
Unity offers a visually-oriented and user-friendly interface that simplifies the creation of 2D and 3D content. With its intuitive drag-and-drop functionality, developers can easily import assets, design scenes, and manipulate objects within the virtual environment. Unity also provides a powerful scripting engine, allowing developers to customize and extend the functionality of their applications using C# programming language.
Another notable feature of Unity is its extensive asset store, which offers a vast library of ready-to-use assets, scripts, plugins, and tools created by both Unity Technologies and the community. This reduces development time and effort, enabling developers to focus more on the creative aspects of their projects.
Unity also excels in providing a range of advanced features to enhance the visual quality of applications. It supports realistic physics simulations, dynamic lighting, particle effects, and post-processing effects, allowing developers to create visually stunning and immersive experiences for HoloLens users.
Furthermore, Unity provides a range of built-in integrations and APIs for HoloLens development. This includes features such as spatial mapping, gesture recognition, voice commands, and spatial sound, which are crucial for creating natural and interactive experiences with HoloLens.
In summary, Unity is a powerful and versatile game development engine that is well-suited for creating interactive experiences, including HoloLens applications. Its user-friendly interface, cross-platform compatibility, extensive asset store, and advanced features make it an excellent choice for developers looking to create compelling and immersive content for HoloLens.
Setting up the HoloLens Development Environment
Before diving into HoloLens development, it’s essential to set up the development environment. Here are the steps to get started:
- Install Visual Studio: HoloLens development requires Visual Studio. Make sure you have Visual Studio 2017 or a newer version installed, with the necessary workload for Universal Windows Platform (UWP) development.
- Download and Install the Windows 10 SDK: The Windows 10 SDK provides the necessary tools and libraries for building UWP applications. Ensure that you have the latest version of the SDK installed.
- Enable Developer Mode: On your HoloLens device, go to Settings > Update & Security > For developers, and enable Developer Mode. This allows you to sideload and test your HoloLens applications directly on the device.
- Get the HoloLens Emulator: If you don’t have access to a physical HoloLens device, you can use the HoloLens Emulator provided by Microsoft. It allows you to simulate the HoloLens environment on your PC for testing and debugging purposes.
- Create a Unity Project: Launch Unity and create a new project. Make sure to select the appropriate settings for Universal Windows Platform (UWP) as the target platform.
- Set Up Unity for HoloLens: Install the Mixed Reality Toolkit (MRTK) package from the Unity Asset Store to enable support for HoloLens development. The MRTK provides a collection of scripts, components, and prefabs that simplify the development of HoloLens applications.
- Configure Build Settings: In Unity, go to File > Build Settings and select Universal Windows Platform as the target platform. Choose the appropriate device and architecture settings based on your development environment.
- Build and Deploy: Click on “Build” in the Build Settings window to generate the Visual Studio solution. Open the solution in Visual Studio, connect your HoloLens device or start the emulator, and hit the “Deploy” button to install and run your application.
- Test and Iterate: Once your application is deployed, you can test it on your HoloLens device or in the emulator. Make sure to iterate and refine your application based on user feedback and testing results.
By following these steps, you can set up your HoloLens development environment and start building amazing applications for the HoloLens device. Remember to keep up to date with the latest HoloLens SDK and Unity releases to take advantage of new features and improvements in your development process.
Importing the Assets
Now that you have set up the development environment for HoloLens, the next step is to import the necessary assets into your Unity project. Assets can include 3D models, textures, audio files, and any other resources required to create your HoloLens application.
Here are the steps to import assets into your Unity project:
- Locate or Create Assets: You may either download assets from online marketplaces, create your own using 3D modeling software, or use pre-built assets available in the Unity Asset Store. Consider the requirements of your application and choose assets that align with your vision.
- Open the Unity Editor: Launch Unity and open your project.
- Import Assets: In the Unity Editor, navigate to the project view and select the folder where you want to import the assets. Right-click on the folder and choose “Import New Asset” or simply drag and drop the assets directly into the folder.
- Wait for Import: Unity will process and import the assets into your project. This may take some time, depending on the size and complexity of the assets. You will see a progress bar indicating the import progress.
- Verify Import: Once the assets are imported, make sure to verify that they have been added to your project. You can do this by checking the project view and confirming that the assets are listed in the appropriate folder.
- Organize Assets: Organize your assets by creating folders and subfolders within the project view to keep everything well-structured and easily accessible. This will help you find and manage the assets throughout the development process.
When importing assets, it is important to consider optimization and performance. Large and complex assets can impact the performance of your HoloLens application. Therefore, it is advisable to optimize assets by reducing polygons, optimizing textures, and implementing LOD (Level of Detail) systems if necessary.
Furthermore, ensure that you have the appropriate usage rights for the assets you import. Respect copyrights and usage restrictions to avoid any legal issues down the line.
Importing assets is an essential step in creating your HoloLens application. By carefully choosing and organizing your assets, you will set a solid foundation for building immersive and interactive experiences on the HoloLens device.
Creating a New Scene in Unity
In Unity, a scene is a collection of game objects, assets, and settings that make up a specific level or environment in your HoloLens application. Creating a new scene allows you to design and build the virtual space where your application will be experienced.
Here’s how you can create a new scene in Unity:
- Open Unity: Launch the Unity Editor and open your project.
- Open the Scene View: In the Unity interface, locate and click on the “Scene” tab to open the Scene view, which is where you will design your scene.
- Create a New Scene: In the top menu bar, navigate to “File” > “New Scene” or use the shortcut Ctrl/Cmd+N to create a new, empty scene.
- Save the Scene: Unity will prompt you to save your new scene. Choose a name and location for your scene file, and click “Save.”
- Design the Scene: With the new scene open, you can now start designing your virtual environment. Use the Unity interface to create and position game objects, import assets, adjust lighting, and set up the overall layout of your scene.
- Organize the Hierarchy: As you work on your scene, you will be adding game objects to the Hierarchy view. Use this view to organize the objects hierarchically and establish relationships between them.
- Customize the Scene: Unity offers a wide range of options for customizing your scene. You can adjust the camera view, set up lighting conditions, add particle effects, and apply post-processing effects to enhance the visual quality and atmosphere of your scene.
- Save and Manage Your Scene: As you make changes to your scene, remember to save your work regularly. You can do this by clicking on “File” > “Save Scene” or using the Ctrl/Cmd+S shortcut. Unity automatically saves your scene as you work, but manual saving ensures that your changes are preserved.
Creating a new scene in Unity provides you with a blank canvas to bring your virtual environment to life. Spend time experimenting, iterating, and refining your scene design to create an engaging and immersive experience for HoloLens users.
Configuring the HoloLens Camera
Configuring the HoloLens camera is a crucial step in developing HoloLens applications that provide a seamless and immersive experience. The camera settings determine how the virtual content is rendered and aligned with the real-world environment. Here’s a guide on how to configure the HoloLens camera:
- Select the Main Camera: In the Unity Scene view, locate the Main Camera game object. This is the camera through which the user will view the HoloLens application.
- Adjust Camera Settings: With the Main Camera selected, modify its settings in the Inspector panel. You can adjust the field of view, near and far clipping distances, and other properties to achieve the desired visual effect.
- Enable Clear Flags: The Clear Flags setting determines how the camera background is rendered. For HoloLens applications, set the Clear Flags to “Solid Color” or “Don’t Clear” to ensure the real-world environment is visible behind the virtual content.
- Configure Background: To composite the real-world environment with the virtual content, set the Background type to “Skybox” or “Solid Color.” Unity provides a Skybox material that can be used as the background to blend the virtual content seamlessly into the surroundings.
- Enable Depth Buffer: To correctly render virtual objects in the correct depth order, enable the Depth Buffer setting in the camera configuration. This ensures that objects appear naturally occluded by real-world objects when users interact with them.
- Adjust Offsets and Scale: By modifying the camera’s position and scale, you can fine-tune the alignment between the real-world environment and the virtual content. Use the HoloLens device during testing to iterate and find the optimal camera configuration for a convincing mixed reality experience.
- Test in Editor and on HoloLens: Test your camera configuration both in the Unity Editor and on the HoloLens device or emulator. Verify that the virtual objects appear convincingly aligned with the real-world environment and make any necessary adjustments.
Configuring the HoloLens camera is a crucial step in ensuring that virtual content seamlessly integrates with the user’s environment. By adjusting camera settings, enabling depth buffer, and finding the right scale and position, you can create an immersive mixed reality experience on the HoloLens device.
Adding Collider Components to Your Objects
Adding collider components to your objects is essential for enabling interaction and collision detection in your HoloLens application. Colliders define the shape and boundaries of objects, allowing them to interact with other objects and respond to user input. Here’s how you can add collider components to your objects in Unity:
- Select the Object: In the Unity Scene view, select the object you want to add colliders to. This can be a 3D model, a game object, or any other element in your scene.
- Add a Collider: Right-click on the selected object in the Hierarchy view and navigate to “3D Object” or “Physics” in the context menu. From here, you can choose the type of collider you want to add, such as a box collider, sphere collider, or capsule collider.
- Adjust Collider Settings: With the collider component added, you can modify its settings in the Inspector panel. This includes adjusting the size, position, and orientation of the collider to match the object’s shape and dimensions.
- Multiple Colliders: If your object has complex or irregular shapes, you may need to add multiple colliders to accurately represent its form. For example, you can combine a box collider and a sphere collider to approximate the shape of a character or an interactive object.
- Mesh Colliders: In some cases, you may want to use a mesh collider to precisely match the shape of your object. Mesh colliders can be created by selecting a 3D mesh asset and checking the “Mesh Collider” checkbox in the Inspector panel. Note that mesh colliders can be computationally expensive, so use them sparingly and optimize their mesh complexity when necessary.
- Test Collision Detection: Once you have added colliders, test the collision detection in your HoloLens application. Ensure that objects respond appropriately to interactions, such as being tapped or manipulated by the user. You can also use Unity’s physics simulation tools to test collisions between objects in the Editor.
Adding collider components to your objects is key to creating interactive and responsive experiences in your HoloLens application. By accurately defining the shape and boundaries of your objects, you enable accurate collision detection and user interaction, enhancing the overall realism and engagement of your mixed reality experience.
Implementing the Touch Input
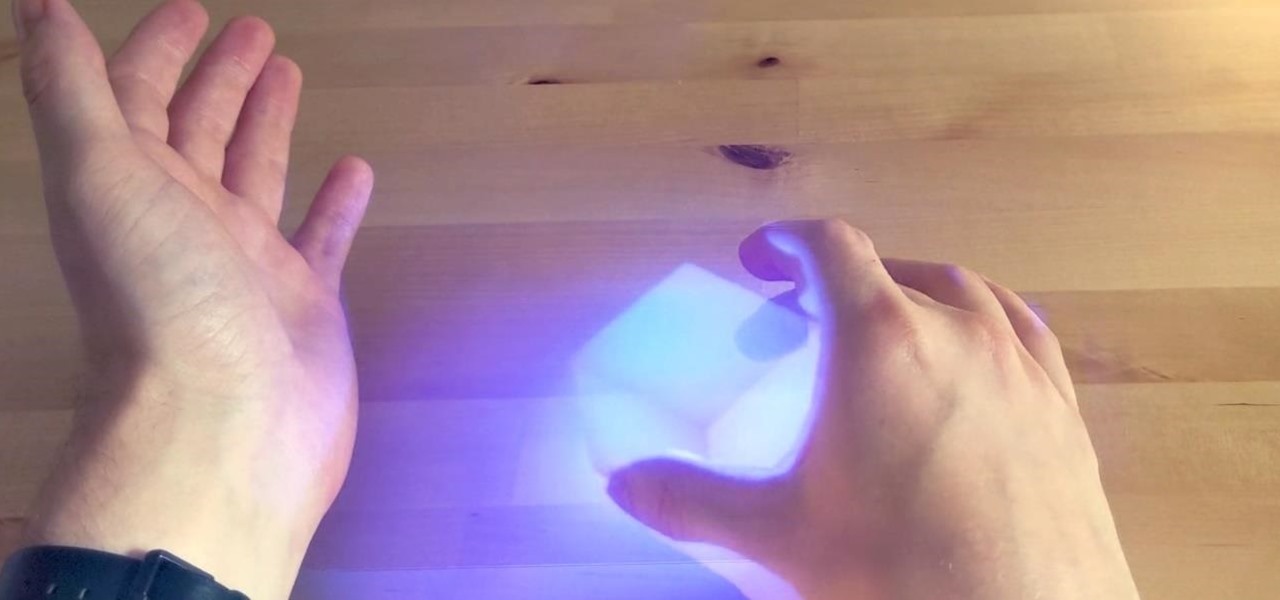
Implementing touch input is essential for enabling users to interact with virtual objects in your HoloLens application. Touch input allows users to tap, swipe, and manipulate objects using their fingers directly on the HoloLens device. Here’s how you can implement touch input in Unity:
- Set Up HoloLens Gestures: Unity provides a set of predefined gestures for HoloLens, such as Tap, Double-Tap, and Hold. To use these gestures, enable the appropriate input module in your Unity project. You can find the input module in the “Mixed Reality Toolkit” (MRTK) package from the Unity Asset Store.
- Implement Event Handlers: Create event handlers for the desired gestures to handle user input. For example, you can respond to a Tap gesture by executing a specific action, such as spawning an object or playing a sound.
- Access Touch Input Data: In the event handlers, access the touch input data provided by the HoloLens device. This includes information such as touch position, timing, and gesture type. Unity’s input system provides convenient functions to retrieve and process this data.
- Detect Object Selection: Implement logic to detect which objects are being touched or selected by the user. You can use Unity’s raycasting feature to determine which objects are intersected by a touch ray, and then perform specific actions on the selected objects.
- Implement Object Manipulation: Enable users to manipulate objects through touch input. This can include features like dragging objects with finger movements, scaling objects with pinch gestures, or rotating objects with rotational gestures.
- Provide Visual Feedback: Enhance the touch input experience by providing visual feedback to indicate object selection, interaction states, and feedback for user actions. This can be achieved through visual effects, animations, or highlighting of selected objects.
- Test and Iterate: Test the touch input functionality on the HoloLens device or emulator. Iterate, refine, and fine-tune the touch input implementation based on user testing and feedback to ensure a smooth and intuitive user experience.
Implementing touch input in your HoloLens application allows users to directly interact with virtual objects, enhancing immersion and user engagement. By following these steps and incorporating intuitive touch gestures, you can create a compelling and interactive mixed reality experience for HoloLens users.
Adding Visual Feedback
Adding visual feedback to your HoloLens application is crucial for providing users with a clear and intuitive understanding of their actions and the state of the virtual objects. Visual feedback enhances the overall user experience and improves the sense of presence in the mixed reality environment. Here are some key strategies to consider when adding visual feedback:
- Object Highlighting: Implement a highlighting effect on selected objects to indicate their interaction state. This can be achieved by changing the color, adding a glow effect, or applying a specific texture or shader to the selected object.
- Interactive Visual Effects: Enhance the visual feedback during object manipulation or interaction. For example, you can add particle effects, animations, or dynamic visual elements to give users a more immersive and responsive experience.
- Visualize Object States: Visual feedback can also be used to represent the state of virtual objects. For instance, you can change the color or texture of an object to indicate whether it is active, inactive, selected, or disabled.
- Provide Progress Indicators: When executing time-consuming actions, such as loading or processing data, display progress indicators or loading animations to keep users informed about the progress and prevent them from perceiving the application as unresponsive.
- Visualize User Interactions: Create visual cues that indicate the effect of user interactions. For example, when a user taps on an object, show a ripple effect or an expanding circle around the touch point to confirm the interaction.
- Audio-Visual Feedback: Combine visual feedback with audio cues to enhance the overall user experience. Play sound effects or provide voice feedback to accompany visual feedback, reinforcing the user’s actions or changes in the application’s state.
- Consider User Preferences: Visual feedback can be highly subjective, so it’s important to allow users to customize or adjust the types and intensity of visual effects. Providing options for visual feedback customization can improve accessibility and user satisfaction.
- User Testing and Iteration: Test the visual feedback with HoloLens users, gather feedback, and iterate on the design. User testing allows you to validate the effectiveness of the visual feedback and make adjustments based on user preferences and expectations.
Adding visual feedback to your HoloLens application plays a vital role in creating an immersive and engaging user experience. By incorporating visual cues, highlighting effects, interactive visual elements, and progress indicators, you can provide users with clear feedback on their actions and improve the overall usability and enjoyment of the mixed reality environment.
Testing the HoloLens Application
Testing is a crucial step in the development process of a HoloLens application. It ensures that your application functions as intended and provides a seamless and immersive experience for HoloLens users. Here’s a guide on how to effectively test your HoloLens application:
- Use the HoloLens Emulator: If you don’t have access to a physical HoloLens device, you can utilize the HoloLens Emulator provided by Microsoft. The emulator allows you to simulate the HoloLens environment on your PC, enabling you to test the functionality and performance of your application.
- Deploy to HoloLens Device: If you have access to a physical HoloLens device, deploy your application directly onto the device for testing. This allows you to experience the application in a real-world setting and assess how well it functions in the intended environment.
- Test User Interactions: Ensure that all user interactions, including touch input, gestures, voice commands, and gaze-based interactions, function correctly and provide a seamless and intuitive user experience. Test for various scenarios, such as different hand positions, object orientations, or background conditions.
- Validate Object Interactions: Verify that virtual objects in your application respond appropriately to user interactions and colliders. Ensure that objects can be selected, moved, rotated, or scaled as intended. Test the collision detection and response between objects to ensure realistic interactions.
- Performance and Optimization: Assess the performance of your application on the HoloLens device or emulator. Monitor FPS (Frames Per Second) and ensure that your application runs smoothly and without lag. Optimize your application by reducing poly counts, improving texture compression, and avoiding performance bottlenecks.
- Orientation and Stability: Test your application’s stability across different orientations and movements of the HoloLens device. Verify that the virtual content remains aligned with the real-world environment and doesn’t drift or become misaligned during usage.
- Usability and User Feedback: Conduct usability testing with HoloLens users to gather feedback on the application’s ease of use, intuitiveness, and overall user experience. Collect user feedback on any challenges or suggestions for improvement, and iterate on your application based on the feedback received.
- Cross-Platform Compatibility: If your application is designed to run on multiple platforms or devices, test its compatibility and functionality across different platforms, such as PC or mobile, ensuring a consistent and smooth experience across all supported devices.
- Iterate and Refine: Based on the findings from testing and user feedback, iterate on your HoloLens application, making necessary improvements and optimizations. Continuously test and refine your application until you achieve the desired level of performance, usability, and user satisfaction.
Thoroughly testing your HoloLens application is essential for delivering a high-quality and immersive experience for users. By ensuring proper functionality, performance optimization, usability, and cross-platform compatibility, you can create a compelling and seamless mixed reality experience that meets the expectations of HoloLens users.