Introduction
Welcome to the world of crowdfunding, where dreams come to life through the support of passionate individuals like you. Indiegogo is one of the leading crowdfunding platforms, empowering creators and innovators around the globe to turn their ideas into reality. However, circumstances may arise when you need to cancel a contribution you’ve made to a campaign. Whether it’s due to a change in financial situation or a shift in priorities, Indiegogo provides a straightforward process to cancel your contribution.
In this guide, we will walk you through the step-by-step process of canceling a contribution on Indiegogo. Whether you’ve decided to redirect your support to another campaign or simply need to modify your contribution amount, rest assured that canceling your contribution is a simple task.
Before we dive into the details, please note that Indiegogo’s cancellation policy may vary based on the campaign’s funding status and the campaign owner’s preferences. It’s important to review the campaign’s cancellation policy to ensure you’re aware of any specific terms or conditions.
Now, let’s get started on canceling your contribution and exploring the options available to you on Indiegogo.
Step 1: Log in to your Indiegogo account
The first step in canceling a contribution on Indiegogo is to log in to your Indiegogo account. If you don’t have an account, you’ll need to create one before proceeding.
To log in, visit the Indiegogo website and click on the “Log In” button located at the top right corner of the homepage. Enter your email address and password associated with your Indiegogo account. Once entered, click on the “Log In” button to access your account dashboard.
If you forgot your password, simply click on the “Forgot Password?” link on the log-in page and follow the instructions to reset it. You’ll receive an email with a link to create a new password.
Once you’re logged in, you’ll be ready to proceed to the next step in canceling your contribution on Indiegogo.
Step 2: Go to “Contributions” page
After logging in to your Indiegogo account, the next step is to navigate to the “Contributions” page. This is where you’ll find a comprehensive list of all your contributions made on Indiegogo.
To access the “Contributions” page, locate the menu icon (usually represented by three horizontal lines) on the top left corner of the screen. Click on the menu icon to reveal a dropdown menu, then select or click on the “Contributions” option.
Alternatively, you can also find the “Contributions” page by clicking on your profile picture or username, which is usually located in the top right corner of the screen. A dropdown menu will appear, and you can choose the “Contributions” option from there.
Once you’re on the “Contributions” page, you’ll see a list of all the campaigns you have contributed to on Indiegogo, along with the contribution amount and the status of each contribution.
Now that you’re on the “Contributions” page, we can proceed to the next step to locate the specific campaign you’ll be canceling your contribution to.
Step 3: Locate the campaign you want to cancel your contribution to
Now that you’re on the “Contributions” page of your Indiegogo account, it’s time to locate the specific campaign for which you want to cancel your contribution. The list on this page will show all the campaigns you have contributed to in the past.
Scroll through the list to find the campaign you want to cancel your contribution for. You can search for it using the campaign’s name or any other relevant details you remember. The list is typically organized chronologically, with the most recent contribution appearing at the top.
If you have a long list of contributions and finding the specific campaign is proving to be challenging, you can utilize the search bar provided on the “Contributions” page. Simply enter the name or any other keywords related to the campaign you are looking for, and the list will be filtered accordingly.
Once you’ve located the campaign you want to cancel your contribution for, move on to the next step to proceed with the cancellation process.
Step 4: Click on the campaign title
After identifying the campaign you wish to cancel your contribution for on the “Contributions” page, the next step is to click on the title of the campaign. This will lead you to the campaign’s main page, where you can manage your contribution.
On the campaign’s main page, you’ll find important information about the campaign, such as its description, updates, and the perks or rewards offered. Take a moment to review the campaign details to ensure that you’re cancelling the correct contribution.
By clicking on the campaign title, you’ll also have the opportunity to familiarize yourself with any additional information or updates provided by the campaign owner. This can be helpful in making an informed decision about canceling your contribution.
Furthermore, visiting the campaign’s main page allows you to assess whether the campaign is still active and ongoing. If the campaign has already ended or reached its funding goal, cancellation options may differ and might be subject to the campaign owner’s discretion.
Once you’ve reviewed the campaign details and confirmed your decision to cancel the contribution, proceed to the next step to begin the cancellation process.
Step 5: Select “Cancel Contribution”
After navigating to the campaign’s main page, you’ll find various options and settings related to your contribution. Look for the option that allows you to cancel your contribution, usually labeled as “Cancel Contribution” or something similar.
Click on the “Cancel Contribution” button to initiate the cancellation process. This will typically prompt a confirmation message asking if you’re sure you want to proceed with canceling your contribution. Read the confirmation message carefully to ensure that you’re cancelling the correct contribution.
By selecting “Cancel Contribution,” you are indicating your intent to withdraw your financial support for the campaign. Keep in mind that canceling your contribution means that you will no longer be eligible for any perks, rewards, or benefits associated with the campaign. Make sure you have considered this before proceeding.
It’s important to note that the option to cancel a contribution may not be available for all campaigns, particularly if the campaign has already ended or the campaign owner has disabled the cancellation feature. In such cases, you may need to reach out to the campaign owner or Indiegogo’s support team for further assistance.
If the cancellation option is available and you’re certain about canceling your contribution, move on to the next step to confirm the cancellation.
Step 6: Confirm cancellation
Once you have selected the “Cancel Contribution” option, you will be taken to a confirmation page to finalize the cancellation. This step ensures that you are fully aware of the implications and consequences of canceling your contribution.
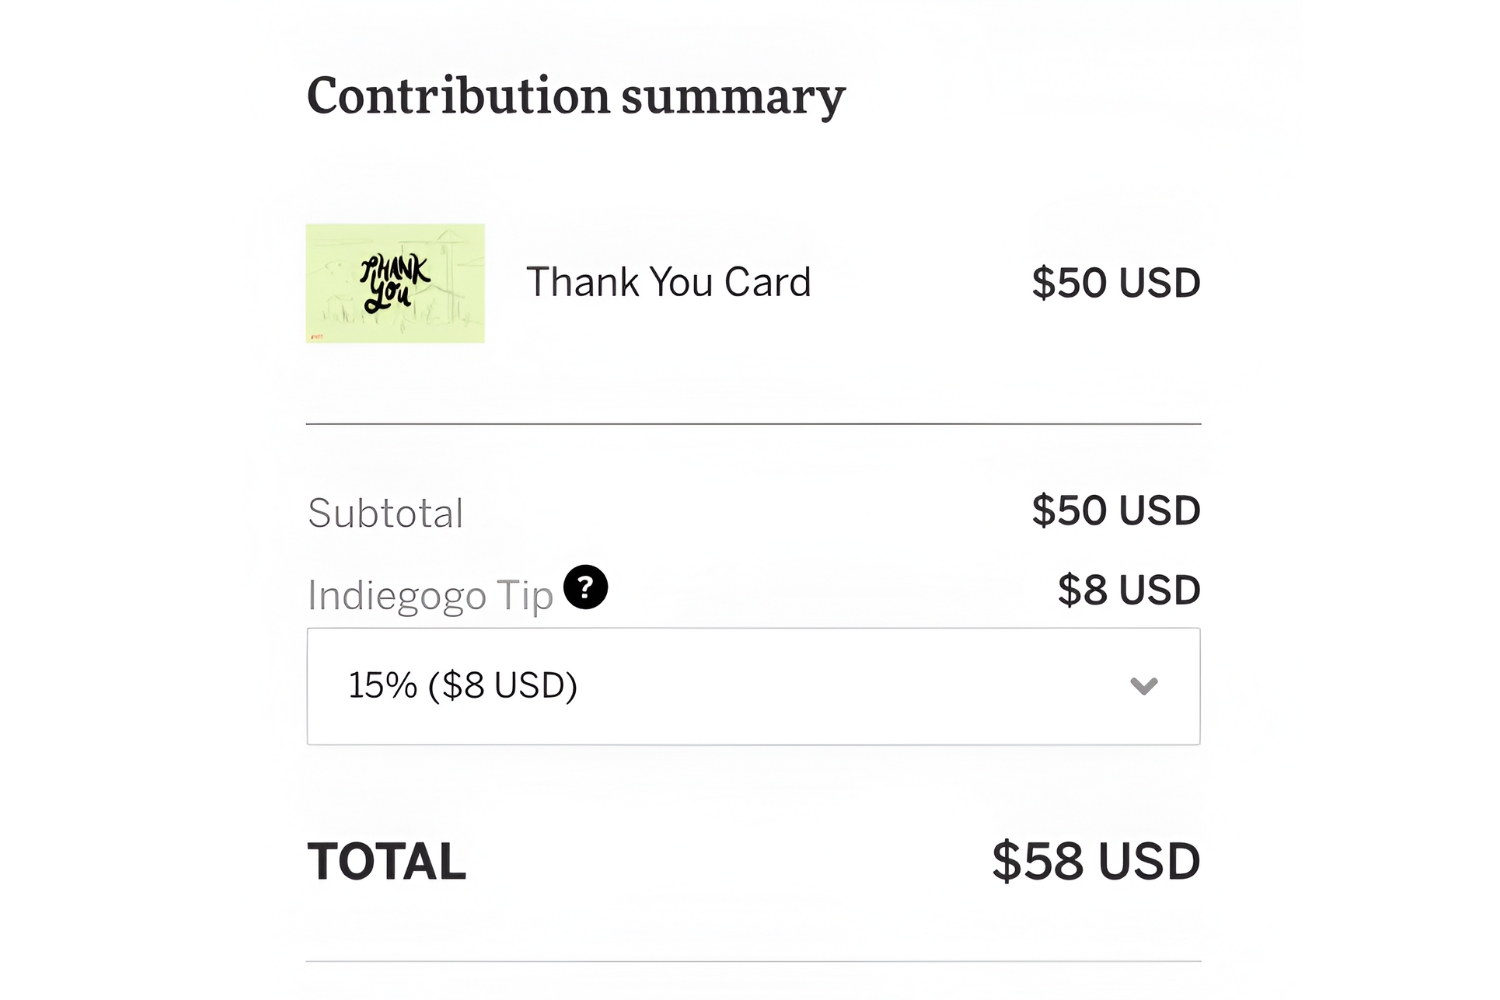
On the confirmation page, you may be asked to review the cancellation details and any refund policies that apply to the campaign. Take a moment to carefully read through this information to understand how the cancellation process works and whether you are eligible for a refund.
If a refund is applicable, the confirmation page will often display the amount that will be refunded to you. Keep in mind that the refund process may take some time, as it depends on various factors such as the campaign’s funding status and the payment method used for the contribution.
Once you are certain about canceling your contribution and have reviewed all the necessary information, go ahead and confirm the cancellation by clicking on the appropriate button. This action will submit your request to cancel your contribution to Indiegogo.
It’s important to note that once you confirm the cancellation, it may not be possible to reverse the process. Therefore, double-check that you’ve selected the correct contribution and are ready to proceed before confirming the cancellation.
Now that you’ve completed the confirmation process, let’s move on to the next step to check for refund details, if applicable.
Step 7: Check for refund details
After confirming the cancellation of your contribution, it’s important to check for any refund details that may apply to your specific situation. Refunds on Indiegogo are subject to the campaign’s refund policy and the payment method used for the contribution.
Depending on the campaign and its refund policy, you may be eligible for a full or partial refund of the contributed amount. The refund process can vary, so it’s essential to review the campaign’s refund policy to understand the specific refund terms and conditions.
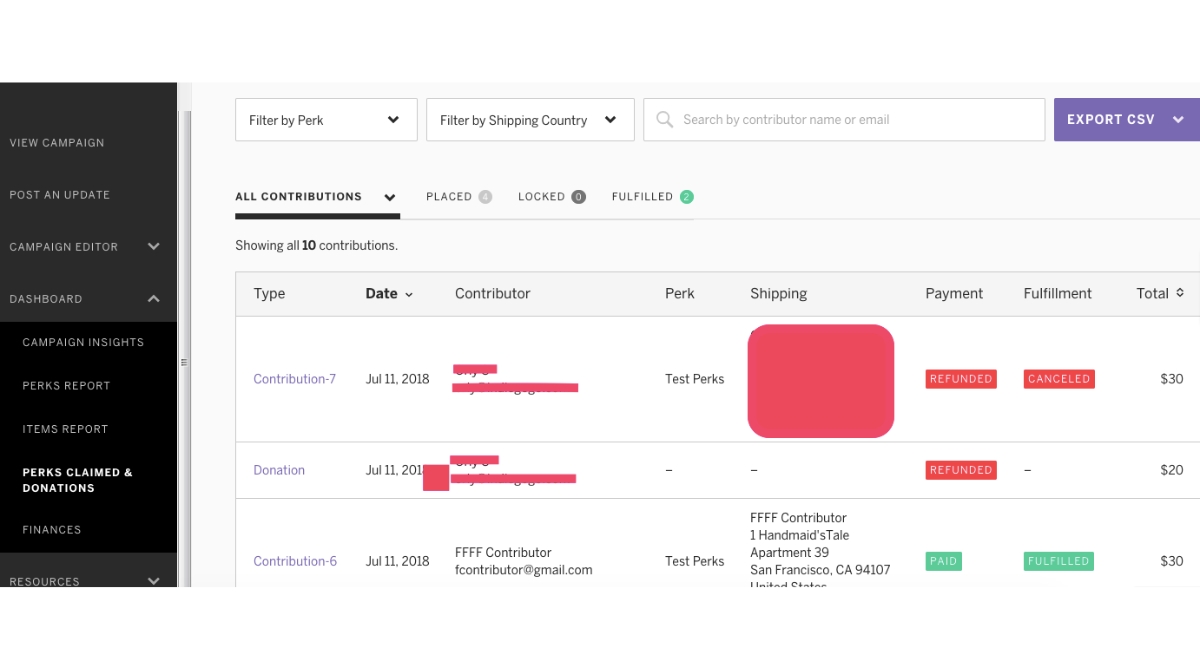
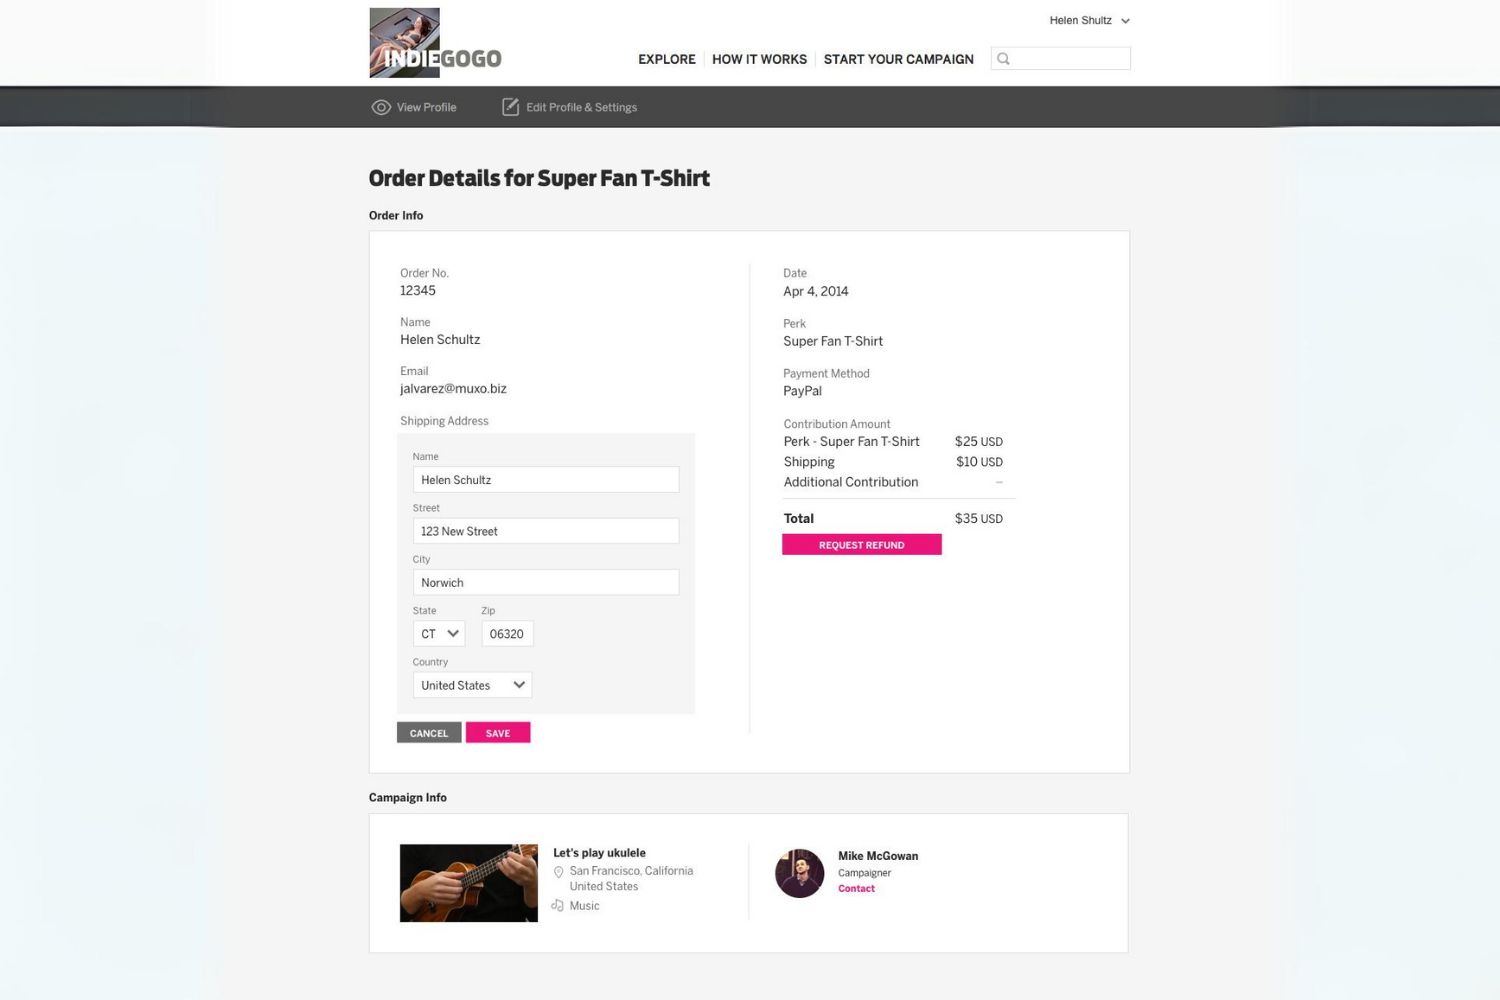
Indiegogo provides an “Order details” section, which you can access either on the campaign’s main page or through your Indiegogo account. This section will display information about your contribution, including any refund that may be applicable.
If a refund is due and the campaign has already processed it, you should see the refunded amount reflected in the “Order details” section. It’s important to note that the timeframe for receiving the refund may vary depending on factors such as the campaign’s funding status and the payment method used.
If you don’t see any refund details or have any questions regarding the refund process, it’s recommended to reach out to the campaign owner directly for clarification. They will be able to provide you with accurate information regarding the refund status and any additional steps that may be required.
Keep in mind that cancellation and refund processes on Indiegogo can be subject to certain limitations and restrictions, as outlined by the campaign owner. It’s always a good idea to thoroughly review the campaign’s terms and conditions, refund policy, and contact the campaign owner or Indiegogo’s support team for any specific inquiries.
By checking for refund details, you can ensure that your cancellation process is complete and that you have all the necessary information regarding any potential refunds associated with your contribution.
Conclusion
Canceling a contribution on Indiegogo is a straightforward process that allows you to modify your support for a campaign when necessary. By following the steps outlined in this guide, you can navigate through Indiegogo’s platform and cancel your contribution with ease.
Remember to log in to your Indiegogo account and access the “Contributions” page to locate the campaign you wish to cancel your contribution for. Click on the campaign title to visit the campaign’s main page and select the “Cancel Contribution” option to initiate the cancellation process. Confirm the cancellation and review any refund details, if applicable, to ensure a smooth and informed experience.
While the cancellation policy may vary based on the specific campaign and its refund terms, it’s crucial to review the campaign’s details and contact the campaign owner or Indiegogo’s support team if you have any questions or concerns regarding the cancellation or refund process.
We hope this guide has provided you with the necessary information to confidently cancel your contribution on Indiegogo. Whether your circumstances have changed or you simply need to redirect your support, Indiegogo offers a user-friendly platform to meet your needs. Remember to stay engaged and explore the vast opportunities available for supporting other campaigns that align with your interests and passions.
Thank you for using Indiegogo and being a part of the vibrant crowdfunding community where dreams are realized through collective support.