Introduction
Welcome to the world of Cash App – a fast, secure, and convenient way to send, receive, and manage your money. Whether you want to pay friends, split bills, or simply add funds to your Cash App account, this guide will walk you through the step-by-step process of adding money to Cash App. With just a few taps on your smartphone, you’ll be able to load your Cash App wallet and have instant access to your funds.
Cash App is a mobile payment service that allows users to send and receive money from friends, family, and businesses. Developed by Square, Inc., Cash App provides a user-friendly platform for seamless transactions and instant transfers. Whether you’re a seasoned Cash App user or new to this innovative app, adding money to your account is a straightforward process that can be done in multiple ways.
In this article, we will explore various methods to add money to Cash App. You can link your bank account or debit card to your Cash App account and conveniently transfer funds. Alternatively, you can use the Cash App Cash Card or even Bitcoin to add money to your Cash App balance. We’ll guide you through each step, ensuring that you can confidently navigate the process and have a smooth experience.
Adding money to Cash App opens up a world of possibilities. You’ll have the flexibility to pay for goods and services, even at businesses that do not accept Cash App directly. You can also use the funds in your Cash App account to withdraw cash from ATMs or invest in stocks and Bitcoin. With Cash App, managing your money has never been easier.
So, let’s dive in and explore the various methods to add money to Cash App. Whether you prefer to link your bank account, use your debit card, or explore other options, we’ve got you covered.
Step 1: Download the Cash App
The first step in adding money to Cash App is to download the app on your mobile device. Cash App is available for both Android and iOS devices and can be easily found in the respective app stores.
To download Cash App, open the Google Play Store or the Apple App Store on your device. Search for “Cash App” in the search bar and look for the distinctive green icon with a white dollar sign. Once you’ve located the app, tap on the “Install” or “Get” button to start the download process. Wait for the app to download and install on your device.
Once the installation is complete, locate the Cash App icon on your home screen or app drawer and tap on it to open the app. If you don’t have an existing Cash App account, you will need to create one. If you already have an account, simply log in using your credentials.
Creating a new account on Cash App is a quick and straightforward process. You will need to provide your mobile phone number or email address and create a unique username and password. Follow the on-screen instructions to complete the account setup.
It’s important to note that Cash App is a secure platform that utilizes encryption and other security measures to protect your personal and financial information. However, to ensure the safety of your account, it is recommended to set up two-factor authentication, which provides an additional layer of security by requiring a unique code to be entered during the login process.
Once you have successfully set up your Cash App account, you’re ready to move on to the next step and link a bank account or debit card to add money to your Cash App balance.
Step 2: Create an Account
In order to add money to Cash App, you need to have an account. If you haven’t already created one, don’t worry – it’s a simple and straightforward process.
Open Cash App on your mobile device and tap on the “Sign Up” button. You will be prompted to enter either your mobile phone number or email address. Choose the option that is most convenient for you and follow the on-screen instructions to proceed.
Next, you will need to create a unique username and password for your Cash App account. Choose a username that is easy to remember but not too obvious, as this will be your identifier when sending and receiving money through Cash App.
Once you’ve entered your desired username and password, tap on the “Next” button. Cash App will then send a verification code to the mobile phone number or email address you provided. Enter the verification code to confirm your account creation.
After verifying your account, Cash App will prompt you to link a debit card or bank account. This step is necessary to add funds to your Cash App balance.
If you choose to link a debit card, you will need to enter the card details, including the card number, expiration date, and CVV code. Cash App will securely store this information for future transactions.
If you prefer to link a bank account, Cash App will ask for your bank’s routing number and your account number. This information can typically be found at the bottom of your checks or in your online banking portal.
After providing the necessary card or bank account information, Cash App will verify the details and link your account. This verification process may take a few moments, but once it’s complete, your Cash App account will be ready to use.
It’s worth noting that Cash App takes security seriously and uses industry-standard encryption to protect your personal and financial information. However, it’s always a good idea to take additional security measures, such as setting up a PIN or enabling fingerprint authentication, to ensure the safety of your account.
Now that you have successfully created your Cash App account and linked a debit card or bank account, you are ready to move on to the next step and add funds to your Cash App balance.
Step 3: Link a Bank Account or Debit Card
To add money to your Cash App balance, you need to link either a bank account or a debit card to your Cash App account. This step is crucial as it allows you to transfer funds securely and conveniently.
Open your Cash App and navigate to the Account tab, represented by a person icon at the bottom right corner of the screen. From there, select “Add Bank” or “Add Card” to begin the process.
If you choose to link a bank account, you will be asked to provide the routing number and account number associated with your bank account. This information can be found on your checks or by logging into your online banking platform. Once you enter the required details, Cash App will securely verify the information to ensure accuracy.
If you prefer to link a debit card, you will need to input the card’s information, including the card number, expiration date, and CVV code. Cash App will store this information securely for future transactions and verifications.
It’s important to note that when linking a bank account or debit card, Cash App may ask for additional verification, such as security questions or a verification code sent to your phone or email. This is a standard security measure to protect your account.
Once your bank account or debit card is successfully linked to Cash App, you’ll have the ability to transfer funds between your account and Cash App seamlessly. This ensures that you always have the convenience of accessing and adding money to your Cash App balance in just a few simple steps.
Remember, Cash App prioritizes the security and privacy of its users. All financial information is encrypted and stored securely, and the platform adheres to industry-standard security protocols.
Now that you have successfully linked a bank account or debit card to your Cash App account, you are ready to proceed to the next step and start adding money to your Cash App balance.
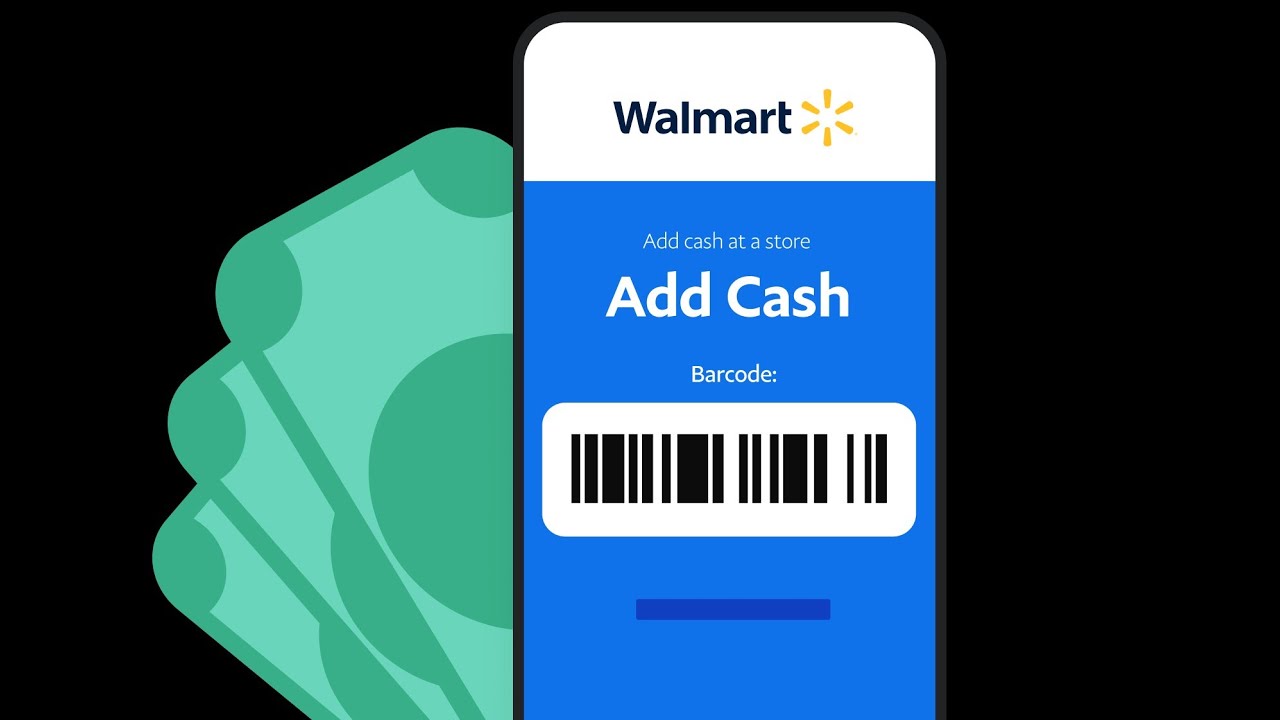
Step 4: Add Money from a Linked Bank Account
Now that you have linked your bank account to your Cash App, you can easily add money to your Cash App balance directly from your bank account.
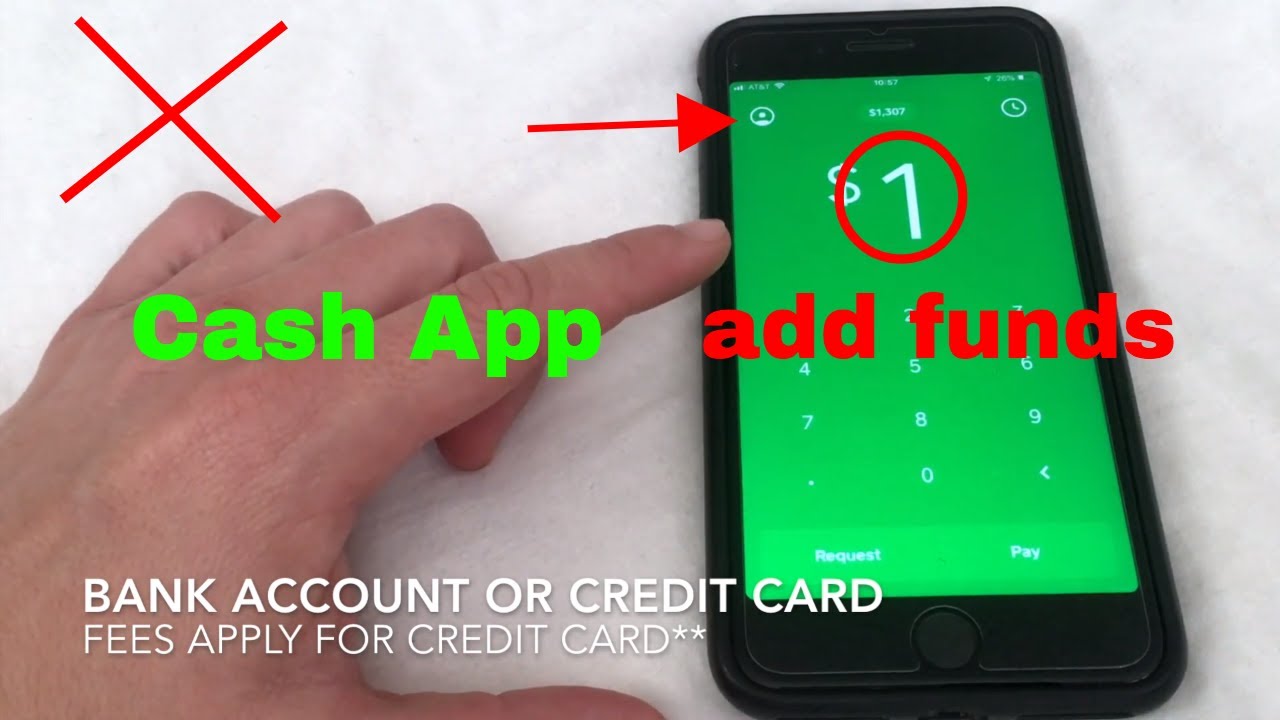
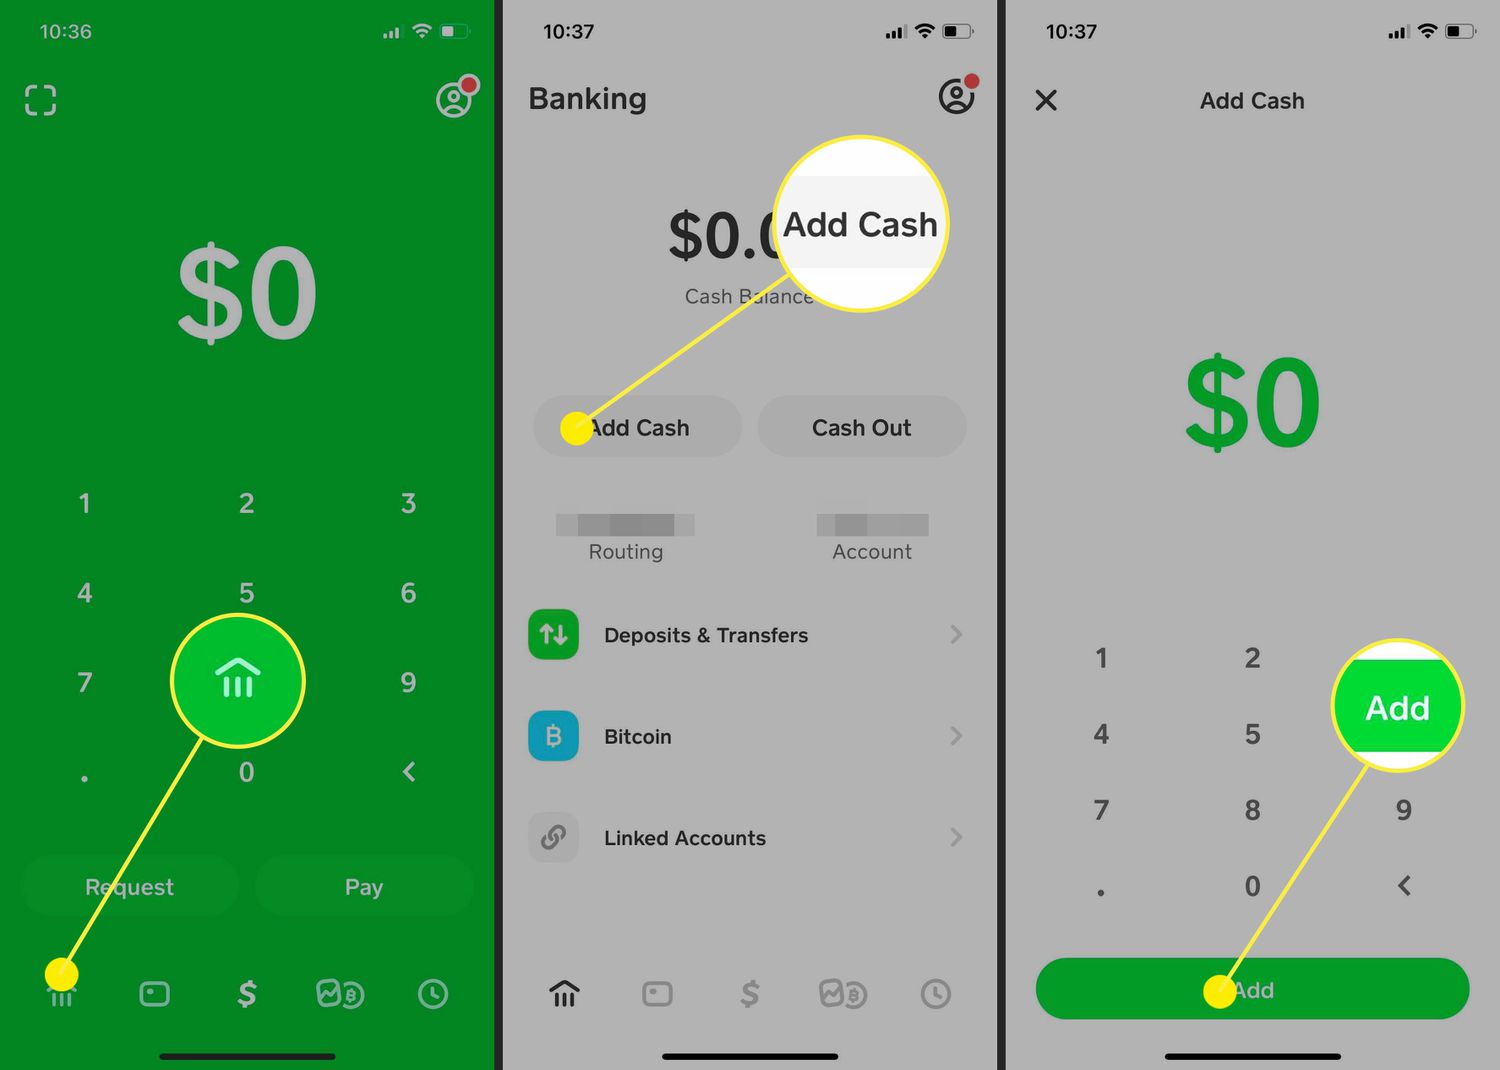
To add money from a linked bank account, open Cash App on your mobile device and tap on the “Banking” tab represented by a dollar sign “$”. From there, select “Add Cash” to initiate the process.
Next, enter the amount of money you want to add to your Cash App balance. Keep in mind that there may be certain limits on the amount you can add at once, depending on your account status and verification level.
After confirming the amount, Cash App will prompt you to select the bank account from which you want to withdraw the funds. If you have multiple bank accounts linked to your Cash App, make sure to choose the correct one.
Once you have selected the bank account, tap on “Add” to initiate the transfer. Cash App will securely withdraw the specified amount from your linked bank account and deposit it into your Cash App balance. The transfer may take a few moments to complete.
It’s worth mentioning that while adding money from a linked bank account is a convenient option, it may take a little longer for the funds to become available in your Cash App balance compared to other methods. The exact timing may vary based on factors such as the bank’s processing time and any potential delays.
Adding money from a linked bank account gives you the flexibility to have a continuous flow of funds in your Cash App balance, allowing you to easily make payments, send money to friends and family, or even invest in stocks and Bitcoin through Cash App’s features.
With the ability to add funds from your linked bank account, Cash App offers a seamless and secure way to manage your money with ease and convenience.
Stay tuned for the next step, where we will explore how to add money from a linked debit card to your Cash App balance.
Step 5: Add Money from a Linked Debit Card
If you prefer to add money to your Cash App balance using a linked debit card, the process is quick and straightforward. By following a few simple steps, you can have funds available in your Cash App account in no time.
To add money from a linked debit card, open Cash App on your mobile device and tap on the “Banking” tab represented by a dollar sign “$”. From there, select “Add Cash” to begin the process.
Next, enter the amount of money you want to add to your Cash App balance. Keep in mind that there may be certain limits on the amount you can add at once, depending on your account status and verification level.
After confirming the amount, Cash App will prompt you to select the linked debit card from which the funds will be deducted. If you have multiple debit cards linked to your Cash App, make sure to choose the correct one.
Once you have selected the debit card, tap on “Add” to proceed with the transfer. Cash App will securely process the transaction and instantly add the specified amount from your debit card to your Cash App balance.
It’s important to note that using a linked debit card provides you with the advantage of immediate availability of funds in your Cash App account. This means that you can start using the funds right away for various transactions, payments, or even cash withdrawals from ATMs using your Cash App Cash Card.
Additionally, when adding money from a linked debit card, Cash App provides an option to enable the “Auto Add” feature. Enabling this feature allows Cash App to automatically add funds to your balance from the linked debit card whenever it falls below a certain threshold, ensuring that you always have sufficient funds available.
Adding money to your Cash App balance from a linked debit card is a convenient option that allows for instant access to your funds. It provides flexibility and ease of use when it comes to making transactions, paying for goods and services, or sending money to friends and family.
Now that you know how to add money from a linked debit card, let’s move on to the next step, where we will explore an alternative method to add money to your Cash App balance using the Cash App Cash Card.
Step 6: Add Money Using Cash App Cash Card
If you have a Cash App Cash Card, adding money to your Cash App balance becomes even more convenient. The Cash Card is a customizable Visa debit card linked directly to your Cash App account, allowing you to spend your Cash App funds wherever Visa cards are accepted.
To add money using your Cash App Cash Card, follow these simple steps:
- Open your Cash App and tap on the “Balance” tab at the bottom of the screen.
- Scroll down until you find your Cash App Cash Card. Tap on it to access the card details and options.
- Select the “Add Cash” option to initiate the process of adding funds to your Cash App balance.
- Enter the amount of money you want to add. Keep in mind any applicable limits on adding funds.
- Confirm the amount and tap on the “Add” button to complete the transaction.
Once the transaction is processed, the added funds will be available in your Cash App balance, ready to be used with your Cash Card. This gives you the freedom to make purchases, withdraw cash, or transfer funds from your Cash App balance to other accounts.
The Cash App Cash Card also offers the option to enable direct deposits, where you can have your paycheck or government benefits automatically deposited onto your Cash App balance. This allows for even greater flexibility and convenience in managing your finances.
With the Cash App Cash Card, adding money to your Cash App balance is as simple as a few taps on your smartphone. It eliminates the need to link external bank accounts or debit cards, providing a seamless experience for accessing and using your funds.
Now that you know how to add money using your Cash App Cash Card, let’s move on to the next step, where we will explore an alternative method to add funds to your Cash App balance using Bitcoin.
Step 7: Add Money Using Bitcoin
Cash App offers an innovative feature that allows users to add money to their Cash App balance using Bitcoin. If you’re a cryptocurrency enthusiast or have Bitcoin holdings, this method provides an alternative way to fund your Cash App account.
To add money using Bitcoin, follow these steps:
- Open your Cash App and tap on the “Investing” tab, represented by a graph icon at the bottom of the screen.
- Scroll down and select “Bitcoin.”
- Tap on “Buy” to initiate the process of purchasing Bitcoin.
- Enter the amount of money you want to convert into Bitcoin. Keep in mind that the amount will be converted based on the current Bitcoin exchange rate.
- Confirm the transaction and tap on “Buy” to proceed.
- Once the Bitcoin purchase is complete, the corresponding amount in Bitcoin will be available in your Cash App Bitcoin balance.
- Now, to add the Bitcoin funds to your Cash App balance, go back to the “Investing” tab and select “Bitcoin” once again.
- Tap on “Sell” and enter the amount of Bitcoin you want to sell for cash.
- Confirm the transaction and tap on “Sell” to proceed.
- The sold Bitcoin will be converted into your Cash App balance, and you can now use this amount for various transactions or transfers.
With the ability to add money to your Cash App balance using Bitcoin, Cash App offers a unique and convenient option for cryptocurrency enthusiasts. It allows seamless integration between your Bitcoin holdings and your Cash App funds.
Keep in mind that the value of Bitcoin can fluctuate, and exchange rates may vary. Make sure to consider the current market conditions and any applicable fees when adding money using Bitcoin.
Now that you know how to add money using Bitcoin, let’s move on to the next step, where we will explore an optional step – verifying your identity on Cash App.
Step 8: Verify Your Identity (Optional)
While not mandatory, verifying your identity on Cash App adds an extra layer of security to your account and allows you to enjoy certain additional features and benefits. Verifying your identity may be required for certain transaction limits or to access specific features such as Cash App Direct Deposit or Cash Card Boosts.
To verify your identity on Cash App, follow these steps:
- Open Cash App and tap on the Account icon at the bottom right corner of the screen.
- Scroll down and select “Personal.”
- Tap on “Verify Your Identity.”
- Follow the on-screen instructions to input your personal information, including your full legal name, date of birth, and last four digits of your Social Security number.
- You may also be prompted to take a photo of your driver’s license, passport, or other identification documents. Ensure the images are clear and provide all necessary information.
- Once you’ve submitted the required information and documents, Cash App will review and verify your identity.
- This process may take a few minutes or up to a few days, depending on the volume of verifications being processed.
- Once your identity is successfully verified, you will receive a confirmation notification from Cash App.
Verifying your identity on Cash App not only adds an additional layer of security but also opens up new opportunities and benefits. For example, a verified account may have higher transaction limits, increased withdrawal and deposit amounts, and eligibility for Cash App features like Cash Card Boosts, Direct Deposit, or Bitcoin withdrawal.
It’s important to note that Cash App takes the security and privacy of its users seriously. Any information shared for verification purposes is encrypted and stored securely in compliance with applicable regulations.
Now that you understand the process of verifying your identity on Cash App, you can decide whether you want to go through this optional step to maximize the benefits and features available to you.
Step 9: Review Your Transaction History
After adding money to your Cash App balance and making various transactions, it’s important to regularly review your transaction history to stay informed and track your financial activity. Cash App provides a convenient and easy-to-access transaction history feature, allowing you to view and monitor your past transactions.
To review your transaction history on Cash App, follow these steps:
- Open Cash App and tap on the Activity tab at the bottom of the screen. It is represented by a clock icon.
- You will be presented with a list of your recent transactions, including payments received, payments sent, and purchases made.
- Scroll through the list to review your transaction history. Each transaction includes details such as the date, time, recipient’s username or description, and the amount.
- You can tap on a specific transaction to view more details, such as the payment status or transaction ID.
- To search for a specific transaction, you can use the search bar at the top of the screen. Enter keywords or the username of the recipient to filter the transaction history.
- For a comprehensive review of your transaction history, you can adjust the date range using the calendar feature or select the “All” option to display all transactions.
- If you need to export or download your transaction history for record-keeping purposes, you can use the option provided within the Cash App settings.
Reviewing your transaction history on Cash App allows you to track your spending, monitor payments sent and received, and maintain a clear record of your financial activity. It provides you with a valuable tool to reconcile transactions, monitor account balances, and stay on top of your financial management.
Furthermore, regularly reviewing your transaction history can help identify any unauthorized or fraudulent activity, ensuring the security of your Cash App account and funds. If you notice any suspicious or unfamiliar transactions, you should report them immediately to Cash App’s customer support for assistance.
By taking the time to understand and review your transaction history regularly, you can have better control over your finances and keep track of all your important dealings on the Cash App platform.
Conclusion
Adding money to your Cash App balance is a simple and convenient process that allows you to have quick access to your funds for various transactions and payments. Whether you choose to link a bank account, use a debit card, leverage the Cash App Cash Card, or even add funds using Bitcoin, Cash App offers multiple options to suit your preferences and needs.
Throughout this guide, we’ve walked you through the step-by-step process of adding money to Cash App. From downloading the app and creating an account to linking bank accounts, debit cards, and exploring alternative methods like using the Cash App Cash Card or Bitcoin, you now have a comprehensive understanding of how to add funds to your Cash App balance.
Remember to review your transaction history regularly to stay informed about your financial activities on Cash App and to monitor your account’s security. Verifying your identity is an optional step that can enhance security, increase transaction limits, and unlock additional features within the app.
Cash App provides a user-friendly platform that prioritizes security and convenience, allowing you to manage your money with ease. Whether you’re making payments, splitting bills with friends, or investing in stocks and Bitcoin, Cash App offers a seamless and efficient way to handle your financial needs.
Now that you have all the knowledge and tools to add money to your Cash App balance, you can confidently navigate the app and make the most of its features. Enjoy the convenience, flexibility, and security that Cash App brings to your financial transactions.
Start using Cash App today and discover the ease of managing your money from the palm of your hand.