Introduction
Welcome to the world of online event management and payment processing! In today’s digital age, setting up events and collecting payments can be done effortlessly and securely. One powerful combination for event management and payment processing is using SignUpGenius with WePay.
If you’ve ever organized an event, whether it’s a school fundraiser, a charity run, or a group outing, you know how challenging it can be to coordinate all the details and collect payments from participants. SignUpGenius is a popular online platform that simplifies the event management process by allowing you to create custom sign-up forms, manage RSVPs, and communicate with participants.
On the other hand, WePay offers a secure and convenient payment processing solution. It allows you to integrate payment options seamlessly into your SignUpGenius event, making it easy for participants to pay registration fees, purchase tickets, or make donations.
By combining the powers of SignUpGenius and WePay, you can streamline your event planning process, increase participation, and ensure a hassle-free payment experience for both you and your attendees. In this article, we’ll guide you through the steps of setting up a SignUpGenius event with WePay integration, so you can start planning and collecting payments with ease.
What is SignUpGenius?
SignUpGenius is a versatile online platform that simplifies the process of organizing and managing events, SignUpGenius gives you the power to create customized sign-up forms, track RSVPs, and communicate with participants all in one place.
Whether you’re planning a school event, a volunteer project, a community fundraiser, or any other type of gathering that requires coordination and sign-ups, SignUpGenius offers a user-friendly solution. With its robust set of features and easy-to-use interface, SignUpGenius has become a go-to tool for event organizers around the globe.
With SignUpGenius, you can create an event sign-up form tailored to your specific needs, including fields for participant names, contact information, preferred time slots, or any other relevant details. You can choose from a variety of customizable templates or create your own design from scratch.
Once your sign-up form is created, you can easily share it with your target audience through various channels like email, social media, or embedding it on your website. Participants can then sign up for available slots, RSVP, and even make payments, depending on your event requirements.
SignUpGenius also offers a range of organizational tools to help you stay on top of your event planning. You can view real-time participant sign-ups, send automated reminders, and communicate with your participants through email notifications or group messaging – ensuring that everyone stays informed and engaged throughout the process.
Whether you’re organizing a small gathering or a large-scale event, SignUpGenius can save you time and effort by streamlining the sign-up process and providing a centralized platform for managing all your event-related tasks.
Now that you have a better understanding of SignUpGenius, let’s explore how you can enhance your event management capabilities by integrating it with the powerful payment processing solution, WePay.
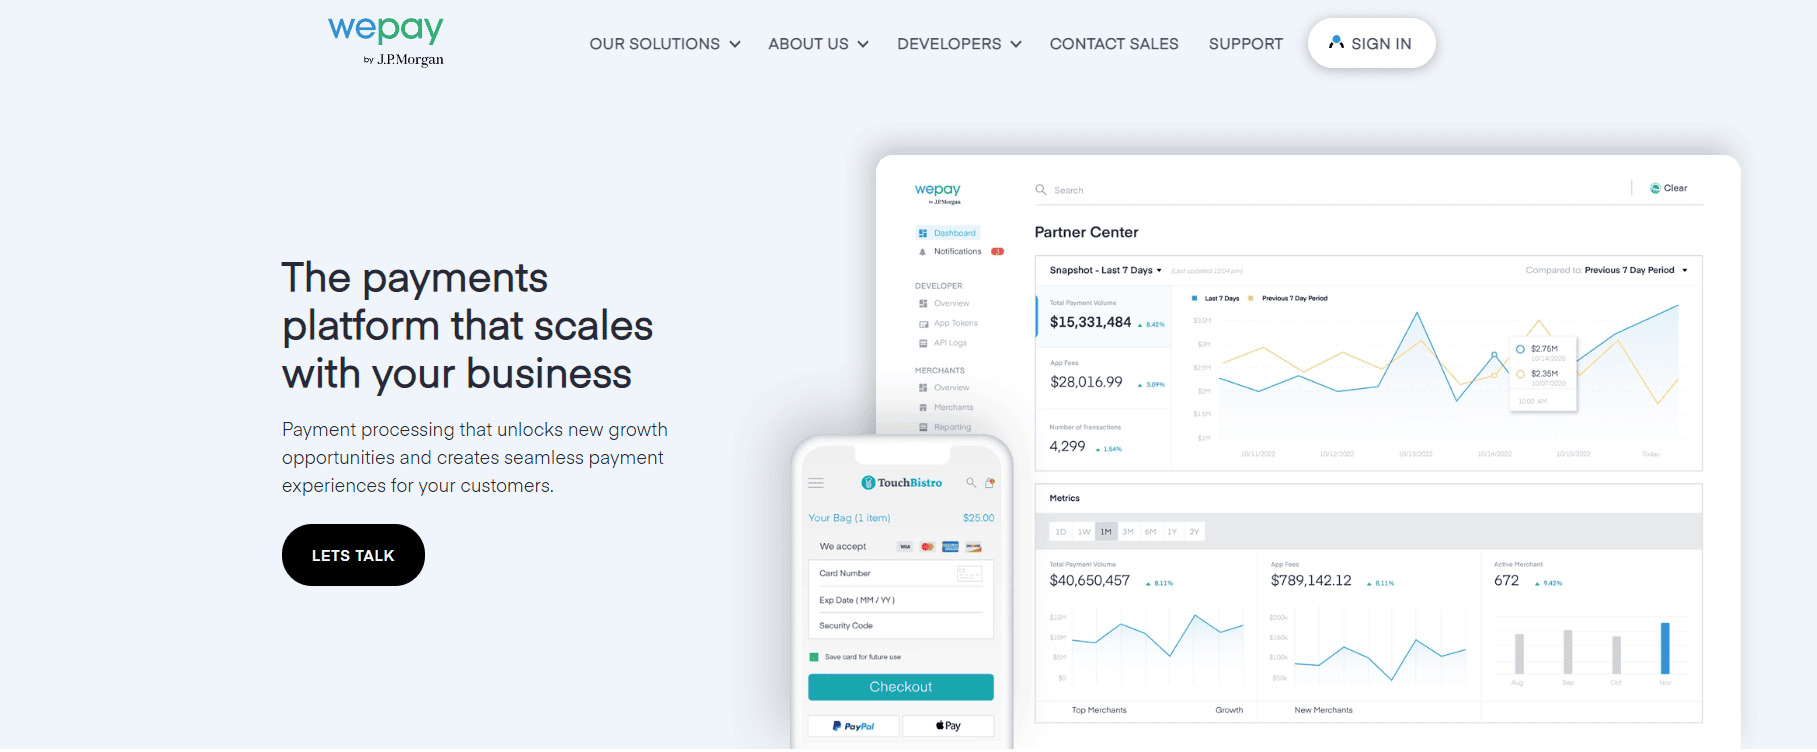
What is WePay?
WePay is a leading online payment processing platform that offers a secure and seamless solution for collecting payments, making it an ideal choice for event organizers. With WePay, you can easily integrate payment options into your SignUpGenius event, allowing participants to make payments for registration fees, ticket purchases, donations, and more.
One of the key advantages of WePay is its focus on security. The platform is designed to minimize risks and protect both event organizers and participants against fraudulent activities. WePay implements advanced fraud detection measures and encryption technologies to ensure that all financial transactions are processed securely and confidentially.
With WePay, you don’t need to worry about the hassle of setting up your own payment gateway or dealing with complex technical integration. SignUpGenius seamlessly integrates with WePay, eliminating any technical barriers and allowing you to start accepting payments for your event with just a few simple steps.
WePay supports various payment methods, including credit cards and bank transfers, making it convenient for participants to choose their preferred payment option. The platform also offers a mobile-friendly payment experience, allowing participants to make payments using their smartphones or tablets. This flexibility and ease of use contribute to a smoother registration process, increasing the likelihood of higher attendance rates for your event.
Another advantage of WePay is its transparent and straightforward fee structure. You can easily understand the processing fees associated with each transaction, enabling you to accurately forecast your event budget and costs. WePay also provides comprehensive reporting and analytics tools, allowing you to monitor and track your event’s financial performance in real-time.
WePay’s reputation as a reliable payment processing platform has earned the trust of many organizations and event organizers. It offers dedicated customer support to assist you with any payment-related queries or issues that may arise during the event planning process.
As you can see, WePay offers a secure, user-friendly, and feature-rich payment processing solution that seamlessly integrates with SignUpGenius. With the power of WePay, you can ensure a seamless and hassle-free payment experience for your event participants, making it easier than ever to collect payments and manage finances for your upcoming event.
Benefits of Using WePay with SignUpGenius
Integrating WePay with SignUpGenius offers a range of benefits that can enhance your event planning and payment processing experience. Let’s explore some of the key advantages:
- Secure and Reliable: WePay prioritizes security and implements robust measures to ensure the safety of financial transactions. With WePay’s advanced fraud detection systems and encryption technologies, you can have peace of mind knowing that all payments are processed securely.
- Convenient Payment Options: WePay supports various payment methods, including credit cards and bank transfers, giving participants the flexibility to choose their preferred payment option. This convenience can lead to a higher registration rate and increased participation in your event.
- Mobile-Friendly Experience: In today’s mobile-driven world, having a mobile-friendly payment experience is crucial. WePay enables participants to make seamless payments using their smartphones or tablets, ensuring a smooth and convenient registration process.
- Transparent Fee Structure: WePay provides a clear and transparent fee structure, allowing you to understand the processing fees associated with each transaction. This transparency enables you to accurately calculate your event budget and manage your finances effectively.
- Real-Time Reporting and Analytics: WePay offers comprehensive reporting and analytics tools, giving you valuable insights into your event’s financial performance. You can monitor payments, track revenue, and make data-driven decisions to optimize your event planning strategy.
- Seamless Integration: Integrating WePay with SignUpGenius is a seamless process that eliminates the need for complex technical integration. You can easily set up WePay within your SignUpGenius event, enabling participants to make payments without any hassle or inconvenience.
- Dedicated Customer Support: WePay provides dedicated customer support to assist you in any payment-related queries or issues that may arise. The responsive and knowledgeable support team ensures that you have a smooth and successful event experience.
By leveraging the benefits of WePay with SignUpGenius, you can streamline your event planning process, increase attendee participation, and provide a secure and convenient payment experience for all. Now, let’s dive into the steps of setting up WePay integration with SignUpGenius for your upcoming event.
Step 1: Creating an Event on SignUpGenius
The first step in setting up your SignUpGenius event with WePay integration is to create the event on the SignUpGenius platform. Follow the steps below to get started:
- Sign up or log in: If you don’t have a SignUpGenius account, sign up for free. If you already have an account, log in to your dashboard.
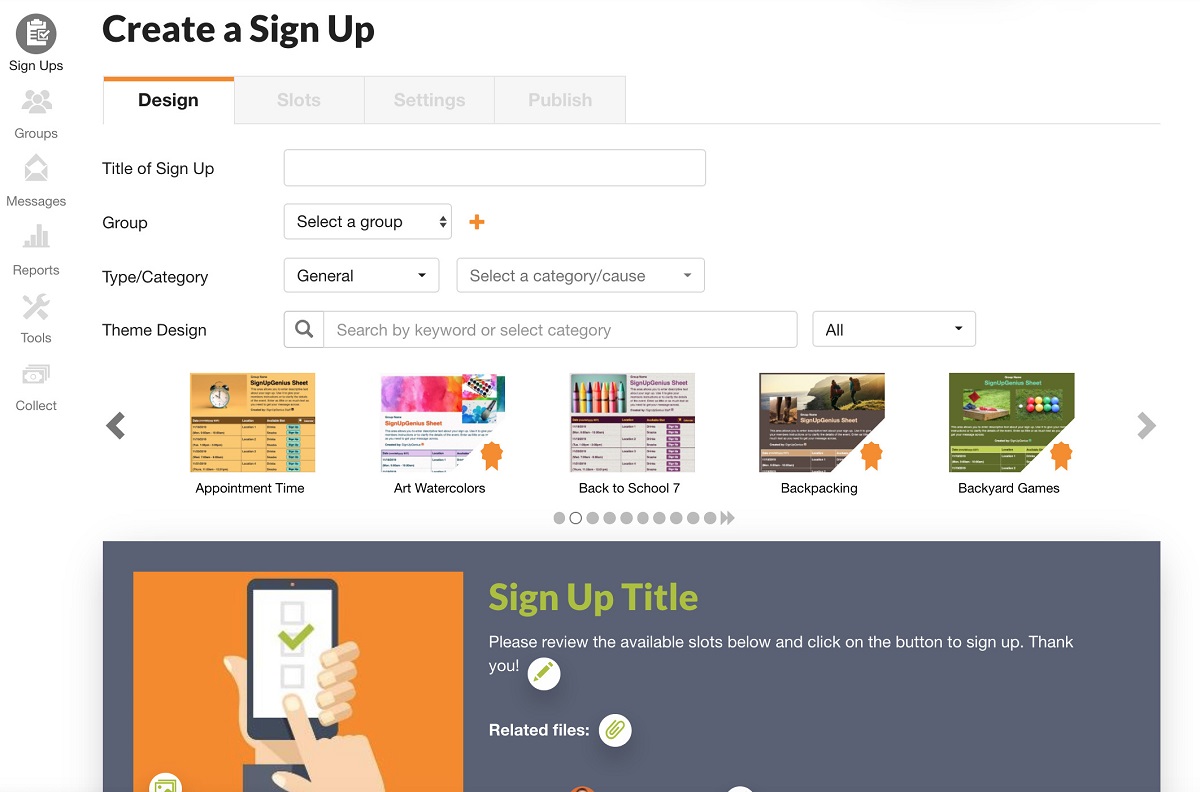
- Create a new sign-up: Click on the “Create a Sign Up” button to begin creating a new event sign-up form.
- Choose a template: Select a template from the available options or start with a blank template if you prefer to customize the event sign-up form from scratch.
- Customize the sign-up form: Provide details about your event, such as the event name, location, date, and any other relevant information. You can also add specific sign-up slots for participants, such as different time slots or volunteer roles.
- Set registration limits (optional): If you have a limit on the number of participants you can accommodate for your event, you can set registration limits for each sign-up slot to ensure a fair distribution.
- Add additional information (optional): Include any additional details or instructions for participants, like what to bring, what to wear, or any prerequisites for attending the event.
- Select communication options: Choose whether you want to enable email notifications and reminders for participants. This will help keep everyone informed about the event and any updates or changes.
- Save and publish: Once you’ve customized your event sign-up form to your satisfaction, save it and publish it. You’ll be provided with a unique URL for your event, which you can share with participants to start signing up.
By following these steps, you will have successfully created your event on SignUpGenius. Now, let’s move on to the next step and integrate WePay to start collecting payments for your event.
Step 2: Setting Up WePay Integration
With your SignUpGenius event created, the next step is to set up WePay integration. Follow the steps below to seamlessly connect WePay to your event:
- Access the SignUpGenius dashboard: Log in to your SignUpGenius account and navigate to your event dashboard.
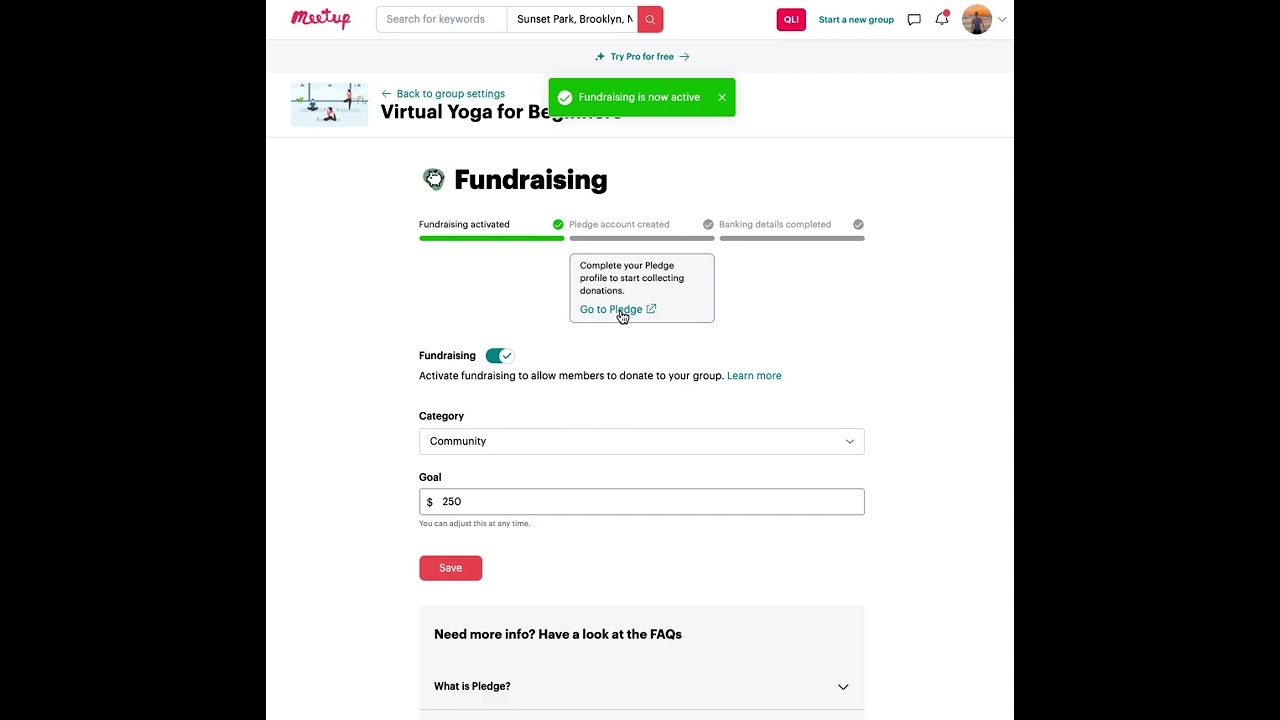
- Go to the “Payments” tab: In the event dashboard, locate and click on the “Payments” tab. This is where you will configure the payment settings for your event.
- Select “WePay” as the payment processor: Look for the option to select a payment processor and choose “WePay” from the available options.
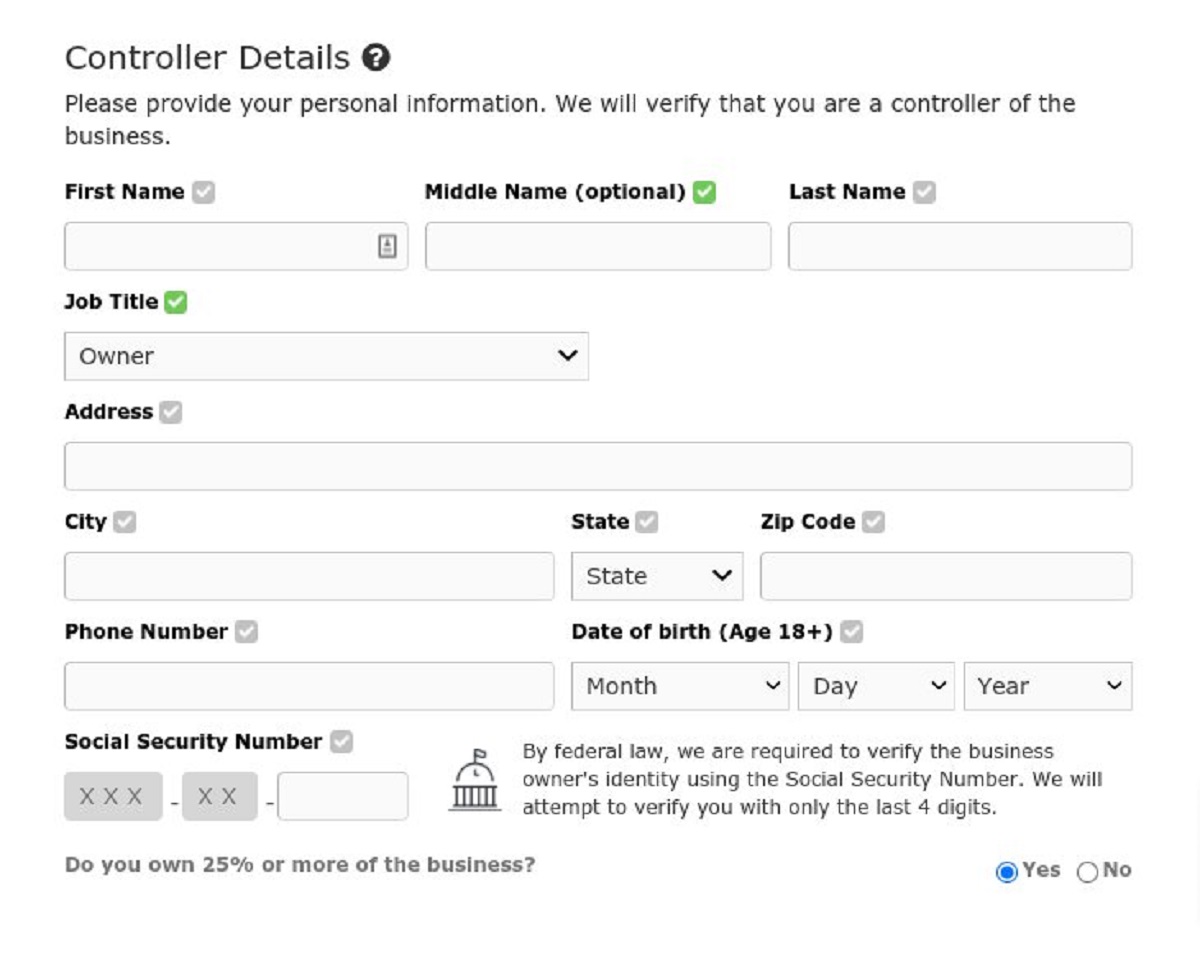
- Create or connect your WePay account: You will be prompted to create a new WePay account or connect an existing one. Follow the on-screen instructions to proceed.
- Authorize SignUpGenius to access your WePay account: Grant SignUpGenius the necessary permissions to integrate with your WePay account. This is required to facilitate the secure processing of payments for your event.
- Configure your payment options: Set the payment options for your event, such as the currency, payment amounts, and any additional fees or discounts you may want to include.
- Enable donations (optional): If you’re accepting donations for your event, you can enable the donation feature in the WePay integration settings. This allows participants to contribute additional funds alongside their registration or ticket purchases.
- Save and test the integration: Once you’ve configured the WePay integration settings to your preference, hit the save button. It’s also a good idea to perform a test transaction to ensure that the integration is working properly.
By following these steps, you will have successfully set up WePay integration with SignUpGenius, enabling participants to make secure payments for your event. Now, let’s move on to the next step and configure the payment options for your event.
Step 3: Configuring Payment Options
After setting up WePay integration for your SignUpGenius event, the next step is to configure the payment options. This will allow you to determine how participants can make payments and set up any additional payment settings specific to your event requirements. Follow the steps below to configure your payment options:
- Access the SignUpGenius event dashboard: Log in to your SignUpGenius account and navigate to the dashboard of the event for which you have set up WePay integration.
- Go to the “Payments” tab: In the event dashboard, click on the “Payments” tab to access the payment settings.
- Select the “Payment Options” section: Locate the section within the payment settings where you can configure the payment options for your event.
- Choose payment method: Select the payment method(s) you want to offer to your participants. This can include credit card payments, bank transfers, or other payment options supported by WePay.
- Set payment amounts: Determine the payment amounts for different registration tiers, ticket types, or any other payment categories you have set up for your event. You can specify fixed amounts or allow participants to enter custom payment amounts.
- Configure additional fees or discounts: If you want to include any additional fees or discounts, such as processing fees or early-bird discounts, you can set them up in this section.
- Enable payment confirmation: Decide whether you want to enable a payment confirmation message or receipt to be displayed to participants after they have successfully made a payment.
- Save your payment options: Once you have configured the payment options to your liking, click the save button to apply the changes.
By following these steps, you will have successfully configured the payment options for your SignUpGenius event. Participants will now have clear instructions on how to make payments and any specific details regarding payment amounts or categories. Now, let’s move on to the next step and customize the event details to make it more informative and engaging.
Step 4: Customizing Event Details
Customizing the event details is an important step in making your SignUpGenius event engaging and informative for participants. It allows you to provide all the necessary information and create a visually appealing event page. Follow the steps below to customize the event details:
- Access the SignUpGenius event dashboard: Log in to your SignUpGenius account and navigate to the dashboard of the event you want to customize.
- Edit event settings: Click on the “Settings” tab to access the event settings, where you can modify various aspects of your event.
- Event title and description: Update the event title to accurately reflect the purpose or theme of your event. Craft a compelling event description that provides a concise overview of what participants can expect, why they should attend, and any special features or highlights.
- Date, time, and location: Ensure that the event date, start time, and location are up-to-date and clearly stated. If applicable, add any specific instructions on how to reach the venue or where to meet.
- Upload event images: Customize the visual appeal of your event page by uploading relevant images. This could include event banners, logos, or pictures that showcase the event’s theme or previous editions.
- Add additional sections: Take advantage of SignUpGenius’ customizable sections to provide more details about your event. You can add sections for agenda, speakers, FAQs, sponsor information, or any other relevant information that enhances the event experience.
- Use formatting options: Utilize the formatting options available to make your event details visually appealing and easy to read. Consider using headings, bullet points, bold text, and numbered lists to organize information and make it more scannable for participants.
- Preview and make adjustments: Before finalizing the customization, take a moment to preview the event page and ensure that all the details are accurate and visually pleasing. Make any necessary adjustments as needed.
- Save and publish: Once you are satisfied with the customization of your event details, save the changes and publish the event. It will now be live and available for participants to view and sign up.
By following these steps, you will have successfully customized the event details for your SignUpGenius event. Participants will have a clear understanding of what the event entails and be enticed to sign up and attend. Now, let’s move on to the final step and publish your event, making it accessible to potential participants.
Step 5: Finalizing and Publishing the Event
The final step in the process of setting up your SignUpGenius event with WePay integration is to finalize and publish the event. This step ensures that your event becomes accessible to potential participants and allows them to sign up and make payments. Follow the steps below to finalize and publish your event:
- Review event details: Take a final look at all the event details, including the event title, description, date, time, location, and any additional sections. Make sure everything is accurate and aligns with your event plan.
- Test registration and payment process: Perform a test registration and payment to ensure that the integration between SignUpGenius and WePay is functioning as expected. Verify that participants can successfully sign up and make payments without any issues.
- Confirm email notifications: Check that the email notifications for event sign-ups, changes, and reminders are set up correctly. Ensure that participants receive the appropriate communication at each stage of the event process.
- Share event URL: Once you are satisfied with the event setup, it’s time to share the event URL with your target audience. Utilize various communication channels such as email, social media, or website embedding to spread the word about your event.
- Promote the event: Take advantage of social media platforms and other marketing channels to promote your event. Create engaging posts and share appealing visuals to generate interest and increase participation.
- Monitor participant sign-ups: Keep an eye on the participant sign-ups in your SignUpGenius event dashboard. Regularly check for new registrations, communicate with participants, and make adjustments if necessary.
- Respond to participant inquiries: Attend to any inquiries or questions from participants promptly. Provide the information they need to ensure a smooth and enjoyable experience at your event.
- Manage payments: Monitor the payments received through WePay and ensure that all transactions are processed smoothly. Keep track of the event’s financial performance and make any necessary adjustments or refunds as needed.
- Wrap up the event: Once the event is over, thank participants for their attendance and feedback. Close the event registration and finalize any remaining payments or post-event tasks, such as sending follow-up emails or collecting participant feedback.
By following these steps, you will have successfully finalized and published your SignUpGenius event with WePay integration. Now, it’s time to sit back, relax, and enjoy the success of your well-managed event!
Conclusion
Congratulations! You have successfully set up your SignUpGenius event with WePay integration, empowering you to effortlessly manage event sign-ups and collect payments. By combining the robust features of SignUpGenius with the secure payment processing capabilities of WePay, you have streamlined your event planning process and provided a seamless payment experience for your participants.
Throughout the process, you learned how to create an event on SignUpGenius, set up WePay integration, configure payment options, customize event details, and finalize and publish your event. Each step was designed to ensure that your event is informative, engaging, and easy to navigate for participants.
Remember to regularly monitor participant sign-ups, respond to inquiries promptly, and manage payments to ensure a smooth and successful event experience. Utilize the reporting and analytics features provided by WePay to gain insights into the financial performance of your event and make data-driven decisions for future planning.
By effectively using SignUpGenius with WePay, you have not only simplified your event management process but also enhanced the overall experience for both you and your participants. The combination of these powerful tools has made event planning more efficient, secure, and convenient.
Now that you have all the knowledge and tools at your disposal, it’s time to put them into action and organize your best event yet. So go ahead, create unforgettable experiences, and make a positive impact with your impeccably managed events.