Introduction
Are you looking to elevate the quality of your video calls and online meetings? Using a mirrorless camera as a webcam can significantly enhance the visual experience, offering superior image quality, depth of field, and overall professionalism. This guide will walk you through the process of harnessing the power of your mirrorless camera for your virtual communication needs.
With the rise of remote work and virtual gatherings, the demand for high-quality webcams has surged. However, many individuals are unaware that their mirrorless camera can serve as a stellar alternative, providing superior video quality and customization options. By following the steps outlined in this guide, you can unlock the full potential of your mirrorless camera and take your video calls to the next level.
Harnessing the power of a mirrorless camera as a webcam not only enhances the visual aspect of your video calls but also allows you to make use of your existing equipment, thereby maximizing your investment. Whether you are a professional conducting virtual meetings or a content creator engaging with your audience, leveraging a mirrorless camera can elevate your online presence and leave a lasting impression.
Now, let's delve into the step-by-step process of transforming your mirrorless camera into a high-quality webcam, ensuring that you are fully equipped to optimize your virtual communication experience.
Step 1: Check Camera Compatibility
Before embarking on the journey of using your mirrorless camera as a webcam, it is crucial to verify its compatibility for this purpose. Not all mirrorless cameras support this functionality out of the box, so it’s essential to confirm whether your specific camera model offers this capability.
Start by consulting the manufacturer’s website or the camera’s user manual to determine if there are any firmware updates or specific software required to enable webcam functionality. Some camera manufacturers provide dedicated software or firmware updates that unlock the webcam feature, allowing you to seamlessly connect your camera to your computer for video calls and live streaming.
Additionally, third-party software solutions may offer compatibility with a broader range of mirrorless cameras, providing a workaround for models that do not natively support webcam functionality. Research and identify popular third-party software options that are known for their compatibility with a wide array of camera models, ensuring that you can leverage your mirrorless camera as a webcam regardless of its native capabilities.
Furthermore, consider the connectivity options of your mirrorless camera. Some cameras feature a micro HDMI or USB-C port that facilitates direct connection to your computer, while others may require specific adapters or capture cards to establish the link. Understanding your camera’s connectivity specifications is vital in determining the additional accessories or cables needed to integrate it seamlessly into your webcam setup.
By thoroughly assessing your mirrorless camera’s compatibility, exploring firmware updates, and researching third-party software solutions, you can ascertain the feasibility of using your specific camera model as a high-quality webcam. This proactive approach sets the stage for a successful transition to harnessing the full potential of your mirrorless camera for your virtual communication needs.
Step 2: Install Necessary Software
After confirming the compatibility of your mirrorless camera for webcam usage, the next step involves installing the essential software that facilitates the seamless integration of your camera into your computer’s webcam ecosystem. Depending on your camera model and the operating system of your computer, there are several software options to consider for this purpose.
Start by visiting the official website of your camera’s manufacturer to check for any proprietary webcam software or firmware updates. These resources often provide dedicated tools designed to enable the webcam functionality of your mirrorless camera, streamlining the setup process and ensuring optimal performance.
If your camera’s manufacturer does not offer specific webcam software or if you are seeking alternative solutions, explore third-party software options renowned for their compatibility with a wide range of camera models. Popular software applications such as OBS Studio, ManyCam, and SparkoCam are known for their versatility in integrating mirrorless cameras into the webcam environment, offering a plethora of customization options and advanced features for your video calls and live streams.
When selecting the software for your webcam setup, consider factors such as ease of use, compatibility with your computer’s operating system, and the availability of features that align with your specific needs, such as video effects, scene switching, and virtual backgrounds. Additionally, ensure that the chosen software supports the connectivity options of your mirrorless camera, whether it utilizes a micro HDMI, USB-C, or requires specific adapters for seamless integration.
By installing the necessary software tailored to your camera model and desired functionality, you pave the way for a smooth transition to utilizing your mirrorless camera as a high-quality webcam. These software solutions not only unlock the webcam potential of your camera but also empower you to customize your video calls and live streams with professional-grade features, enhancing your virtual communication experience.
Step 3: Connect the Camera to Your Computer
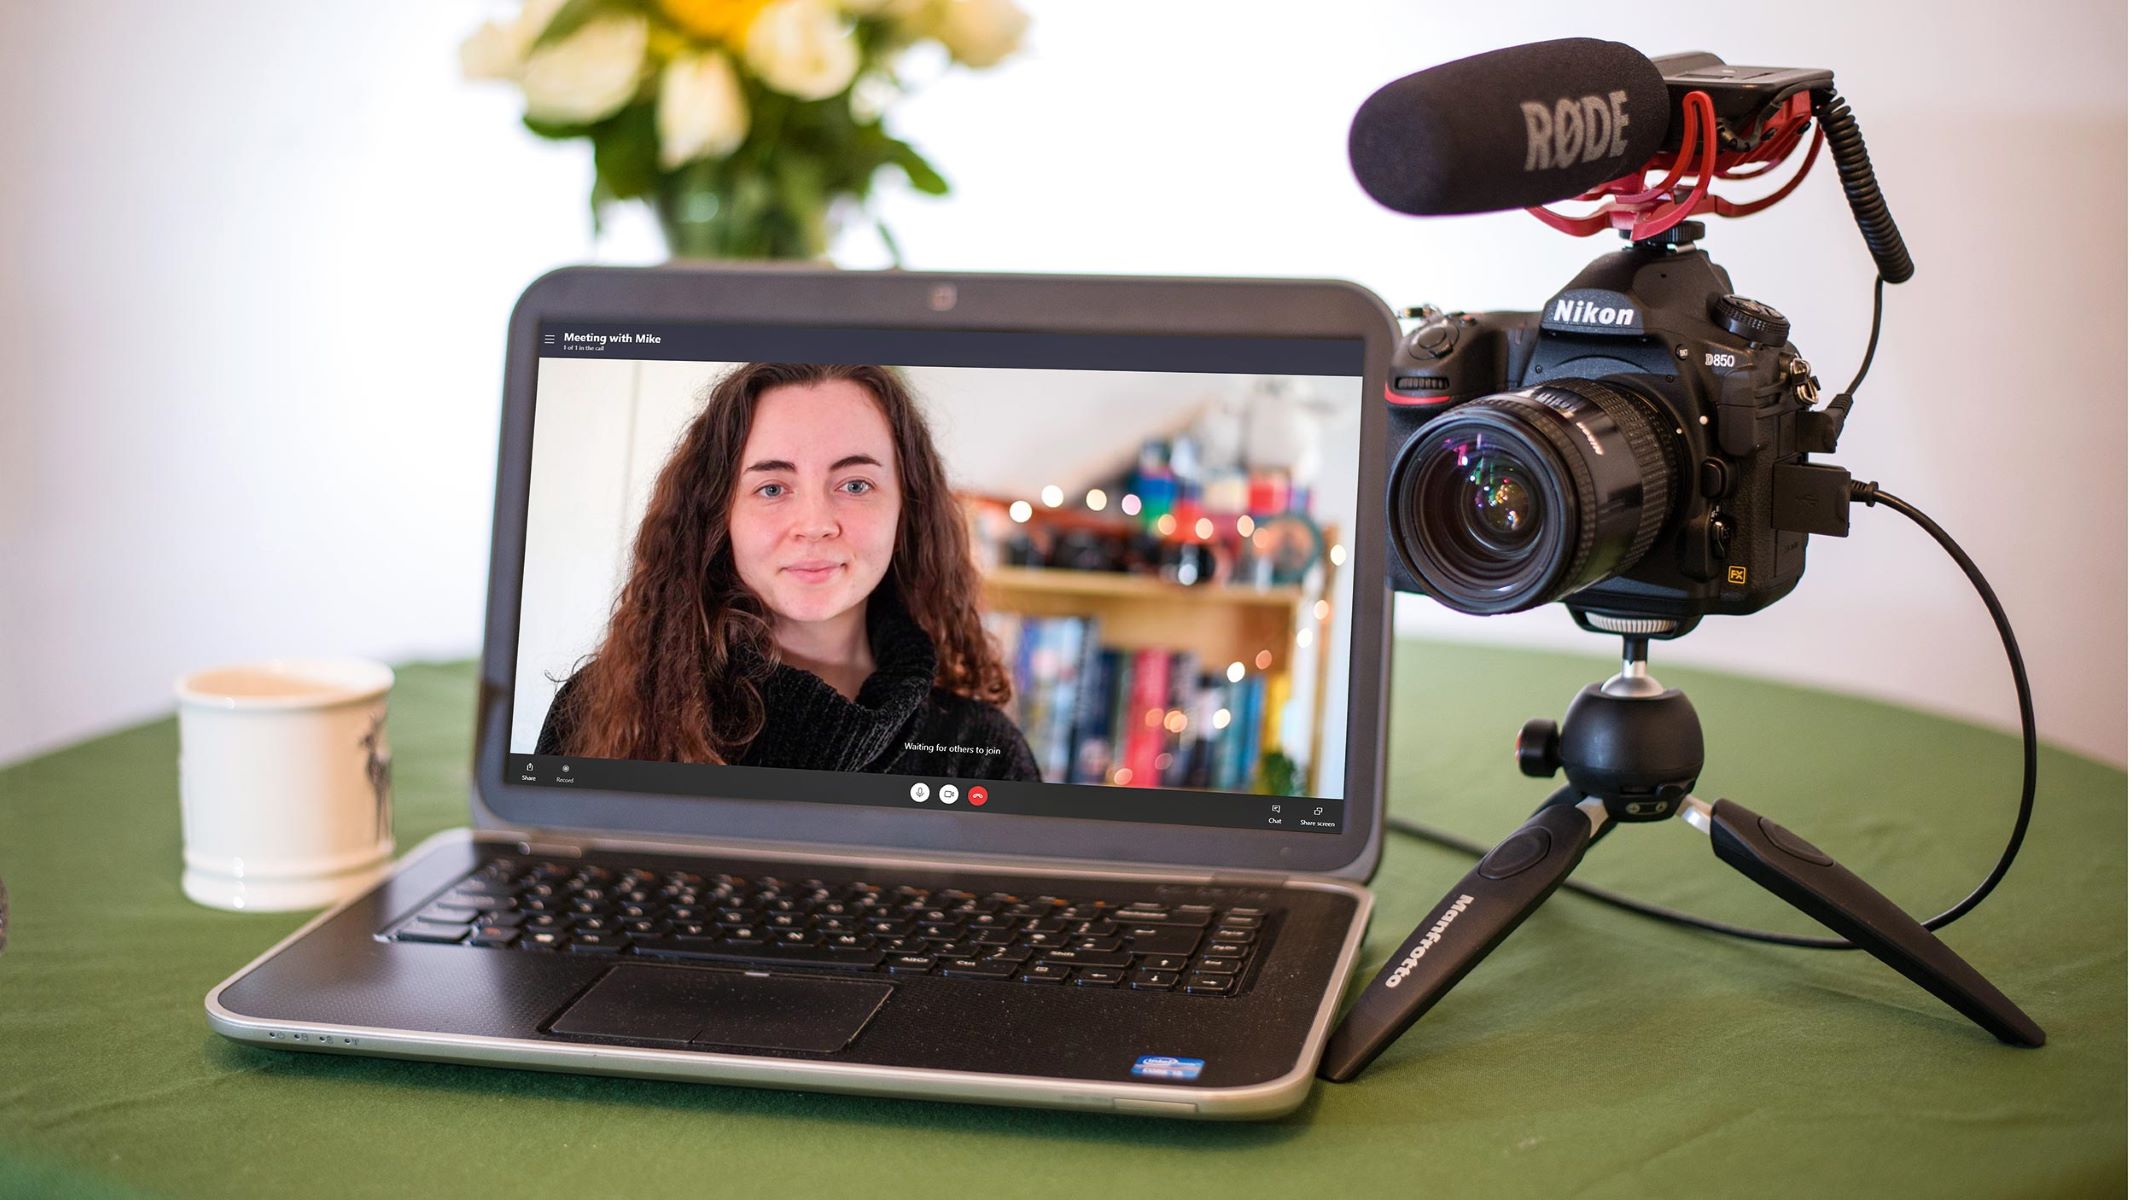
Once you have verified the compatibility of your mirrorless camera and installed the necessary software, the next crucial step is to establish a seamless connection between your camera and your computer, enabling it to function as a webcam for your virtual communication needs. Depending on your camera model and computer setup, there are several methods to achieve this connection.
If your mirrorless camera features a micro HDMI port, you can directly connect it to your computer’s HDMI input using a compatible cable. This method allows for high-quality video transmission and is often accompanied by audio input through the camera’s built-in microphone or an external microphone, providing a comprehensive solution for video calls and live streaming.
Alternatively, if your camera utilizes a USB-C port, you can connect it to your computer using a USB-C cable, leveraging the camera’s data transfer capabilities to transmit video and audio signals directly to your computer. Some mirrorless cameras support USB tethering, allowing for a direct and reliable connection to your computer without the need for additional capture cards or adapters.
For cameras that do not feature a micro HDMI or USB-C port, you may need to utilize specific adapters or capture cards to establish the connection. HDMI capture cards, for instance, enable you to connect your camera’s HDMI output to a USB port on your computer, effectively integrating your mirrorless camera into your computer’s webcam ecosystem.
Regardless of the connectivity method employed, it is essential to ensure that your computer recognizes the camera as a webcam input. This involves configuring the video and audio settings within your chosen software to select the mirrorless camera as the primary input source, enabling it to deliver high-quality video and audio for your virtual communication.
By successfully connecting your mirrorless camera to your computer, you lay the foundation for leveraging its superior imaging capabilities for video calls, online meetings, and live streams. This seamless integration not only enhances the visual quality of your virtual communication but also showcases the potential of utilizing professional-grade equipment for a captivating and impactful online presence.
Step 4: Set Up the Camera Settings
With your mirrorless camera successfully connected to your computer, the next crucial step is to configure its settings to optimize the visual output and ensure a seamless webcam experience for your virtual communication endeavors. By adjusting the camera settings, you can fine-tune the image quality, exposure, and other parameters to deliver professional-grade video for your video calls, live streams, and online meetings.
Begin by accessing the camera’s menu or settings interface to customize the video output for webcam usage. Depending on your camera model, you may have the option to adjust parameters such as resolution, frame rate, white balance, and exposure compensation to achieve the desired visual presentation. Ensure that the selected settings align with the requirements of your virtual communication platform and the ambient lighting conditions in your environment.
Furthermore, consider enabling features such as face tracking, autofocus, and image stabilization if available on your camera, enhancing the overall visual experience and ensuring that you remain in focus and well-framed throughout your video calls and live streams. These features contribute to a polished and professional presentation, elevating the quality of your virtual communication.
If your camera offers the flexibility to save custom settings profiles, consider creating a dedicated profile optimized for webcam usage. This allows you to swiftly switch to the predefined settings tailored for video calls and live streams, streamlining the setup process and ensuring consistent, high-quality performance for your virtual communication needs.
Additionally, explore the audio settings of your mirrorless camera to ensure that the audio input, whether from the camera’s built-in microphone or an external microphone, is optimized for clear and crisp sound reproduction. Adjust the microphone sensitivity, wind noise reduction, and other audio parameters to deliver an immersive auditory experience during your virtual communication sessions.
By meticulously configuring the camera settings to align with the requirements of webcam usage, you harness the full potential of your mirrorless camera, delivering unparalleled visual quality and customization options for your video calls, online meetings, and live streams. This attention to detail and customization elevates your virtual communication experience, leaving a lasting impression on your audience and collaborators.
Step 5: Position the Camera for Optimal Use
Positioning your mirrorless camera effectively is pivotal in ensuring an optimal visual experience for your video calls, live streams, and online meetings. By strategically placing the camera and considering factors such as framing, lighting, and stability, you can enhance the overall presentation and engagement during your virtual communication sessions.
First and foremost, consider the framing and composition of your video feed. Position the camera at eye level or slightly above to create a natural and flattering perspective, allowing you to maintain eye contact with your audience and convey a sense of presence and engagement. Additionally, ensure that the camera angle provides a well-balanced view of your surroundings, minimizing distractions and focusing the attention on the subject, whether it’s yourself or the content you are presenting.
Lighting plays a crucial role in enhancing the visual quality of your video feed. Position the camera in a well-lit environment, utilizing natural light or artificial lighting sources to illuminate your face evenly and minimize shadows. Consider employing soft, diffused lighting to achieve a flattering and professional look, avoiding harsh or direct light that may cause glare or overexposure.
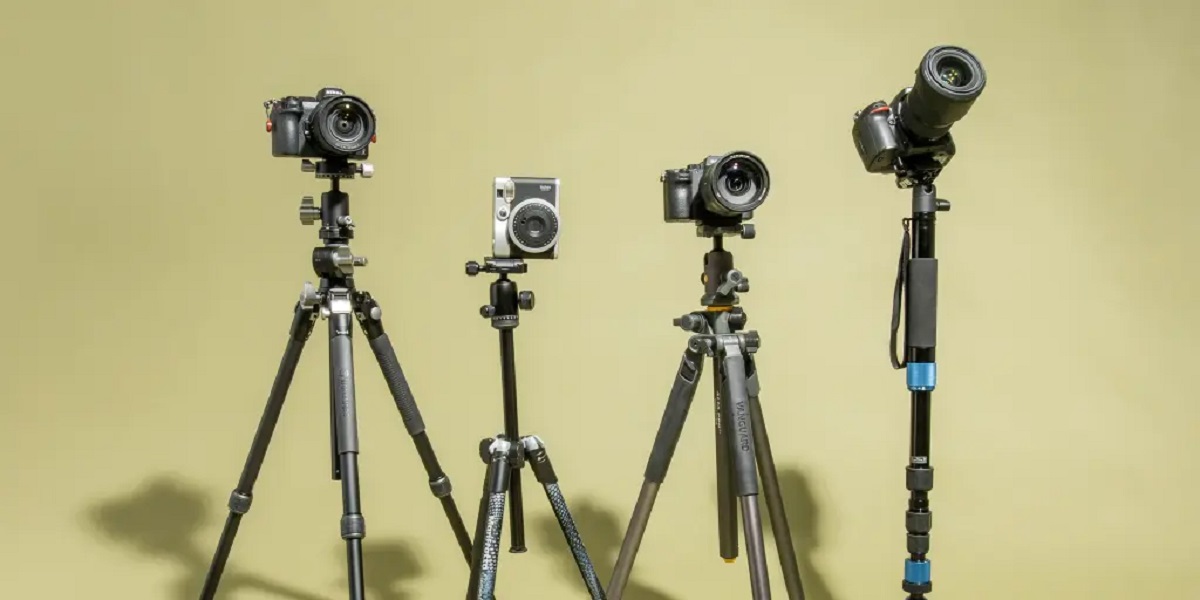
Stability is essential for a consistent and polished presentation. Mount your mirrorless camera on a stable surface or a tripod to minimize camera shake and ensure a steady video feed. This not only enhances the visual quality but also conveys a sense of professionalism and attention to detail, elevating your virtual communication presence.
Consider the background of your video feed and ensure that it is clean, uncluttered, and visually appealing. Remove any distractions or items that may detract from the focal point, maintaining a professional and polished backdrop that complements the overall visual presentation. Furthermore, you may explore virtual background options within your chosen software to add a touch of creativity and customization to your video calls and live streams.
By thoughtfully positioning your mirrorless camera, paying attention to framing, lighting, stability, and the background, you elevate the visual quality and professionalism of your virtual communication. This strategic approach enhances the impact of your video calls and live streams, fostering engagement and leaving a lasting impression on your audience and collaborators.
Step 6: Test Your Setup
Once you have completed the setup of your mirrorless camera as a webcam, it is essential to thoroughly test the configuration to ensure that everything is functioning as intended. Testing your setup allows you to identify and address any potential issues, fine-tune the settings, and familiarize yourself with the operation of your mirrorless camera in its new role as a high-quality webcam.
Begin by launching your chosen video conferencing or live streaming platform and accessing the video and audio settings within the software. Select your mirrorless camera as the primary video input and verify that the audio input, whether from the camera’s built-in microphone or an external microphone, is recognized and functioning properly. Conduct a brief audio test to ensure clear and distortion-free sound reproduction.
Once the video and audio inputs are configured, initiate a test call or stream to observe the visual quality and performance of your mirrorless camera. Pay attention to factors such as image clarity, exposure, color accuracy, and overall framing to ascertain that the camera settings align with your desired presentation. Make any necessary adjustments to the camera settings or positioning based on your observations.
During the test, explore the functionality of any customization options offered by your chosen software, such as video effects, scene switching, or virtual backgrounds. Familiarize yourself with the features and capabilities of the software to leverage its full potential in enhancing your virtual communication experience.
Consider recording a brief segment using your mirrorless camera to review the playback and further evaluate the visual and auditory aspects of your setup. This allows you to identify any potential areas for improvement and refine the settings to deliver an exceptional video and audio presentation for your future virtual communication sessions.
Engage in a mock video call or live stream with a friend or colleague to gather feedback on the visual and auditory quality of your setup. Request their input on factors such as image clarity, lighting, audio fidelity, and overall presentation to gain valuable insights and make informed adjustments, ensuring that your mirrorless camera serves as an effective and professional-grade webcam for your virtual communication needs.
By thoroughly testing your mirrorless camera setup, you can fine-tune the settings, address any potential issues, and gain confidence in utilizing your camera as a high-quality webcam. This proactive approach ensures that your virtual communication sessions are characterized by exceptional visual and auditory quality, leaving a lasting impression on your audience and collaborators.
Conclusion
Transforming your mirrorless camera into a high-quality webcam presents a myriad of opportunities to elevate your virtual communication experience. By following the step-by-step process outlined in this guide, you have unlocked the full potential of your mirrorless camera, harnessing its superior imaging capabilities for video calls, online meetings, and live streams.
From verifying the compatibility of your camera to meticulously configuring its settings and positioning it effectively, each step in the process contributes to a seamless transition to utilizing your mirrorless camera as a professional-grade webcam. The attention to detail and strategic approach employed in this transformation ensures that your virtual communication is characterized by exceptional visual and auditory quality, leaving a lasting impression on your audience and collaborators.
By leveraging your mirrorless camera as a webcam, you have not only enhanced the visual aspect of your video calls and live streams but also demonstrated resourcefulness and creativity in maximizing the potential of your existing equipment. This proactive approach not only elevates the quality of your virtual communication but also showcases your commitment to delivering professional-grade presentations in the digital realm.
As you continue to utilize your mirrorless camera as a webcam, consider exploring additional features and customization options offered by your chosen software to further enhance your virtual communication experience. Whether it’s integrating virtual backgrounds, refining the audio settings, or experimenting with video effects, embracing the versatility of your mirrorless camera empowers you to captivate your audience and stand out in the virtual landscape.
Embrace the potential of your mirrorless camera as a webcam, and let its superior imaging capabilities redefine your virtual communication experience, setting the stage for impactful and engaging interactions in the digital realm.