Introduction
So, you've just returned from an exhilarating adventure with your action camera in tow, and now you're eager to transform your raw footage into a captivating video that truly captures the essence of your experience. Whether you're a thrill-seeking daredevil, an avid traveler, or simply someone who loves documenting life's memorable moments, editing your action camera videos can take your storytelling to the next level.
Editing action camera footage may seem daunting at first, but with the right tools and techniques, you can seamlessly piece together your clips to create a visually stunning and engaging video. From choosing the right editing software to adding the finishing touches, this guide will walk you through the step-by-step process of editing your action camera videos like a pro.
By the end of this journey, you'll have the skills and confidence to transform your raw action camera footage into a polished and professional-looking video that you'll be proud to share with the world. So, buckle up and get ready to unleash your creativity as we delve into the exciting world of action camera video editing!
Choosing the Right Editing Software
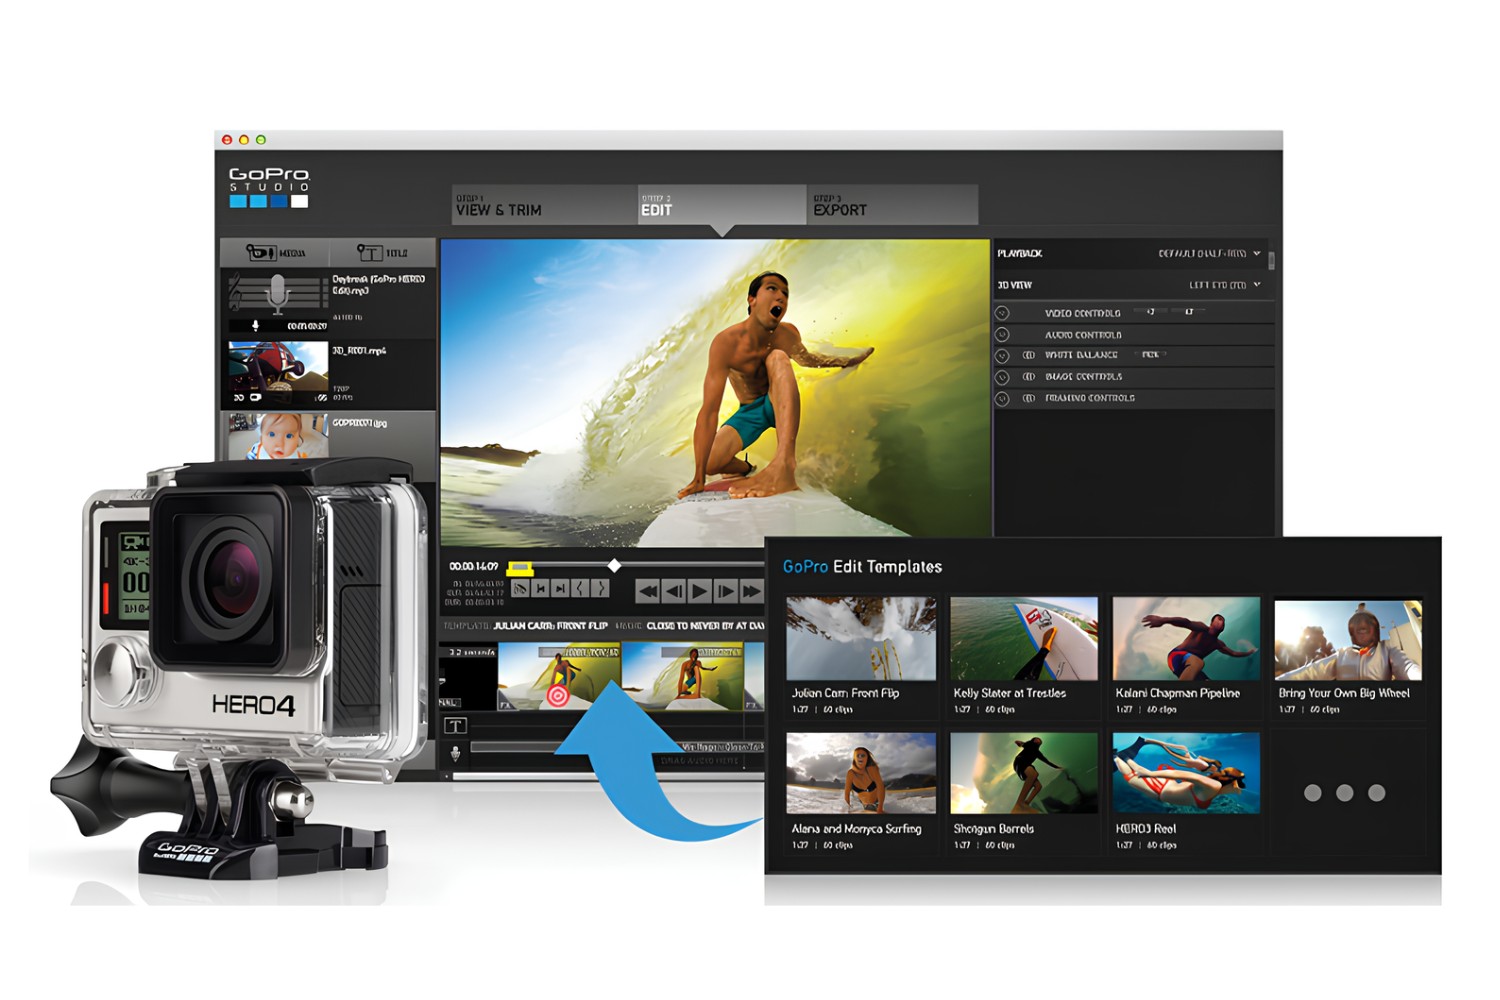
When it comes to editing your action camera videos, selecting the right editing software is the crucial first step. The market is flooded with a wide array of editing programs, each offering unique features and capabilities. Your choice of software will significantly impact the editing process and the final outcome of your video. Here are some key factors to consider when choosing the right editing software for your action camera footage:
- Compatibility: Ensure that the editing software is compatible with the file format of your action camera footage. Most modern editing programs support popular formats such as MP4, MOV, and AVI.
- User-Friendly Interface: Look for software that offers an intuitive and user-friendly interface, especially if you’re new to video editing. A clean and organized layout can streamline the editing process and reduce the learning curve.
- Editing Features: Consider the specific editing features offered by the software. Basic features such as trimming, cutting, and adding transitions are essential, while more advanced capabilities like color correction, audio manipulation, and special effects can elevate the quality of your video.
- Performance and Speed: Opt for editing software that runs smoothly on your computer and offers fast rendering times. This is particularly important when working with high-resolution action camera footage, as it can be demanding on system resources.
- Community and Support: Check if the software has an active user community and reliable customer support. Online forums, tutorials, and responsive support channels can be invaluable resources when you encounter challenges or seek creative inspiration.
Popular editing software options for action camera videos include Adobe Premiere Pro, Final Cut Pro, DaVinci Resolve, and Sony Vegas Pro, among others. Take the time to explore their features, watch tutorials, and even try out free trial versions to determine which software best aligns with your editing needs and preferences.
Ultimately, the right editing software will empower you to unleash your creativity and bring your action camera footage to life with precision and flair. Once you’ve identified the perfect editing tool, you’ll be well-equipped to embark on the exhilarating journey of transforming your raw footage into a polished and captivating video.
Importing Your Footage
After selecting the ideal editing software, the next step in the video editing process is importing your action camera footage into the editing interface. This crucial phase sets the stage for organizing and manipulating your clips to craft a compelling visual narrative. Here’s a step-by-step guide to seamlessly import your footage:
- Connect Your Action Camera: Begin by connecting your action camera to your computer using the appropriate USB cable or by inserting the memory card into a card reader. Ensure that your camera is powered on and set to the appropriate mode for file transfer.
- Launch the Editing Software: Open your chosen editing software and create a new project or open an existing one. Navigate to the import or media tab within the software’s interface to prepare for importing your footage.
- Import Options: Most editing software provides various methods for importing footage. You can typically drag and drop files directly from your computer’s file explorer into the software, use the import media function, or access the footage directly from your connected action camera or memory card.
- Organize Your Footage: Once imported, take the time to organize your footage into folders or bins within the editing software. This step is essential for efficient workflow management, especially when working with a large volume of clips from your action camera.
- Proxy Workflow: For high-resolution action camera footage that may strain your computer’s processing power, consider creating proxy files during the import process. Proxy files are lower-resolution versions of your footage that allow for smoother editing and can be seamlessly swapped with the original high-resolution files during the final export.
Importing your footage effectively lays the groundwork for the editing journey ahead. With your clips seamlessly integrated into the editing software, you’re now ready to embark on the creative process of crafting your action-packed video masterpiece.
Organizing Your Clips
Once your action camera footage is imported into the editing software, the next essential step is organizing your clips to streamline the editing process and maintain a clear overview of your visual assets. Effective clip organization not only enhances your workflow efficiency but also enables you to quickly locate specific moments within your footage. Here’s how to effectively organize your clips:
- Creating a Folder Structure: Begin by establishing a logical folder structure within the editing software to categorize your clips. This can include folders for different locations, activities, or specific segments of your adventure, providing a clear and intuitive layout for your footage.
- Utilizing Keywords and Tags: Many editing software options offer the ability to add keywords, tags, or metadata to your clips. Take advantage of these features to label your footage with relevant descriptors, making it easier to search for specific scenes or elements during the editing process.
- Storyboarding: If your video follows a specific narrative or sequence, consider creating a rough storyboard within the editing software. This can involve arranging thumbnail representations of your clips in the desired order, providing a visual roadmap for the structure of your video.
- Rating and Sorting: Use the rating and sorting features within the editing software to flag standout clips, mark favorites, or categorize footage based on its quality or relevance to your video’s storyline.
- Creating Subclips: For lengthy clips that encompass multiple distinct moments, consider creating subclips that isolate and categorize individual segments. This approach can simplify the editing process by breaking down large clips into manageable components.
By implementing a systematic approach to organizing your clips, you’ll lay a solid foundation for the creative editing journey ahead. This structured framework not only enhances your efficiency but also empowers you to unleash your storytelling prowess as you weave together the exhilarating moments captured by your action camera.
Trimming and Cutting Footage
Once your action camera footage is organized, the process of trimming and cutting plays a pivotal role in refining your video’s narrative and pacing. This phase allows you to eliminate unnecessary footage, focus on key moments, and craft a seamless visual story. Here’s a comprehensive guide to effectively trimming and cutting your action camera footage:
- Identifying Key Moments: Begin by carefully reviewing your footage to identify the standout moments, compelling visuals, and pivotal sequences that encapsulate the essence of your adventure. These key moments will serve as the building blocks of your edited video.
- Setting In and Out Points: Utilize the in and out point functions within the editing software to mark the precise segments of your footage that you intend to use. This approach allows you to focus on specific sections of each clip, streamlining the editing process.
- Eliminating Unnecessary Footage: Trim away any extraneous or repetitive footage that does not contribute to the overall narrative or visual impact of your video. This selective approach ensures that your final edit remains engaging and concise.
- Sequencing and Flow: Pay close attention to the flow and continuity of your footage as you trim and cut. Ensure that the sequence of clips maintains a natural and coherent progression, guiding viewers through the unfolding story of your adventure.
- Refining Transitions: As you trim and cut your footage, consider how transitions between clips can enhance the overall visual appeal. Smooth transitions, such as cuts, fades, or dissolves, can seamlessly connect moments and maintain a captivating viewing experience.
By meticulously trimming and cutting your action camera footage, you’ll distill the essence of your adventure into a captivating visual narrative. This process empowers you to showcase the most exhilarating and visually stunning moments, ensuring that your edited video resonates with viewers and immerses them in the thrill of your action-packed escapade.
Adding Transitions
Transitions play a crucial role in enhancing the visual flow and coherence of your action camera video. When seamlessly integrated, transitions guide the viewer from one scene to the next, creating a polished and engaging viewing experience. Here’s a comprehensive exploration of how to effectively incorporate transitions into your video editing process:
- Understanding Transition Types: Familiarize yourself with various transition options offered by your editing software, such as cuts, fades, dissolves, wipes, and more. Each type of transition imparts a distinct visual and emotional impact, so consider the tone and pacing of your video when selecting transitions.
- Applying Transitions: Identify points in your video where transitions can enhance the visual continuity between clips. Introduce transitions between scenes, particularly when there is a shift in location, time, or mood, to maintain a seamless and immersive viewing experience.
- Adjusting Transition Duration: Fine-tune the duration of transitions to ensure that they complement the pacing of your video. Smooth, gradual transitions may be suitable for tranquil moments, while quick cuts or dynamic transitions can amplify the energy of action-packed sequences.
- Experimenting with Effects: Some editing software provides additional transition effects, such as blurs, light leaks, or stylized animations. Experiment with these effects to infuse your video with creative flair and visual intrigue, elevating the overall production value.
- Consistency and Subtlety: Maintain a consistent approach to transitions throughout your video, ensuring that they enhance the narrative without overshadowing the content. Subtle and seamless transitions often have a more profound impact on the viewer’s experience.
By thoughtfully integrating transitions into your action camera video, you’ll elevate the visual storytelling and maintain a captivating rhythm that draws viewers deeper into the heart of your adventure. These carefully chosen transitions serve as the invisible threads that weave your individual clips into a cohesive and immersive cinematic tapestry.
Color Correction and Grading
Color correction and grading are essential aspects of the video editing process, particularly when working with action camera footage that captures a wide range of environments and lighting conditions. These techniques allow you to refine the visual aesthetics of your video, enhance the mood, and ensure consistency across diverse clips. Here’s a detailed exploration of how to effectively apply color correction and grading to your action camera footage:
- White Balance Adjustment: Begin by addressing the white balance of your footage to ensure that colors appear natural and accurate. Adjusting the white balance can rectify any tint or color cast caused by varying light sources, resulting in a more balanced and true-to-life color palette.
- Exposure and Contrast Enhancement: Fine-tune the exposure and contrast settings to optimize the brightness and dynamic range of your footage. This step can bring out intricate details in both shadowed and well-lit areas, enhancing the overall visual depth and clarity.
- Color Grading for Mood: Delve into the realm of color grading to evoke specific emotions and atmospheres within your video. By manipulating the color tones and hues, you can infuse your footage with warmth, coolness, vibrancy, or cinematic stylization, aligning the visuals with the thematic essence of your adventure.
- Consistency Across Clips: Ensure that color correction and grading maintain a consistent visual tone across all your clips. This cohesiveness fosters a seamless viewing experience and reinforces the overarching aesthetic of your video.
- Preserving Authenticity: While color correction and grading offer ample creative freedom, it’s important to preserve the authenticity of the original footage. Strive to enhance the visual appeal without straying too far from the natural essence of the captured environments and moments.
By skillfully applying color correction and grading techniques, you’ll transform your raw action camera footage into a visually captivating and cohesive narrative. The nuanced manipulation of colors and tones will not only elevate the aesthetic quality of your video but also imbue it with emotive depth, inviting viewers to immerse themselves in the rich visual tapestry of your adventure.
Adding Music and Sound Effects
Music and sound effects are powerful tools that can elevate the emotional impact and immersive quality of your action camera video. Thoughtfully integrating audio elements can enhance the storytelling, evoke specific moods, and amplify the exhilaration of your adventure. Here’s a comprehensive guide on how to effectively incorporate music and sound effects into your video editing process:
- Choosing the Right Music: Select music that complements the pacing, theme, and emotional resonance of your video. Consider the energy levels, instrumentation, and genre to align the music with the spirit of your adventure, whether it’s a high-octane pursuit or a serene exploration.
- Aligning with Visual Beats: Sync the musical beats and rhythms with the visual dynamics of your footage. This synchronization can create impactful moments of visual and auditory synergy, enhancing the overall viewing experience.
- Enhancing Emotional Resonance: Leverage music to evoke specific emotions and enhance the storytelling elements of your video. Whether it’s building anticipation, conveying tranquility, or amplifying excitement, the right musical accompaniment can deeply resonate with your audience.
- Layering Sound Effects: Integrate relevant sound effects, such as nature sounds, ambient noises, or action-specific audio cues, to immerse viewers in the sensory experience of your adventure. These subtle auditory details can enrich the authenticity and depth of your video.
- Audio Balance and Mixing: Ensure that the audio levels are balanced to prevent overpowering or overshadowing the visual elements. The harmonious blend of music, sound effects, and ambient audio enhances the overall audio-visual cohesion of your video.
By skillfully weaving music and sound effects into your action camera video, you’ll elevate the sensory impact and storytelling prowess of your visual narrative. The harmonious fusion of captivating visuals and evocative audio elements will transport viewers into the heart of your adventure, creating an immersive and unforgettable viewing experience.
Adding Text and Graphics
Text and graphics serve as valuable visual elements that can enhance the storytelling, provide context, and add a layer of informative detail to your action camera video. Whether it’s location labels, timestamps, or dynamic graphic overlays, these elements can enrich the viewer’s understanding and engagement with your adventure. Here’s a comprehensive exploration of how to effectively incorporate text and graphics into your video editing process:
- Contextual Text Overlays: Integrate text overlays to provide context, such as location names, dates, or significant details related to the depicted scenes. This textual information can enrich the narrative and offer valuable insights to the viewer.
- Dynamic Graphic Elements: Utilize dynamic graphic elements, such as animated icons, arrows, or visual indicators, to direct attention, highlight key elements, or add a touch of visual flair to specific moments within your video.
- Subtitles and Captions: If your adventure involves dialogue, foreign languages, or important verbal cues, consider incorporating subtitles or captions to ensure accessibility and clarity for a diverse audience.
- Branding and Identity: Introduce visual elements that reflect your personal brand, logo, or thematic motifs to infuse your video with a distinct identity and reinforce your unique storytelling style.
- Animated Text and Graphics: Explore the creative potential of animated text and graphics to add dynamic movement and visual interest to your video. These animated elements can captivate viewers and elevate the overall production value of your narrative.
By thoughtfully integrating text and graphics, you’ll enrich the visual tapestry of your action camera video, providing viewers with contextual cues, engaging visual enhancements, and a deeper connection to the unfolding adventure. These meticulously crafted visual elements serve as the guiding signposts and immersive embellishments that elevate the storytelling impact of your video.
Exporting Your Edited Video
Once you’ve meticulously crafted and polished your action camera video, the final step is exporting the edited masterpiece to share with your audience. This crucial phase ensures that your video maintains its visual integrity and optimal quality across various viewing platforms. Here’s a comprehensive guide on how to effectively export your edited video:
- Resolution and Format: Determine the ideal resolution and format for your exported video based on the intended viewing platform. Whether it’s YouTube, social media, or personal playback, select the appropriate resolution and format to ensure optimal visual fidelity and compatibility.
- Compression and File Size: Balance the video’s quality with file size considerations by adjusting the compression settings. Optimize the compression to retain visual clarity while managing the file size for efficient uploading and sharing.
- Audio Settings: Verify that the audio settings align with your desired audio quality and format. Ensure that the audio encoding maintains the integrity of your carefully curated sound elements.
- Metadata and Tags: Embed relevant metadata, such as video titles, descriptions, and tags, into the exported file. This information enhances the discoverability and organization of your video across online platforms.
- Watermarking and Branding: Consider adding a discreet watermark or branding elements to protect your video and reinforce your visual identity. This step is particularly relevant for content shared on public platforms.
By meticulously configuring the export settings, you’ll ensure that your action camera video is presented to your audience in the best possible light, maintaining its visual fidelity, audio integrity, and overall impact. The exported video stands as a testament to your creative vision and the thrilling moments captured through the lens of your action camera, ready to captivate and inspire viewers around the world.


