Introduction
So, you've been out and about, capturing stunning images with your DSLR camera. Whether you're a professional photographer or an enthusiastic hobbyist, your camera is your prized possession. Over time, as you've ventured into various environments to capture the perfect shot, your camera has likely accumulated its fair share of dust, smudges, and dirt. It's essential to keep your DSLR camera body clean to ensure optimal performance and pristine image quality.
In this comprehensive guide, we'll walk you through the step-by-step process of cleaning your DSLR camera body. From gathering the necessary supplies to delicately cleaning the sensor, we've got you covered. By following these simple yet crucial cleaning procedures, you can maintain the longevity and functionality of your beloved camera.
Whether you're preparing for a professional shoot or simply want to keep your equipment in top-notch condition, regular cleaning is a fundamental aspect of camera maintenance. Let's delve into the essential steps to ensure your DSLR camera body remains spotless and ready to capture breathtaking moments.
Gather Your Supplies
Before embarking on the cleaning process, it’s vital to gather the necessary supplies to ensure a thorough and safe cleaning experience for your DSLR camera body. Here’s a list of essential items you’ll need:
- Lens cleaning solution and tissue: Specifically formulated for camera lenses, this solution is designed to effectively remove smudges and fingerprints without leaving streaks or residue.
- Blower bulb: A gentle and efficient tool for removing dust and debris from the camera body, lens, and sensor.
- Microfiber cloth: Ideal for wiping down the exterior of the camera body and lens without scratching the surfaces.
- Sensor cleaning kit: This kit typically includes specialized swabs and cleaning solution designed for safely and effectively cleaning the sensor.
- Cotton swabs: Useful for reaching small crevices and corners of the camera body.
- Camera body cleaning solution: A mild cleaning solution specifically formulated for camera bodies to remove dirt and grime.
- Soft brush: A delicate brush for gently removing loose particles from the camera body and lens.
- Protective gloves: Optional but recommended to prevent fingerprints and oil transfer during the cleaning process.
By assembling these supplies, you’ll be well-equipped to tackle the task of cleaning your DSLR camera body with precision and care. Now that you have everything you need, let’s move on to the next steps to ensure your camera remains in pristine condition.
Remove the Lens
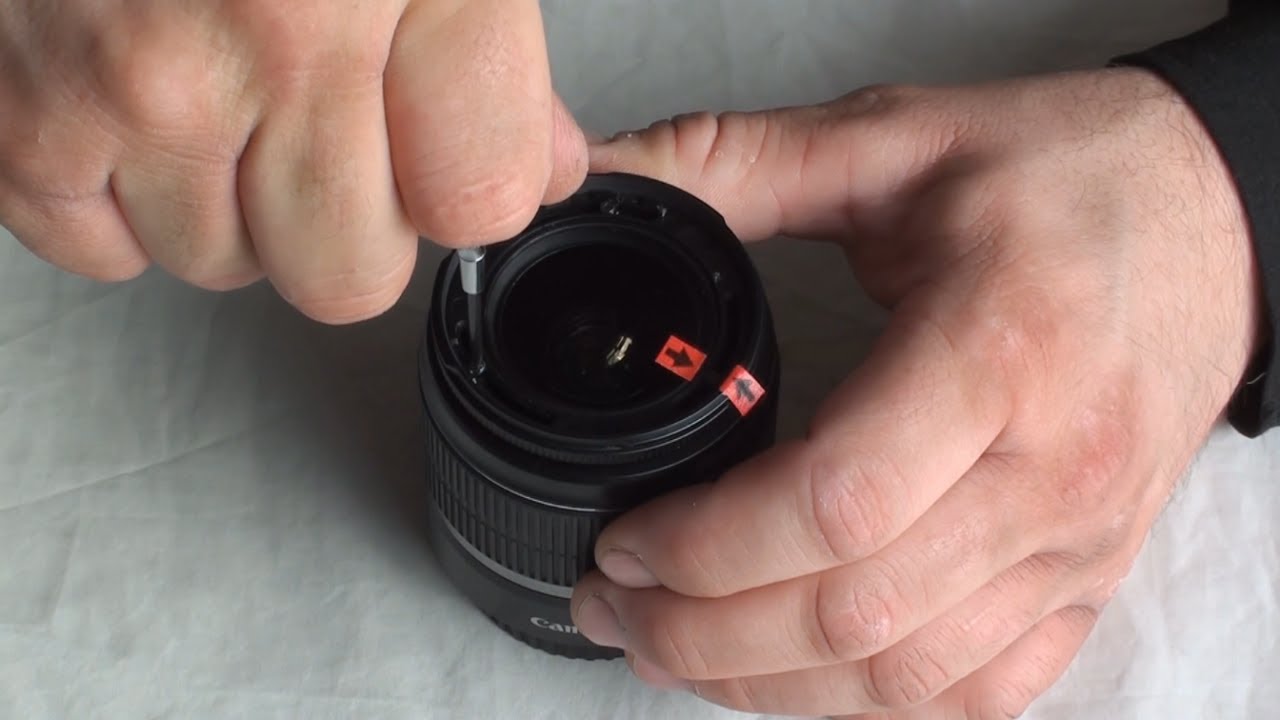
Before diving into the cleaning process, it’s crucial to remove the lens from your DSLR camera. This step is essential as it allows for thorough access to the camera body and sensor, ensuring a comprehensive cleaning experience. Follow these steps to safely remove the lens:
- Power Off the Camera: Before removing the lens, ensure that your camera is powered off to prevent any potential damage during the removal process.
- Press the Lens Release Button: Locate the lens release button on your camera body, typically positioned near the base of the lens mount. Depress the button to release the lens.
- Twist and Remove the Lens: While holding the camera with one hand, use your other hand to gently twist the lens counterclockwise to detach it from the camera body. Carefully lift the lens away from the camera once it’s fully released.
- Cap the Lens: To prevent dust and debris from entering the exposed rear element of the lens, promptly attach the rear lens cap to protect it until you’re ready to reattach it.
By following these steps, you’ve successfully removed the lens from your DSLR camera, paving the way for a thorough cleaning of the camera body, sensor, and lens. With the lens safely removed, you’re now ready to proceed to the next crucial steps in the cleaning process.
Use a Blower to Remove Dust
Once the lens is removed, it’s time to address any accumulated dust and debris on the camera body and sensor. A blower bulb is a gentle and effective tool for removing loose particles without the risk of causing scratches or damage. Follow these steps to use a blower to remove dust from your DSLR camera:
- Point the Camera Downward: To prevent dislodged dust from resettling on the sensor or internal components, point the camera body downward while performing the dust removal process.
- Engage the Camera’s Sensor Cleaning Mode: Many DSLR cameras are equipped with a sensor cleaning mode that raises the mirror and opens the shutter, providing direct access to the sensor for cleaning. Consult your camera’s manual to activate this feature.
- Gently Squeeze the Blower Bulb: With the camera’s lens mount facing downward, gently squeeze the blower bulb to release a burst of air. Direct the airflow into the interior of the camera body to dislodge any loose dust particles.
- Avoid Contact with Internal Components: Exercise caution to avoid the blower nozzle coming into contact with internal components to prevent damage. Maintain a safe distance while directing the airflow.
- Repeat as Needed: If necessary, repeat the process of using the blower bulb to ensure that any remaining dust is effectively removed from the camera body and sensor.
By utilizing a blower to remove dust, you can effectively eliminate loose particles that may compromise the quality of your images. This initial step sets the stage for a more detailed cleaning of the camera’s exterior, sensor, and other crucial components. With the dust removal process complete, you’re now ready to proceed to the next steps in restoring your DSLR camera to its optimal condition.
Clean the Exterior of the Camera Body
After addressing the internal components, it’s time to focus on cleaning the exterior of your DSLR camera body. Over time, the exterior surfaces can accumulate dirt, smudges, and grime, detracting from the camera’s appearance and potentially hindering its functionality. Follow these steps to effectively clean the exterior of your camera:
- Use a Microfiber Cloth: Begin by gently wiping down the camera body with a clean, dry microfiber cloth. This will help remove surface dust and smudges without the need for additional cleaning solutions.
- Target Stubborn Stains: For more persistent stains or grime, lightly dampen a portion of the microfiber cloth with a small amount of camera body cleaning solution. Carefully wipe the affected areas, ensuring that no excess moisture comes into contact with sensitive components.
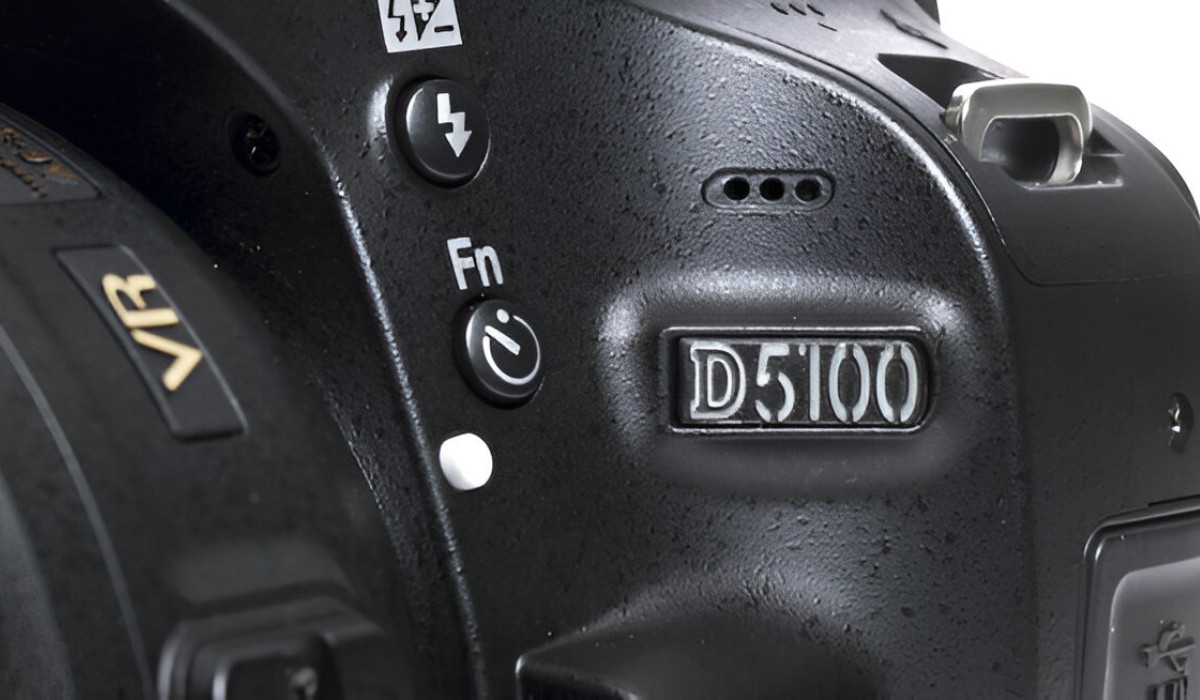
- Pay Attention to Buttons and Dials: Use a soft brush or cotton swab to gently clean around the buttons, dials, and crevices of the camera body. This will help dislodge any trapped debris and maintain the functionality of these essential controls.
- Inspect the Lens Mount: Take a moment to inspect the lens mount for any visible dirt or debris. Use the blower bulb to remove any loose particles, ensuring a clean and secure connection when reattaching the lens.
- Protect the LCD Screen: To clean the LCD screen, use a microfiber cloth specifically designed for electronic displays. Gently wipe the screen in a circular motion to remove fingerprints and smudges, taking care not to apply excessive pressure.
By meticulously cleaning the exterior of your DSLR camera body, you not only enhance its aesthetic appeal but also maintain its functionality and longevity. With these essential cleaning steps completed, your camera is well on its way to being restored to its optimal condition, ready to capture stunning images with clarity and precision.
Clean the LCD Screen
The LCD screen of your DSLR camera is a crucial interface for composing and reviewing your shots, making it essential to keep it clean and free of smudges or debris. Follow these steps to effectively clean the LCD screen and maintain its pristine condition:
- Power Off the Camera: Before cleaning the LCD screen, ensure that your camera is powered off to prevent accidental button presses or changes in settings.
- Use a Microfiber Cloth: Begin by gently wiping the LCD screen with a dry microfiber cloth to remove any loose dust or particles. This initial step helps prevent scratching the screen during the cleaning process.
- Apply a Small Amount of Cleaning Solution: If there are stubborn smudges or fingerprints on the screen, apply a small amount of specialized LCD screen cleaning solution to a corner of the microfiber cloth.
- Gently Wipe the Screen: Using the dampened portion of the cloth, gently wipe the LCD screen in a circular motion to remove any smudges or fingerprints. Avoid applying excessive pressure to prevent potential damage to the screen.
- Dry the Screen: After cleaning, use the dry portion of the microfiber cloth to gently dry the LCD screen, ensuring that no moisture remains on the surface.
- Inspect for Residue: Carefully inspect the screen for any remaining residue or streaks. If necessary, repeat the cleaning process with a fresh microfiber cloth to achieve a streak-free finish.
By following these steps, you can effectively clean the LCD screen of your DSLR camera, ensuring optimal visibility and clarity when composing and reviewing your shots. A clean and well-maintained LCD screen enhances the overall user experience and contributes to the professional appearance and functionality of your camera.
Clean the Viewfinder
The viewfinder of your DSLR camera is your window to the world you’re capturing through the lens. Over time, it can accumulate dust and debris, impacting the clarity of your composition and hindering your overall shooting experience. Follow these steps to effectively clean the viewfinder of your camera:
- Inspect the Viewfinder: Begin by carefully inspecting the viewfinder for any visible dust, smudges, or debris. This initial assessment will help you determine the extent of cleaning required.
- Use a Blower Bulb: Gently squeeze the blower bulb to release a burst of air, directing it into the viewfinder to dislodge any loose dust particles. Ensure that the camera is pointed downward to prevent dislodged dust from resettling inside the viewfinder.
- Microfiber Cloth for the Eyepiece: Use a dry microfiber cloth to gently wipe the eyepiece surrounding the viewfinder. This will help remove any surface dust or smudges that may affect your viewing experience.
- Inspect for Smudges: If there are stubborn smudges or residue on the viewfinder eyepiece, lightly dampen a corner of the microfiber cloth with a small amount of lens cleaning solution. Carefully wipe the eyepiece to remove any remaining smudges, taking care not to apply excessive moisture.
- Ensure Clarity: After cleaning, peer through the viewfinder to ensure that it is free of dust, smudges, and any other obstructions. A clear and clean viewfinder is essential for accurately composing your shots and achieving precise focus.
By following these steps, you can effectively clean the viewfinder of your DSLR camera, ensuring a clear and unobstructed view as you compose your shots. A clean viewfinder not only enhances your shooting experience but also contributes to the overall maintenance and care of your valuable camera equipment.
Clean the Sensor
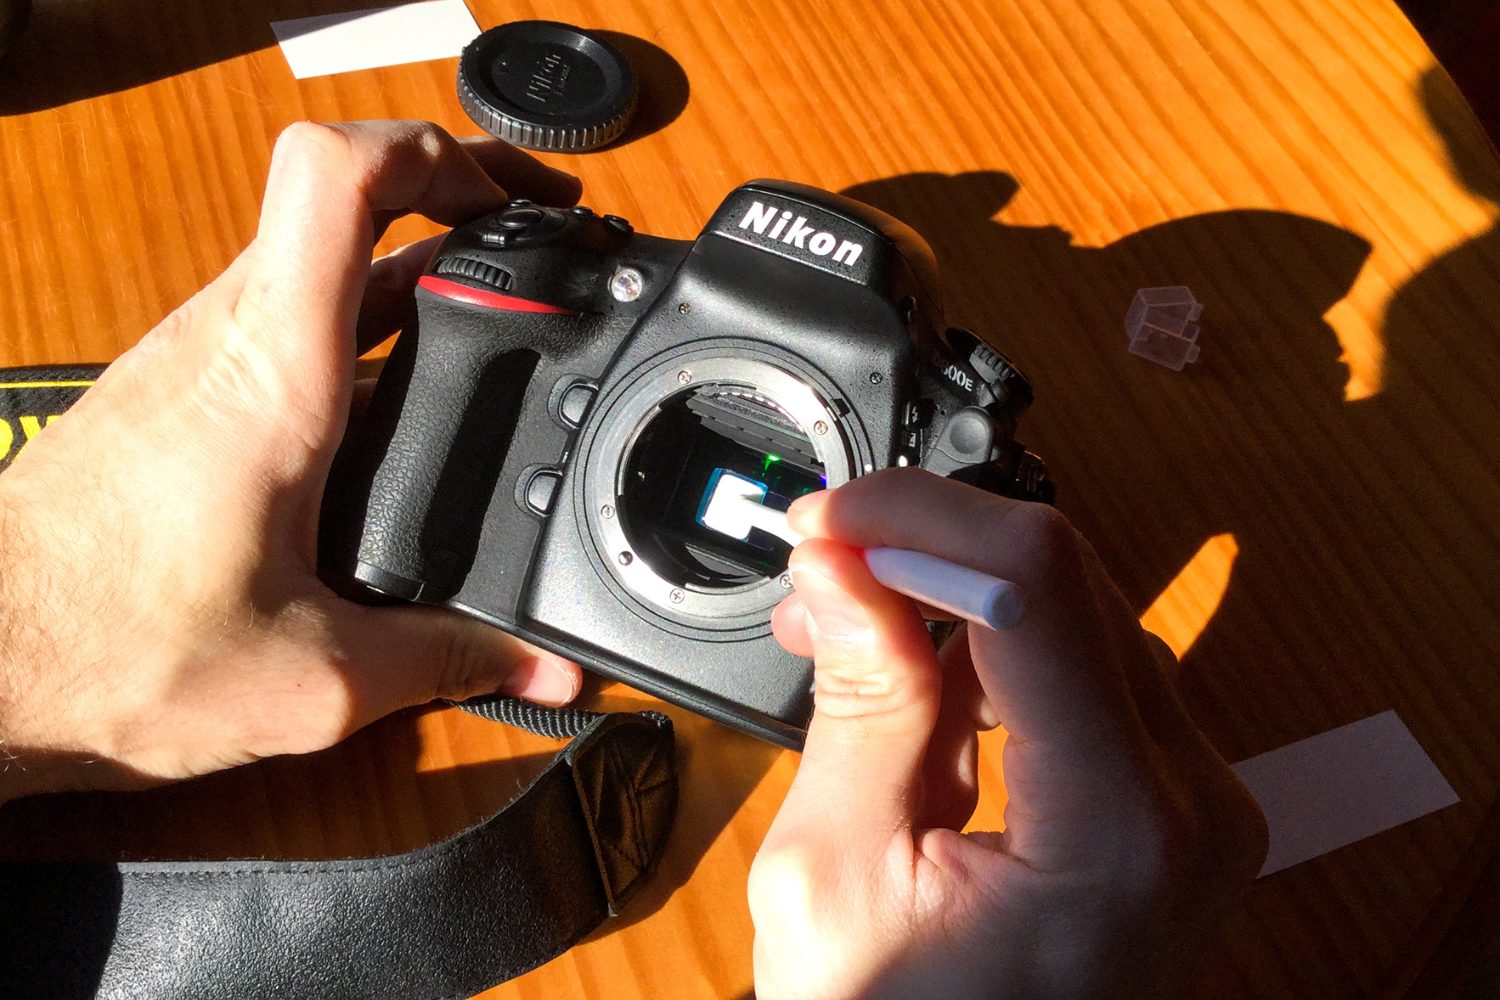
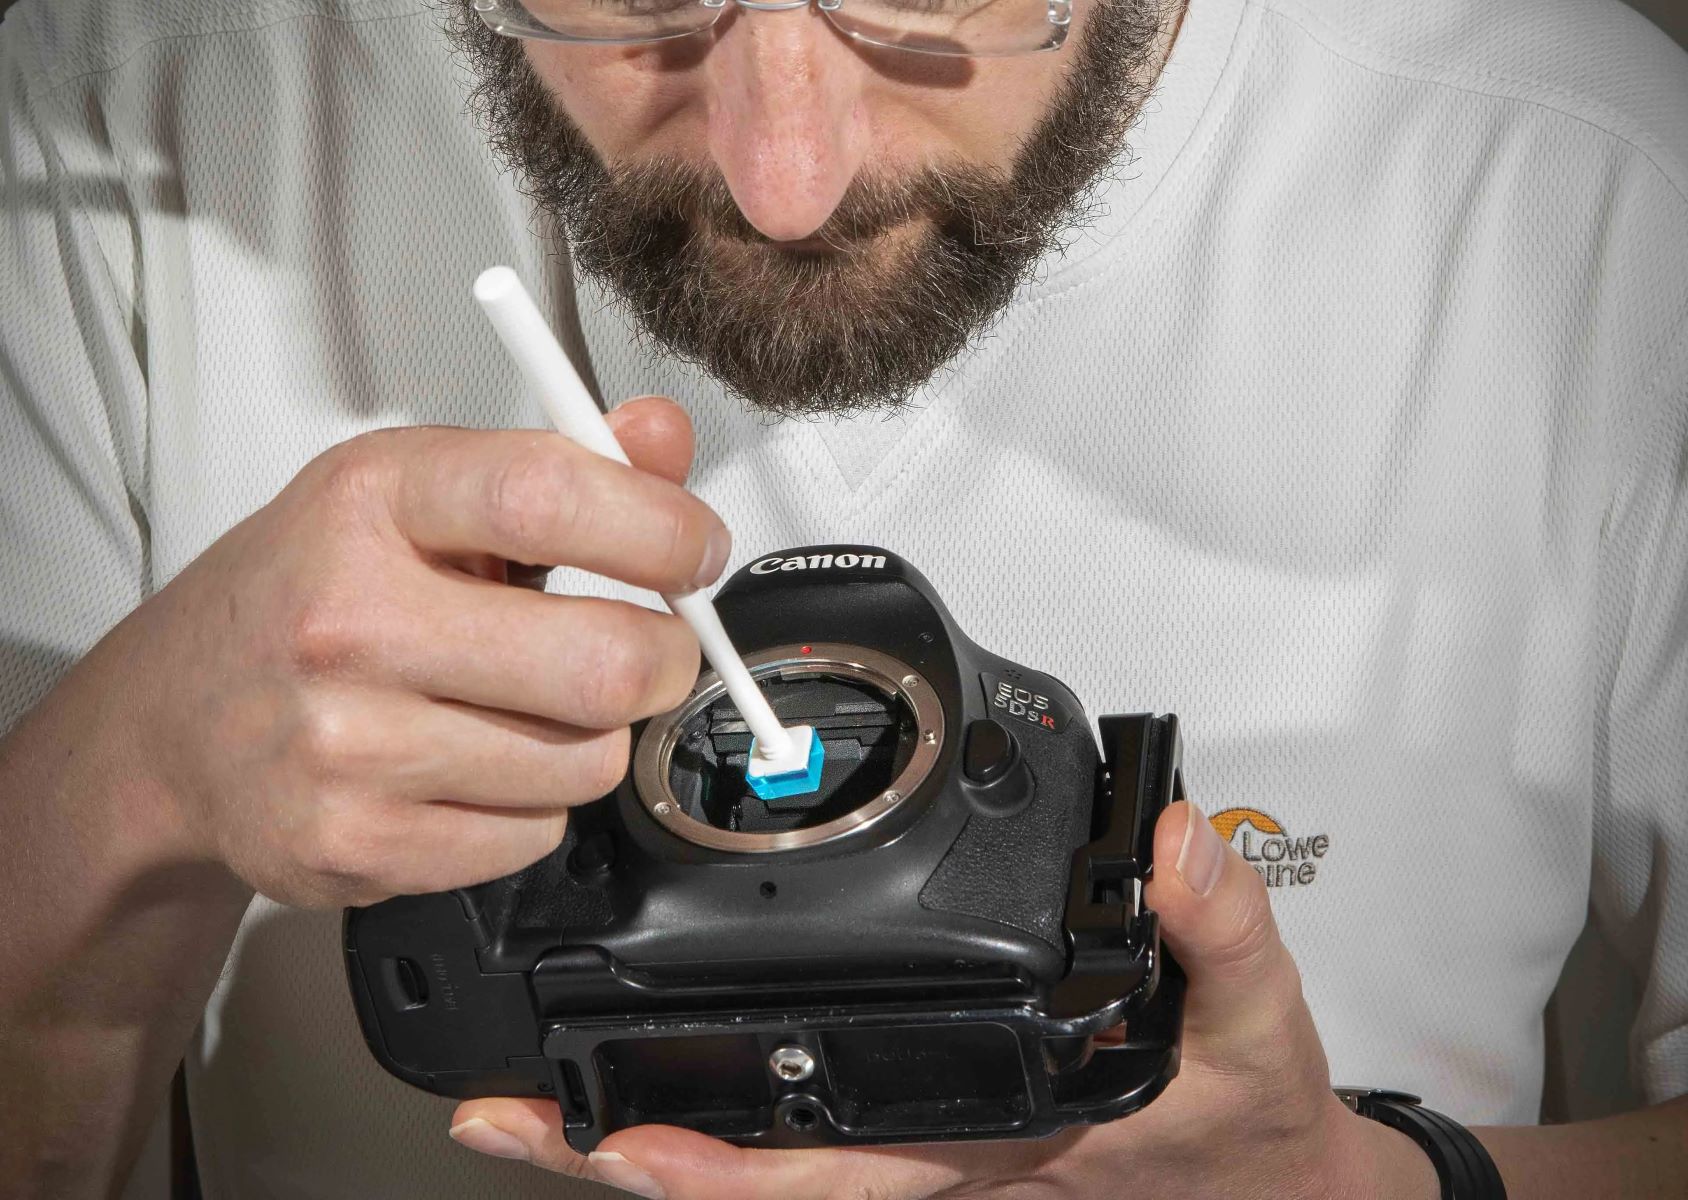
The sensor of your DSLR camera is a critical component that directly impacts the quality and clarity of your images. Over time, it can attract dust and particles, leading to visible spots and blemishes in your photos. Cleaning the sensor requires precision and care to ensure optimal results without causing damage. Follow these essential steps to effectively clean the sensor of your DSLR camera:
- Activate the Sensor Cleaning Mode: Access your camera’s menu to engage the sensor cleaning mode, which raises the mirror and opens the shutter, exposing the sensor for cleaning. This feature facilitates safe access to the sensor for maintenance.
- Use a Blower Bulb: Gently utilize a blower bulb designed for sensor cleaning to remove any loose dust or particles from the sensor. Direct the airflow across the sensor surface to dislodge any debris, taking care to avoid contact with the sensor itself.
- Inspect for Stubborn Particles: After using the blower, carefully inspect the sensor for any persistent spots or particles that may require further attention. A well-lit environment and a sensor loupe can aid in identifying any remaining imperfections.
- Employ Sensor Cleaning Swabs: If stubborn particles are present, use specialized sensor cleaning swabs and a minimal amount of sensor cleaning solution to delicately remove the blemishes. Follow the manufacturer’s instructions for proper swabbing techniques and avoid excessive pressure on the sensor.
- Conduct a Test Shot: After cleaning the sensor, capture a test shot of a uniformly lit surface at a narrow aperture to check for any remaining spots or artifacts. Review the test image at 100% magnification on a computer to ensure the sensor is free of imperfections.
By meticulously following these steps, you can effectively clean the sensor of your DSLR camera, ensuring that it remains free of visible spots and blemishes that can detract from the quality of your images. A clean sensor not only contributes to the overall performance of your camera but also allows you to capture stunning, pristine photographs with confidence.
Reassemble the Camera
After completing the meticulous cleaning process, it’s time to reassemble your DSLR camera, ensuring that all components are securely and properly positioned for optimal functionality. Follow these essential steps to reassemble your camera with care and precision:
- Inspect the Lens and Mount: Before reattaching the lens, inspect both the lens and the camera’s mount for any residual dust or debris. Use a blower bulb to remove any loose particles, ensuring a clean connection when reassembling.
- Align and Attach the Lens: With the camera powered off, align the lens with the mount and gently twist it clockwise until it locks into place. Take care to avoid applying excessive force, ensuring a secure and snug attachment.
- Power On and Test Functionality: Once the lens is reattached, power on the camera and verify that all functions, including autofocus and image stabilization, are operating as expected. Capture a test shot to confirm that the camera is functioning optimally.
- Secure Lens Caps and Accessories: If not in use, securely cap both the front and rear elements of the lens to prevent dust and debris from accumulating. Additionally, ensure that any accessories, such as lens hoods or protective filters, are properly reattached and secured.
- Review and Reset Settings: Take a moment to review and reset any custom settings or modes on your camera that may have been adjusted during the cleaning process. Ensure that the camera is configured to your preferred shooting parameters.
By methodically reassembling your DSLR camera, you can ensure that all components are securely in place, ready to deliver exceptional performance and image quality. With the camera fully reassembled and tested, you’re now prepared to embark on your next photographic adventure with confidence in the cleanliness and functionality of your valuable equipment.
Conclusion
Congratulations! By following the comprehensive guide to cleaning your DSLR camera body, you’ve taken a crucial step in maintaining the performance, longevity, and image quality of your valuable equipment. Regular cleaning and maintenance not only enhance the aesthetic appeal of your camera but also contribute to its functionality and reliability in capturing stunning photographs.
From gathering the essential cleaning supplies to delicately addressing the sensor and viewfinder, you’ve embarked on a journey to ensure that your DSLR camera remains in optimal condition. By adhering to the step-by-step cleaning procedures outlined in this guide, you’ve demonstrated a commitment to caring for your equipment and preserving its capabilities for future photographic endeavors.
Remember, a clean DSLR camera body and sensor are essential for producing professional-quality images free of imperfections and blemishes. By integrating regular cleaning into your camera maintenance routine, you can uphold the integrity of your equipment and consistently deliver exceptional photography results.
As you reassemble your camera and prepare for your next photographic pursuit, take pride in the care and attention you’ve dedicated to preserving your DSLR camera. With a spotless and well-maintained camera at your disposal, you’re poised to capture breathtaking moments with clarity, precision, and confidence.
Embrace the art of camera maintenance and cleaning as an integral part of your photography journey, ensuring that your DSLR camera remains a reliable and steadfast companion in capturing the beauty of the world through your lens.