Introduction
Welcome to the world of acoustic guitar EQ, where the art of shaping your guitar’s sound comes to life. Whether you’re a seasoned musician or a beginner, understanding how to EQ your acoustic guitar can significantly enhance your playing experience. In this article, we will explore the basics of acoustic guitar EQ, from understanding frequency bands to finding the right balance for your instrument’s unique sound.
Equalization, commonly referred to as EQ, is the process of adjusting the frequency response of an audio signal. With acoustic guitars, EQ allows us to tailor the tone and optimize the sound for different playing styles and environments. Whether you’re performing live, recording in a studio, or simply jamming at home, knowing how to effectively EQ your acoustic guitar can make a world of difference.
Before diving into the specifics, it’s important to mention that there is no one-size-fits-all approach to EQ. Every guitarist has their own preference and style, and there are endless possibilities when it comes to shaping the sound of your instrument. However, understanding the fundamentals will provide you with a solid foundation to experiment and discover the perfect EQ settings for your acoustic guitar.
Throughout this article, we will explore the various components of acoustic guitar EQ, including frequency bands, finding the right balance, and common EQ techniques for different playing styles. Additionally, we will cover EQing in live performances and recording studios, as well as using EQ pedals to shape your guitar’s sound.
Whether you’re looking to add warmth and depth to your strumming patterns, boost the presence of your fingerstyle playing, or eliminate unwanted frequencies, understanding how to manipulate the EQ of your acoustic guitar is an essential skill. So, let’s dive in and discover the world of acoustic guitar EQ together!
The Basics of Acoustic Guitar EQ
Equalization plays a crucial role in shaping the sound of your acoustic guitar. By adjusting the frequencies, you can highlight certain aspects of your playing and mitigate any unwanted resonances or inconsistencies. Understanding the basics of acoustic guitar EQ will empower you to achieve a well-balanced and pleasing tone.
When it comes to EQ, it’s essential to have a basic understanding of frequency bands. Frequencies are categorized into three main ranges: low, mid, and high. Low frequencies (bass) are responsible for the deep, rumbling tones, mid frequencies control the warmth and body of the sound, while high frequencies (treble) accentuate the clarity and brightness.
Getting familiar with the EQ controls on your guitar amp or audio interface is essential. Most EQ controls consist of knobs or sliders for adjusting the volume of specific frequency ranges. Commonly found controls include bass (low-frequency adjustment), mid-range (mid-frequency adjustment), and treble (high-frequency adjustment).
As a starting point, it’s recommended to keep the EQ settings neutral and make slight adjustments based on your guitar’s natural sound. Begin by playing your guitar and slowly adjust the bass, mid, and treble controls, paying attention to the changes in tone. This will help you establish a baseline from which you can begin sculpting your desired sound.
When EQing your acoustic guitar, it’s crucial to strike a balance between the different frequency ranges. Boosting or cutting extreme amounts of frequencies can result in an artificial or unbalanced sound. Instead, aim for subtle adjustments to enhance specific characteristics of your guitar’s tone.
A common challenge when EQing acoustic guitars is combating feedback, especially in live performance settings. Feedback occurs when the sound from the speakers is picked up by the guitar’s pickup or microphone, creating a loop of amplified sound. To combat feedback, it’s important to find the frequencies that are causing the problem and reduce them slightly using the EQ controls.
In addition to managing feedback, EQ can also be used to cater to different playing styles and musical genres. For example, if you enjoy fingerstyle playing, boosting the mid-range frequencies can enhance the warmth and articulation of your playing. On the other hand, if you prefer strumming chords, slightly boosting the low and high frequencies can add depth and sparkle to your sound.
Remember, mastering acoustic guitar EQ takes time and experimentation. There is no one-size-fits-all solution, as everyone has their own unique playing style and preferred sound. Don’t be afraid to make adjustments and trust your ears to guide you in finding the sweet spot for your acoustic guitar’s EQ.
Understanding Frequency Bands
When it comes to equalizing your acoustic guitar, understanding frequency bands is essential. Frequency bands refer to the ranges of frequencies that music and sound are divided into. By grasping the concept of frequency bands, you’ll have the ability to target specific aspects of your guitar’s audio spectrum and shape their prominence in the overall sound.
There are three primary frequency bands to be aware of: low, mid, and high. Each band encompasses a different range of frequencies and contributes unique characteristics to your guitar’s tone.
The low-frequency band, also known as the bass range, is responsible for the deep, rumbling tones. These frequencies give your guitar its foundation and thickness. Adjusting the low-frequency EQ controls can add weight to your sound or reduce boomy resonances.
The mid-frequency band takes care of the warmth and body of your guitar’s sound. This range is where the majority of your guitar’s natural tone lies. By tweaking the mid-frequency EQ controls, you can emphasize the tonal characteristics of your instrument and make it stand out in the mix.
The high-frequency band, often called treble, affects the clarity and brightness of your guitar’s sound. Adjusting the high-frequency EQ controls can add sparkle and definition to your playing. It can also help your guitar cut through the mix, especially in dense arrangements.
It’s important to note that these frequency bands overlap to some extent. For example, the mid-range frequencies consist of both lower mid-range and upper mid-range frequencies. The specific frequency ranges can vary depending on the EQ controls or software you’re using, but having a basic understanding of how low, mid, and high frequencies work will help you identify areas that need adjustment.
When equalizing your acoustic guitar, it’s crucial to strike a balance among the frequency bands. Boosting or cutting extreme amounts of frequencies can result in an unnatural or unbalanced sound. Instead, aim for subtle adjustments to bring out the desired characteristics of your guitar’s tone.
Understanding the frequency bands also allows you to address specific issues. For example, if you notice muddiness in your guitar’s sound, it might be due to excessive low frequencies. In this case, reducing the bass range can help clean up the overall mix. Conversely, if your guitar lacks presence and articulation, boosting the mid-range frequencies can bring out the desired qualities in your sound.
By mastering the concept of frequency bands, you can better understand the spectrum of your acoustic guitar’s tone and make informed decisions when it comes to EQ adjustments. Experimenting with different frequency ranges and finding the right balance will allow you to create a well-rounded and professional sound that complements your playing style and musical preferences.
Finding the Right Balance
When it comes to EQing your acoustic guitar, finding the right balance is crucial. The goal is to shape your guitar’s sound in a way that enhances its natural characteristics and suits your musical style. Achieving the perfect balance involves careful consideration of the frequency bands and making subtle adjustments to achieve the desired tone.
One key aspect of finding the right balance is avoiding excessive boosts or cuts in the EQ. While it may be tempting to crank up the bass or treble to achieve a certain effect, it’s important to maintain a balanced overall sound. Extreme adjustments can result in a unnatural or muddled tone that lacks clarity.
Another consideration is the interaction between different frequency bands. Boosting the bass frequencies, for example, may cause the mid and high frequencies to be overshadowed or masked. To avoid this, it’s important to make adjustments across the frequency spectrum to ensure all elements of your guitar’s sound are properly represented.
When finding the right balance, it’s also important to consider the context in which you’re playing. Different environments and musical genres may require different EQ settings. For example, if you’re playing in a small, intimate venue, you may want to emphasize the mid frequencies to enhance the warmth and presence of your guitar. On the other hand, if you’re playing in a large, open-air space, you may need to boost the high frequencies to cut through the mix.
Listening is key when finding the right balance. Take the time to experiment with different EQ settings and listen carefully to how they affect the overall sound. Pay attention to the details and nuances of your guitar’s tone, and make subtle adjustments as needed. Trust your ears and make changes based on what sounds pleasing to you.
It’s important to note that finding the right balance may require some trial and error. Don’t be discouraged if you don’t achieve the desired sound right away. Take your time to experiment and fine-tune the EQ settings until you find the perfect balance that showcases your guitar’s unique voice.
In addition to EQ adjustments, other factors can affect the balance of your acoustic guitar’s sound. Consider the position of the guitar pickup, the type and gauge of strings you’re using, and your playing technique. These factors, along with EQ, work together to create the overall tone and balance of your instrument.
By taking the time to find the right balance through careful EQ adjustments and consideration of other factors, you can achieve a well-rounded and pleasing sound that enhances your playing and captivates your audience.
Tips for EQing an Acoustic Guitar
EQing an acoustic guitar requires a combination of technical know-how and a keen ear. Here are some useful tips to help you navigate the EQ process and achieve the best possible sound for your instrument:
- Start with a neutral EQ: Begin by setting all EQ controls to their neutral or center positions. This will give you a baseline to work from and help you understand the natural sound of your guitar.
- Make subtle adjustments: When EQing, it’s best to make small, incremental changes. Dramatic boosts or cuts can lead to an artificial or unbalanced sound. Take your time and listen carefully to the changes as you make adjustments.
- Listen from different angles: Don’t rely solely on standing in front of your amp or speakers. Move around the room and listen from different angles to get a better sense of how your guitar sounds in different positions.
- Consider the playing style: The EQ settings you choose should complement your playing style. If you’re a fingerstyle guitarist, you may want to boost the mid-range frequencies to bring out the warmth and articulation. If you’re a strummer, consider adjusting the bass and treble to enhance the rhythm and clarity of your playing.
- Address feedback issues: Feedback can be a challenge when amplifying an acoustic guitar. If you’re experiencing feedback, try reducing the frequencies that are causing the problem. Pay attention to the resonance frequencies of your guitar and make slight cuts in those areas.
- Experiment with different EQ pedal placements: If you’re using an EQ pedal, try placing it both before and after any other effects pedals in your signal chain. Each placement can have a different effect on the overall sound, so experiment to find the best placement for your desired tone.
- Take note of the room acoustics: Keep in mind that the acoustics of the room or venue you’re playing in will impact the sound of your guitar. Adjust your EQ settings accordingly to compensate for any reflections or resonances that may affect the overall sound.
- Record and listen back: Recording your acoustic guitar and listening to the playback can provide valuable insights into the EQ adjustments you’ve made. It allows you to hear your guitar objectively and make further refinements to achieve the desired sound.
- Don’t be afraid to experiment: EQing is an ongoing process of discovery. Don’t hesitate to try out different EQ settings and techniques to find your unique sound. Trust your ears and allow yourself the freedom to explore and experiment.
Remember, there is no one-size-fits-all approach to EQing an acoustic guitar. It’s all about finding the right combination of adjustments that brings out the best in your instrument and suits your personal preferences. With these tips in mind, you’ll be well on your way to achieving a rich, balanced, and captivating sound from your acoustic guitar.
Common EQ Techniques for Different Guitar Styles
When it comes to EQing an acoustic guitar, different playing styles require different approaches. Here are some common EQ techniques that can help you achieve the desired sound for various guitar styles:
- Fingerstyle: Fingerstyle players often seek warmth, clarity, and articulation in their sound. To achieve this, consider boosting the mid-range frequencies. This will bring out the natural warmth and definition of your fingerpicking patterns without sacrificing the low-end resonance.
- Strumming: Strumming chords requires a balance between rhythm and clarity. A common approach is to slightly boost the low and high frequencies while keeping the mid-range frequencies neutral. This helps accentuate the depth and sparkle of the strummed chords, allowing them to cut through the mix with clarity.
- Lead playing: Lead guitar playing often calls for a sound that stands out and cuts through in a solo or melodic context. To achieve this, consider boosting the high frequencies to add clarity and sustain to your notes. Be mindful not to overdo it, as excessive treble can result in a shrill or harsh sound.
- Folk or country: These styles often benefit from a balanced and natural acoustic sound. Start with a neutral EQ and make subtle adjustments as needed. Aim for clarity in the high-end while maintaining a warm and articulate mid-range.
- Rock or blues: For styles that require a more aggressive and dynamic sound, consider boosting the mid-range frequencies to add punch and presence. This can help your guitar cut through a dense mix and provide a punchy and driven tone.
- Acoustic-electric: If you’re playing an acoustic-electric guitar, you have the advantage of additional EQ options. Experiment with the built-in pickups or preamp settings, as well as the EQ controls on your amplifier or audio interface. Play around with different combinations to find the perfect balance that suits your style.
Remember that these techniques are merely starting points and can be adjusted based on your specific guitar, playing style, and personal preferences. Each player and instrument is unique, so don’t be afraid to experiment and find the EQ settings that bring out the best in your guitar’s sound.
Additionally, keep in mind that these EQ techniques can also be combined with other effects such as reverb, delay, or compression to further shape your guitar’s tone. The key is to listen carefully, trust your instincts, and refine the EQ settings until you achieve the desired sound for your chosen guitar style.
By understanding and applying these common EQ techniques, you can enhance your playing experience and bring out the best in your acoustic guitar sound, regardless of the musical style you’re pursuing.
EQing for Live Performances
When it comes to live performances, EQing your acoustic guitar plays a critical role in ensuring your instrument cuts through the mix and sounds balanced in the given venue. Here are some essential tips for EQing your acoustic guitar for live performances:
Consider the Venue: Every venue has its unique acoustics and challenges. Take the time to evaluate the room or space where you will be performing. Listen for any reflections or resonances that may impact the sound of your guitar. Adjust your EQ settings accordingly to compensate for any deficiencies or excessive frequencies.
Combat Feedback: Feedback can be a common issue when amplifying an acoustic guitar in a live setting. To prevent feedback, identify the frequencies that are causing the problem and make slight cuts in those areas using your EQ controls. Be mindful not to cut too much, as it can affect the overall sound quality.
Focus on Clarity: In a live performance, it’s crucial for your guitar to have clarity and to cut through the mix. Consider boosting the frequencies that provide definition and articulation, such as the high and mid-range frequencies. This will help ensure that your guitar’s nuances and details are heard by the audience.
Balance the Sound: Find the right balance between the low, mid, and high frequencies of your guitar. Make subtle adjustments to achieve a well-rounded and even tone. Be cautious not to boost or cut excessively, as it can result in an artificial or unbalanced sound.
Communicate with the Sound Engineer: If you have a dedicated sound engineer for your performance, communicate your desired sound and work together to achieve the best possible EQ settings. Explain your playing style, musical preferences, and any specific challenges you may face. The sound engineer can help fine-tune the EQ to optimize the sound in the specific venue and ensure it translates well to the audience.
Listen and Adjust: While performing live, listen carefully to your guitar’s sound through the monitors or PA system. Pay attention to any changes in the room dynamics and adjust your EQ settings accordingly. Trust your ears and make fine-tuning adjustments to ensure your guitar sounds its best in the live performance environment.
Test and Rehearse: Prior to the live performance, take the time to test and rehearse your EQ settings in the actual performance space. This will give you an opportunity to make any necessary adjustments and ensure that your guitar sounds its best in the specific venue.
Use High-Quality Equipment: Investing in high-quality equipment, such as microphones, pickup systems, and amplifiers, can make a significant difference in the sound of your acoustic guitar in a live performance. Ensure that your gear is in good condition and well-suited for the type of venue you are performing in.
Remember that each live performance setting is unique, and EQing for live performances requires adaptation to the specific environment. By considering the venue, combating feedback, focusing on clarity, balancing the sound, and working closely with the sound engineer, you can achieve a well-defined and captivating sound for your acoustic guitar in any live performance setting.
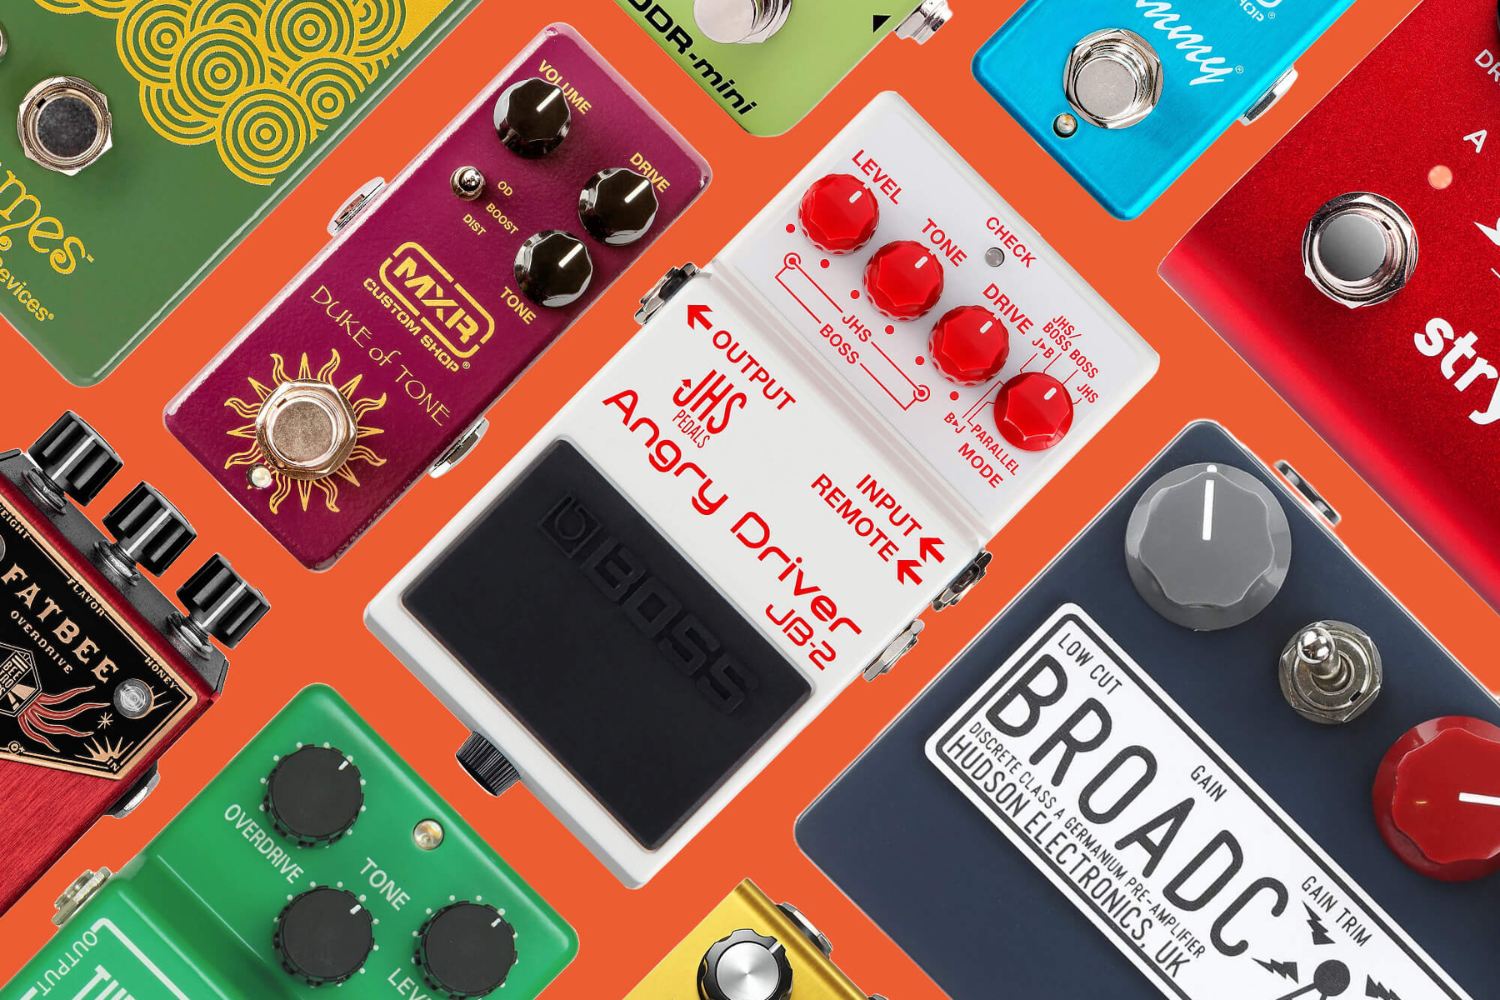
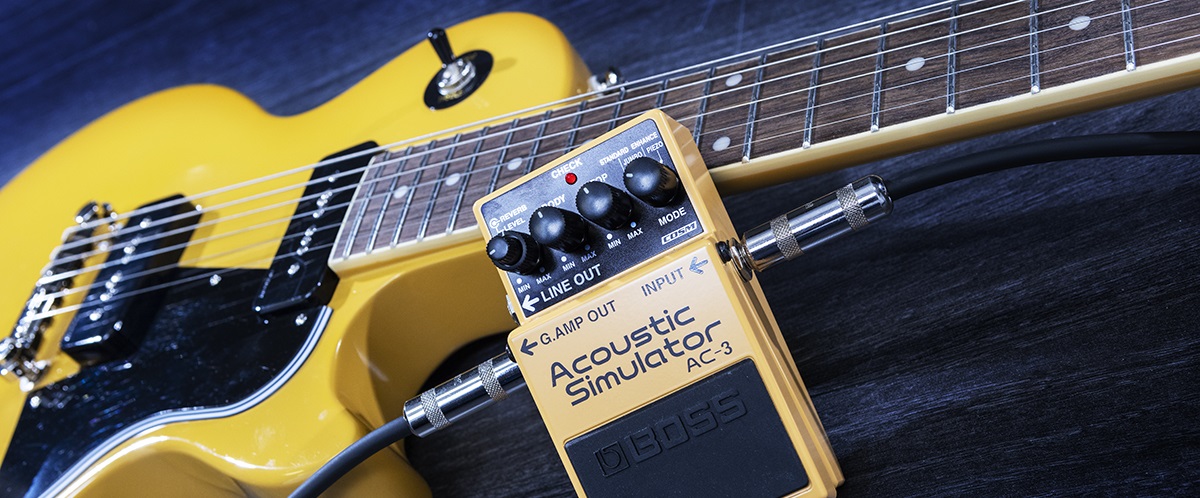
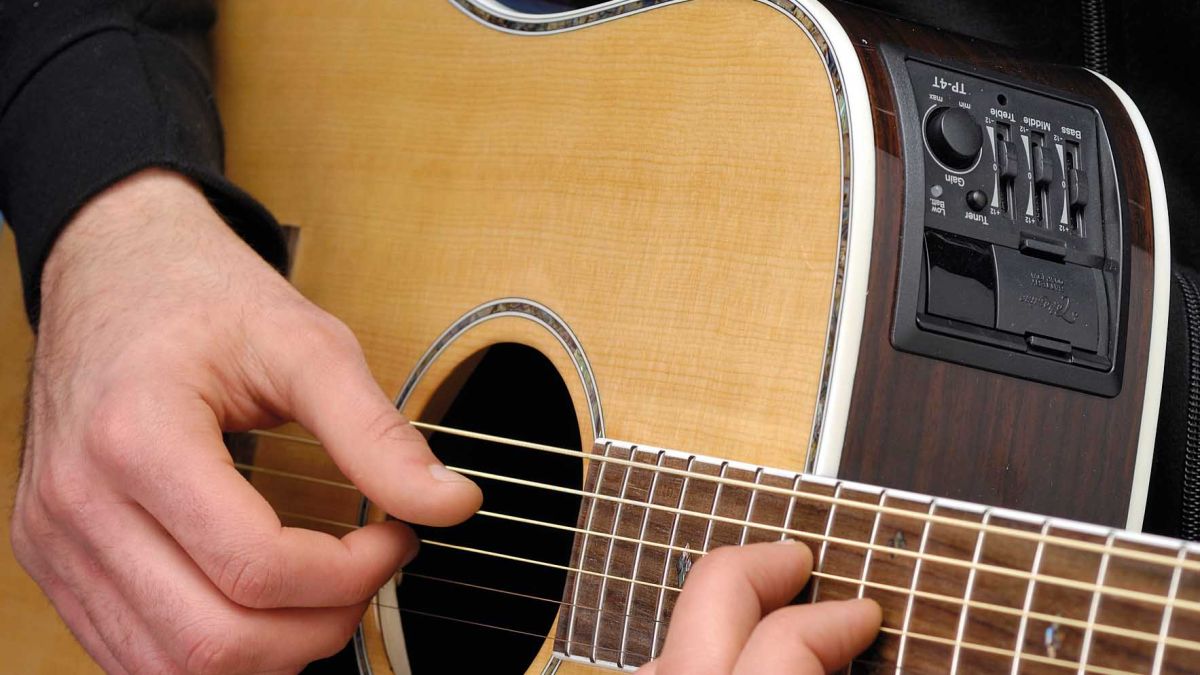
Using EQ Pedals for Acoustic Guitars
EQ pedals are a valuable tool for shaping the sound of your acoustic guitar. They provide you with additional control over the EQ settings, allowing you to refine your tone and achieve the desired sound. Here are some tips for using EQ pedals effectively with your acoustic guitar:
Know Your Pedal: Familiarize yourself with the controls and functionalities of your EQ pedal. Each pedal may have different EQ bands, frequency ranges, and adjustments. Understanding how your pedal works will enable you to make precise and intentional EQ adjustments.
Start with a Neutral Setting: Begin by setting all EQ controls on your pedal to their neutral or center positions. This will provide a balanced starting point, allowing you to make adjustments based on your guitar’s natural sound and the specific requirements of your playing style.
Make Subtle Adjustments: When using an EQ pedal, it’s best to make small, incremental changes. Take your time and listen carefully to the effect each adjustment has on your guitar’s sound. Making subtle adjustments will allow you to maintain a natural and well-balanced tone.
Experiment with Different Frequency Bands: EQ pedals usually offer control over multiple frequency bands. Take advantage of this flexibility by experimenting with each band. For example, you may boost the high frequencies to add brightness and definition to your guitar’s sound or adjust the mid-range to enhance the warmth and body.
Consider Your Playing Style and Musical Genre: Your playing style and the musical genre you’re performing in will influence the EQ adjustments you make with your pedal. For fingerstyle playing, you might want to emphasize the mid-range frequencies to bring out the expressiveness and clarity of individual notes. For strumming, adjusting the bass and treble frequencies can enhance the rhythm and dynamics of chord progressions.
Use in Combination with Other Effects: EQ pedals can work in tandem with other effects pedals to shape your guitar’s tone. Combine your EQ pedal with reverb, delay, or other modulation effects to further enhance your sound and create unique sonic textures.
Experiment and Trust Your Ears: EQing is subjective, and every guitarist has unique preferences. Experiment with different settings and trust your ears to guide you. Listen to how your guitar sounds with the EQ pedal engaged and make adjustments based on what sounds pleasing to you.
Practice and Rehearse: Incorporate your EQ pedal into your practice and rehearsal routine. Spend time experimenting with different settings and gaining familiarity with how they affect your guitar’s sound. This will help you develop a deeper understanding of your pedal and enable you to make on-the-fly adjustments during performances.
Using an EQ pedal with your acoustic guitar gives you greater control and flexibility over your instrument’s sound. By knowing your pedal, making subtle adjustments, considering your playing style, and experimenting with different settings, you can create a tailored and captivating sound with your acoustic guitar.
EQing in the Recording Studio
EQing in the recording studio is a crucial step in achieving a polished and professional sound for your acoustic guitar. With the ability to make precise adjustments during the mixing process, you can shape your guitar’s tone to fit perfectly within your overall mix. Here are some essential tips for EQing your acoustic guitar in the recording studio:
Preparation: Before diving into EQing, ensure that your acoustic guitar is properly recorded. Use high-quality microphones and experiment with different microphone placements to capture the best possible sound. Proper recording techniques lay the foundation for a successful EQing process.
Listen Analytically: When EQing in the studio, it’s important to listen critically and analytically. Pay attention to the different frequency ranges and how they interact with each other. Identify any problem areas or resonances that need to be addressed, and make thoughtful adjustments to achieve a balanced and professional sound.
Trim Unwanted Frequencies: Start by identifying any frequencies that are causing muddiness or unwanted resonances in the guitar’s sound. Use a narrow Q setting on your EQ plugin or hardware unit to cut these frequencies gently. Remember to make small adjustments and listen carefully to ensure you maintain the natural characteristics of the guitar.
Enhance Presence and Clarity: To give your acoustic guitar more presence and definition, consider gentle boosts in the mid-range and high-frequency bands. This can help the guitar stand out in the mix and add articulation to your playing. Be cautious not to overdo it and introduce harshness or sibilance.
Consider the Role in the Mix: Keep in mind how the acoustic guitar fits into the overall mix. If it’s intended to be a supporting instrument, consider reducing the low frequencies and boosting the mid-range to provide clarity and separation from other elements. If the guitar is the focal point, make appropriate adjustments to ensure it shines and takes center stage.
Panning and Stereo Imaging: EQing isn’t just about frequency adjustments. Use panning and stereo imaging techniques to position your acoustic guitar in the stereo field. If you’ve recorded multiple guitar tracks, consider spreading them out to create a wider and more immersive sonic experience.
Automation: Don’t be afraid to automate your EQ settings throughout the song to add dynamics and emphasize certain sections or passages. For example, you may want to boost the high frequencies during a guitar solo or reduce the low frequencies during a softer verse. Automation can bring out the nuances and make the guitar sound more expressive.
Reference Tracks: Use reference tracks from professional recordings as a benchmark. Compare your acoustic guitar sound to those of well-mixed and well-produced tracks in a similar genre. This can provide you with valuable insights and help you make more informed EQ decisions.
Trust Your Ears: Ultimately, trust your ears throughout the EQing process. Use your judgment and rely on what sounds best to you. Pay attention to the overall balance, clarity, and coherence of the guitar sound in the context of the song. Your ears are your best tool for creating a stellar acoustic guitar tone in the recording studio.
EQing in the recording studio is a meticulous process that requires attention to detail and a discerning ear. With careful adjustments, consideration of the guitar’s role in the mix, and reliance on your ears, you can achieve an outstanding and professionally-mixed acoustic guitar sound that enhances your overall production.
Conclusion
EQing your acoustic guitar is an art that can greatly enhance your playing experience and overall sound. By understanding the basics of acoustic guitar EQ, including frequency bands and finding the right balance, you gain the tools to shape your guitar’s tone to your liking. Whether you’re a fingerstyle player, a strummer, or a lead guitarist, knowing how to EQ your acoustic guitar allows you to bring out the best in your instrument and cater to different musical styles.
Throughout this article, we’ve explored various techniques and tips for EQing an acoustic guitar. From using EQ pedals to optimizing your sound in live performances or capturing the perfect tone in the recording studio, each context requires careful consideration and adjustments. Remember to listen critically, make subtle adjustments, and trust your ears throughout the EQing process.
Ultimately, Eqing is a subjective process that varies from player to player and depends on personal preferences and musical style. There is no one-size-fits-all approach, but by experimenting, rehearsing, and honing your skills, you can discover the unique sound that truly represents you as a guitarist.
So, embrace the opportunity to delve into the world of acoustic guitar EQ. Explore the frequency bands, experiment with different EQ settings, and let your guitar sing with clarity, warmth, and presence. With practice and an understanding of the principles discussed, you’ll have the tools to unlock endless possibilities and create a captivating and personalized sound for your acoustic guitar.