Introduction
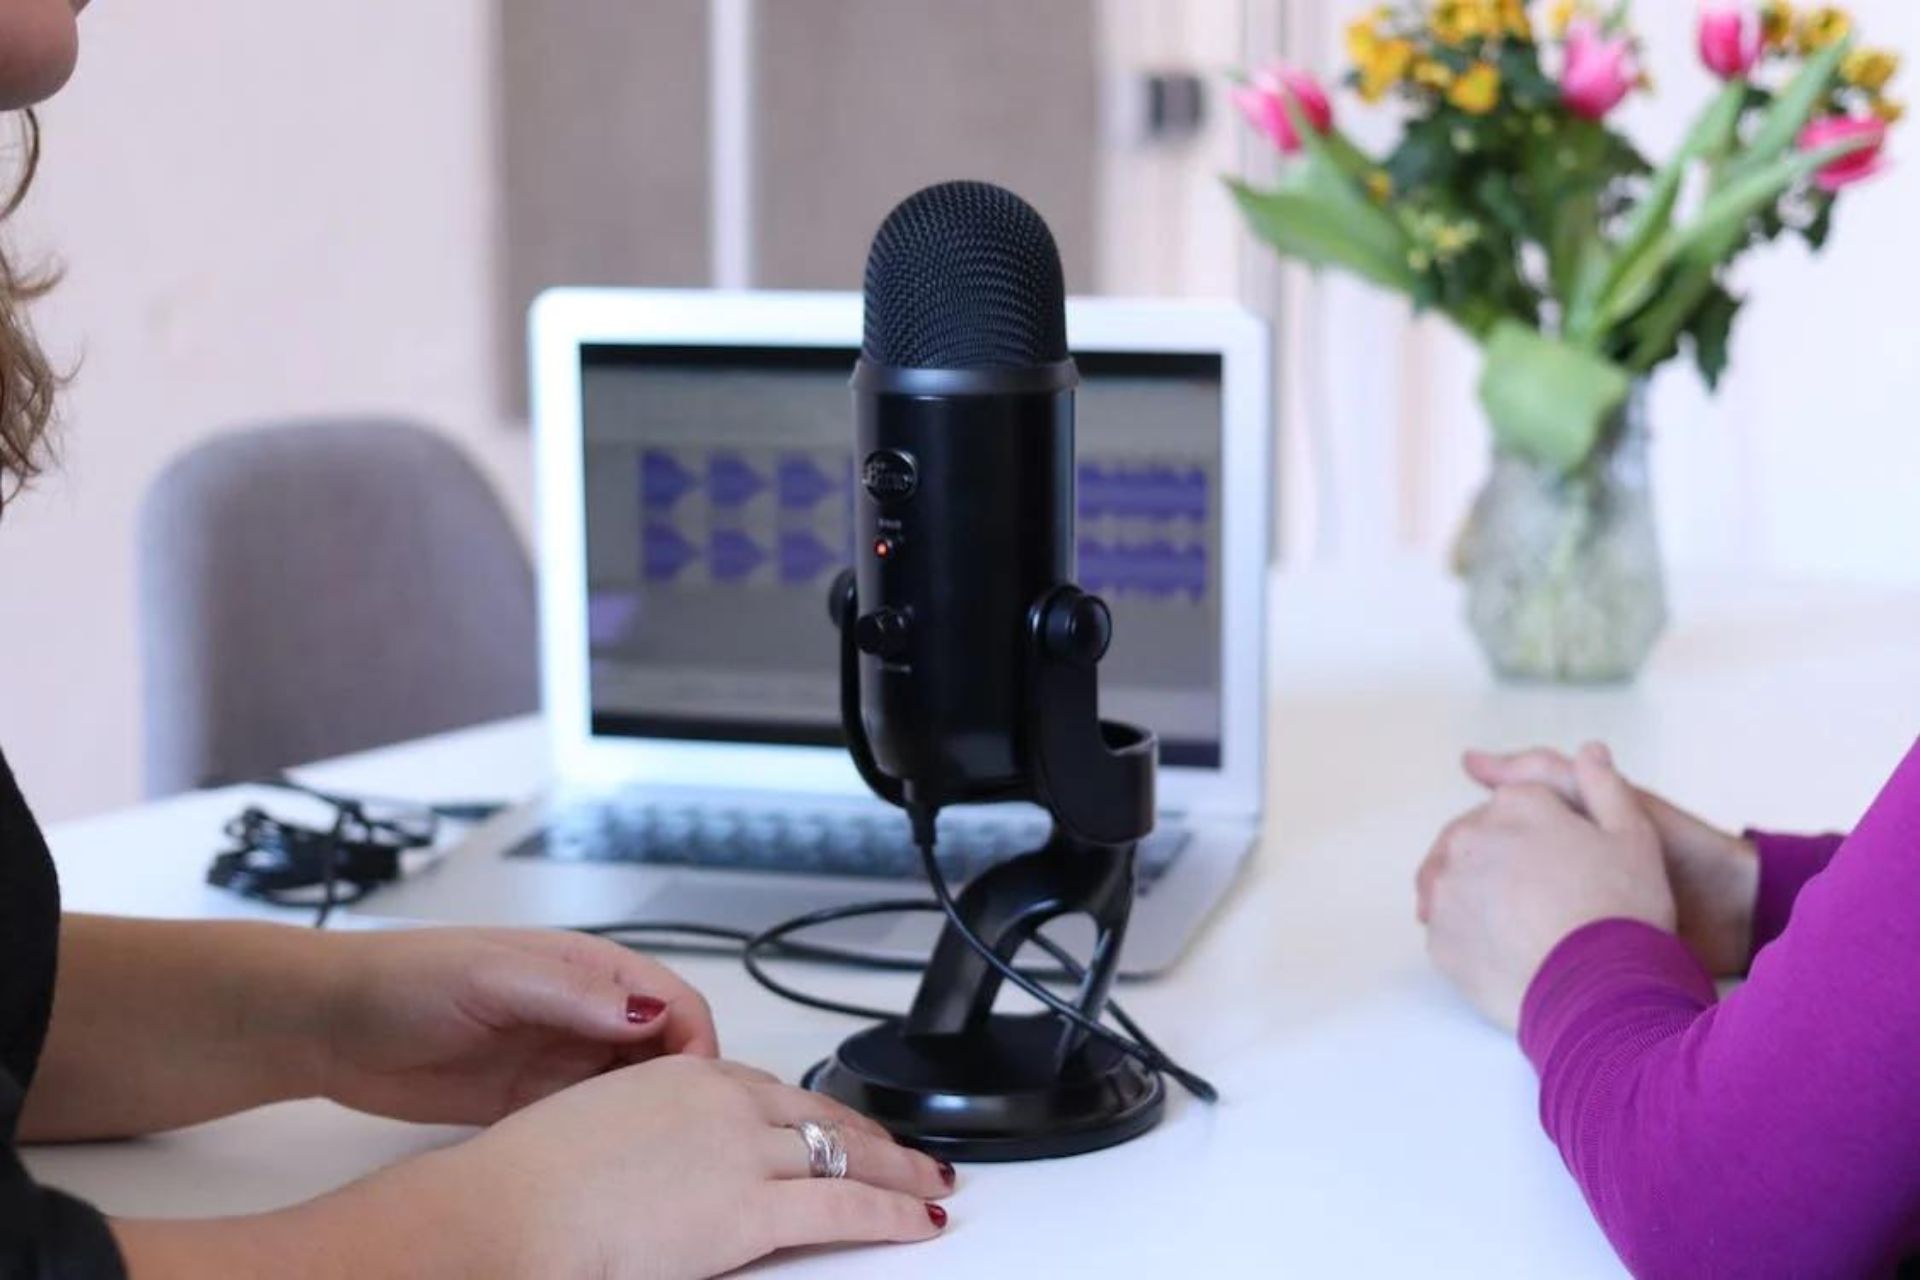
Welcome to the world of USB microphones, where high-quality audio recording and convenience converge. Whether you’re a content creator, musician, podcaster, or simply someone who wants to enhance their audio communications, USB microphones have become a popular choice. These plug-and-play devices allow users to capture professional-grade audio directly into their computers without the need for complex audio interfaces or external power sources.
However, the journey to perfect sound isn’t always smooth. One of the most common issues that USB microphone users encounter is crackling or popping sounds during recording or playback. These unwanted noises can be frustrating and diminish the overall audio quality.
In this article, we will delve into the causes of crackling in USB microphones and explore effective solutions to overcome this issue. By understanding the underlying reasons behind these crackling sounds, you can troubleshoot and resolve them, ensuring crisp and clear audio for all your recording needs.
Whether you’re a beginner or an experienced user, this guide will provide you with valuable insights and tips to get the most out of your USB microphone. So, let’s dive in and uncover the mysteries behind this crackling phenomenon!
Understanding USB Microphones
Before we dive into the specifics of crackling in USB microphones, let’s first gain a basic understanding of what USB microphones are and how they work. USB microphones, short for Universal Serial Bus microphones, are audio devices that connect directly to a USB port on your computer or laptop.
Unlike traditional microphones that require an audio interface or mixer to connect to your computer, USB microphones have a built-in audio interface. This means that they can convert analog signals from your voice or other sound sources into digital signals that your computer can understand.
USB microphones are designed to be plug-and-play devices, which means they can be easily connected to your computer without the need for additional drivers or complicated setup. Once connected, you can use them for a variety of applications such as voiceovers, podcasting, gaming, video conferencing, musical recordings, and more.
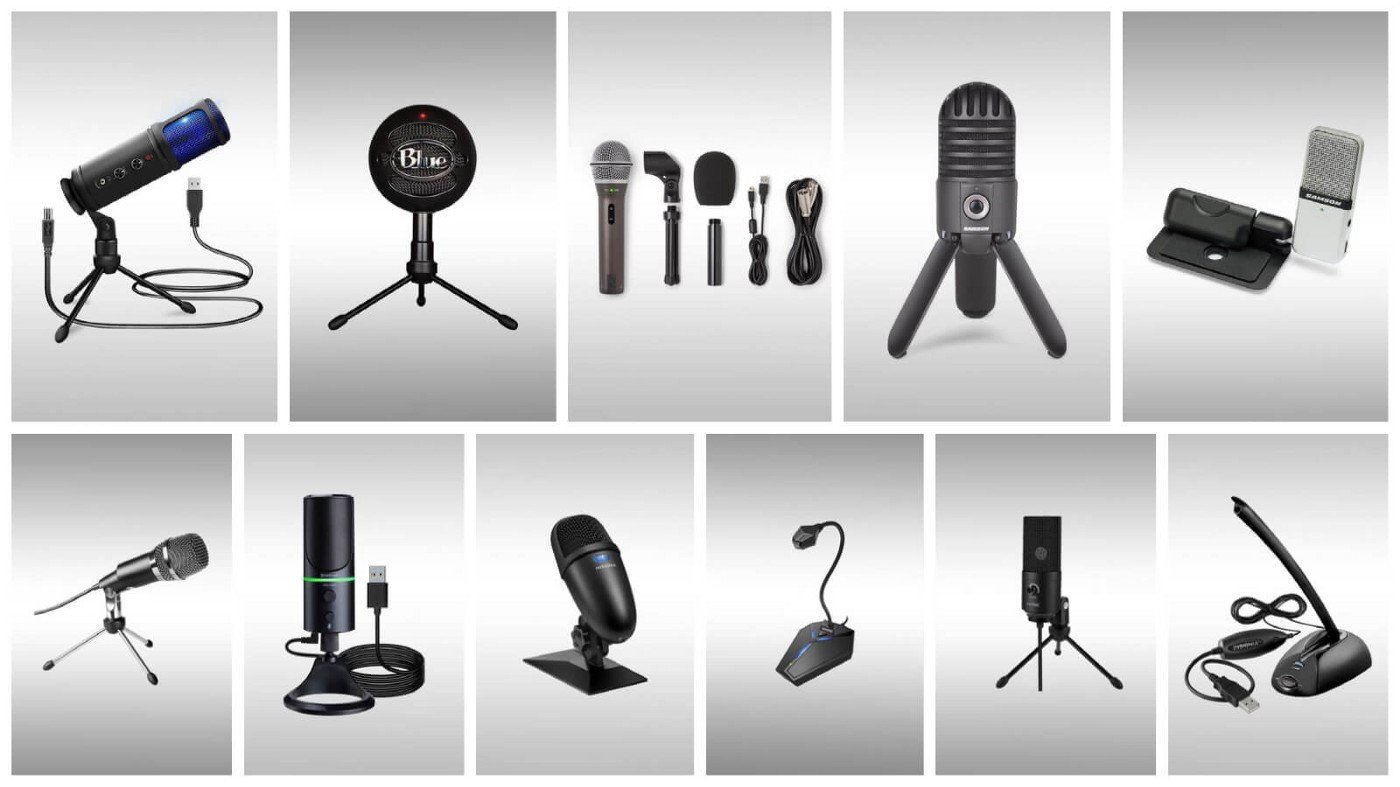
These microphones come in different shapes, sizes, and styles to cater to various needs and preferences. From compact handheld microphones to desktop condenser mics, USB microphones offer a range of options to suit different recording scenarios.
Furthermore, USB microphones often come with additional features such as volume control, headphone monitoring, mute buttons, gain adjustment, and even built-in pop filters to enhance your recording experience.
With their ease of use, versatility, and affordable price tags, USB microphones have gained popularity among both amateurs and professionals in the audio industry.
Now that we have a better understanding of USB microphones, let’s explore the phenomenon of crackling sounds and what causes them in these devices.
What is Crackling?
Crackling refers to the undesirable sound of popping, static, or distortion that occurs when using a USB microphone. Instead of producing clean and smooth audio, the microphone picks up unwanted noise that can disrupt the clarity and overall quality of your recordings or communication.
Crackling sounds can manifest in various ways, including intermittent pops, constant static, or occasional bursts of distortion. These noises can be frustrating, especially when you’re trying to deliver professional-grade audio content.
Crackling sounds are often more noticeable during quiet or silent moments in recordings when there is no or minimal audio input. They can also become more prominent when recording at higher volumes or when using sensitive microphones.
It’s important to distinguish crackling from other audio issues. For example, background noise, feedback, or distortion caused by excessive gain or improper microphone placement are separate problems that may require different solutions.
Now that we understand what crackling is and how it can impact your recordings, let’s explore the common causes behind this issue in USB microphones.
Common Causes of Crackling in USB Microphones
Crackling in USB microphones can occur due to various reasons. Understanding these causes will help you identify and resolve the issue more effectively. Here are some common factors that can contribute to crackling sounds:
1. Poor USB Connection: A weak or faulty USB connection can lead to data transfer issues, resulting in crackling sounds. Ensure that the USB cable is securely plugged into both the microphone and the computer’s USB port.
2. Interference from Electrical Devices: Nearby electrical devices, such as mobile phones, routers, or fluorescent lights, can cause electromagnetic interference that affects the audio signal. Keep your USB microphone away from such devices to minimize interference.
3. Incompatible or Outdated Drivers: Outdated or incompatible drivers can cause conflicts and affect the performance of your USB microphone. Ensure that you have the latest drivers installed for your microphone model.
4. Low Power Supply: USB microphones rely on the power provided by the USB port. Insufficient power can result in crackling sounds. Avoid using USB hubs and connect the microphone directly to a powered USB port on your computer.
5. Faulty USB Cable: A damaged or low-quality USB cable can introduce interference and affect the audio quality. Consider replacing the USB cable with a high-quality, shielded cable.
6. Sampling Rate and Bit Depth Mismatch: Incorrect settings of the sampling rate and bit depth in your computer’s audio settings can cause compatibility issues and lead to crackling sounds. Ensure that the settings match the specifications of your USB microphone.
7. Environmental Factors: Environmental factors, such as radio frequency interference or excessive humidity, can affect the performance of your USB microphone and introduce crackling sounds. Minimize these factors as much as possible during recording.
Identifying the specific cause of crackling in your USB microphone may require some troubleshooting. By addressing these common factors, you can take proactive steps to minimize or eliminate crackling sounds in your recordings or communications.
Poor USB Connection
A poor USB connection is one of the most common causes of crackling in USB microphones. When the connection between your microphone and computer is weak or unstable, data transfer issues can occur, leading to audio disruptions and crackling sounds.
To address this issue, follow these steps to ensure a solid and reliable USB connection:
1. Check the USB Ports: Inspect the USB port on your computer and the USB connector on the microphone for any physical damage or debris. Clean them gently if necessary.
2. Try a Different USB Port: Plug your USB microphone into a different USB port on your computer. This can help rule out any issues specific to a particular port on your computer.
3. Use a USB 2.0 Port: If your computer has both USB 3.0 and USB 2.0 ports, try connecting your USB microphone to a USB 2.0 port. Some USB microphones may have better compatibility and stability with USB 2.0.
4. Avoid USB Hubs: If you are using a USB hub to connect multiple devices, try connecting your microphone directly to a USB port on your computer instead. USB hubs can sometimes introduce data transfer issues and affect the overall performance of your USB microphone.
5. Securely Connect the USB Cable: Ensure that the USB cable is securely plugged into both the microphone and the computer’s USB port. A loose connection can lead to intermittent disruptions and crackling sounds.
6. Use a High-Quality USB Cable: If you suspect that the USB cable may be the issue, consider using a high-quality USB cable. Poorly shielded or damaged cables can introduce interference and affect the audio signal quality.
By taking these steps and ensuring a solid USB connection, you can minimize the chances of crackling in your USB microphone. If the issue persists, continue exploring the other common causes to identify and resolve the problem effectively.
Interference from Electrical Devices
Interference from electrical devices is another potential cause of crackling sounds in USB microphones. When nearby electronic devices emit electromagnetic signals, they can interfere with the audio signal captured by the microphone, resulting in unwanted noise and crackling.
Here are some steps you can take to minimize interference from electrical devices:
1. Keep Distance: Maintain a reasonable distance between your USB microphone and other electronic devices such as mobile phones, routers, monitors, or power adapters. The closer these devices are to your microphone, the higher the chance of electromagnetic interference.
2. Change Locations: If you notice consistent crackling sounds in a particular room or area, try moving to a different location. Some environments might have more interference due to wiring or nearby electronic equipment.
3. Shield Cables: Use shielded cables for your USB microphone. Shielded cables have a conductive layer that helps block electromagnetic interference. High-quality cables often provide better shielding and can help reduce crackling caused by external interference.
4. Opt for Balanced Connections: If possible, use microphones with balanced connections (such as XLR) rather than USB. Balanced connections help reduce the impact of electromagnetic interference by canceling out noise through a balanced signal.
5. Disable WiFi or Bluetooth: Temporarily turning off nearby WiFi routers or Bluetooth devices can help determine if they are causing interference. If the crackling subsides when these devices are off, consider adjusting their positioning to minimize the impact.
6. Use Power Filtering: Plug your computer and USB microphone into a power conditioner or surge protector with built-in noise filtering. These devices can help mitigate interference from the power supply and provide cleaner power to your equipment.
By implementing these measures, you can reduce the likelihood of interference from electrical devices and mitigate crackling in your USB microphone. If the issue persists, continue exploring other potential causes to identify and address the problem effectively.
Incompatible or Outdated Drivers
Incompatible or outdated drivers can be a common culprit behind crackling sounds in USB microphones. Drivers are software components that allow your computer’s operating system to communicate with and control the functionality of your USB microphone.
If the drivers are not properly installed, incompatible, or outdated, they can cause conflicts and impact the performance of your USB microphone, resulting in crackling sounds. Here are some steps to address driver-related issues:
1. Check for Updates: Visit the manufacturer’s website or the support page for your USB microphone. Look for any available driver updates specifically designed for your microphone model and download the latest version.
2. Reinstall the Drivers: Uninstall the existing drivers for your USB microphone from your computer. Then, reinstall the updated drivers that you downloaded from the manufacturer’s website. Follow the installation instructions provided with the driver package.
3. Use Generic USB Audio Drivers: If the manufacturer’s drivers are causing issues, you can try using the generic USB audio drivers that are built into your operating system. These drivers may not provide all the advanced features of the specific manufacturer’s drivers, but they can help eliminate compatibility issues.
4. Update Operating System: Ensure that your operating system is up to date with the latest updates and patches. Sometimes, system updates include driver updates or improvements that can resolve compatibility issues with USB devices.
5. Restart your Computer: After installing or updating drivers, restart your computer to ensure that any changes take effect properly. Sometimes, a simple restart can resolve driver-related issues.
It’s important to note that driver-related issues can vary depending on your operating system (e.g., Windows, macOS, Linux) and the specific model of your USB microphone. Always refer to the manufacturer’s documentation and instructions for the most accurate and up-to-date information on driver installation and compatibility.
By ensuring that you have the correct and updated drivers for your USB microphone, you can minimize the chances of crackling caused by driver conflicts or incompatibility. If the issue persists, continue exploring other potential causes to troubleshoot and resolve the problem effectively.
Low Power Supply
A low power supply can contribute to crackling sounds in USB microphones. USB microphones rely on the power provided by the USB port to operate. Insufficient power can lead to voltage drops and inadequate current flow, affecting the stability and performance of the microphone.
To address low power supply issues and minimize crackling sounds, consider the following steps:
1. Use a Powered USB Port: Connect your USB microphone to a powered USB port on your computer or laptop. These ports provide a higher power output, ensuring sufficient power supply to drive the microphone and prevent voltage drops.
2. Avoid USB Hubs: If possible, avoid using USB hubs to connect your microphone. USB hubs may not provide enough power to properly support the microphone’s operation, leading to low power supply issues and resulting in crackling sounds.
3. Disconnect Unused USB Devices: If you have multiple USB devices connected to your computer, disconnect any that are not necessary. This helps free up power resources and allows your USB microphone to receive adequate power for optimal performance.
4. Use External Power Sources: In some cases, USB microphones may have the option to be powered by an external power source, such as a power adapter or batteries. If available, consider using these alternative power sources to ensure a stable and sufficient power supply.
5. Consider a USB Audio Interface: For users experiencing persistent low power supply issues, using a USB audio interface can be a viable solution. USB audio interfaces have dedicated power sources and provide higher-quality audio conversion, eliminating potential power-related problems.
It’s worth noting that USB microphone power requirements can vary depending on the model and manufacturer. Always refer to the specifications and documentation provided by the manufacturer for specific power requirements and recommendations.
By ensuring a sufficient power supply to your USB microphone, you can minimize crackling caused by low power situations. If the issue persists, continue exploring other potential causes to identify and address the problem effectively.
Faulty USB Cable
A faulty USB cable is another common cause of crackling sounds in USB microphones. USB cables can deteriorate over time or be subjected to physical damage, resulting in poor data transmission and disruptions in the audio signal.
To address this issue and minimize crackling sounds, consider the following steps:
1. Inspect the USB Cable: Carefully examine the USB cable that connects your microphone to your computer. Look for any visible signs of damage, such as frayed or bent connectors, exposed wires, or kinks in the cable. A faulty cable may have poor connections, leading to crackling sounds.
2. Replace the USB Cable: If you suspect that the USB cable is the cause of the issue, replace it with a new, high-quality USB cable. Choose a cable with proper shielding and a sturdy build to ensure reliable data transmission and minimize the chances of crackling.
3. Avoid Excessive Cable Length: USB cables have limitations when it comes to maintaining a reliable data connection over long distances. If your USB cable is excessively long (usually longer than 15 feet or 5 meters), it may contribute to signal degradation and crackling sounds. Consider using a shorter cable or a USB extender/repeater if needed.
4. Use a Certified USB Cable: When purchasing a replacement USB cable, ensure that it is certified for USB use. Certified cables are tested for compliance with USB standards and are less likely to introduce interference or data transmission issues.
5. Securely Connect the USB Cable: Ensure that the USB cable is securely plugged into both the microphone and the USB port on your computer. A loose connection can lead to intermittent disruptions and cause crackling sounds.
Remember to test your USB microphone with the new cable to see if the crackling issue is resolved. If the problem persists, continue exploring other potential causes to troubleshoot and resolve the issue effectively.
Sampling Rate and Bit Depth Mismatch
A mismatch in sampling rate and bit depth settings can cause crackling sounds in USB microphones. The sampling rate refers to the number of audio samples captured per second, while the bit depth determines the level of precision in representing each audio sample.
To minimize crackling caused by sampling rate and bit depth mismatch, consider the following steps:
1. Check the Sampling Rate and Bit Depth Settings: Open your computer’s audio settings and ensure that the sampling rate and bit depth settings match the specifications of your USB microphone. Setting an incorrect sampling rate or bit depth can result in compatibility issues and lead to crackling sounds.
2. Match the Specifications: Consult the documentation or manufacturer’s specifications for your USB microphone to determine the correct sampling rate and bit depth settings. Make the necessary adjustments in your computer’s audio settings to align with the microphone’s specifications.
3. Avoid Drastic Changes in Settings: If you need to change the sampling rate or bit depth settings, do so gradually. Drastic changes can cause conflicts and result in crackling sounds. Experiment with different settings while monitoring the audio output to find the optimal configuration.
4. Ensure Recording/Playback Software Compatibility: Some recording or playback software may have specific requirements or limitations when it comes to sampling rate and bit depth. Ensure that your software is compatible with the settings you have chosen for your USB microphone.
5. Restart Recording/Playback Software: After making any changes to sampling rate and bit depth settings, restart your recording or playback software. This helps ensure that the software recognizes the new settings and properly processes the audio signal.
By ensuring the correct sampling rate and bit depth settings, you can minimize the chances of crackling caused by mismatched settings. However, if the crackling persists, continue exploring other potential causes to identify and resolve the issue effectively.
Environmental Factors
Environmental factors can contribute to crackling sounds in USB microphones. These factors may not be directly related to the microphone itself but can have an impact on its performance and the quality of the audio signal.
Consider the following environmental factors and steps to minimize crackling caused by them:
1. Radio Frequency Interference (RFI): Radio waves emitted by nearby devices, such as wireless routers, cell phones, or other electronic equipment, can interfere with the audio signal, leading to crackling sounds. Keep your USB microphone away from such devices, especially if they are known to emit strong RFI.
2. Excessive Humidity: High levels of humidity can affect the components of your USB microphone and introduce crackling sounds. Avoid using the microphone in extremely humid environments or consider using dehumidifiers to control moisture levels.
3. Shielding against Electromagnetic Interference (EMI): Some USB microphones come with built-in shielding to protect against electromagnetic interference. Ensure that your microphone has proper shielding, especially if you are using it in environments with strong EMI sources like power transformers or lighting systems.
4. Physical Vibrations: Vibrations from nearby equipment or movements of the microphone itself can introduce unwanted noise and cause crackling sounds. Place the microphone on a stable surface or use a shock mount to reduce vibrations and improve recording quality.
5. Acoustic Treatment: Poor room acoustics can contribute to unwanted reflections, echoes, and background noise, which can affect the overall audio quality. Consider using acoustic treatments like foam panels or diffusers to minimize these issues and improve the clarity of your recordings.
6. Avoid Airflow: Direct air currents from fans or air conditioning vents can cause turbulence and introduce noise into the microphone. Position the microphone away from such airflows to reduce the impact on audio quality.
By considering and mitigating these environmental factors, you can help minimize crackling sounds in your USB microphone. However, if the issue persists, continue exploring other potential causes to troubleshoot and resolve the problem effectively.
How to Fix Crackling in USB Microphones
If you’re experiencing crackling sounds in your USB microphone, don’t worry! There are several steps you can take to troubleshoot and resolve this issue. Follow these recommendations to fix crackling in USB microphones:
1. Check and Reconnect the USB Connection: Inspect the USB cable and connectors for any damage or loose connections. Securely plug the USB cable into the microphone and the USB port on your computer.
2. Eliminate Interference from Electrical Devices: Keep your USB microphone away from electronic devices that may emit electromagnetic interference, such as mobile phones, routers, or fluorescent lights.
3. Update or Reinstall Drivers: Visit the manufacturer’s website and ensure that you have the latest drivers installed for your USB microphone. If the drivers are outdated or causing conflicts, reinstall them or try using generic USB audio drivers.
4. Ensure Sufficient Power Supply: Connect your USB microphone to a powered USB port on your computer to ensure a stable power supply. Avoid using USB hubs and consider using external power sources if available.
5. Replace the USB Cable: If the USB cable is damaged or of poor quality, replace it with a high-quality, shielded USB cable to improve data transmission and minimize interference.
6. Adjust Sampling Rate and Bit Depth Settings: Verify that the sampling rate and bit depth settings in your computer’s audio settings match the specifications of your USB microphone. Adjust the settings if necessary.
7. Consider Environmental Factors: Minimize the impact of environmental factors like radio frequency interference, excessive humidity, and physical vibrations by keeping your microphone away from such influences.
By implementing these solutions, you can effectively address crackling sounds in your USB microphone and restore high-quality audio. Remember to test your microphone after each step to verify if the issue has been resolved. If the problem persists, you may need to consult the manufacturer or seek additional technical support.
Check and Reconnect the USB Connection
One of the first steps to take when tackling crackling sounds in a USB microphone is to check and reconnect the USB connection. A loose or faulty connection can disrupt the data transfer between the microphone and the computer, resulting in crackling or intermittent audio.
Follow these steps to properly check and reconnect the USB connection:
1. Inspect the USB Cable: Examine the USB cable for any visible damage, such as frayed wires or bent connectors. If you notice any issues, it’s crucial to replace the cable to ensure a reliable connection.
2. Clean the USB Ports: Dust or debris in the USB ports of both the microphone and the computer can affect the connection. Use compressed air or a soft brush to carefully clean the USB ports before reconnecting the cable.
3. Reconnect the USB Cable: Ensure that the USB cable is securely and fully inserted into both the USB port on the microphone and the USB port on the computer. A loose connection can cause intermittent disruptions and result in crackling sounds.
4. Try a Different USB Port: If you continue to experience crackling even after checking the connection, try plugging the USB cable into a different USB port on your computer. Sometimes, certain USB ports may have better performance or power capabilities.
5. Use a USB 2.0 Port: If your computer has both USB 2.0 and USB 3.0 ports, try connecting your USB microphone to a USB 2.0 port instead. Some USB microphones may have better compatibility and stability when using USB 2.0 ports.
6. Avoid Using USB Hubs: Connecting the microphone directly to a USB port on your computer rather than through a USB hub can help ensure a more stable connection. USB hubs may introduce additional latency or power limitations that can affect the audio quality.
By carefully checking and reestablishing the USB connection, you can eliminate any potential connection issues that may be causing the crackling sounds. If the problem persists, continue exploring further troubleshooting steps to pinpoint and resolve the root cause.
Eliminate Interference from Electrical Devices
Interference from electrical devices can often contribute to crackling sounds in USB microphones. Electrical devices, such as mobile phones, routers, and fluorescent lights, emit electromagnetic signals that can interfere with the audio signal, resulting in unwanted noise and crackling.
To minimize interference from electrical devices and reduce crackling sounds, consider the following steps:
1. Keep Distance: Ensure that your USB microphone is positioned away from other electronic devices. The closer these devices are to your microphone, the higher the likelihood of electromagnetic interference. Create physical separation between your microphone and devices known to cause interference.
2. Shielding: USB microphones are typically designed with built-in shielding to minimize interference. Make sure that your microphone has proper shielding and that it is in optimal condition. Consider upgrading to a higher-quality USB microphone if you consistently experience interference issues.
3. Turn Off or Relocate Devices: When experiencing crackling sounds, turn off or relocate electronic devices that are known to cause interference. Mobile phones, routers, and other wireless devices can emit strong electromagnetic signals that can disrupt the audio signal. Moving them away from the microphone can help reduce interference.
4. Use Balanced Connections: If your recording setup allows for it, consider using microphones with balanced connections, such as XLR, and connecting them through a dedicated audio interface. Balanced connections help to minimize the impact of external electromagnetic interference.
5. Adjust Antenna Placement: If you’re using wireless devices, such as wireless routers or wireless microphones, ensure that the antennas are properly positioned for optimal performance. Adjusting the position of the antennas may help minimize interference.
6. Use Shielded Cables and Filters: Consider using shielded cables for your USB microphone. These cables are designed to reduce electromagnetic interference and can help minimize crackling sounds. Additionally, using electromagnetic interference (EMI) filters on the power cords of electrical devices can help mitigate interference.
By taking these steps to eliminate interference from nearby electrical devices, you can significantly reduce crackling sounds in your USB microphone. If the issue persists, continue exploring other potential causes and solutions to address the problem effectively.
Update or Reinstall Drivers
Outdated or incompatible drivers can often be the cause of crackling sounds in USB microphones. Drivers are software components that allow your computer’s operating system to communicate with and control the functionality of your USB microphone. If the drivers are not properly installed, incompatible, or outdated, they can cause conflicts and impact the performance of your microphone, resulting in crackling sounds.
To address driver-related issues and minimize crackling, consider the following steps:
1. Check for Updates: Visit the manufacturer’s website or the support page specific to your USB microphone model. Look for any available driver updates or software downloads. These updates often include bug fixes and compatibility improvements that can resolve crackling issues.
2. Download and Install Updates: Download the latest driver updates or software packages from the manufacturer’s website. Follow the provided instructions to install or update the drivers on your computer. Make sure to select the correct drivers for your specific operating system.
3. Reinstall the Drivers: If you are still experiencing crackling sounds after updating the drivers, consider reinstalling them. To do this, uninstall the existing drivers for your USB microphone through the Device Manager (Windows) or Audio MIDI Setup (macOS). Then, restart your computer and reinstall the latest drivers you downloaded.
4. Use Generic USB Audio Drivers: If the manufacturer’s drivers are causing issues, you can try using the generic USB audio drivers provided by your operating system. These drivers are built-in and may offer better compatibility and stability. To switch to generic drivers, uninstall the manufacturer’s drivers and restart your computer. The generic drivers should automatically install upon restart.
5. Update Your Operating System: Ensure that your operating system is up to date with the latest updates and patches. Sometimes, system updates include driver updates or improvements that can resolve compatibility issues with USB devices, including your USB microphone.
Remember to restart your computer after installing or updating the drivers to ensure that any changes take effect properly. Additionally, consult the manufacturer’s documentation or support resources for specific instructions related to driver installation and compatibility for your USB microphone model.
By updating or reinstalling drivers, you can resolve potential conflicts and compatibility issues, leading to a smoother audio experience with minimized crackling in your USB microphone. If the problem persists, continue exploring other potential causes to troubleshoot and address the issue effectively.
Ensure Sufficient Power Supply
Insufficient power supply can contribute to crackling sounds in USB microphones. USB microphones rely on the power provided by the USB port to operate. If the power supply is inadequate, it can result in voltage drops and improper current flow, impacting the stability and performance of the microphone and leading to crackling sounds in the audio signal.
To address low power supply issues and minimize crackling sounds, consider the following steps:
1. Use a Powered USB Port: Connect your USB microphone to a powered USB port on your computer or laptop. Powered USB ports provide a higher power output, ensuring sufficient power supply to drive the microphone and prevent voltage drops.
2. Avoid Using USB Hubs: USB hubs may not provide enough power to support the proper operation of your USB microphone. If possible, connect the microphone directly to a USB port on your computer without using a hub. This eliminates any potential power limitations or latency introduced by the hub.
3. Disconnect Unused USB Devices: Disconnect any unnecessary USB devices from your computer. Having too many USB devices connected simultaneously can overload the power supply, affecting the performance of your USB microphone. Reduce the power load by disconnecting any devices that are not in use.
4. Use External Power Sources: Some USB microphones have the option to be powered by an external power source, such as a power adapter or batteries. If available, consider using these alternative power sources to ensure a stable and sufficient power supply to your microphone.
5. Check USB Port Specifications: Not all USB ports provide the same power output. Some USB ports on your computer may offer more power than others. Refer to the specifications of your USB microphone and the USB ports on your computer to identify the ports that are capable of delivering the necessary power for optimal microphone performance.
By ensuring a sufficient power supply to your USB microphone, you can minimize crackling caused by low power situations. Remember to test your microphone after implementing these steps to check if the issue has been resolved. If the problem persists, continue exploring other potential causes to troubleshoot and address the issue effectively.
Replace the USB Cable
A faulty or low-quality USB cable can contribute to crackling sounds in USB microphones. USB cables can deteriorate over time, suffer physical damage, or have poor shielding, leading to disruptions in data transmission and introducing interference that affects the audio signal quality.
To minimize crackling caused by the USB cable, consider the following steps:
1. Inspect the USB Cable: Carefully examine the USB cable connected to your microphone. Look for any visible signs of damage, such as frayed or exposed wiring, bent or damaged connectors, or kinks in the cable. If you notice any issues, it’s crucial to replace the cable to ensure reliable data transmission.
2. Choose a High-Quality USB Cable: Invest in a high-quality USB cable that is designed for data transmission with good shielding. Look for cables with thicker wiring, reinforced connectors, and proper shielding to minimize electromagnetic interference and improve signal quality.
3. Try a Different USB Cable: If you suspect that the current USB cable might be causing the crackling sounds, try using a different USB cable. Borrow one from another device, or purchase a new one that meets the necessary specifications for your USB microphone.
4. Use a Shorter USB Cable: Excessively long USB cables (usually longer than 15 feet or 5 meters) can introduce signal degradation and performance issues. If possible, use a shorter USB cable to reduce the chances of crackling caused by signal loss.
5. Avoid Low-Quality Cables: Low-quality or generic USB cables may lack proper shielding, resulting in interference and poor data transmission. Invest in cables from reputable manufacturers to ensure better build quality and performance.
6. Ensure Secure Connections: When replacing the USB cable, make sure to securely plug it into both the USB port on your microphone and the USB port on your computer. Loose connections can introduce intermittent disruptions and result in crackling sounds.
By replacing the USB cable with a high-quality, properly shielded cable, you can significantly minimize crackling caused by faulty or low-quality connections. Ensure to test your microphone after replacing the cable to verify if the issue has been resolved. If the problem persists, continue exploring other potential causes to troubleshoot and address the issue effectively.
Adjust Sampling Rate and Bit Depth Settings
Incorrect sampling rate and bit depth settings can lead to crackling sounds in USB microphones. The sampling rate determines the number of audio samples captured per second, while the bit depth determines the level of detail or precision in representing each audio sample. Mismatched settings between the microphone and the computer can result in compatibility issues and affect the audio signal quality.
To address crackling caused by sampling rate and bit depth mismatch, consider the following steps:
1. Check the Sampling Rate and Bit Depth Settings: Open the audio settings on your computer and ensure that the sampling rate and bit depth settings match the specifications of your USB microphone. Refer to the documentation provided with your microphone for the correct settings.
2. Adjust the Settings: If the sampling rate and bit depth settings do not match, make the necessary adjustments in your computer’s audio settings. Use the recommended settings specified by the manufacturer of your USB microphone for optimal performance.
3. Avoid Drastic Changes: When changing the sampling rate or bit depth settings, avoid making drastic changes. Sudden and significant changes in these settings can cause conflicts and result in crackling sounds. Instead, make gradual adjustments and observe the impact on the audio quality.
4. Test Different Settings: Experiment with different sampling rate and bit depth settings while monitoring the audio output. Find a combination that provides the best audio quality without introducing crackling or distortion. Keep in mind that higher sampling rates and bit depths generally result in better audio fidelity, but they may require more processing power.
5. Restart Recording/Playback Software: After making changes to the sampling rate and bit depth settings, restart your recording or playback software. This ensures that the software recognizes the new settings and properly processes the audio signal.
By adjusting the sampling rate and bit depth settings to match the specifications of your USB microphone, you can ensure compatibility and minimize crackling sounds. Remember to test your microphone after each adjustment to verify if the issue has been resolved. If the problem persists, continue exploring other potential causes to troubleshoot and address the issue effectively.
Consider Environmental Factors
Environmental factors can play a significant role in causing crackling sounds in USB microphones. While these factors may not be directly related to the microphone itself, they can have an impact on its performance and the overall audio signal quality.
Here are some environmental factors to consider when attempting to minimize crackling sounds:
1. Radio Frequency Interference (RFI): Radio frequency interference can be caused by nearby electronic devices such as mobile phones, routers, or other wireless equipment. These devices emit radio waves that can interfere with the audio signal, leading to crackling sounds. Keep your USB microphone away from such devices, especially when recording in environments with a high degree of RFI.
2. Excessive Humidity: High levels of humidity can negatively affect the components of your USB microphone, leading to crackling sounds. Avoid using the microphone in areas with excessive humidity, or consider using dehumidifiers to control moisture levels and maintain a more stable recording environment.
3. Shielding against Electromagnetic Interference (EMI): USB microphones are typically designed with built-in shielding to help minimize electromagnetic interference. Ensure that your microphone has adequate shielding and is in optimal condition. Upgrading to a higher-quality USB microphone with better shielding can further reduce the potential for crackling caused by EMI.
4. Physical Vibrations: External vibrations can introduce unwanted noise and contribute to crackling sounds in USB microphones. Place the microphone on a stable surface or use a shock mount to reduce vibrations caused by handling or nearby equipment.
5. Room Acoustics: Poor room acoustics can lead to reflections, echoes, and background noise, which can negatively impact the audio quality. Consider using acoustic treatments such as foam panels, bass traps, or diffusers to improve the acoustics of your recording space and minimize unwanted noise.
6. Avoid Airflow: Direct airflow from fans, air conditioning vents, or open windows can cause turbulence and generate noise in the microphone. Position the microphone away from sources of airflow to minimize the impact on audio quality.
By considering and addressing these environmental factors, you can significantly reduce crackling sounds in your USB microphone. However, if the issue persists, continue exploring other potential causes and solutions to effectively troubleshoot and solve the problem.
Conclusion
Crackling sounds in USB microphones can be frustrating, but with the right knowledge and troubleshooting steps, this issue can often be resolved. By understanding the common causes of crackling, such as poor USB connections, interference from electrical devices, outdated drivers, low power supply, faulty USB cables, sampling rate and bit depth mismatch, and environmental factors, you can effectively address and minimize crackling sounds in your USB microphone.
Throughout this guide, we have explored various solutions for each cause. Some of these solutions include checking and reconnecting the USB connection, eliminating interference from electrical devices, updating or reinstalling drivers, ensuring sufficient power supply, replacing the USB cable, adjusting sampling rate and bit depth settings, and considering environmental factors. By implementing these steps and troubleshooting techniques, you can greatly improve the audio quality and reduce or eliminate crackling in your USB microphone recordings.
Remember to approach each troubleshooting step with patience and thoroughness. Test your USB microphone after each adjustment to assess whether the crackling has been resolved or reduced. It’s important to keep in mind that the specific solution that works for you may vary depending on your microphone model and the unique circumstances surrounding your recording setup.
If you have exhausted all troubleshooting options and the crackling persists, it may be worth consulting the manufacturer’s support resources or seeking assistance from technical experts who are knowledgeable in audio equipment. They can provide further guidance and advice to help identify and resolve the issue.
By taking proactive steps to address crackling sounds in your USB microphone, you can ensure a smooth and professional audio experience for your recordings, podcasts, voiceovers, or any other creative projects you undertake. Enjoy producing high-quality audio with your USB microphone and let your creativity shine without the hindrance of crackling sounds.