Introduction
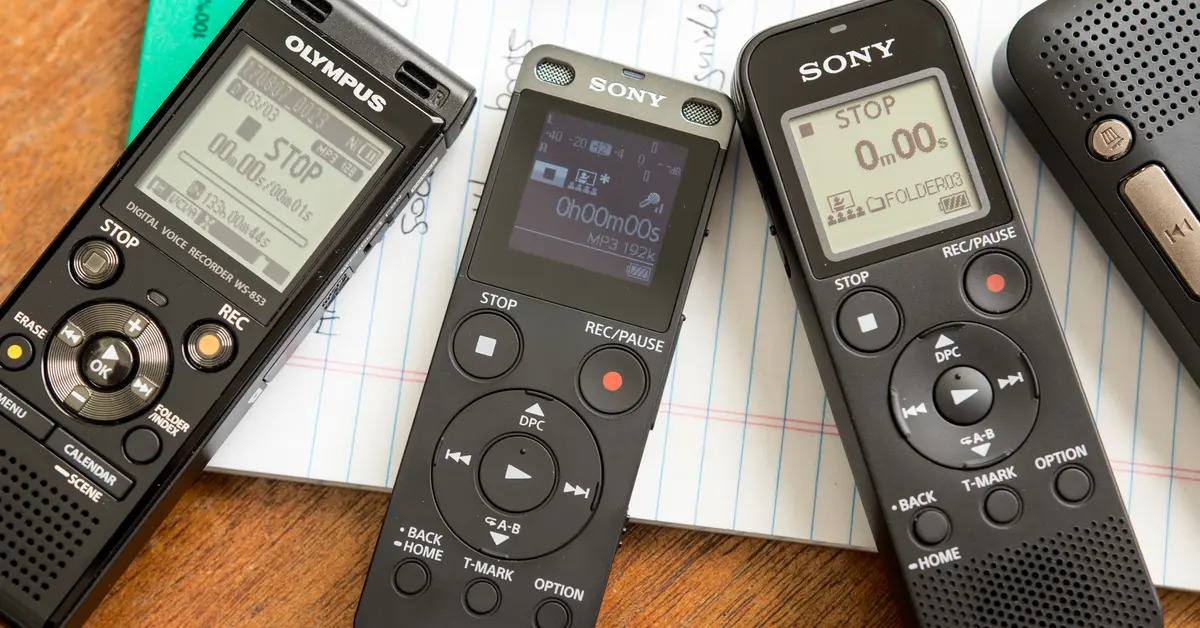
Are you looking to level up your audio recording game? Look no further than the Zoom H5. This versatile portable recorder is not only perfect for capturing high-quality audio on the go, but it can also double as a USB microphone for your computer. By connecting the Zoom H5 to your computer via USB, you can enjoy the convenience of using it as a powerful microphone for any audio recording application.
Whether you are a podcaster, musician, voice-over artist, or simply someone who needs a reliable USB microphone for video conferences or online meetings, the Zoom H5 is an excellent choice. With its advanced features and easy-to-use interface, you can achieve professional-grade audio recordings from the comfort of your own home.
In this guide, we will walk you through the process of setting up your Zoom H5 as a USB microphone. We will cover everything from connecting the device to your computer to adjusting the audio settings and configuring the recording parameters. By following these steps, you’ll be able to harness the power of the Zoom H5 and elevate your audio recording capabilities.
Before we dive into the technical details, let’s take a closer look at some of the reasons why the Zoom H5 is a popular choice among audio enthusiasts:
- Portability: The Zoom H5’s compact and lightweight design makes it easy to carry and use in various recording environments.
- High-quality audio: With its built-in X/Y stereo microphones and compatibility with external microphones, the Zoom H5 captures rich and detailed sound.
- Versatility: The Zoom H5 can be used not only as a USB microphone but also as a standalone recorder, audio interface, and field recorder.
- User-friendly interface: The intuitive controls and LCD screen on the Zoom H5 make it easy to navigate and adjust settings.
Now that we’ve covered the basics, let’s proceed with the step-by-step instructions for setting up the Zoom H5 as a USB microphone. Get ready to enhance your audio recording experience and unlock new possibilities with this powerful device.
Setting up the Zoom H5 as a USB microphone
Before you can start using the Zoom H5 as a USB microphone, you’ll need to ensure that the device is properly set up and connected to your computer. Follow these steps to get started:
- Power on the Zoom H5: Press and hold the power button on the side of the Zoom H5 to turn it on. The LCD screen will light up, indicating that the device is ready for use.
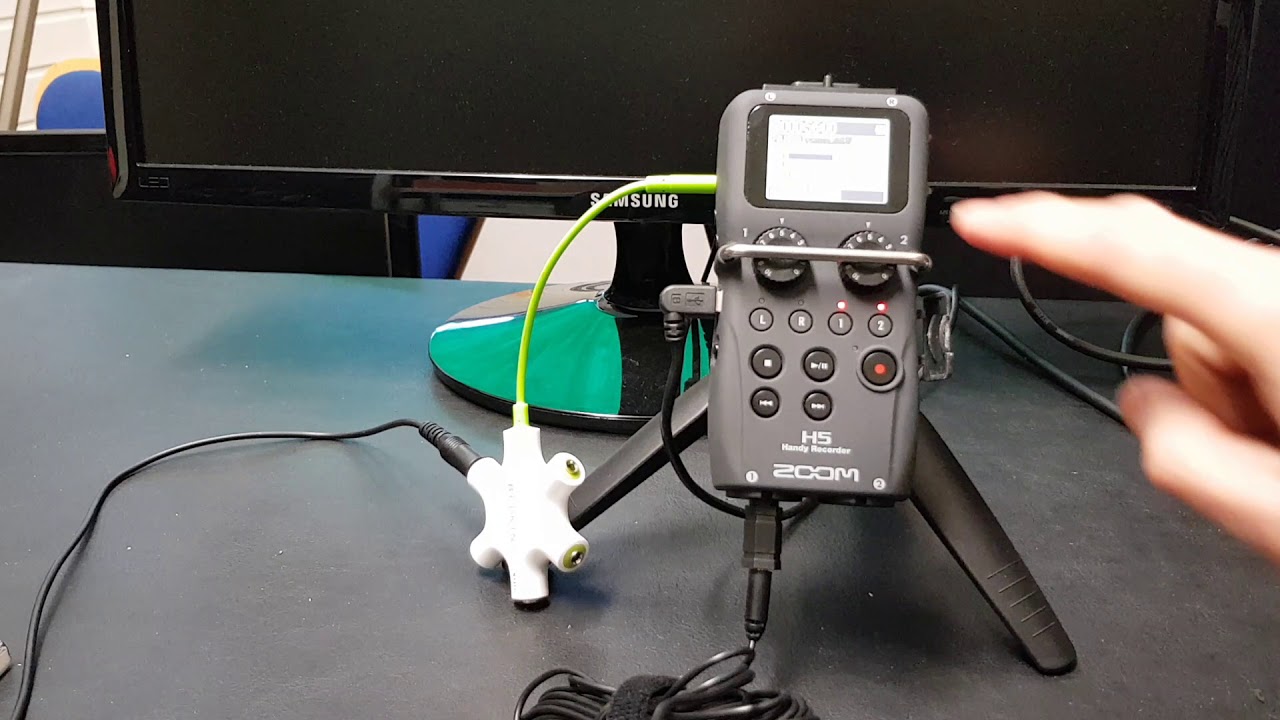
- Connect the Zoom H5 to your computer: Take the USB cable that came with the Zoom H5 and plug one end into the USB port on the device. Plug the other end into an available USB port on your computer. The computer will recognize the device and install any necessary drivers.
- Put the Zoom H5 into USB audio interface mode: On the Zoom H5, press the Menu button to enter the menu screen. Use the navigation buttons to scroll to the USB submenu and press the Select button. From the USB submenu, select the “Audio interface” option. This mode allows the Zoom H5 to function as a USB microphone.
- Check the connection status: Once you have selected the “Audio interface” option, the LCD screen will display “Connected” to indicate that the Zoom H5 is successfully connected to your computer as a USB microphone.
With the Zoom H5 now set up as a USB microphone, you can proceed to adjust the audio settings on your computer for optimal recording performance. In the next section, we will walk you through the process of making these adjustments.
Connecting the Zoom H5 to your computer
Once you have powered on the Zoom H5 and put it in USB audio interface mode, it’s time to connect it to your computer. Follow these steps to ensure a proper connection:
- Locate the USB port on the Zoom H5: The USB port is located on the side of the Zoom H5. It is a standard USB Type-B port.
- Locate an available USB port on your computer: Look for an available USB port on your computer. This is usually located on the side or back of the computer tower or on the side of a laptop.
- Connect the USB cable: Take the USB cable that came with the Zoom H5 and plug the Type-B end into the USB port on the device. Plug the other end, which is a standard USB Type-A, into the available USB port on your computer.
- Wait for the computer to recognize the Zoom H5: Once the Zoom H5 is connected to your computer, it may take a moment for the computer to recognize the device. During this time, the Zoom H5’s LCD screen will display “Connecting.”
- Install any necessary drivers: In some cases, your computer may require additional drivers to properly recognize and use the Zoom H5 as a USB microphone. If prompted, follow the on-screen instructions to install the necessary drivers. The drivers can usually be downloaded from the Zoom website.
- Confirm the connection: Once the computer recognizes the Zoom H5, the LCD screen on the device will display “Connected” or show relevant information about the connection status.
It is important to note that the Zoom H5 should be the only audio device connected to your computer during this process. Disconnect any other USB microphones or audio interfaces to avoid conflicts and ensure proper functionality.
With the Zoom H5 successfully connected to your computer, you’re ready to move on to the next step: adjusting the audio settings on your computer.
Adjusting the audio settings on your computer
After connecting the Zoom H5 to your computer, it’s important to adjust the audio settings to ensure optimal recording quality. Follow these steps to adjust the audio settings on your computer:
- Access the audio settings: Depending on your operating system, access the audio settings by navigating to the Control Panel or System Preferences. Look for the “Sound” or “Audio” option.
- Select the recording tab: Once in the audio settings, navigate to the “Recording” or “Input” tab. Here, you will see a list of available recording devices.
- Select the Zoom H5 as the default recording device: Locate the Zoom H5 in the list of available recording devices. Right-click on the Zoom H5 and select “Set as Default Device” or a similar option. This ensures that your computer will use the Zoom H5 as the default recording device.
- Adjust the recording volume: Still in the audio settings, locate the volume control for the Zoom H5. Adjust the recording volume to an appropriate level. It’s recommended to set the volume to around 70-80% to avoid audio distortion.
- Test the audio input: To ensure that the Zoom H5 is properly configured, speak into the microphone or tap on it lightly. Check the volume levels on your computer to confirm that the Zoom H5 is receiving audio input.
It’s important to note that the configuration process may vary slightly depending on your operating system. If you are unsure how to access or adjust the audio settings on your computer, refer to the user manual or online documentation for your particular operating system.
By adjusting the audio settings on your computer and selecting the Zoom H5 as the default recording device, you have taken the necessary steps to optimize the audio quality. Now, let’s move on to configuring the recording parameters on the Zoom H5 itself.
Selecting the Zoom H5 as the default recording device
Once you have connected the Zoom H5 to your computer and adjusted the audio settings, it’s time to select the Zoom H5 as the default recording device. This ensures that any application or software you use will recognize the Zoom H5 as the primary input device for recording audio. Follow these steps to select the Zoom H5 as the default recording device:
- Access the recording devices: Right-click on the speaker icon in the system tray (Windows) or click on the Apple menu and select “System Preferences,” then “Sound” (Mac).
- Navigate to the recording tab: In the Sound or Audio settings, locate the “Recording” or “Input” tab.
- Choose the Zoom H5 as the default recording device: In the list of available recording devices, locate the Zoom H5. Click on it to select it as the default recording device.
- Adjust the recording volume: Once you have selected the Zoom H5 as the default recording device, you can further adjust the recording volume to your preference. Use the volume slider or settings provided in the Sound or Audio settings.
- Test the audio input: To ensure that the Zoom H5 is functioning as the default recording device, speak into the microphone or tap on it lightly. Check the volume levels on your computer to confirm that the Zoom H5 is receiving audio input.
It’s important to note that the steps to select the default recording device may vary depending on your operating system. If you encounter any difficulties or are unsure about the process, consult the user manual or online documentation relevant to your operating system.
By selecting the Zoom H5 as the default recording device, you have successfully ensured that any recording application or software on your computer will utilize the Zoom H5 for audio input. Now, let’s move on to configuring the recording parameters on the Zoom H5 itself.
Configuring the recording parameters on the Zoom H5
Now that the Zoom H5 is connected to your computer and selected as the default recording device, it’s time to configure the recording parameters on the Zoom H5 itself. This ensures that you can capture audio with the desired settings and customize the recording experience to your specific needs. Follow these steps to configure the recording parameters on the Zoom H5:
- Access the menu options: On the Zoom H5, press the Menu button to enter the menu screen. Use the navigation buttons to scroll and select the desired menu option.
- Select the recording format: Navigate to the “Recording Format” menu option and select the desired recording format. The Zoom H5 supports various formats, including WAV and MP3. Choose the format that best suits your needs.
- Set the sample rate and bit depth: Within the recording format menu, you can also adjust the sample rate and bit depth. Higher sample rates and bit depths generally result in higher audio quality, but they also require more storage space. Select the appropriate settings for your intended use.
- Choose the input type: Depending on your recording needs, you can configure the Zoom H5 to use the built-in X/Y stereo microphones, external microphones, or a combination of both. Navigate to the “Input Type” menu and select the desired option.
- Adjust the recording gain: The Zoom H5 allows you to adjust the recording gain to control the sensitivity of the microphone input. Navigate to the “Input Gain” menu and make adjustments based on your recording environment and input source.
- Set the low cut filter and limiter: The Zoom H5 features a low cut filter and limiter to enhance audio quality and prevent distortion. Navigate to the respective menus and configure the settings according to your needs.
- Save your settings: Once you have configured the desired recording parameters, navigate to the “Save” or “Apply” menu option to save your settings. You can also create custom presets for different recording scenarios.
It’s important to explore and experiment with the various menu options on the Zoom H5 to fully utilize its capabilities. Refer to the user manual for more detailed instructions and information on the available features.
By configuring the recording parameters on the Zoom H5, you have tailored the device to your specific recording requirements. Now, with everything set up, let’s explore how to use the Zoom H5 as a USB microphone with audio recording software.
Using the Zoom H5 as a USB microphone with audio recording software
Now that you have set up and configured the Zoom H5 as a USB microphone, it’s time to utilize it with audio recording software on your computer. With the Zoom H5 connected and recognized by your computer, follow these steps to get started:
- Choose your preferred audio recording software: There are various audio recording software options available, both paid and free. Choose the software that best suits your needs and install it on your computer.
- Open the audio recording software: Once the software is installed, open it on your computer. Locate the settings or preferences section related to audio input devices.
- Select the Zoom H5 as the input device: In the audio input settings, choose the Zoom H5 as the input device or microphone. The software should recognize the Zoom H5 as a connected USB microphone.
- Adjust the recording levels: Use the audio recording software to adjust the recording levels for the Zoom H5. This will ensure that the input signal is optimized and prevents clipping or distortion during recording.
- Start recording: With the Zoom H5 connected as the input device and the recording levels adjusted, you are ready to start recording. Use the controls within the audio recording software to initiate and stop the recording.
- Monitor your audio: Most recording software provides the option to monitor your audio while recording. This allows you to listen to the incoming audio through headphones or speakers connected to your computer.
- Review and edit your recordings: Once you have finished recording, you can review and edit your recordings within the audio recording software. Trim, apply effects, and mix multiple audio tracks to achieve the desired result.
Remember to save your recordings in a suitable format and location on your computer for easy access in the future. These steps are a general guideline, and the specific process may vary depending on the audio recording software you are using. Refer to the software’s documentation or support resources for more detailed instructions.
By using the Zoom H5 as a USB microphone with audio recording software, you can leverage the device’s high-quality audio capture capabilities and enjoy a seamless and professional recording experience. Now, let’s dive into some common issues you may encounter and how to troubleshoot them.
Troubleshooting common issues
While setting up and using the Zoom H5 as a USB microphone, you may encounter some common issues. Don’t worry, as these can often be easily resolved. Here are some troubleshooting tips to help you address these issues:
- No audio input: If you’re not hearing any sound or receiving any input signal from the Zoom H5, check your computer’s audio settings. Ensure that the Zoom H5 is selected as the default recording device and that the input volume is properly adjusted.
- Distorted audio: If you’re experiencing distortion or clipping in your recordings, reduce the input gain on the Zoom H5 or adjust the recording levels in your audio recording software. This will help prevent the audio from peaking and ensure a clean recording.
- No playback audio: If you’re unable to hear playback audio from the Zoom H5, check your computer’s audio output settings. Ensure that the Zoom H5 is selected as the default playback device and that the volume is turned up.
- Driver issues: If you’re encountering driver-related problems, such as unrecognized device or connectivity issues, visit the Zoom website to download and install the latest drivers for the Zoom H5. This should resolve any compatibility or driver-related issues.
- USB connection issues: If you’re experiencing intermittent or unstable USB connections, try using a different USB cable or a different USB port on your computer. This can help troubleshoot any potential issues with the USB connection.
- Software compatibility: If you’re having trouble using the Zoom H5 with specific audio recording software, ensure that your software is up to date and compatible with the Zoom H5. Check the software’s documentation or support resources for any known compatibility issues or recommended settings.
- Power and battery issues: If the Zoom H5 is not powering on or is experiencing battery drain quickly, ensure that it is properly charged or connected to a power source. If using batteries, replace them with fresh ones and make sure they are inserted correctly.
If you’ve tried these troubleshooting steps and you’re still experiencing issues, consult the Zoom H5 user manual or reach out to the Zoom support team for further guidance and assistance.
By being aware of these common issues and troubleshooting methods, you can overcome any hurdles that may arise and continue to enjoy the benefits of using the Zoom H5 as a USB microphone.
Conclusion
Congratulations! You have successfully set up and configured your Zoom H5 as a USB microphone, allowing you to capture high-quality audio for various recording purposes. By following the step-by-step instructions in this guide, you have learned how to connect the Zoom H5 to your computer, adjust the audio settings, select it as the default recording device, and configure the recording parameters.
With the Zoom H5 connected, you can now utilize it as a USB microphone with your preferred audio recording software. Whether you’re recording podcasts, music, voice-overs, or participating in online meetings, the Zoom H5 offers versatility and excellent audio quality.
Remember, troubleshooting can be necessary at times. By being familiar with common issues and knowing how to address them, you can overcome any obstacles that may arise during your recording sessions.
Now that you are equipped with the knowledge and skills to make the most of your Zoom H5 as a USB microphone, let your creativity flow and capture stunning audio for your projects. Whether you’re a professional or an aspiring audio enthusiast, the Zoom H5 is sure to elevate your recording experience.
Happy recording!