Introduction
Playing the acoustic guitar is a joyous experience, but when an unwanted buzzing sound emerges, it can quickly turn into a frustrating ordeal. This article aims to equip you with the knowledge and techniques to eliminate buzzing on your acoustic guitar, allowing you to fully enjoy your musical journey.
A buzzing sound on an acoustic guitar can stem from various factors, such as improper setup, old strings, or issues with the guitar's components. Understanding the root cause of the buzzing is crucial in effectively addressing the problem. Whether you are a seasoned musician or a beginner, the following steps will guide you through the process of identifying and resolving the buzzing issue, ensuring that your guitar produces clear and harmonious tones.
By examining the guitar's action, adjusting the truss rod, inspecting the nut and saddle, changing the strings, and addressing fret buzz, you can systematically troubleshoot and resolve the buzzing problem. Each step plays a crucial role in ensuring that your acoustic guitar produces the rich, resonant tones it is renowned for, free from the interference of unwanted buzzing.
With a clear understanding of the causes of buzzing and the methods to rectify them, you can restore your acoustic guitar to its optimal performance, allowing you to immerse yourself in the soul-stirring melodies that only a finely-tuned instrument can produce. Let's delve into the steps to identify and eliminate buzzing on your acoustic guitar, ensuring that your musical journey remains uninterrupted by unwanted distractions.
Check the Action
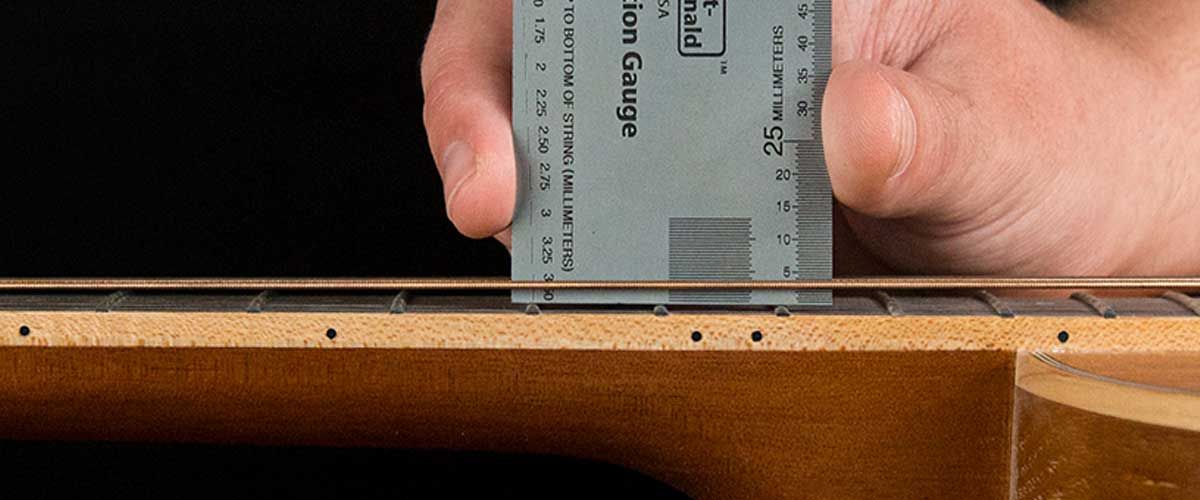
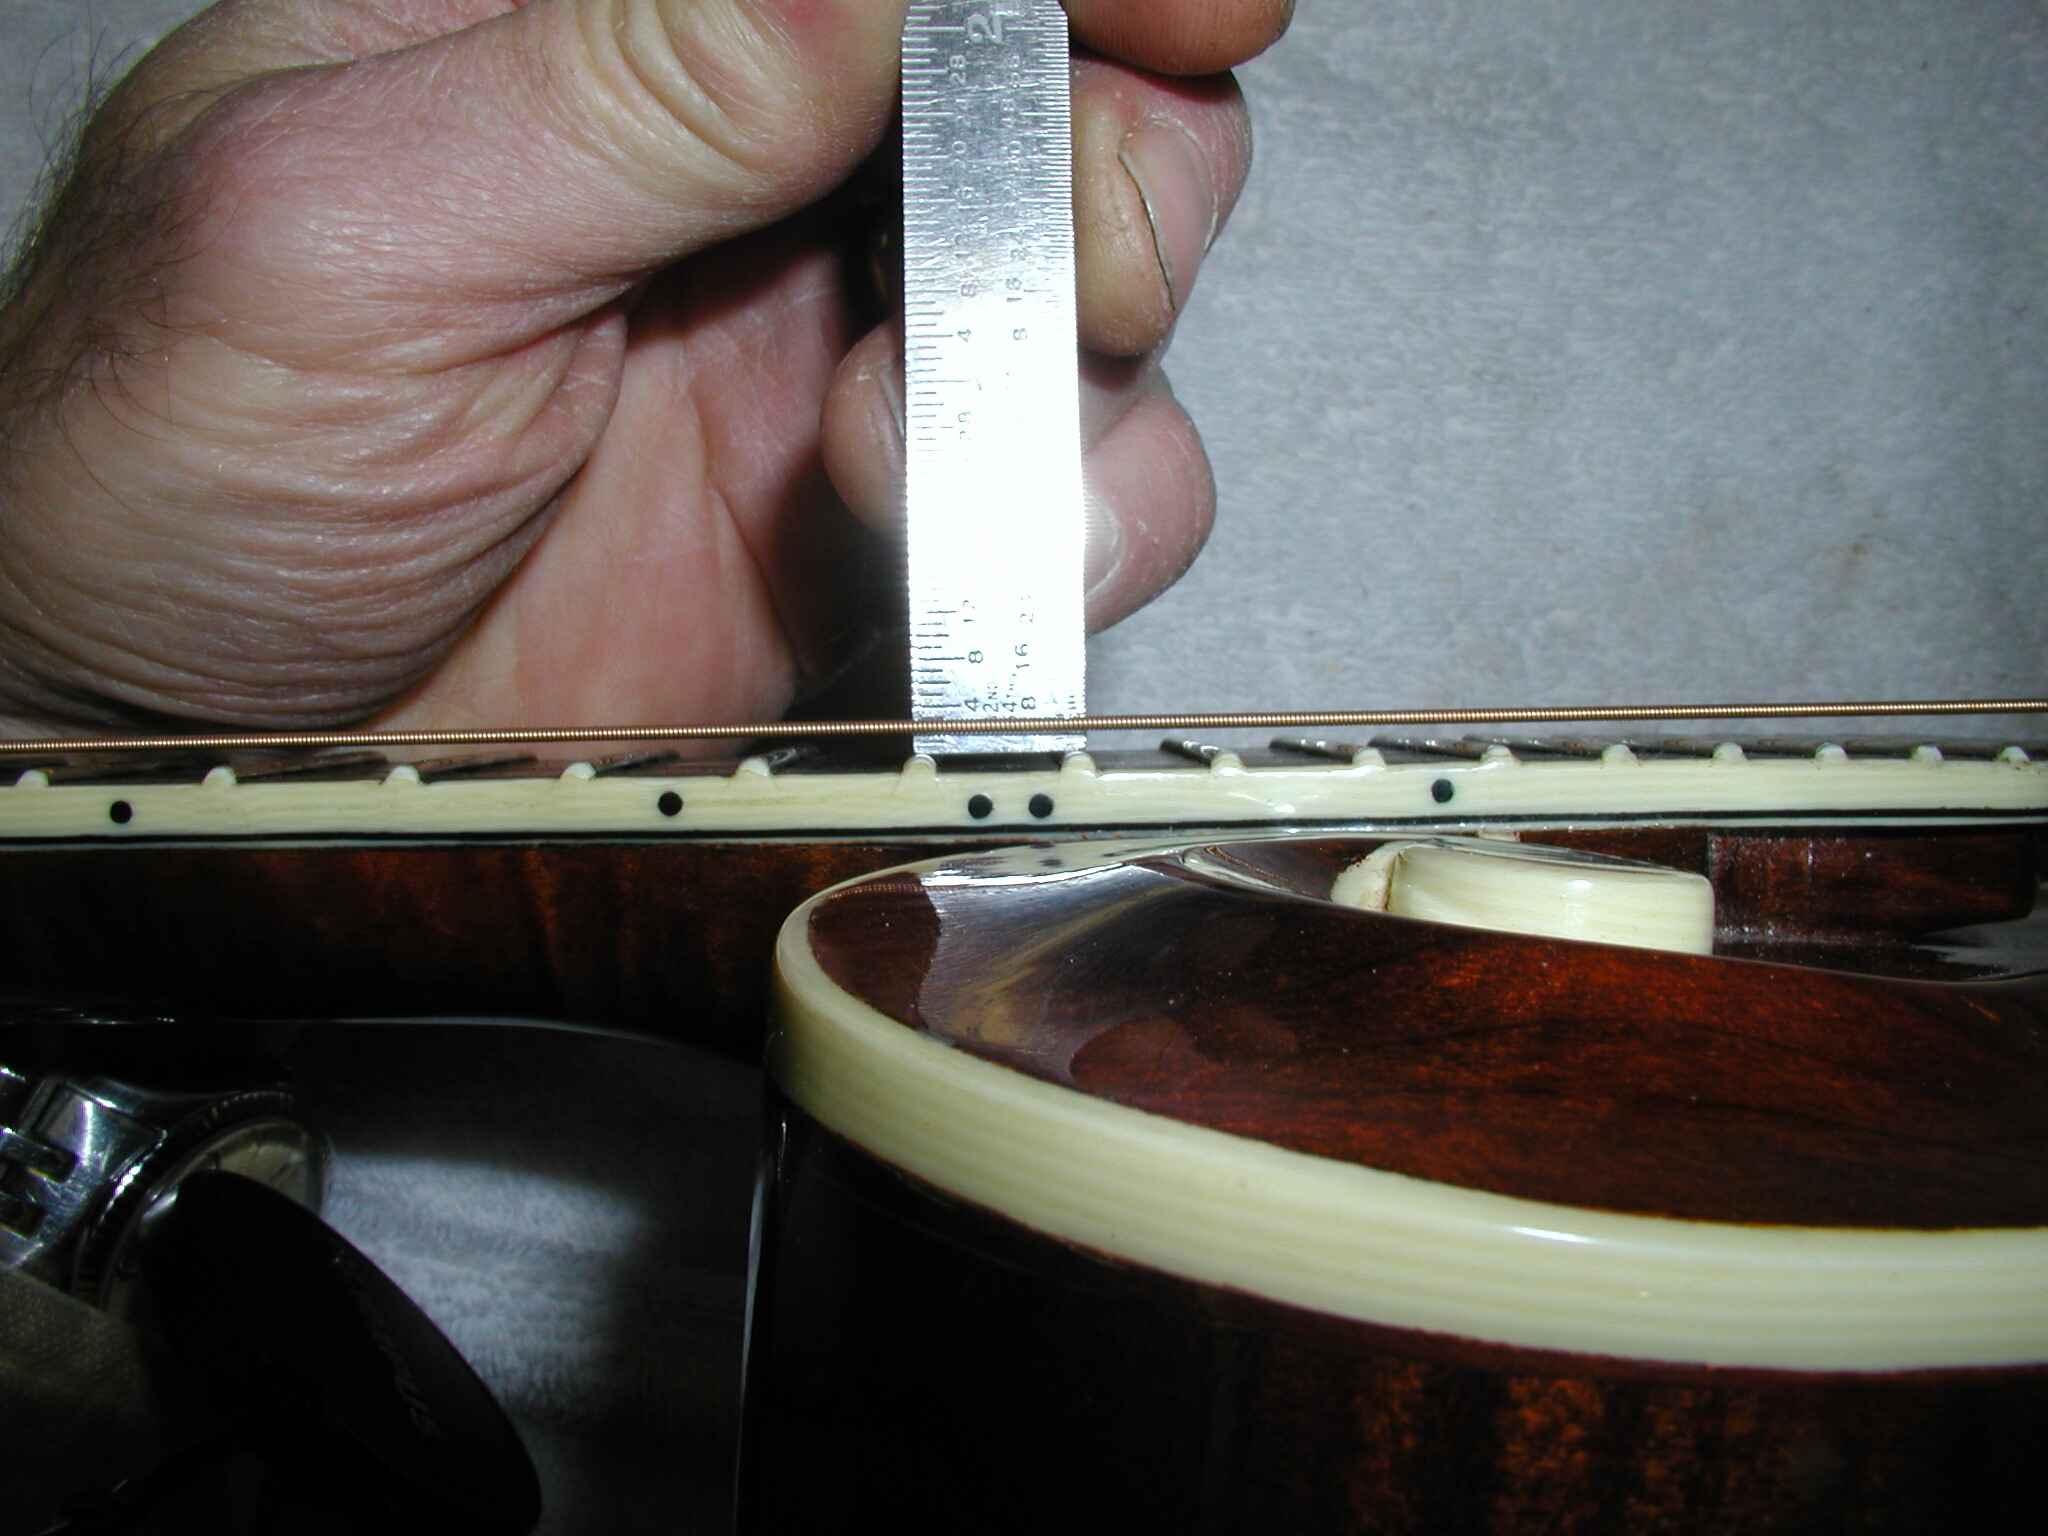
One of the primary causes of buzzing on an acoustic guitar is inadequate string action, which refers to the height of the strings above the fretboard. To check the action, start by inspecting the distance between the strings and the frets. If the strings are too close to the frets, they are likely to produce a buzzing sound when played. Conversely, if the strings are too far from the frets, it can lead to discomfort and hinder playability.
Using a feeler gauge or specialized guitar ruler, measure the string height at the 12th fret. The standard action for an acoustic guitar typically ranges from 2.0mm to 2.5mm on the bass side and 1.5mm to 2.0mm on the treble side. If the measurements fall outside of these ranges, adjustments are necessary to achieve the optimal action.
To adjust the action, locate the saddle, which is the component that supports the strings at the bridge. Depending on the guitar model, the saddle may be adjustable or require professional attention. If the action is too high, the saddle may need to be lowered, while a low action may necessitate raising the saddle. Carefully make incremental adjustments to the saddle height, rechecking the action after each alteration until the desired string height is achieved.
Checking the action is a fundamental step in troubleshooting buzzing on an acoustic guitar. By ensuring that the string height is within the recommended range, you can mitigate buzzing while optimizing playability. This step sets the foundation for a comfortable and resonant playing experience, allowing you to fully explore the musical potential of your acoustic guitar.
Adjust the Truss Rod
The truss rod is a crucial component of an acoustic guitar’s neck that helps maintain its structural integrity and curvature. When the truss rod is improperly adjusted, it can lead to buzzing issues due to an uneven or warped neck. Before adjusting the truss rod, it’s essential to determine whether the neck has an excessive forward or backward bow, as this can impact the playability and sound of the guitar.
To assess the neck’s curvature, hold down the low E string at the first and last fret, then observe the gap between the string and the frets around the 7th to 9th frets. If there is too much space, the neck may have excessive relief, while minimal or no space indicates a back-bowed neck. Ideally, there should be a slight gap, allowing the string to move without touching the frets.
If the neck requires adjustment, locate the truss rod adjustment nut, typically found at the headstock or inside the soundhole. Using an appropriate truss rod wrench, make incremental adjustments, turning the nut clockwise to counteract a back bow and counterclockwise to address excessive relief. It’s crucial to make gradual changes, allowing the neck to acclimate to each adjustment before further modification.
After each adjustment, recheck the neck’s curvature to ensure that it aligns with the desired specifications. A properly adjusted truss rod contributes to a straight and balanced neck, minimizing buzzing and maintaining consistent string action across the fretboard.
Adjusting the truss rod is a delicate process that requires precision and attentiveness. By addressing any neck irregularities through meticulous truss rod adjustments, you can enhance the playability and tonal clarity of your acoustic guitar, paving the way for an enriching musical experience.
Check the Nut and Saddle
The nut and saddle play a pivotal role in maintaining the proper string height and spacing on an acoustic guitar. Irregularities or damage to these components can result in buzzing, affecting the overall sound quality and playability of the instrument. Inspecting the nut and saddle is essential in troubleshooting buzzing issues and ensuring that the strings are properly seated and aligned.
Begin by examining the nut, which is located at the top of the fretboard, near the headstock. The nut slots should securely hold the strings at the appropriate height, allowing them to vibrate freely without making contact with the frets. If the nut slots are excessively worn or improperly filed, it can lead to buzzing, particularly in the lower fret positions.
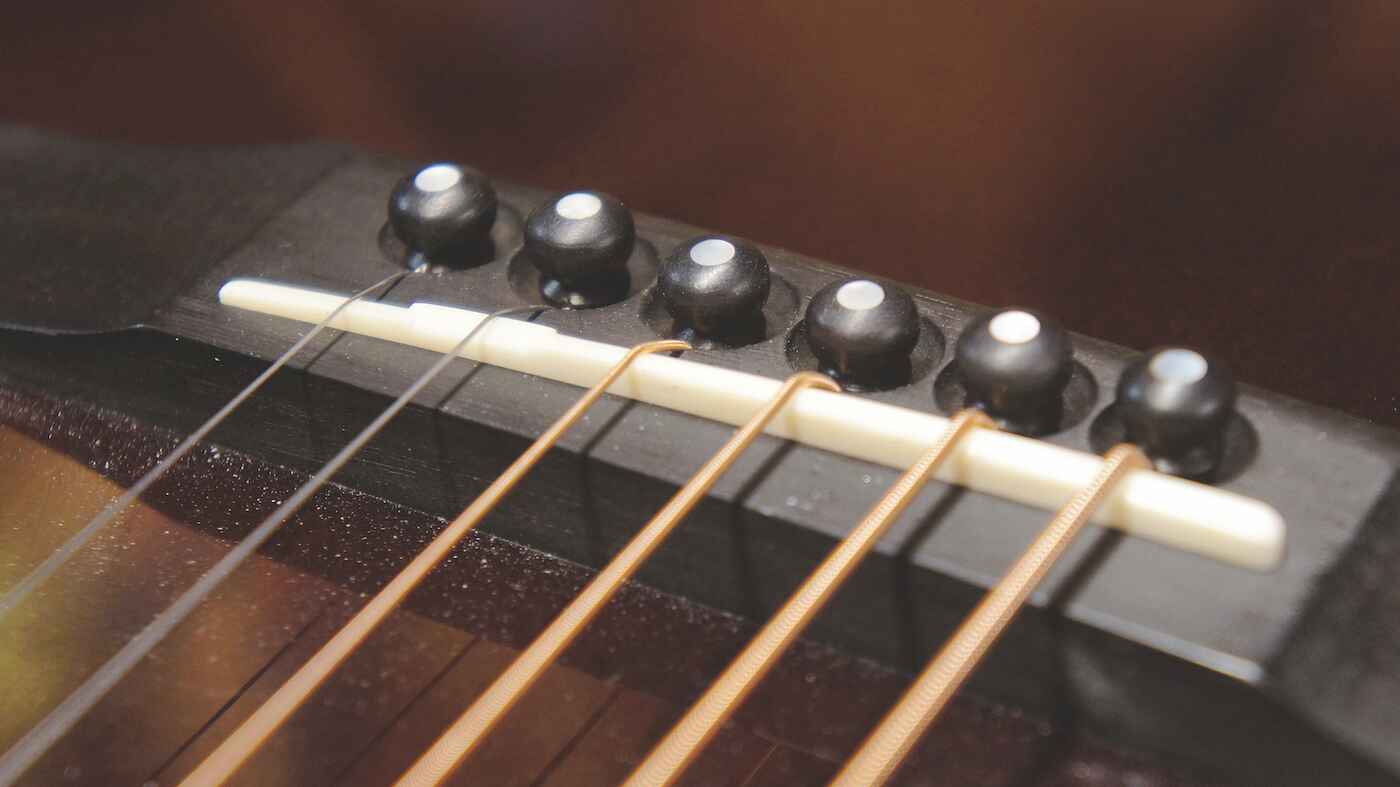
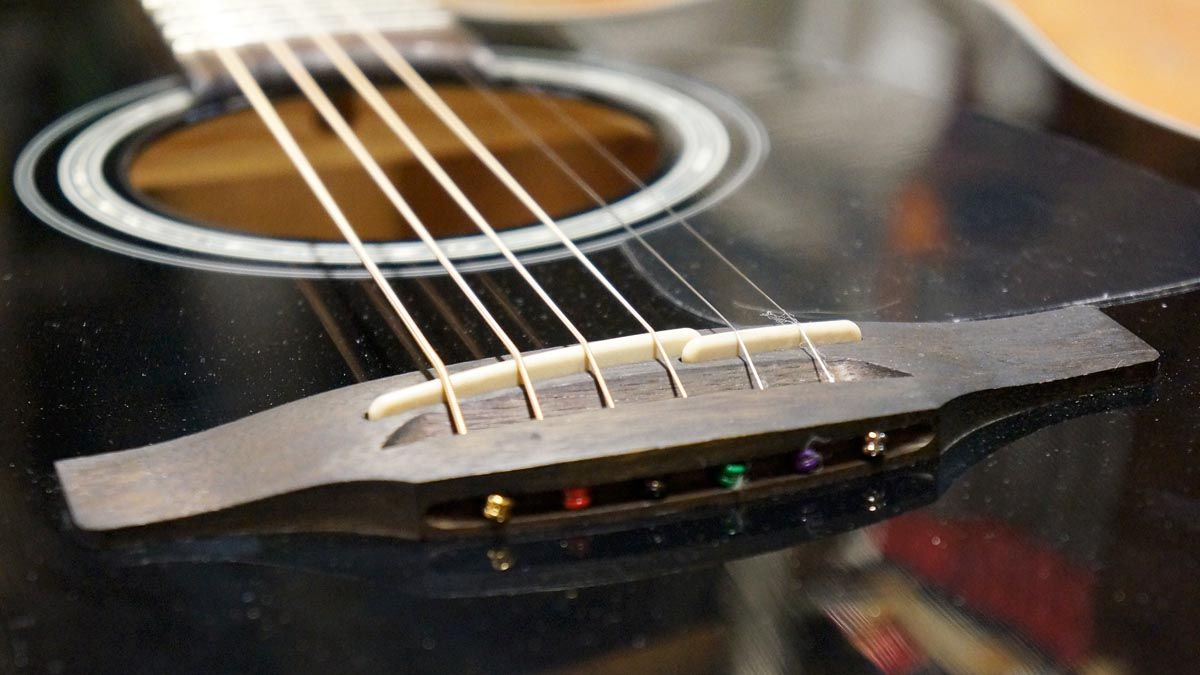
Similarly, the saddle, situated at the bridge of the guitar, supports the strings and determines their height above the frets. Inspect the saddle for any signs of wear, unevenness, or damage that may impede proper string vibration. Additionally, ensure that the saddle is seated securely in its slot and that it maintains a consistent height across the strings.
If the nut or saddle exhibits signs of wear or damage, consider seeking professional assistance to rectify the issues. Replacing the nut or saddle with high-quality, properly fitted components can significantly alleviate buzzing and enhance the resonance and sustain of the guitar.
By meticulously examining and maintaining the nut and saddle, you can mitigate buzzing and optimize the string action, contributing to a more harmonious and enjoyable playing experience. These components are integral to the guitar’s setup and directly impact its tonal characteristics, making their proper assessment and maintenance essential in resolving buzzing issues.
Change the Strings
Over time, acoustic guitar strings endure wear and tear, leading to a decline in their tonal clarity and vibrational integrity. Worn-out strings are prone to producing buzzing and muted tones, detracting from the instrument’s sonic potential. Changing the strings regularly is a fundamental aspect of guitar maintenance and can significantly alleviate buzzing issues while revitalizing the guitar’s sound.
When considering string replacement, factors such as string gauge, material, and brand can influence the instrument’s overall tonal characteristics. Opt for high-quality strings that align with your playing style and tonal preferences, ensuring that they are suitable for your acoustic guitar’s specific requirements.
Before removing the old strings, take note of their winding technique and ensure that you have the appropriate replacement strings on hand. Upon removing the old strings, thoroughly clean the fretboard and the areas around the bridge and nut to remove accumulated debris and residue, preparing the guitar for the installation of new strings.
When installing the new strings, ensure that they are securely anchored at the bridge and properly seated in the nut slots, maintaining the recommended string height and spacing. Tune the strings to the desired pitch and stretch them gently to facilitate the settling of the new strings.
Changing the strings on your acoustic guitar not only eliminates buzzing but also rejuvenates its tonal clarity and resonance, allowing for a more expressive and dynamic playing experience. Regular string changes contribute to the preservation of the guitar’s sonic integrity and playability, ensuring that it continues to inspire and captivate with its rich and vibrant tones.
Address Fret Buzz
Fret buzz, characterized by an unwanted buzzing or rattling sound when playing certain frets, can detract from the overall playability and tonal clarity of an acoustic guitar. This issue often stems from irregularities in the frets, neck, or string action, necessitating meticulous attention to resolve the buzzing and restore the guitar’s optimal performance.
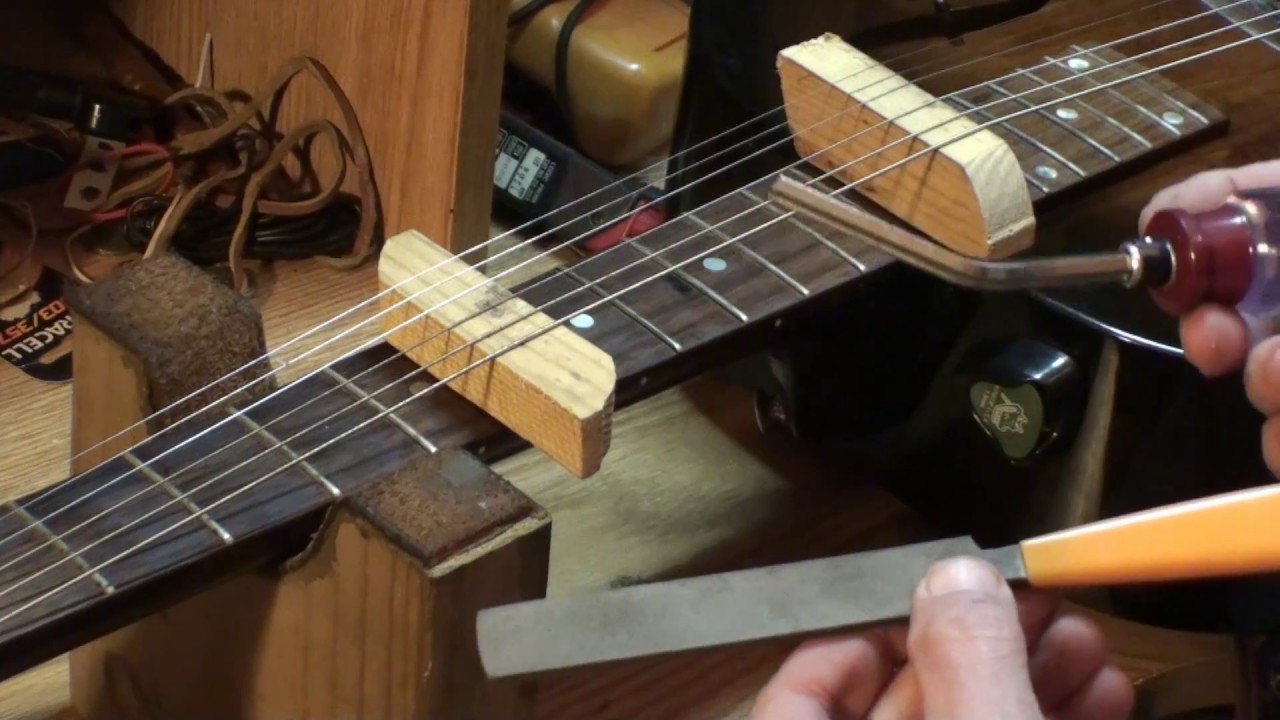
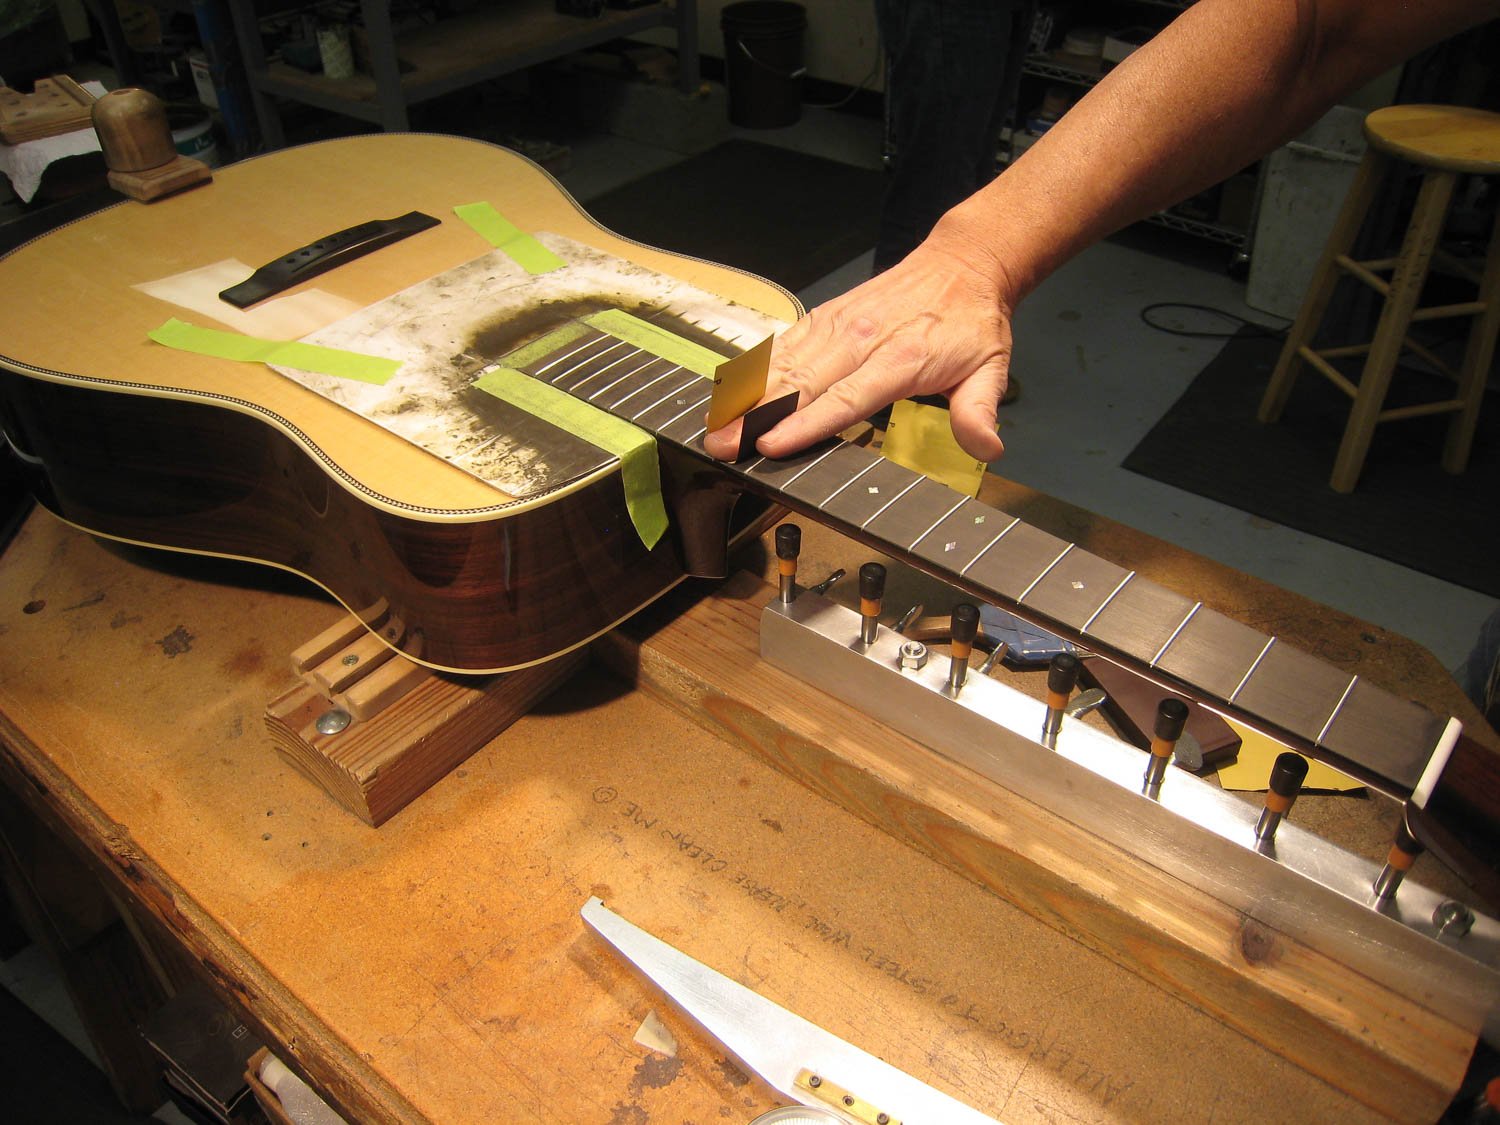
To address fret buzz, begin by examining the frets for any signs of wear, unevenness, or protrusions. Fret irregularities can impede string vibration and lead to buzzing, particularly when the strings make contact with uneven fret surfaces. If fret wear or protrusions are identified, seeking professional fret dressing or leveling services can rectify these issues, ensuring that the frets facilitate smooth string action and resonance.
Additionally, consider the possibility of neck irregularities contributing to fret buzz. An excessively bowed or back-bowed neck can result in uneven string action and buzzing. By adjusting the truss rod, as discussed earlier, you can rectify neck curvature issues and mitigate fret buzz caused by neck irregularities.
String action plays a crucial role in addressing fret buzz. As previously mentioned, ensuring that the string height and spacing are within the recommended range can significantly mitigate buzzing issues. Carefully inspect the string action and make necessary adjustments to the nut and saddle to achieve optimal string height, thereby minimizing fret buzz.
By diligently addressing fret buzz through meticulous fret inspection, neck adjustments, and string action optimization, you can restore the acoustic guitar to its full sonic potential, free from the interference of unwanted buzzing. This comprehensive approach to troubleshooting fret buzz contributes to a more enjoyable and rewarding playing experience, allowing the instrument to resonate with clarity and expressiveness.
Conclusion
Resolving buzzing issues on an acoustic guitar requires a systematic approach that encompasses various aspects of the instrument’s setup and maintenance. By addressing the action, truss rod, nut and saddle, strings, and fret buzz, you can effectively troubleshoot and eliminate unwanted buzzing, restoring the guitar’s tonal clarity and playability.
Each step in the process plays a crucial role in ensuring that the acoustic guitar performs optimally, free from the interference of buzzing or rattling sounds. Checking the action and adjusting the truss rod allow for the optimization of string height and neck curvature, mitigating buzzing while enhancing playability. Inspecting and maintaining the nut and saddle contribute to proper string seating and alignment, further minimizing buzzing issues.
Regular string changes not only alleviate buzzing but also rejuvenate the guitar’s tonal characteristics, ensuring that it continues to resonate with clarity and expressiveness. Additionally, addressing fret buzz through meticulous fret inspection, neck adjustments, and string action optimization is essential in restoring the guitar’s sonic integrity and playability.
By meticulously attending to each aspect of the acoustic guitar’s setup and maintenance, you can eliminate buzzing and ensure that the instrument produces rich, resonant tones, allowing for a more immersive and rewarding musical experience. Whether you are a seasoned musician or a beginner, the knowledge and techniques shared in this article empower you to troubleshoot buzzing issues and maintain your acoustic guitar in optimal playing condition.
With a clear understanding of the causes of buzzing and the methods to rectify them, you can confidently address buzzing issues as they arise, preserving the sonic integrity and playability of your acoustic guitar. By nurturing and maintaining your instrument, you can continue to explore its expressive potential, creating captivating melodies and immersing yourself in the timeless allure of acoustic music.