Introduction
So, you've settled in for a gaming session, ready to strategize, communicate with your team, and immerse yourself in the virtual world. However, as you attempt to communicate with your teammates using your gaming headset, you encounter a frustrating obstacle – your microphone isn't working. This issue can be a major hindrance to your gaming experience, as effective communication is often crucial for success in many multiplayer games.
But fear not, as there are several troubleshooting steps you can take to address this problem and get back to gaming with a fully functional headset microphone. In this guide, we'll explore various potential solutions to help you resolve the issue and regain the ability to communicate clearly with your gaming companions.
Whether you're experiencing this problem for the first time or it's been an ongoing issue, understanding the potential causes and solutions can be immensely beneficial. By following the steps outlined in this guide, you'll be equipped with the knowledge and tools to troubleshoot and resolve microphone issues with your gaming headset.
Let's delve into the troubleshooting process and explore the steps you can take to identify and address the root cause of your headset microphone's malfunction. Whether it's a hardware issue, software glitch, or settings misconfiguration, we'll cover the essential strategies for diagnosing and resolving the problem, ensuring that you can resume your gaming adventures with seamless communication.
Check the Physical Connections
Before delving into complex software troubleshooting, it’s essential to start with the basics. Begin by meticulously examining the physical connections of your gaming headset to identify any potential issues that may be causing the microphone malfunction. Here’s a systematic approach to checking the physical connections:
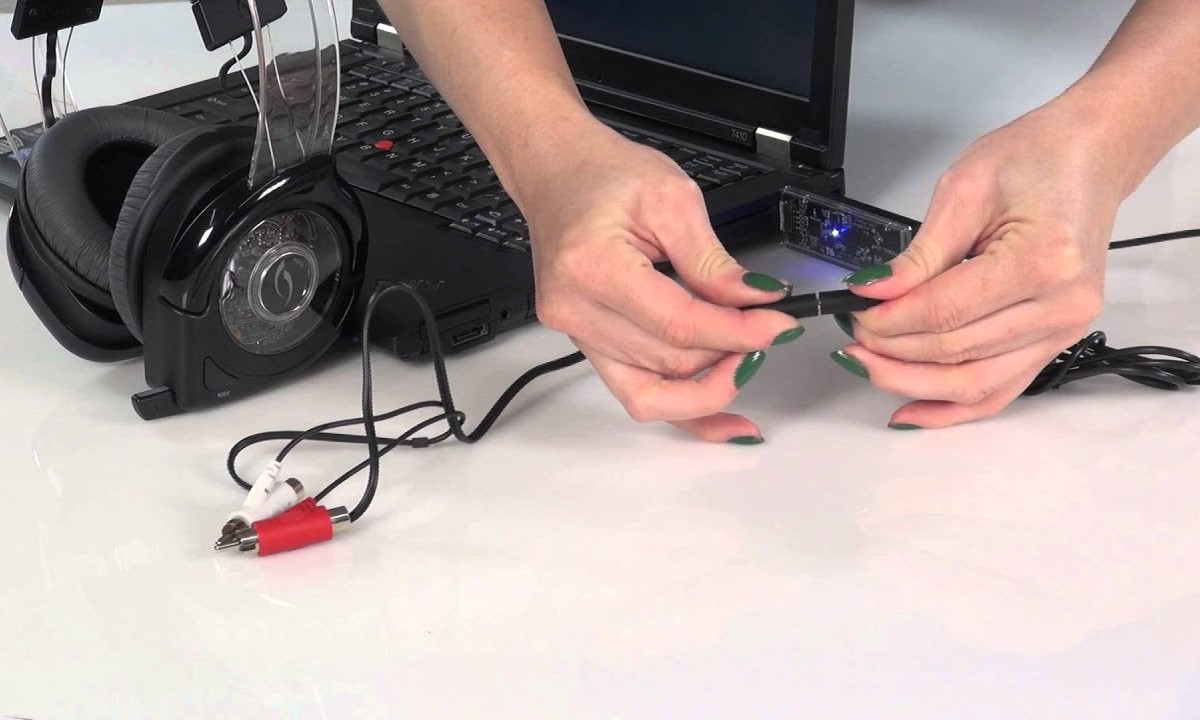
- Inspect the Headset Jack: Ensure that the headset jack is fully inserted into the audio/microphone port on your computer or gaming console. Sometimes, a loose or partial connection can impede the microphone’s functionality. Gently unplug and reinsert the jack to establish a secure connection.
- Clean the Jack and Port: Over time, dust and debris can accumulate in the headset jack and port, leading to connectivity problems. Use a can of compressed air or a small brush to carefully remove any foreign particles that may be obstructing the connection.
- Check the Headset Cable: Examine the entire length of the headset cable, paying close attention to any signs of fraying, kinks, or damage. A damaged cable can disrupt the flow of audio signals, affecting the microphone’s performance. If you notice any damage, consider replacing the headset cable with a compatible one.
- Test the Headset on Another Device: To rule out potential issues with your computer or gaming console, test the headset on a different device such as a smartphone or tablet. If the microphone functions properly on the alternate device, the problem likely resides within the original device’s settings or hardware.
By meticulously examining the physical connections and addressing any issues that are discovered, you can eliminate common hardware-related causes of microphone malfunctions. Once you’ve ensured that the physical components are in optimal condition, you can proceed to explore software-related solutions to further diagnose and resolve the issue.
Update Your Audio Drivers
Outdated or corrupted audio drivers can often lead to various audio-related issues, including problems with the microphone on your gaming headset. To ensure that your audio drivers are functioning optimally, it’s crucial to keep them updated with the latest versions. Here’s how you can update your audio drivers:
- Access Device Manager: On Windows, right-click on the Start button and select “Device Manager” from the menu. This will open the Device Manager window, where you can view and manage the hardware devices installed on your computer.
- Locate the Audio Device: In the Device Manager window, expand the “Sound, video and game controllers” category to reveal the audio devices installed on your system. Look for the specific audio device associated with your gaming headset.
- Update the Audio Driver: Right-click on the audio device and select “Update driver” from the context menu. You will be prompted to choose between automatically searching for updated driver software online or browsing your computer for driver software. Select the appropriate option based on your preference.
- Restart Your Computer: After updating the audio driver, it’s advisable to restart your computer to ensure that the changes take effect. Once your computer has restarted, test the microphone on your gaming headset to determine if the driver update has resolved the issue.
If the microphone issue persists despite updating the audio driver, consider visiting the manufacturer’s website of your computer or audio device to manually download and install the latest driver for your specific model. Always ensure that you download drivers from reputable sources to avoid potential security risks or compatibility issues.
By keeping your audio drivers up to date, you can mitigate potential software-related causes of microphone malfunctions and maintain the optimal performance of your gaming headset. Additionally, regularly updating your audio drivers can contribute to overall system stability and compatibility with the latest software and hardware updates.
Check Microphone Settings in Windows
Windows provides a range of settings that directly impact the functionality of external microphones, including those integrated into gaming headsets. By reviewing and adjusting these settings, you can potentially resolve issues related to microphone detection and performance. Here’s how you can check and configure microphone settings in Windows:
- Access Sound Settings: Right-click on the speaker icon in the system tray and select “Open Sound settings.” This will open the Sound settings window, where you can manage audio input and output devices.
- Configure Input Device: In the Sound settings window, scroll down to the “Input” section and ensure that your gaming headset is selected as the default input device. If it’s not the default device, click on the dropdown menu and choose your headset from the list of available input devices.
- Adjust Microphone Properties: Below the input device selection, click on “Device properties” to access additional settings for the microphone. Here, you can adjust the microphone volume, enable enhancements, and troubleshoot any issues related to the microphone’s functionality.
- Check Privacy Settings: In some cases, privacy settings in Windows may prevent certain apps from accessing the microphone. To review and modify these settings, go to “Settings > Privacy > Microphone” and ensure that the toggle switch for “Allow apps to access your microphone” is turned on. Additionally, you can individually manage app permissions to access the microphone based on your preferences.
After reviewing and adjusting the microphone settings in Windows, test the microphone on your gaming headset to determine if the changes have resolved the issue. If the problem persists, consider restarting your computer to ensure that the settings are applied effectively.
By navigating through the microphone settings in Windows and making necessary adjustments, you can potentially address software-related barriers that hinder the proper functioning of your gaming headset’s microphone. Understanding and managing these settings empowers you to optimize the performance of your microphone within the Windows environment, enhancing your overall gaming experience.
Test the Microphone on Another Device
When troubleshooting issues with your gaming headset’s microphone, it’s essential to determine whether the problem is specific to your computer or gaming console. Testing the microphone on another device can help isolate the source of the issue and guide your troubleshooting efforts. Here’s how you can conduct this diagnostic test:
- Use a Different Device: Connect your gaming headset to an alternate device such as a smartphone, tablet, or another computer with compatible audio ports. Ensure that the device supports the input and output connectors required for your headset.
- Record a Test Audio: On the alternate device, open a voice recording app or a communication platform that allows you to record audio. Speak into the microphone on your gaming headset and record a brief test audio to assess the quality and functionality of the microphone.
- Playback and Evaluate: After recording the test audio, play it back to listen to the captured sound. Pay attention to the clarity, volume, and any potential distortions or anomalies in the recorded audio. This evaluation can help you determine if the microphone is functioning properly on the alternate device.
If the microphone on your gaming headset operates flawlessly on the alternate device, it indicates that the hardware and microphone components are functioning as intended. In this scenario, the issue may be related to the settings or compatibility of your primary computer or gaming console. You can then focus on troubleshooting the specific device to resolve the microphone malfunction.
Conversely, if the microphone exhibits the same issues on the alternate device, it suggests that the problem may be hardware-related, requiring further inspection of the gaming headset’s components or potential replacement of the device.
By testing the microphone on another device, you can effectively narrow down the potential causes of the malfunction and tailor your troubleshooting approach accordingly. This diagnostic step provides valuable insights into the nature of the issue, guiding you towards an accurate resolution for the microphone problem with your gaming headset.
Adjust Privacy Settings in Windows
Windows incorporates privacy settings that govern the access and utilization of various hardware components, including the microphone. By reviewing and adjusting these settings, you can ensure that your gaming headset’s microphone is permitted to function seamlessly within the Windows environment. Here’s how you can navigate and modify privacy settings related to the microphone:
- Access Privacy Settings: Open the Windows Settings app and navigate to the “Privacy” section. Here, you can manage permissions for various system features and apps, including the microphone.
- Microphone Permissions: Within the Privacy settings, select “Microphone” from the left-hand menu to access the microphone permissions page. Here, you can review which apps have permission to access your microphone and modify these permissions as needed.
- Enable Microphone Access: Ensure that the toggle switch for “Allow apps to access your microphone” is turned on. This setting allows applications to utilize the microphone for audio input, which is essential for gaming and communication purposes.
- Manage App Permissions: Scroll down to view the list of apps that have requested access to the microphone. You can individually enable or disable microphone access for specific apps based on your preferences and privacy considerations.
After adjusting the privacy settings related to the microphone, it’s advisable to test the functionality of your gaming headset’s microphone within applications and games that require audio input. By doing so, you can verify that the modifications to the privacy settings have effectively facilitated the microphone’s operation without any hindrances.
By proactively managing privacy settings in Windows, you can ensure that your gaming headset’s microphone is granted the necessary permissions to function seamlessly within the operating system. This proactive approach empowers you to optimize the audio input capabilities of your gaming headset while maintaining control over app-specific access to the microphone, enhancing your overall privacy and user experience.
Use a Different USB Port
If your gaming headset utilizes a USB connection for both audio output and microphone input, issues with the USB port can affect the functionality of the headset, including the microphone. By utilizing a different USB port on your computer, you can troubleshoot potential connectivity or port-specific issues that may be impeding the microphone’s operation. Here’s how you can proceed with this troubleshooting step:
- Identify Alternate USB Ports: If your computer has multiple USB ports, locate an available port that you can use for connecting your gaming headset. Ensure that the alternate port is functioning properly and is not obstructed by physical damage or debris.
- Disconnect and Reconnect: Unplug the USB connector of your gaming headset from its current port and insert it into the alternate USB port. Ensure that the connection is secure and that the headset is recognized by your computer as a valid audio input and output device.
- Check for Recognition: Once the headset is connected to the alternate USB port, verify that your computer detects the device and configures it for audio and microphone usage. You may need to access the audio settings in your operating system to confirm that the headset is selected as the default input and output device.
- Test the Microphone: After ensuring that the headset is recognized and configured within the new USB port, test the microphone by speaking into it and verifying that the audio input is captured and transmitted effectively. If the microphone functions as intended, it indicates that the previous USB port may have been the source of the issue.
By utilizing a different USB port for your gaming headset, you can isolate potential port-specific problems and determine if the original port was contributing to the microphone malfunction. This troubleshooting step can help you identify and resolve connectivity issues, ensuring that the headset’s microphone operates reliably within your gaming environment.
Contact Customer Support
If you’ve diligently attempted the troubleshooting steps outlined in this guide and the microphone on your gaming headset continues to malfunction, reaching out to the customer support team of the headset’s manufacturer or the retailer can provide valuable assistance. Customer support representatives are equipped to address technical issues, provide personalized guidance, and offer solutions tailored to your specific situation. Here’s how you can effectively engage with customer support to seek resolution for the microphone problem:
- Gather Product Information: Before contacting customer support, gather essential product details such as the model number, serial number, and purchase information for your gaming headset. Having this information readily available can expedite the troubleshooting process and enable the support team to offer targeted assistance.
- Initiate Contact: Reach out to the customer support team through their designated channels, which may include phone support, email, live chat, or a support ticket system on the manufacturer’s website. Choose the communication method that best suits your preferences and availability.
- Describe the Issue: Clearly articulate the specific issue you’re experiencing with the microphone on your gaming headset. Provide a detailed account of the troubleshooting steps you’ve already undertaken, including any relevant observations or patterns related to the malfunction.
- Follow Guidance: Customer support representatives may provide additional troubleshooting steps, firmware updates, or specific instructions to diagnose and resolve the microphone problem. Follow their guidance meticulously and communicate any outcomes or progress resulting from their recommendations.
- Explore Warranty Coverage: If your gaming headset is within the warranty period, inquire about potential warranty coverage for the microphone issue. Customer support can guide you through the warranty process and facilitate repairs, replacements, or other applicable solutions based on the headset’s warranty terms.
Engaging with customer support can be instrumental in addressing persistent microphone issues with your gaming headset. The expertise and resources of the support team can help you navigate complex technical challenges, explore warranty options, and ultimately achieve a resolution that restores the full functionality of your headset’s microphone.
By leveraging the support and expertise of the customer service team, you can gain valuable insights, personalized assistance, and targeted solutions that align with the specific technical nuances of your gaming headset’s microphone malfunction.


