Introduction
Band replacement is a simple yet effective way to breathe new life into your Fitbit Charge. Whether you're looking to upgrade the style, improve comfort, or replace a worn-out band, this process allows you to customize your wearable device to better suit your preferences. With a myriad of replacement bands available in various materials, colors, and designs, you can transform the look and feel of your Fitbit Charge to align with your personal style and activities.
The original band that comes with the Fitbit Charge is undoubtedly durable and functional, but it may not always reflect your individual taste or meet your specific needs. By exploring the world of replacement bands, you open the door to a wealth of options that can enhance both the aesthetic appeal and functionality of your device.
In this guide, we'll delve into the process of band replacement for the Fitbit Charge, providing step-by-step instructions and valuable tips to ensure a smooth and successful transition. Whether you're a fitness enthusiast seeking a more breathable band for intense workouts or a fashion-conscious individual looking to accessorize your wearable tech, this guide will equip you with the knowledge and confidence to embark on your band replacement journey.
As we embark on this band replacement adventure, it's important to keep in mind that the process is not only practical but also an opportunity for self-expression. Your Fitbit Charge is more than just a fitness tracker; it's a reflection of your unique style and personality. By personalizing it with a new band, you can make a statement, express your creativity, and elevate your overall experience with this essential piece of wearable technology. So, let's dive into the world of band replacement and unlock the potential for a truly customized Fitbit Charge experience.
How to Remove the Original Band
Removing the original band from your Fitbit Charge is the crucial first step in the band replacement process. This procedure requires a gentle touch and attention to detail to ensure that the device remains unharmed during the transition. Here's a comprehensive guide to safely removing the original band:
-
Prepare Your Workspace: Find a clean, well-lit area to work in, preferably with a flat surface. This will provide a stable environment for the band replacement process and minimize the risk of misplacing small components.
-
Secure the Fitbit Charge: Lay your Fitbit Charge on the flat surface with the display facing down. This position allows for easy access to the band attachment points and ensures that the device remains stable during the band removal process.
-
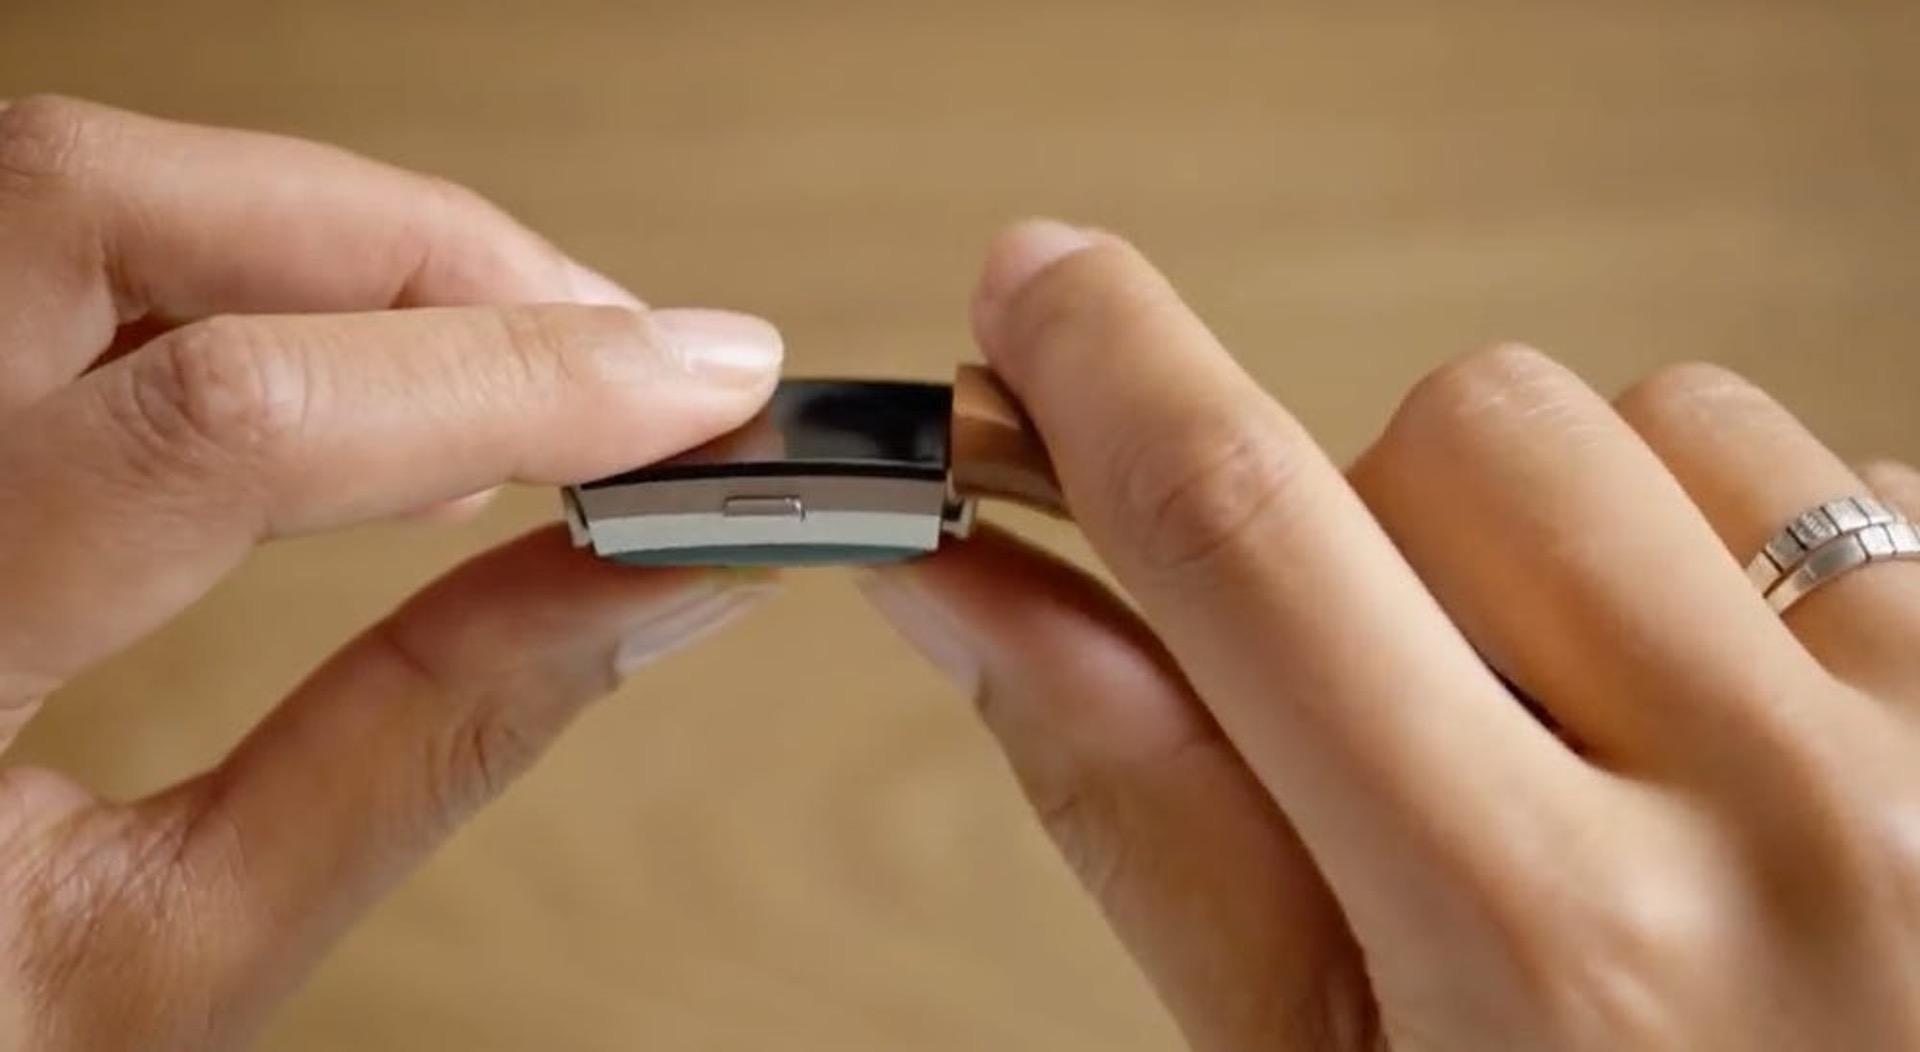
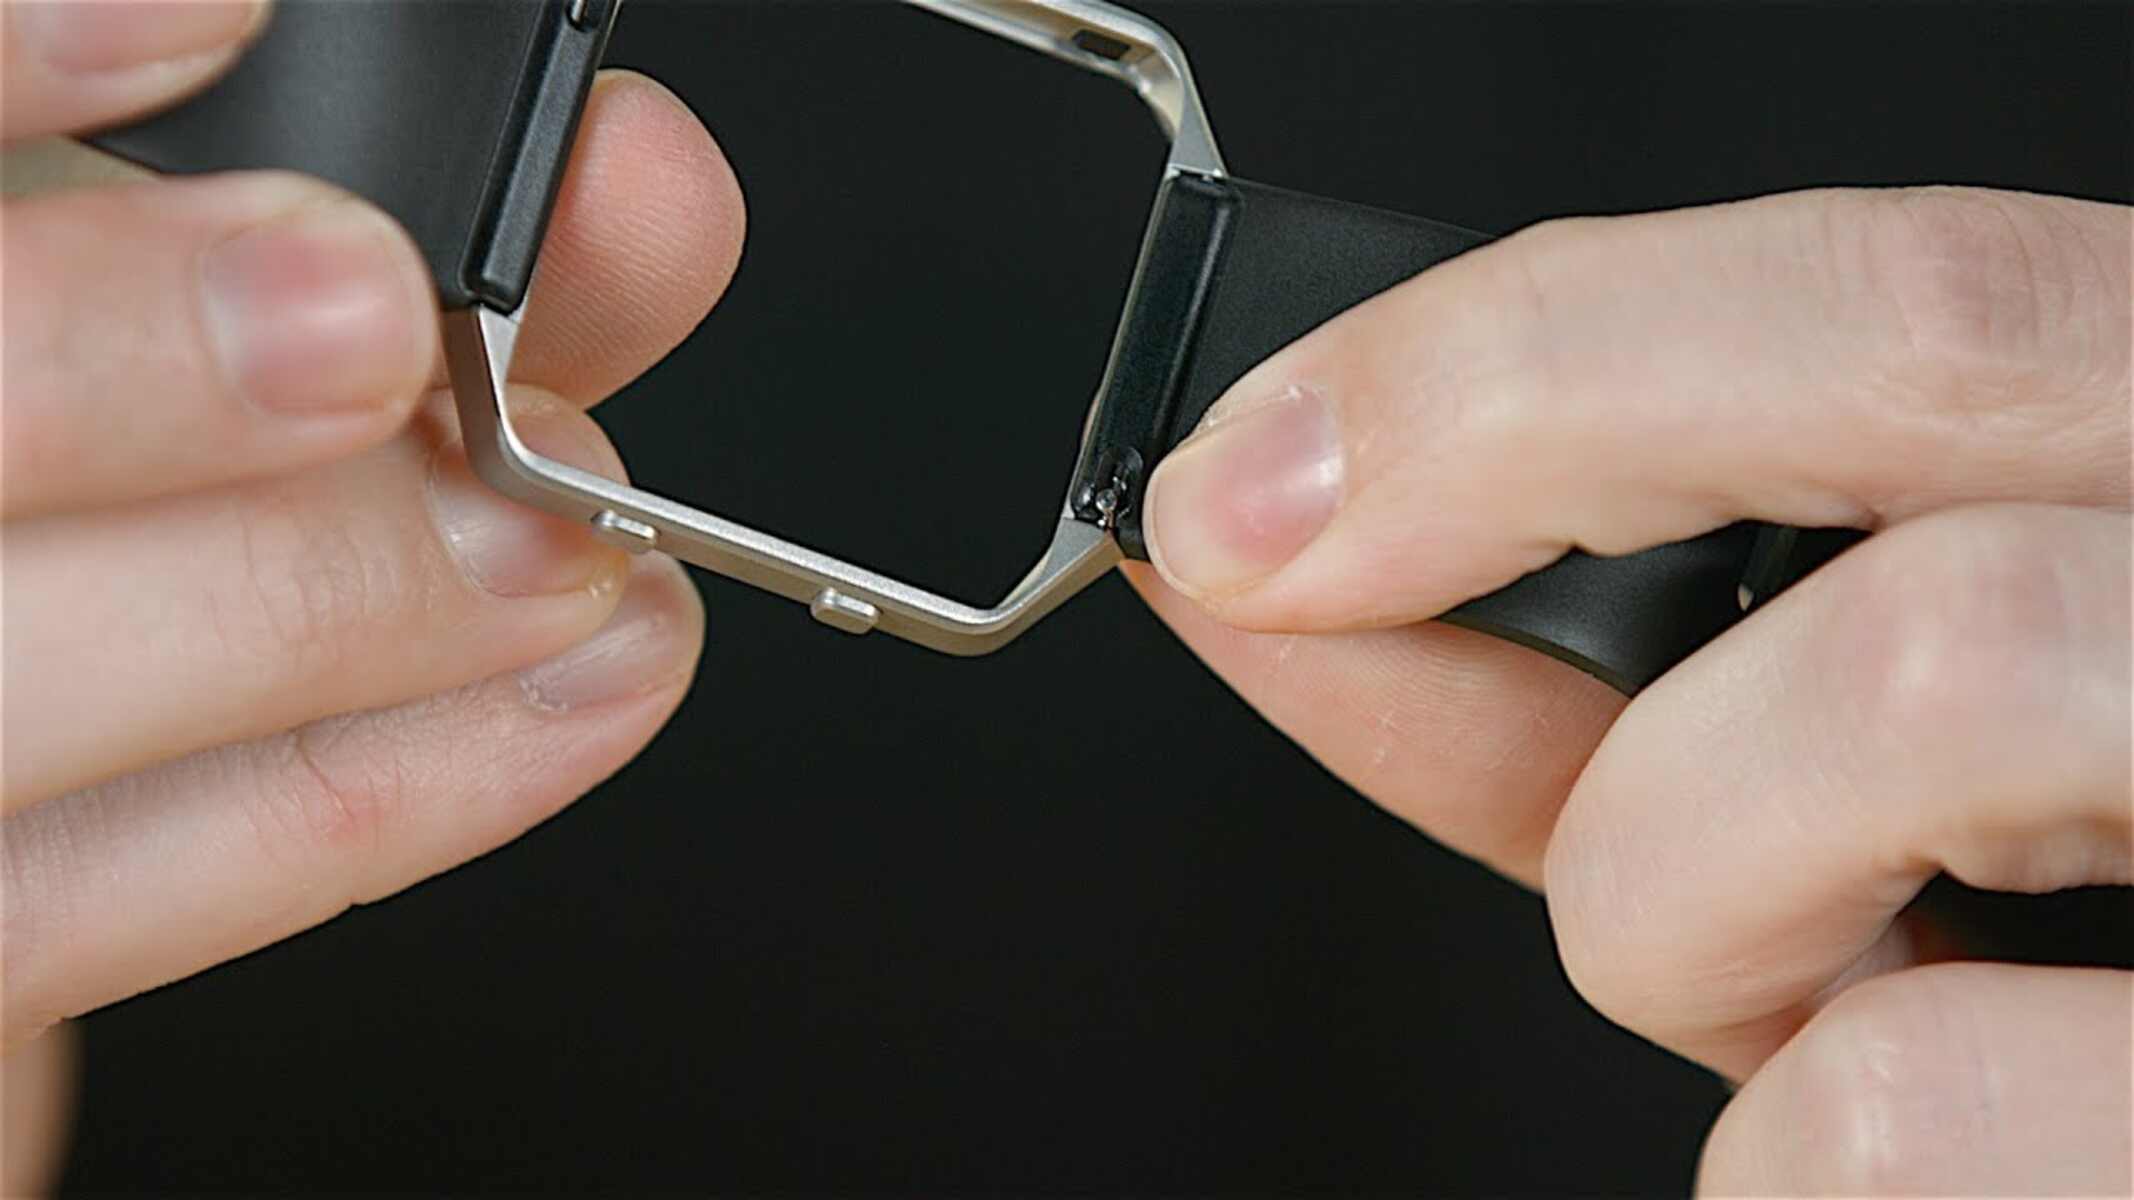
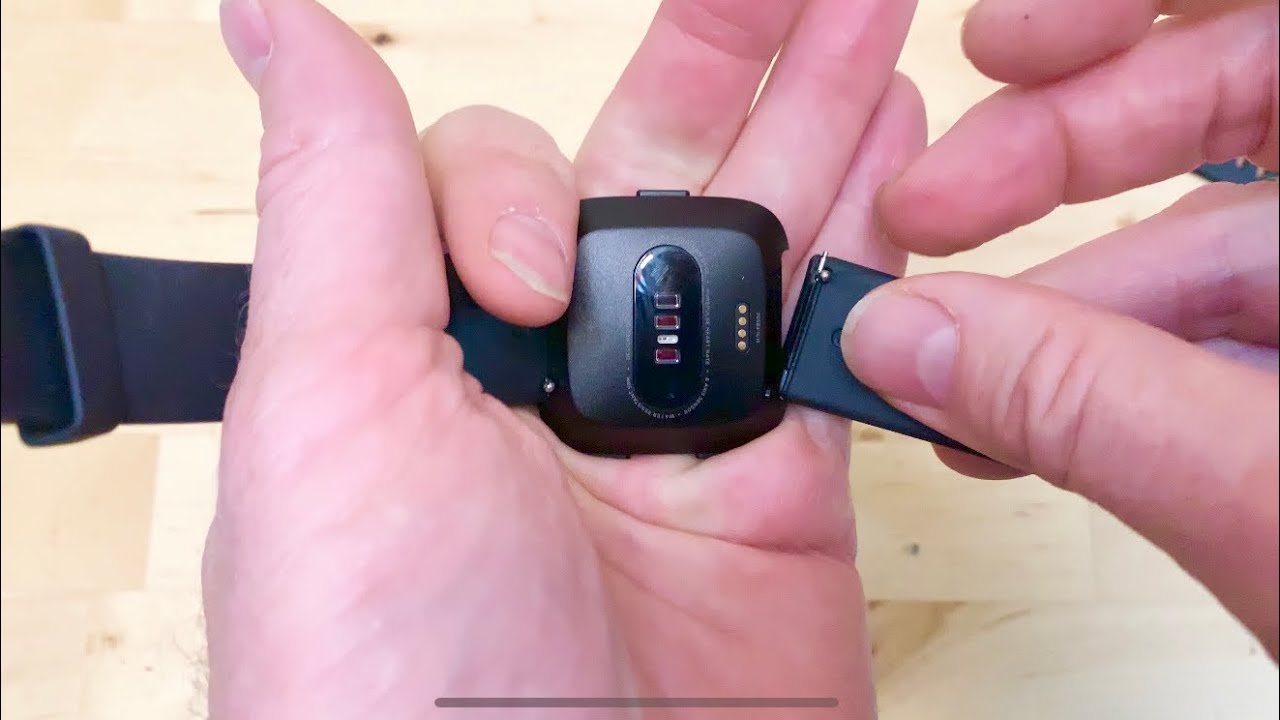
Locate the Band Latches: On the underside of the Fitbit Charge, you'll find the band latches near the top and bottom of the device. These latches secure the original band in place and need to be carefully released to detach the band.
-
Gently Depress the Latches: Using your thumb or index finger, gently depress the latch on one side of the device. Apply steady, even pressure to disengage the latch, taking care not to force it or use excessive strength.
-
Repeat for the Other Side: Once the first latch is released, proceed to depress the latch on the opposite side of the Fitbit Charge. Again, use a delicate touch and maintain consistent pressure to avoid damaging the device or the band attachment points.
-
Remove the Original Band: With both latches disengaged, carefully lift the original band away from the Fitbit Charge. Take your time to ensure a smooth separation, keeping an eye on any small components that may be attached to the band.
-
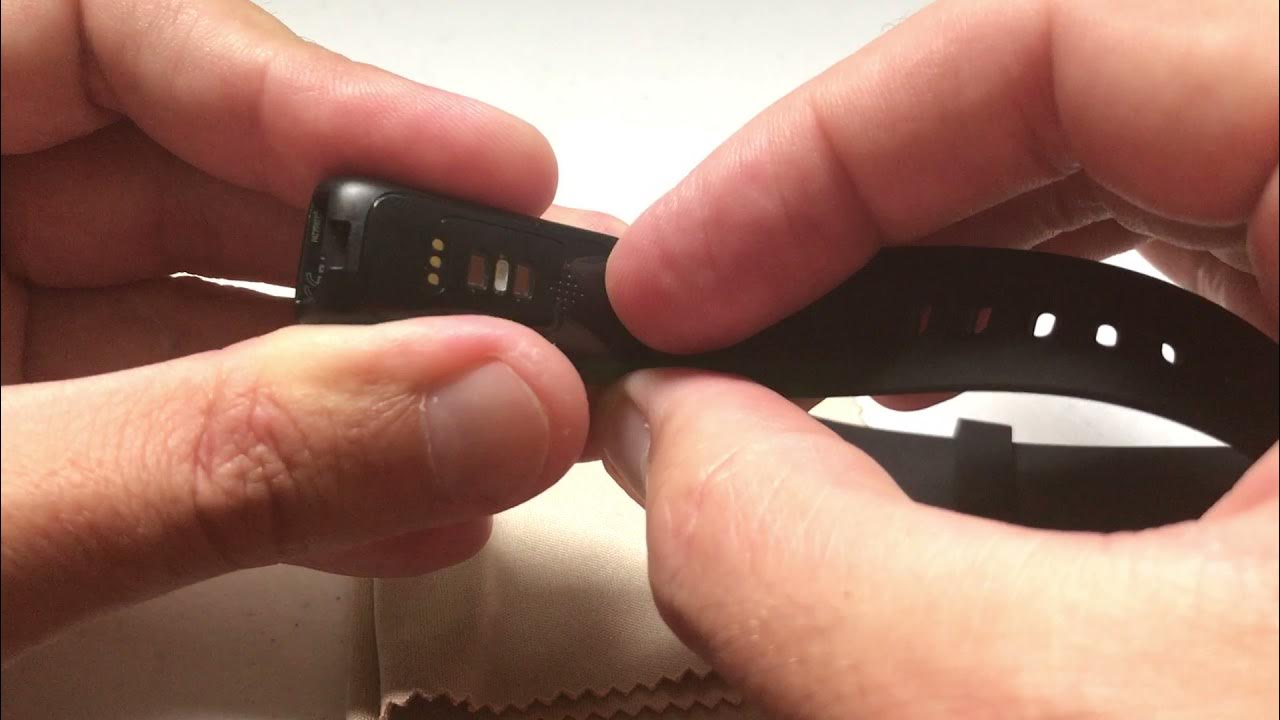
Inspect the Attachment Points: As you remove the original band, take a moment to inspect the attachment points on the Fitbit Charge. Ensure that they are clean and free of any debris or damage that could hinder the installation of the new band.
By following these steps, you can safely and effectively remove the original band from your Fitbit Charge, setting the stage for the exciting process of choosing and attaching a replacement band. With the original band removed, you're now ready to explore the diverse world of replacement bands and embark on the next phase of your band replacement journey.
Choosing a Replacement Band
Selecting a replacement band for your Fitbit Charge is an exhilarating opportunity to tailor your wearable device to your unique style, preferences, and activities. As you embark on this stage of the band replacement process, consider the following factors to guide your decision-making:
Material and Comfort
The material of the replacement band plays a pivotal role in both comfort and functionality. Silicone bands are popular for their flexibility, sweat resistance, and easy maintenance, making them ideal for active individuals. Alternatively, if you prioritize a more luxurious feel, consider leather or metal bands, which offer a sophisticated aesthetic and long-lasting durability. For those with sensitive skin, hypoallergenic materials such as nylon or fabric bands provide a comfortable and irritation-free wearing experience.
Style and Aesthetics
Your Fitbit Charge replacement band presents an opportunity to express your personal style. Whether you prefer vibrant colors, sleek monochromatic designs, or patterns that make a statement, there is a myriad of options to complement your fashion sensibilities. Additionally, some bands feature embellishments, such as studs or decorative stitching, adding a touch of individuality to your wearable device.
Activity-Specific Features
Consider your lifestyle and the activities in which you engage when choosing a replacement band. If you are an avid fitness enthusiast, a breathable, moisture-wicking band may enhance your comfort during workouts. For swimmers, selecting a water-resistant band ensures that your Fitbit Charge can accompany you during aquatic activities without compromising its functionality.
Interchangeability and Customization
Some replacement bands offer interchangeable straps, allowing you to effortlessly switch between different colors and materials to suit various occasions. Additionally, customizable bands with adjustable closures provide a tailored fit, ensuring that your Fitbit Charge remains secure and comfortable throughout the day.
Compatibility and Functionality
When selecting a replacement band, ensure that it is compatible with your specific Fitbit Charge model. Additionally, consider any additional functionalities, such as built-in NFC for contactless payments, that may be integrated into certain replacement bands to further enhance the utility of your wearable device.
By carefully considering these factors, you can confidently select a replacement band that aligns with your individual preferences, seamlessly integrating style, comfort, and functionality into your Fitbit Charge experience. With the perfect replacement band chosen, you are now poised to embark on the next step of the band replacement process: attaching the new band to your Fitbit Charge.
Attaching the New Band
With the original band successfully removed and a carefully chosen replacement band in hand, it's time to embark on the exciting phase of attaching the new band to your Fitbit Charge. This process requires precision and attention to detail to ensure a secure and seamless fit. Here's a step-by-step guide to effectively attach the new band:
-
Prepare the Replacement Band: Before beginning the attachment process, inspect the replacement band to familiarize yourself with its design and ensure that any included components, such as pins or adapters, are readily accessible. This proactive approach sets the stage for a smooth and efficient attachment process.
-
Align the Band Attachment Points: Position the replacement band alongside your Fitbit Charge, aligning the attachment points on the band with the corresponding slots on the device. Take note of any indicators or markings that signify the top and bottom of the band to ensure proper alignment.
-
Secure the Band Latches: With the attachment points aligned, gently press the band against the Fitbit Charge, guiding the latches into the slots. Apply even pressure on both sides of the device to engage the latches securely, ensuring that the band sits flush against the device without any gaps.
-
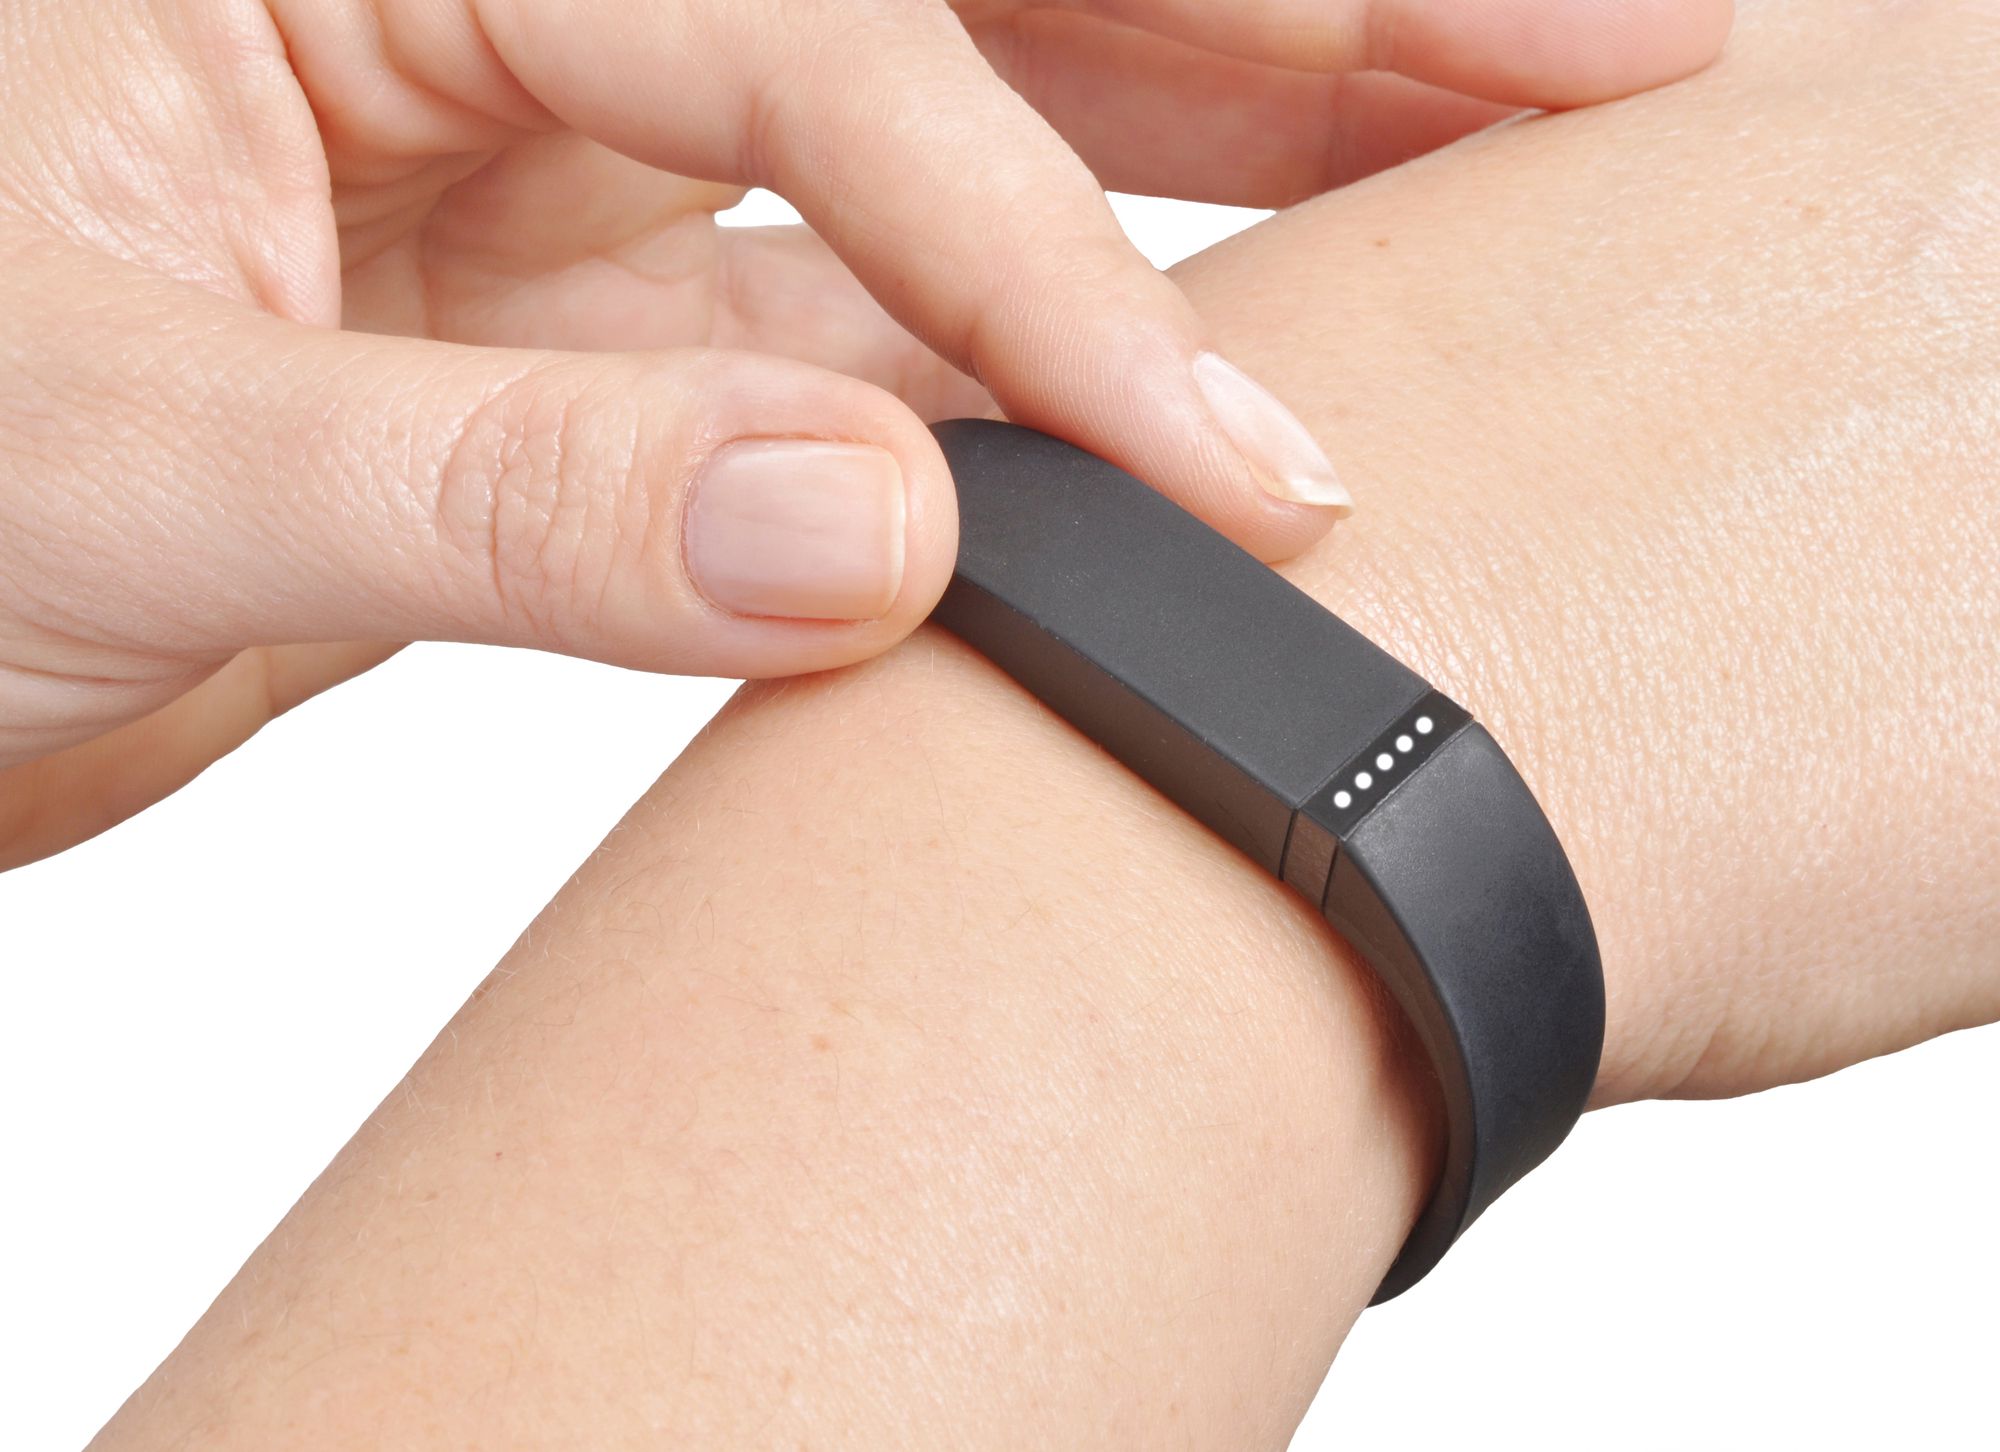
Confirm a Snug Fit: Once the band latches are engaged, perform a quick visual and tactile inspection to confirm that the replacement band is securely attached. Check for any signs of misalignment or instability, and gently wiggle the band to verify its firm connection to the device.
-
Test the Band's Security: To further validate the attachment, lightly tug on the replacement band to ensure that it remains firmly in place. This gentle test helps confirm that the band latches have effectively secured the band to the Fitbit Charge, minimizing the risk of accidental detachment during wear.
-
Verify Comfort and Flexibility: With the replacement band securely attached, assess its comfort and flexibility by gently bending and adjusting the band on your wrist. Ensure that it sits comfortably and does not cause any discomfort or irritation, allowing for unrestricted movement throughout the day.
By following these steps, you can confidently attach the new replacement band to your Fitbit Charge, elevating the device with a fresh and personalized look. This seamless transition not only enhances the aesthetic appeal of your wearable device but also ensures a comfortable and secure fit for your daily activities. With the new band in place, you are now poised to fully enjoy the customized experience offered by your revamped Fitbit Charge.
Tips for Band Replacement
Embarking on the journey of band replacement for your Fitbit Charge opens the door to a world of customization and personalization. As you navigate this process, consider the following tips to ensure a seamless and rewarding experience:
-
Proper Maintenance: After attaching a new replacement band, periodically inspect the attachment points and latches to ensure they remain free of debris and damage. Regular maintenance helps preserve the integrity of the band attachment mechanism, contributing to a longer-lasting and reliable fit.
-
Band Rotation: If you have multiple replacement bands, consider rotating them periodically to distribute wear and tear evenly. This practice not only extends the lifespan of each band but also allows you to effortlessly adapt your Fitbit Charge to different activities and occasions.
-
Band Sizing: When selecting a replacement band, carefully consider the sizing options to ensure a comfortable and secure fit. Some bands offer adjustable closures or multiple size options, allowing you to tailor the fit to your wrist dimensions for optimal comfort and functionality.
-
Cleaning and Care: Depending on the material of your replacement band, adhere to the manufacturer's cleaning and care instructions to maintain its appearance and functionality. Proper care prolongs the vibrancy and integrity of the band, preserving its visual appeal and comfort.
-
Explore Accessories: Enhance the versatility of your Fitbit Charge by exploring compatible accessories, such as band embellishments, protective cases, or decorative charms. These accessories provide an additional layer of personalization and allow you to further express your unique style through your wearable device.
-
Consider Activity-Specific Bands: If you engage in diverse activities, consider investing in activity-specific replacement bands tailored to your pursuits. For instance, a breathable, sweat-resistant band may be ideal for workouts, while a water-resistant band suits aquatic activities, ensuring that your Fitbit Charge remains a reliable companion across various endeavors.
-
Community and Reviews: Engage with the Fitbit community and seek out user reviews when exploring replacement bands. Valuable insights from fellow users can offer practical guidance and firsthand experiences, helping you make informed decisions and discover bands that align with your specific needs and preferences.
By integrating these tips into your band replacement journey, you can maximize the value and enjoyment derived from customizing your Fitbit Charge. Each tip serves as a valuable consideration, contributing to a tailored and refined experience that reflects your individual style, activities, and maintenance practices. With these insights in mind, you are well-equipped to embark on the band replacement process with confidence and creativity, unlocking the full potential of your Fitbit Charge.
Conclusion
In conclusion, the process of band replacement for the Fitbit Charge transcends mere functionality; it embodies a journey of personalization, self-expression, and enhanced user experience. By navigating the steps of removing the original band, selecting a replacement band, and attaching the new band, you have embarked on a transformative endeavor that elevates the aesthetics and functionality of your wearable device.
The act of removing the original band symbolizes a departure from the standard and sets the stage for embracing individuality. Whether driven by a desire for enhanced comfort during workouts, a fashion-forward statement, or a reflection of personal style, the choice to replace the band is a deliberate step towards a more personalized Fitbit Charge experience.
Selecting a replacement band entails a thoughtful consideration of material, style, activity-specific features, interchangeability, and compatibility. This decision-making process empowers users to align their wearable device with their unique preferences, ensuring that the Fitbit Charge becomes an extension of personal style and an adaptable companion for diverse activities.
Attaching the new replacement band represents the culmination of this journey, as the device is infused with a fresh identity that resonates with the user's individuality. The seamless integration of the replacement band not only enhances the visual appeal of the Fitbit Charge but also ensures a comfortable and secure fit, optimizing its functionality for daily wear and various activities.
As you embrace the band replacement process, the tips provided serve as valuable companions, offering practical guidance and insights to enrich the journey. From proper maintenance and band rotation to exploring accessories and considering activity-specific bands, these tips empower users to maximize the value and versatility of their Fitbit Charge, fostering a customized experience that evolves with their lifestyle and preferences.
Ultimately, the band replacement journey transcends the mere act of swapping bands; it represents a celebration of personal style, a commitment to comfort and functionality, and an ongoing exploration of customization. By infusing your Fitbit Charge with a replacement band that reflects your individuality, you have transformed a functional device into a personalized statement that accompanies you on your daily endeavors.
As you embark on this band replacement adventure, remember that your Fitbit Charge is more than just a wearable device; it is a canvas for self-expression, a reflection of your unique style, and a companion on your journey towards a more personalized and enriched lifestyle.