Introduction
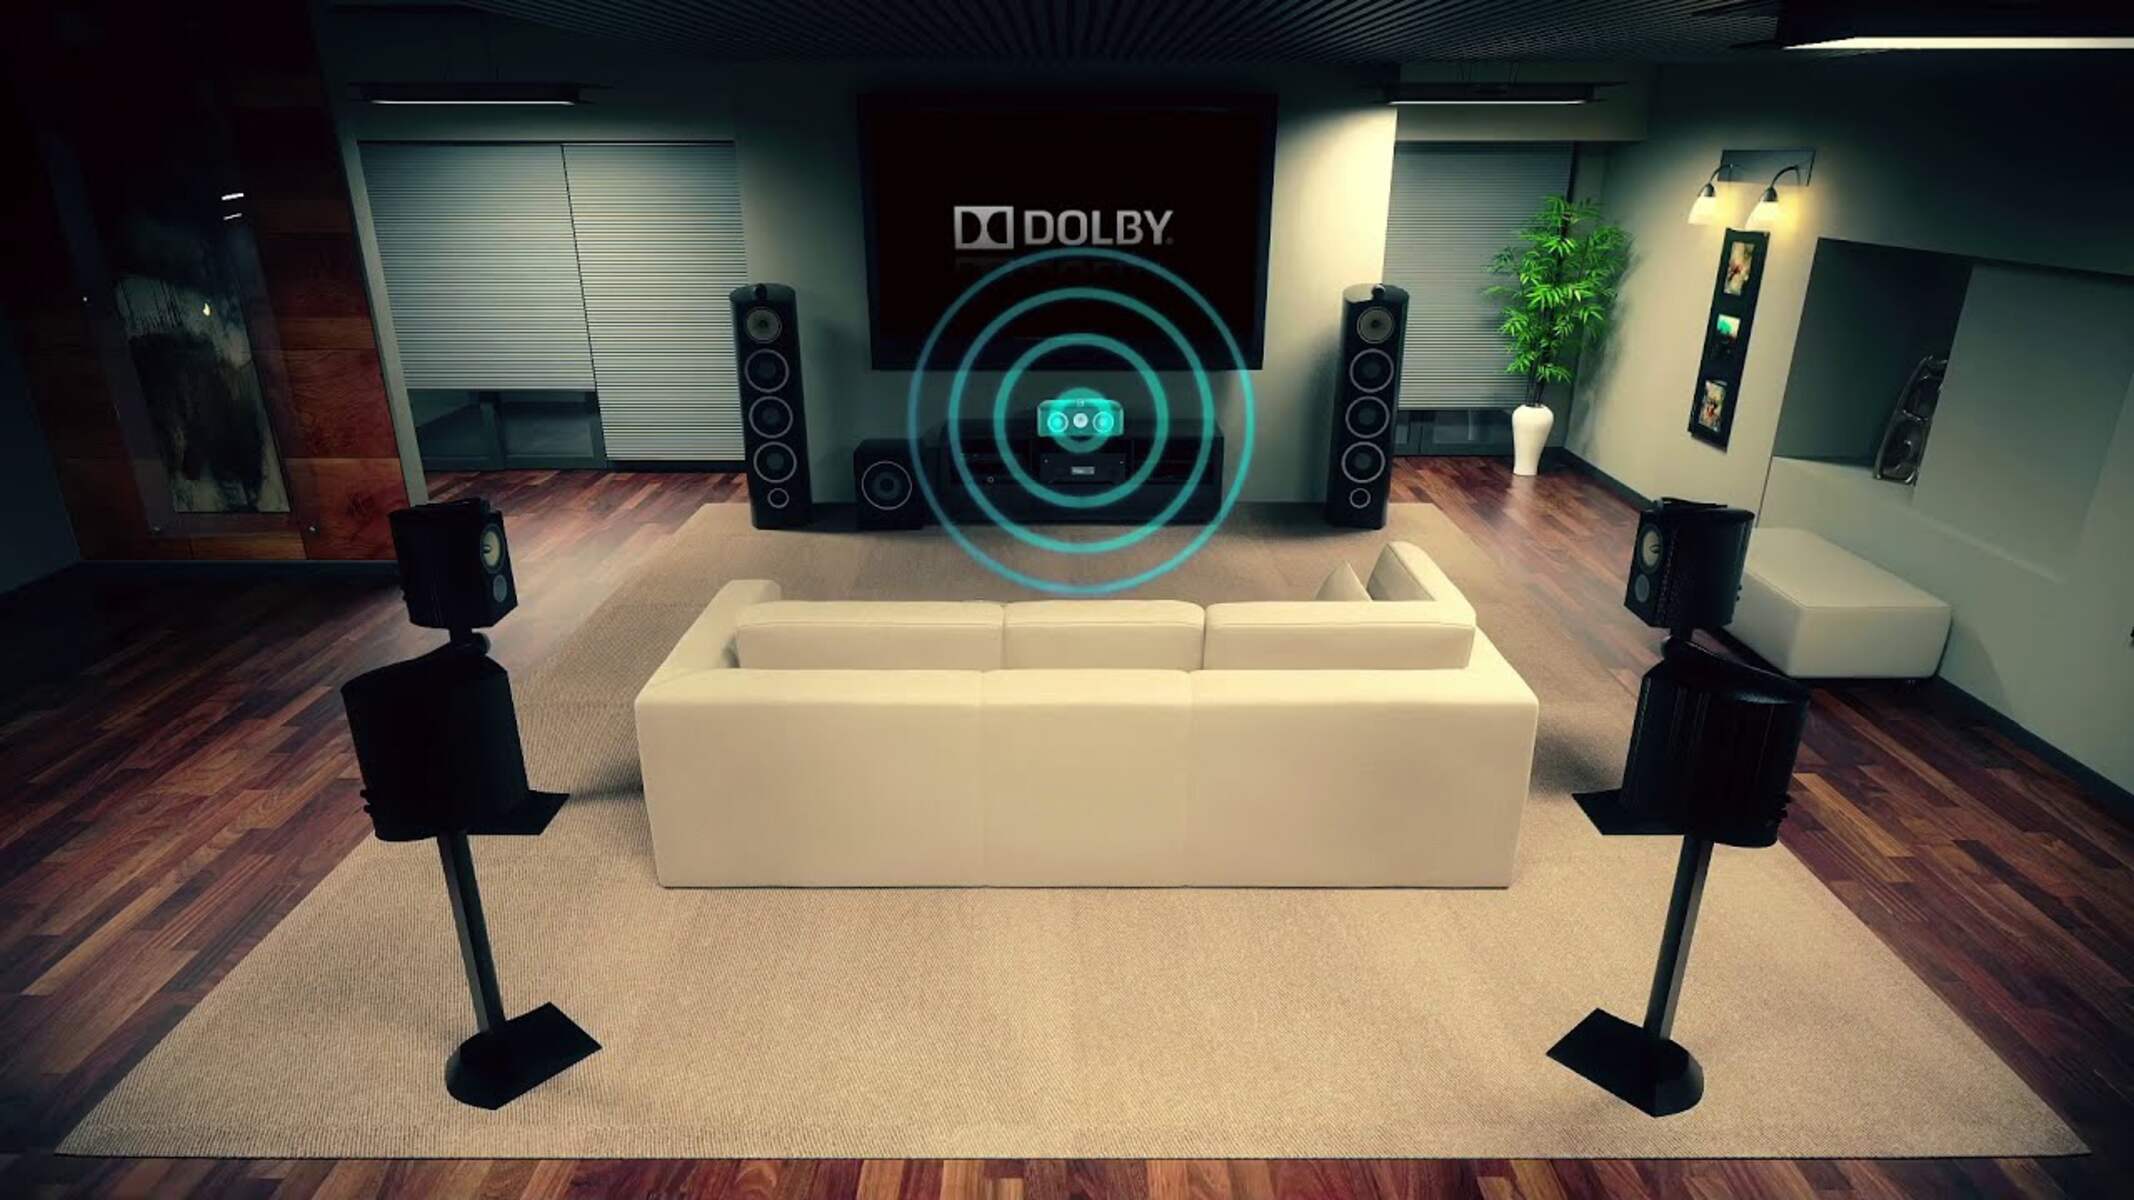
Welcome to the world of immersive audio experience with a 7.1 surround sound system! Whether you’re a movie enthusiast, a gamer, or a music lover, a 7.1 surround sound system can take your audio enjoyment to the next level. By having speakers strategically placed around your room, you can create a truly immersive audio experience that makes you feel like you’re right in the middle of the action.
In this guide, we will walk you through the step-by-step process of setting up your very own 7.1 surround sound system. From choosing the right speakers to adjusting the levels, we will cover all the necessary steps to help you achieve the optimal audio setup.
But before we dive into the technical details, let’s first understand what a 7.1 surround sound system is. A 7.1 surround sound system consists of a combination of speakers and amplifiers that work together to reproduce multi-channel audio. The ‘7’ in 7.1 stands for the number of main speakers that are used in the setup, while the ‘1’ represents the presence of a subwoofer for low-frequency sound reproduction.
Unlike traditional stereo systems that only use two speakers to create a sense of depth and directionality, a 7.1 surround sound system takes it a step further by adding additional surround and overhead speakers. This configuration allows for a more immersive and realistic audio experience, with sound coming from all directions and even above you.
Now that you have a basic understanding of what a 7.1 surround sound system entails, let’s dive deeper into the specific steps involved in setting up your own system. Whether you’re a tech-savvy enthusiast or a beginner, this guide will provide you with the knowledge and confidence to create a top-notch audio setup in your own home.
Overview of a 7.1 Surround Sound System
Before we delve into the nitty-gritty of setting up a 7.1 surround sound system, let’s take a closer look at the key components that make up this audio setup.
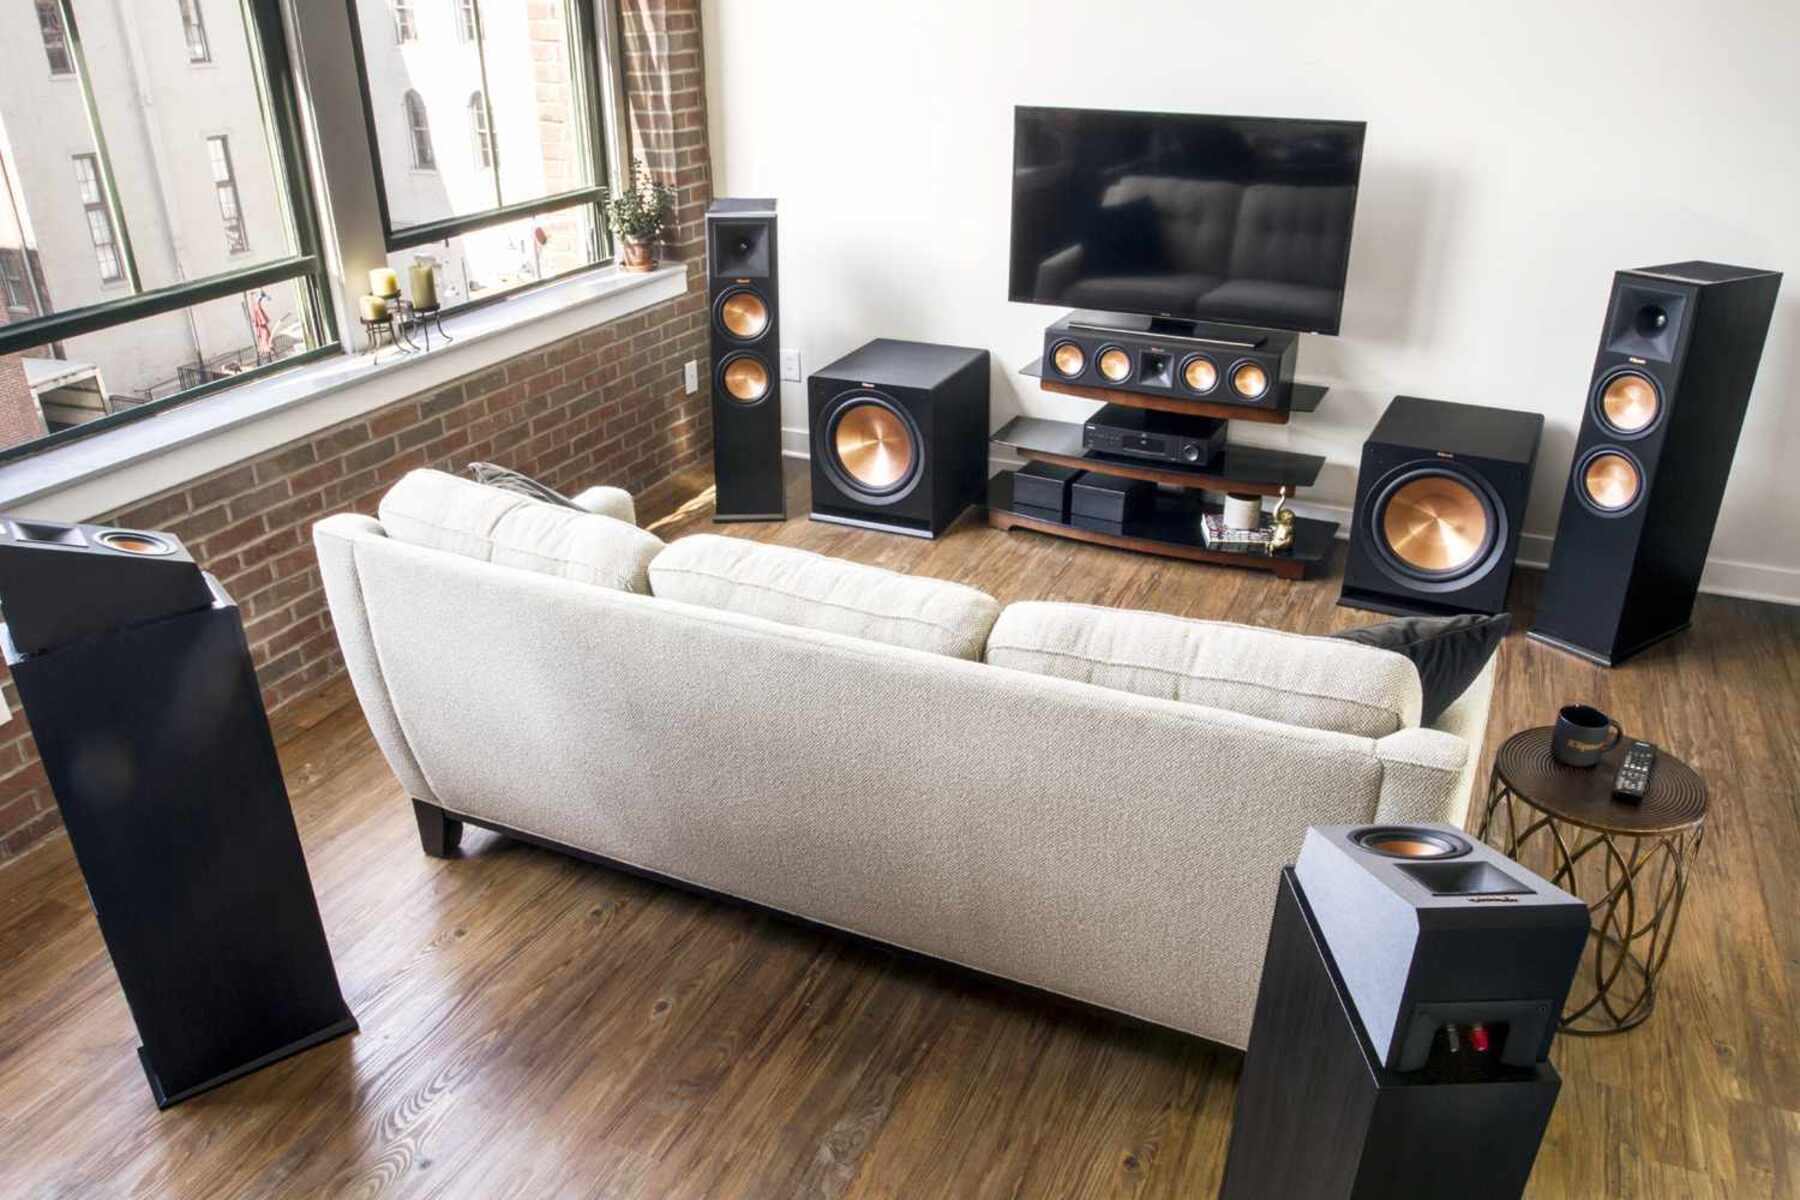
Main Speakers: The main speakers in a 7.1 surround sound system consist of three primary channels – the front left, center, and front right speakers. These speakers handle the majority of the audio content, including dialogue, music, and sound effects. They are positioned in front of the listener to create a cohesive soundstage.
Surround Speakers: In addition to the main speakers, a 7.1 system includes four surround speakers – two surround speakers and two rear speakers. These speakers are responsible for creating a sense of ambient sound and immersing the listener in a more realistic audio environment. They are typically placed to the sides and behind the listening area.
Subwoofer: The subwoofer is a specialized speaker designed to reproduce low-frequency sounds, such as deep bass or rumbling explosions. It adds depth and impact to the overall audio experience, providing a rich and powerful low-end presence. The subwoofer can be placed anywhere in the room, as low-frequency sounds are non-directional.
Amplifier or Receiver: To power and control the speakers, a dedicated amplifier or receiver is needed. This device receives audio signals from various sources, such as a TV, Blu-ray player, or game console, and distributes them to the appropriate speakers. It also allows you to control the volume and settings of each individual speaker.
Cabling and Connectivity: To connect all the speakers to the amplifier or receiver, various cables are used. This includes speaker wires for connecting the speakers, HDMI cables for high-quality audio transmission, and audio cables for analog connections. It is important to use high-quality cables to ensure optimal audio performance.
With a basic understanding of the components involved, you’re ready to embark on the journey of setting up your very own 7.1 surround sound system. In the following sections, we will guide you through each step of the setup process, providing detailed instructions and tips along the way.
Step 1: Choosing the Right Speakers
When it comes to setting up a 7.1 surround sound system, choosing the right speakers is crucial. The quality and compatibility of your speakers will greatly impact the overall audio experience. Here are a few factors to consider when selecting your speakers:
Speaker Types: There are various types of speakers available, including floor-standing, bookshelf, in-wall, and in-ceiling speakers. Each type has its own advantages and placement options. Floor-standing speakers offer powerful sound and are ideal for larger rooms, while bookshelf speakers are more compact and versatile. In-wall and in-ceiling speakers can be discreetly mounted and provide a clean, clutter-free look.
Speaker Frequency Range: The frequency range of the speakers determines the range of sounds they can reproduce. For a 7.1 surround sound system, it is recommended to choose speakers that have a wide frequency response, ideally ranging from 20Hz to 20kHz. A broader frequency range ensures that you can fully experience both the deep lows and crisp highs in your audio content.
Power Handling: Each speaker has its own power handling capacity, which indicates the maximum amount of power it can handle without distortion. Make sure the speakers you choose can handle the power output of your amplifier or receiver. It is advisable to have speakers with power handling slightly higher than your amplifier’s output for a better dynamic range and headroom.
Timbre Matching: To achieve a seamless and natural sound reproduction, it’s important to ensure timbre matching among all your speakers. Timbre refers to the tonal quality and character of sound produced by a particular instrument or voice. Matching the timbre of your speakers ensures that the sound seamlessly transitions from one speaker to another without any noticeable differences or missing details.
Budget and Room Size: Consider your budget and the size of your room when selecting speakers. It’s a balance between finding speakers that offer excellent sound quality within your budget and speakers that are suitable for the size and acoustics of your room. Take measurements and consider the layout of your room to determine the ideal size and positioning of your speakers.
Brand Reputation and Reviews: Researching brands and reading reviews can provide valuable insights into the quality and performance of speakers. Look for brands with a good reputation for producing high-quality audio equipment. Reading reviews from other users can also give you an idea of the pros and cons of specific speakers.
By considering these factors, you can make an informed decision and choose speakers that best suit your needs and preferences. In the next step, we will guide you through setting up the front left and right speakers, which are essential for creating a solid foundation for your 7.1 surround sound system.
Step 2: Setting Up the Front Left and Right Speakers
The front left and right speakers are the cornerstone of your 7.1 surround sound system, providing the main audio output and creating a wide soundstage. Proper placement and positioning of these speakers are essential to achieve accurate sound imaging and a balanced audio experience. Follow these steps to set up your front left and right speakers:
1. Placement: Start by placing the front left and right speakers on either side of your TV or display. The ideal placement is to position them at ear level, slightly angled towards the listening area. This helps to create a spacious soundstage and ensures the sound is directed towards your ears.
2. Distance from the Wall: Ensure that the front speakers are not pushed against the wall or placed too far forward. Aim to maintain a distance of at least a few inches from the wall to allow sound waves to disperse freely and avoid any interference or distortion.
3. Leveling and Stability: Use a level to ensure that the speakers are straight and aligned horizontally. Additionally, make sure that the speakers are stable and securely positioned, avoiding any vibrations or movement that can affect the audio quality.
4. Wiring: Connect the front left and right speakers to the appropriate speaker terminals on your amplifier or receiver. Use high-quality speaker wires and ensure that they are securely connected and properly labeled to avoid any confusion or mix-ups during the setup.
5. Calibration: After connecting the speakers, you may need to calibrate them using the setup features on your amplifier or receiver. This calibration process ensures that the speaker levels, distances, and other audio settings are optimized for your specific room and listening preferences.
6. Testing: With the speakers set up and calibrated, play some audio content to test the sound output. Ensure that the sound is evenly distributed between the front left and right speakers. Listen for any imbalances, distortion, or phase cancellation issues, and make adjustments as necessary.
7. Fine-tuning: Experiment with the speaker placement by making small adjustments if needed. Moving the speakers a few inches or angling them slightly can have a significant impact on the sound imaging and overall audio performance.
Remember to follow the manufacturer’s guidelines and recommendations for your specific speakers and amplifier/receiver. Taking the time to properly set up your front left and right speakers will lay a solid foundation for the rest of your 7.1 surround sound system. In the next step, we will focus on positioning the center channel speaker, which plays a crucial role in enhancing dialogue and centralizing sound sources.
Step 3: Positioning the Center Channel Speaker
The center channel speaker is a crucial component of your 7.1 surround sound system, responsible for reproducing dialogue and centralizing sound sources. Proper positioning of the center channel speaker is essential to ensure clear and accurate sound projection. Follow these steps to position your center channel speaker:
1. Placement: The center channel speaker should be placed either directly above or below your TV or display. It should be positioned at the same height as the front left and right speakers to maintain a balanced soundstage. If placing the speaker on a stand, ensure that it is sturdy and secure.
2. Alignment: Align the center channel speaker with the front left and right speakers to maintain symmetry and coherence in the soundstage. This alignment helps create a seamless transition between speakers and delivers a natural and immersive audio experience.
3. Distance from the TV: If placing the center channel speaker above the TV, make sure it is not obstructing the view of the screen. Leave enough space between the speaker and the TV to avoid any shadows or blockages that might affect your viewing experience.
4. Angling: Tilt the center channel speaker slightly towards the listening area to direct the sound towards the listeners. This angling ensures that the dialogue and sound effects are properly projected and intelligible, enhancing the overall audio clarity.
5. Wiring: Connect the center channel speaker to the dedicated center speaker terminal on your amplifier or receiver using high-quality speaker wires. Ensure that the connections are secure to avoid any audio interruptions or distortion during playback.
6. Calibration: Use the calibration features on your amplifier or receiver to adjust the levels and integrate the center channel speaker with the rest of the speakers in your system. This calibration process ensures that the overall audio output is balanced and optimized for your listening environment.
7. Testing: Play audio content with prominent dialogue to test the performance of the center channel speaker. Ensure that the dialogue is clear, centered, and well-balanced with the other speakers. Make any necessary adjustments to the speaker levels or positioning to achieve the desired audio clarity.
8. Fine-tuning: If needed, make small adjustments to the placement or angle of the center channel speaker to further optimize the sound projection. Experiment with slight movements to find the sweet spot that delivers the best dialogue intelligibility and audio cohesion.
Properly positioning the center channel speaker is essential for an immersive surround sound experience. Paying attention to its placement, alignment, and calibration ensures that dialogue and sound sources are accurately reproduced and enhance your overall audio enjoyment. In the next step, we will focus on placing the surround speakers, which add depth and dimensionality to your surround sound setup.
Step 4: Placing the Surround Speakers
The surround speakers play a crucial role in a 7.1 surround sound system, immersing you in a three-dimensional audio experience by creating ambient sound and enveloping you from the sides and rear. Proper placement of the surround speakers is essential to achieve optimal sound effects and to enhance the overall audio immersion. Follow these steps to place your surround speakers:
1. Side Surround Speakers: The side surround speakers should be positioned on either side of the listening area, slightly above ear level. Place them at an angle, aiming towards the center of the listening area. This positioning helps create a spacious and enveloping soundstage, making the sound appear to come from the sides.
2. Rear Surround Speakers: The rear surround speakers should be placed behind the listening area, preferably equidistant from the side surround speakers. Position them at around ear level or slightly above, pointing towards the center of the listening area. This placement enhances the rear sound effects, creating a more immersive audio experience.
3. Distance from the Listener: Position the surround speakers at an equal distance from the primary listening position. Aim to maintain a balanced sound field, ensuring that the sound from the surround speakers reaches your ears at the same time, without any noticeable delay or imbalance.
4. Angle and Direction: Angle the surround speakers slightly towards the listening area. This helps direct the sound towards you and ensures better localization of sound effects. Experiment with small adjustments to find the angle that provides the most balanced and immersive surround sound experience.
5. Wiring: Connect the surround speakers to the appropriate speaker terminals on your amplifier or receiver. Use high-quality speaker wires and ensure a secure connection. Proper labeling of the cables will help you easily identify and connect the surround speakers during the setup process.
6. Calibration: Use the calibration features on your amplifier or receiver to adjust the levels and synchronize the surround speakers with the rest of the system. This calibration process optimizes the sound distribution, ensuring a cohesive and immersive audio experience.
7. Testing: Play audio content that has distinct surround sound effects to test the performance of the surround speakers. Listen for a seamless transition of sound as it moves from the front speakers to the surround speakers, creating a lifelike audio environment. Make any necessary adjustments to the levels or positioning if required.
8. Fine-tuning: If needed, make minor adjustments to the placement or angle of the surround speakers to achieve the desired surround sound effect. Fine-tune the speakers by moving them slightly or altering the direction to refine the audio experience and ensure the sound is accurately projected.
Placing the surround speakers correctly is essential for an immersive surround sound experience. The strategic placement and alignment of these speakers enhance the audio dimensionality and create a realistic sound environment that truly engages your senses. In the next step, we will guide you through the installation process of the subwoofer, which adds depth and impact to your audio setup.
Step 5: Installing the Subwoofer
The subwoofer is a critical component of a 7.1 surround sound system, responsible for reproducing low-frequency sounds and adding depth and impact to your audio setup. Proper installation of the subwoofer is essential to achieve a balanced and immersive audio experience. Follow these steps to install your subwoofer:
1. Placement: Start by identifying a suitable location for the subwoofer. As low-frequency sounds are non-directional, you have flexibility in its placement. Ideally, place the subwoofer on the front wall, between the front left and right speakers, or anywhere in the front half of the room. Experiment with different positions to find the spot that provides the best bass response and integration with the rest of the speakers.
2. Distance from the Wall: Avoid placing the subwoofer directly against a wall. Leave some distance between the subwoofer and the wall to prevent the buildup of excessive bass and minimize any potential vibrations or distortion. The precise distance may vary depending on the acoustics of your room and the specific characteristics of the subwoofer.
3. Leveling: Ensure that the subwoofer is level and stable on the floor or any other surface. Use additional padding or an isolation pad if needed to reduce vibrations and eliminate any unwanted resonances. This will ensure that the subwoofer functions optimally and delivers a clean and accurate bass response.
4. Connectivity: Connect the subwoofer to the appropriate subwoofer output on your amplifier or receiver using a high-quality subwoofer cable. Ensure that the cable is securely connected at both ends to avoid any signal loss or interference. Make sure to follow the manufacturer’s instructions regarding the correct wiring configuration for your specific subwoofer model.
5. Calibration: After connecting the subwoofer, you may need to calibrate it using the setup features on your amplifier or receiver. This calibration process ensures that the subwoofer integrates seamlessly with the rest of the speakers, and the bass levels are properly balanced for your listening environment.
6. Testing: Play audio content that has prominent low-frequency sounds or bass-heavy music to test the performance of the subwoofer. Listen for a tight and well-defined bass response that complements the overall audio output. Adjust the subwoofer level as necessary to achieve the desired balance and impact in the bass reproduction.
7. Fine-tuning: If needed, experiment with small adjustments to the subwoofer placement and settings to optimize the bass response. Moving the subwoofer a few inches, adjusting the phase control, or tweaking the crossover settings can significantly impact the performance and integration of the subwoofer with the rest of the system.
Installing the subwoofer correctly is crucial for achieving a full-bodied and immersive audio experience. By following these steps, you can ensure that the subwoofer seamlessly integrates with the rest of your 7.1 surround sound system, delivering deep, impactful bass that enhances your home theater or audio setup. In the next step, we will guide you through adjusting the speaker levels to achieve balanced audio output.
Step 6: Adjusting the Speaker Levels
Once you have set up all the speakers in your 7.1 surround sound system, it’s essential to calibrate and adjust the speaker levels to ensure a balanced audio output. Properly adjusted speaker levels enhance the overall audio experience and create a cohesive soundstage. Follow these steps to adjust the speaker levels:
1. Calibration Tools: Refer to your amplifier or receiver’s manual to identify the calibration tools available. Most modern receivers offer built-in calibration features such as an automatic speaker setup or a manual setup with a sound pressure level (SPL) meter.
2. Speaker Distance: Measure the distance from each speaker to the primary listening position. Enter these distances into your amplifier or receiver’s calibration setup. This information helps the system calculate the appropriate delay settings and time alignment for the different speakers.
3. SPL Meter Setup: If using an SPL meter, position the meter at your primary listening position, ensuring that it is positioned at ear level. Follow the instructions provided with the SPL meter to calibrate it to a reference level, usually 75dB SPL.
4. Audio Test Tones: Many amplifiers or receivers come with audio test tones that can be played through each speaker individually during the calibration process. Use the test tones to adjust the speaker levels by ear or with the assistance of the SPL meter.
5. Speaker Level Adjustments: Access the speaker level adjustment settings on your amplifier/receiver and adjust the levels for each speaker to match the desired reference level. This ensures that each speaker is outputting sound at the appropriate volume relative to the others.
6. Fine-tuning and Listening: Once you have adjusted the speaker levels, play various audio content, such as movies or music, to ensure that the sound is well-balanced and coherent. Listen for any imbalances or discrepancies in the audio output and make additional adjustments if necessary.
7. Bass Management: If your amplifier or receiver has a bass management system, configure the crossover settings for each speaker. The crossover settings determine the frequency range at which each speaker transitions to the subwoofer. Adjust these settings to achieve a smooth transition of bass frequencies between the speakers and subwoofer.
By carefully adjusting the speaker levels, you can ensure that each speaker is contributing to a well-balanced audio experience. Taking the time to calibrate and fine-tune the speaker levels will enhance the imaging, detail, and overall performance of your 7.1 surround sound system. In the next step, we will guide you through connecting the amplifier or receiver to complete the setup process.
Step 7: Connecting the Amplifier or Receiver
Connecting your amplifier or receiver properly is the final step in setting up your 7.1 surround sound system. The amplifier or receiver acts as the central hub, distributing audio signals to the various speakers in your setup. Follow these steps to connect your amplifier or receiver:
1. Placement: Choose a suitable location for your amplifier or receiver. Ensure that it is placed in a well-ventilated area, away from heat sources, and with enough space for proper cable management.
2. Power Connection: Connect the power cord of your amplifier or receiver to a power outlet. Ensure that the switch is turned off before plugging it in. Double-check the voltage and power requirements to ensure compatibility with your electrical system.
3. Input Connections: Connect the audio sources, such as a TV, Blu-ray player, gaming console, or media streaming device, to the appropriate input ports on your amplifier or receiver. Use HDMI, optical, coaxial, or analog audio cables, depending on the available options and the capabilities of your audio sources.
4. Speaker Connections: Connect the speaker wires from each speaker to the corresponding speaker terminals on your amplifier or receiver. Ensure that the polarities are correctly matched (positive to positive, negative to negative) to avoid any phase cancellation or distortion.
5. Subwoofer Connection: Connect the subwoofer output on your amplifier or receiver to the input on your subwoofer. This can be done using a dedicated subwoofer cable or through the use of RCA cables, depending on the specific connections available on your equipment.
6. Calibration and Configuration: Access the setup menu on your amplifier or receiver to configure the audio settings, speaker distances, levels, and other parameters. Follow the on-screen instructions or refer to the user manual for detailed guidance on calibrating and configuring your specific model.
7. Test and Troubleshoot: Once the connections and configuration are complete, test your setup by playing different types of audio content. Ensure that audio is being output from the correct speakers, and all channels are functioning as expected. Address any issues or troubleshooting needs that may arise during this testing phase.
8. Cable Management: Organize the cables by using cable ties, clips, or cable conduits to ensure a clean and clutter-free setup. Proper cable management not only improves the aesthetics but also simplifies future maintenance or changes to your audio system.
By carefully connecting your amplifier or receiver, you complete the physical setup of your 7.1 surround sound system. This central component ensures seamless audio distribution and control, culminating in a fully functional surround sound experience. In the next step, we will provide some final testing and troubleshooting tips to ensure optimal performance.
Step 8: Testing and Troubleshooting
Once you have completed the setup of your 7.1 surround sound system, it’s crucial to thoroughly test the system and address any potential issues or troubleshooting needs. Proper testing ensures that your system is functioning optimally and delivers the desired audio experience. Here are some steps you can take to test and troubleshoot your setup:
1. Audio Source Testing: Play various types of audio content, such as movies, music, or games, to test the performance and accuracy of the audio reproduction. Listen for clarity, balance, and accurate directionality of sound effects or instruments.
2. Channel Identification: Confirm that the sound is being correctly reproduced by each speaker by playing test tones or audio clips that specifically identify and play through each channel. This helps identify any issues with speaker wiring, placement, or configuration.
3. Dialogue Intelligibility: Pay attention to the clarity of dialogue in movies or TV shows. Adjust the center channel speaker level if necessary to ensure clear and intelligible speech without being overpowered by other sounds or effects.
4. Bass Response: Evaluate the performance of the subwoofer and its integration with the rest of the speakers. Listen for a balanced and impactful bass response, ensuring that low-frequency sounds are reproduced accurately without overpowering or distorting the audio.
5. Surround Sound Experience: Focus on the surround and rear speakers to assess the enveloping and immersive sound experience. Check for the proper placement and directionality of sound effects, ensuring they are seamless and accurately positioned in the surround field.
6. Connectivity and Signal Quality: Monitor the connections between the amplifier or receiver and the audio sources to ensure stable and reliable signal transmission. Check for any loose connections or interference that may affect the audio quality.
7. Troubleshooting: If you encounter any issues during testing, refer to the troubleshooting section of the user manual for your amplifier or receiver. Common issues include speaker phase mismatches, incorrect calibration settings, or audio source compatibility problems. Follow the recommended steps to troubleshoot and resolve these issues.
8. Firmware and Software Updates: Check for firmware or software updates for your amplifier or receiver. These updates may address known issues, improve performance, or introduce new features. Follow the manufacturer’s instructions to ensure your system is up to date.
9. Professional Help: If you are unable to resolve any persistent issues or if you prefer expert assistance, consider consulting a professional audio technician or installer. They can provide additional support, specialized equipment, and expertise to optimize your surround sound system.
By thoroughly testing your 7.1 surround sound system, addressing any troubleshooting needs, and ensuring proper configuration, you can enjoy an immersive and high-quality audio experience. Regular maintenance and periodic testing will help maintain the performance of your system over time. Now, sit back, relax, and immerse yourself in the captivating soundstage of your very own 7.1 surround sound system!
Conclusion
Congratulations on successfully setting up your 7.1 surround sound system! Through careful speaker selection, placement, and calibration, you have created a captivating audio experience that brings movies, games, and music to life. Your dedication to optimizing each aspect of the setup, from choosing the right speakers to adjusting levels and troubleshooting, has resulted in a truly immersive surround sound experience.
A properly configured 7.1 surround sound system envelops you in rich and detailed audio, creating a sense of depth and realism that enhances your viewing and listening pleasure. The front left and right speakers form a solid foundation, while the center channel speaker enhances dialogue clarity. The surround and rear speakers add spatial dimensionality, and the subwoofer injects depth and impact with its low-frequency reproduction.
Remember to periodically check and recalibrate your system to ensure optimal performance. Stay up to date with any firmware or software updates to take advantage of enhancements and new features that may be released for your amplifier or receiver.
Continue to explore and enjoy your favorite movies, games, and music, immersing yourself in the captivating soundstage of your 7.1 surround sound system. Experiment with different audio content to fully appreciate the dynamic range, precise imaging, and enveloping surround sound experience that your setup provides.
If ever in doubt, refer to the instructions provided with your equipment or consult the user manual for your specific amplifier or receiver. Don’t hesitate to seek professional help if you encounter persistent issues or if you want to further fine-tune your system.
With your 7.1 surround sound system, you have unlocked a new level of audio enjoyment in your home. Get ready to be fully immersed in the sights and sounds of your favorite movies, games, and music like never before!