Introduction
Replacing a traditional thermostat with a smart thermostat can be a game-changer for your home. Not only does it offer increased convenience and control, but it can also lead to energy savings and improved comfort. With the ability to adjust the temperature remotely, create customized schedules, and even integrate with other smart devices, a smart thermostat is a valuable addition to any modern household.
In this article, we will guide you through the process of replacing your old thermostat with a smart thermostat. We will provide detailed step-by-step instructions, along with helpful tips and troubleshooting advice, to ensure a successful installation. Whether you’re a DIY enthusiast looking to upgrade your home or simply want to take advantage of the benefits of a smart thermostat, this guide is here to help.
Before we dive into the installation process, it’s important to note that while the steps may vary slightly depending on the brand and model of your smart thermostat, the general principles remain the same. It’s always recommended to consult the manufacturer’s instructions specific to your thermostat to ensure a smooth installation process.
Now, let’s explore the key factors to consider when choosing the right smart thermostat for your home.
Choosing the Right Smart Thermostat
When it comes to selecting a smart thermostat, it’s important to consider your specific needs and the compatibility with your heating and cooling system. Here are some factors to keep in mind:
- Compatibility: Check if your heating and cooling system is compatible with the smart thermostat you’re considering. Most smart thermostats are designed to work with conventional HVAC systems, but if you have a unique or older setup, you may need to find a thermostat specifically designed for it.
- Features: Different smart thermostats offer a range of features. Consider what features are important to you. Do you want voice control, geofencing, learning capabilities, or energy reports? Make a list of the features you desire to help narrow down your options.
- Design: Smart thermostats come in various designs, sizes, and colors. Consider how the thermostat will fit with your home’s décor. Some thermostats have large touchscreens for easy control, while others have a more minimalist appearance.
- Brand and Compatibility: Research different smart thermostat brands and read reviews from reliable sources. Ensure that the thermostat you choose is compatible with your home’s Wi-Fi network and any other smart devices you want to integrate it with, such as voice assistants or home automation systems.
- Price: Set a budget for your smart thermostat purchase. While some high-end models may offer advanced features, there are also affordable options that provide excellent functionality and energy savings. Remember that the long-term energy savings provided by a smart thermostat can offset the initial cost.
By considering these factors, you can make an informed decision and choose the right smart thermostat that meets your needs and preferences. Now that you have an idea of what to look for in a smart thermostat, let’s move on to the next step: gathering the necessary tools and materials.
Gathering the Tools and Materials
Before you begin the installation process, it’s essential to gather all the necessary tools and materials. Having everything on hand will make the installation smoother and more efficient. Here’s a list of what you’ll need:
- Screwdriver: A small flathead or Phillips screwdriver will be needed to remove the cover and screws holding your current thermostat in place.
- Wire Labels: It’s helpful to have some wire labels or masking tape and a pen to label the wires that will be disconnected from the old thermostat. This will make reconnecting them to the new thermostat easier.
- Voltage Tester: To ensure your thermostat’s power is turned off during the installation process, have a voltage tester handy. This tool will help you confirm whether the power is off or if there is still electricity running through the wires.
- Smart Thermostat: Of course, you’ll need the smart thermostat itself. Make sure you’ve reviewed the compatibility of the thermostat with your heating and cooling system before making a purchase.
- User Manual and Installation Guide: It’s important to have the user manual and installation guide provided by the manufacturer of the smart thermostat. These instructions will help guide you through the installation process specific to your model.
- Optional: Wire Strippers, Wire Nuts, and Electrical Tape: Depending on the wiring of your existing thermostat, you may need wire strippers to remove the insulation from the wires. Wire nuts and electrical tape can be helpful for securing and insulating any connections if needed.
- Optional: WiFi Network Information: If your smart thermostat connects to your home’s WiFi network, have your network name and password readily available. This information will be required during the setup process later on.
By having these tools and materials prepared, you’ll be ready to proceed with the installation process smoothly and minimize any unnecessary delays. Next, we’ll move on to turning off the power to ensure safety during the installation.
Turning off the Power
Before you begin removing the old thermostat, it’s crucial to turn off the power to ensure your safety and prevent any electrical mishaps. Follow these steps to turn off the power:
- Locate the Circuit Breaker: Find the circuit breaker or fuse box in your home. It is usually located in the basement, utility room, or garage. If you’re not sure where it is, consult your home’s electrical diagram or contact a professional.
- Identify the Thermostat Circuit: Look for the circuit breaker that controls the power to your heating and cooling system. It may be labeled as “Furnace,” “HVAC,” or something similar. Flip the switch associated with this circuit to the “Off” position.
- Test the Thermostat: Before proceeding, verify that the power is turned off. Set your thermostat to a different temperature and make sure the heating or cooling system does not start up.
- Double-Check with a Voltage Tester: For added safety, use a voltage tester to confirm that there is no power running through the thermostat wires. Make sure the tester indicates zero voltage before proceeding with any work.
Turning off the power is crucial to prevent any electrical accidents while working on the thermostat. Take your time to ensure that the power is off by double-checking with a voltage tester. Now that you have confirmed that the power is turned off, we can move on to the next step: removing the old thermostat.
Removing the Old Thermostat
Now that you’ve turned off the power and ensured your safety, it’s time to remove the old thermostat. Follow these steps:
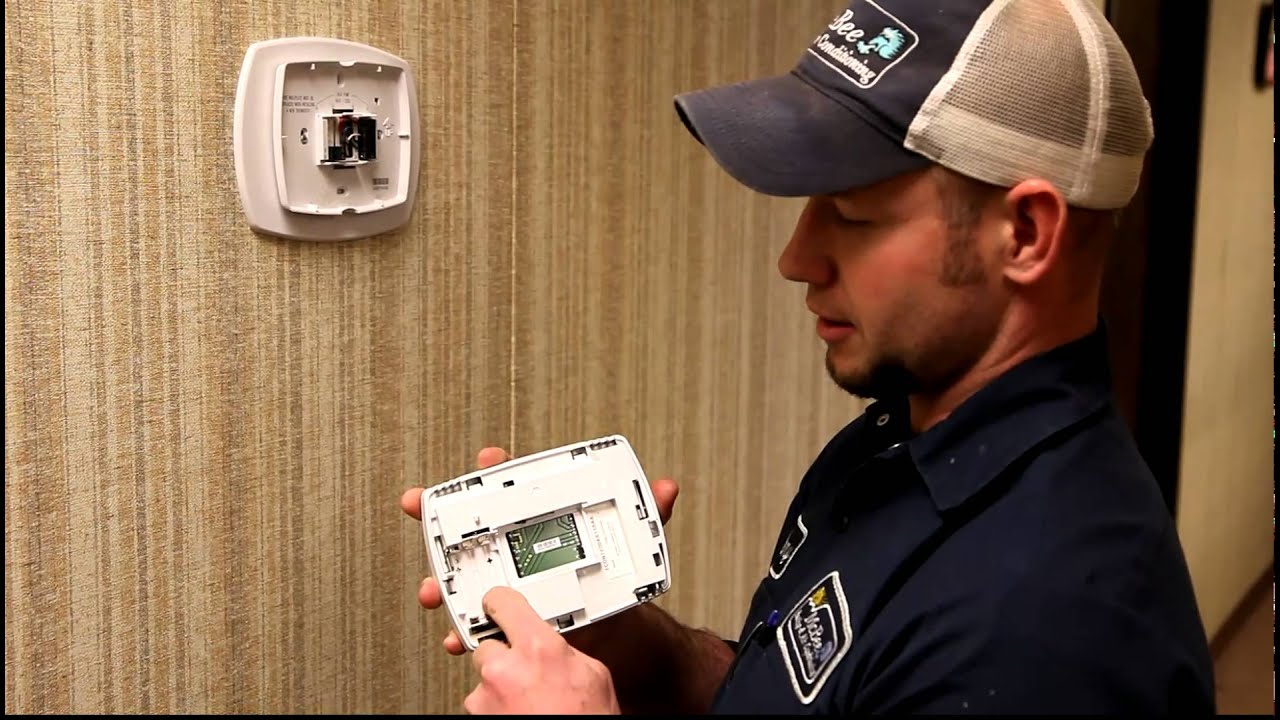
- Remove the Thermostat Cover: Gently pull off the thermostat cover to expose the wiring and thermostat base. Some covers may have screws holding them in place, so use a screwdriver if necessary.
- Take a Picture of the Wiring: Before disconnecting any wires, take a clear picture of the existing wiring. This will serve as a reference when connecting the wires to the new smart thermostat.
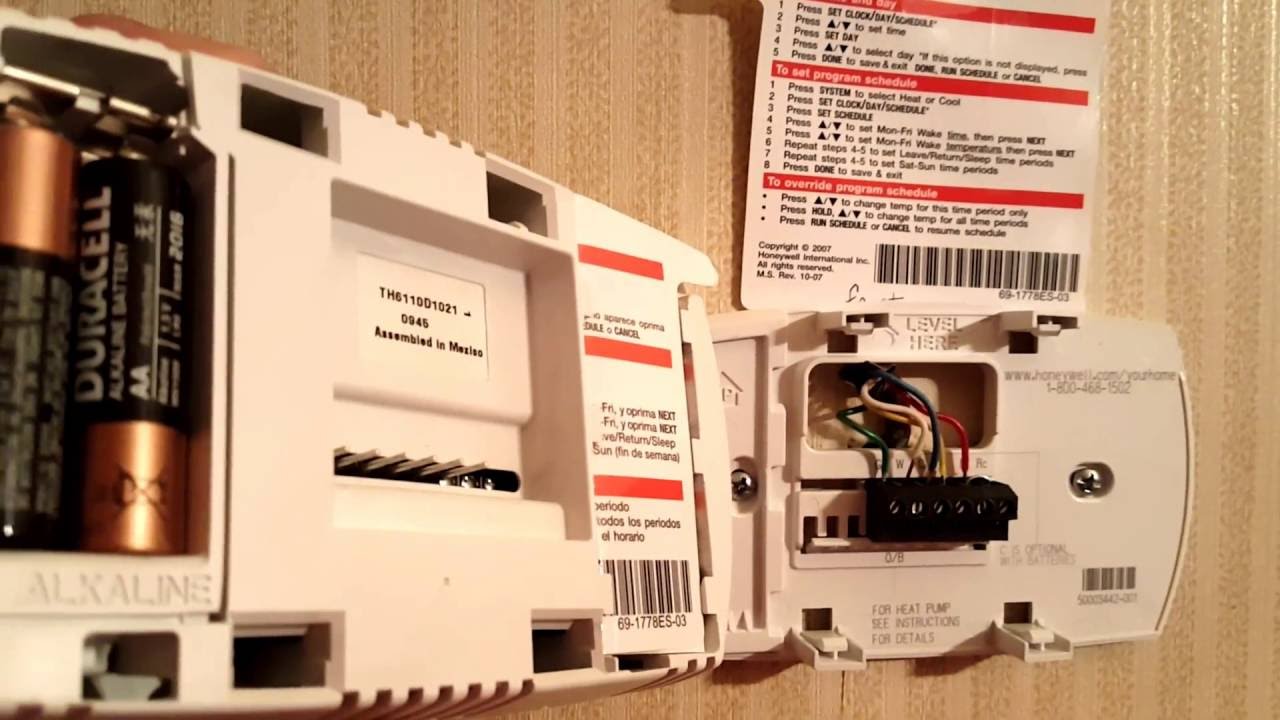
- Label and Disconnect the Wires: Carefully label each wire with the corresponding terminal letter using wire labels or masking tape. Then, unscrew the wire connectors or terminal screws to release the wires one by one.
- Remove the Thermostat Base: Once the wires are disconnected, remove the thermostat base from the wall. You may need to unscrew it from the mounting plate or use a gentle twisting motion to release it.
- Inspect and Prepare the Wall: Take a moment to inspect the wall and the area surrounding the thermostat. Clean off any dust or debris and remove any adhesive residue left by the old thermostat.
By following these steps, you’ll be able to successfully remove the old thermostat. Remember to handle the wires with care, as they may still carry voltage even with the power turned off. Keep the wires organized and refer to the picture you took earlier when connecting them to the new smart thermostat. Now, let’s move on to the exciting part – connecting the wires to the smart thermostat!
Connecting the Wires to the Smart Thermostat
With the old thermostat removed, it’s time to connect the wires to your new smart thermostat. Follow these steps:
- Refer to the Manual: Consult the user manual and installation guide provided by the manufacturer of your smart thermostat. It will outline the specific wiring instructions and terminal designations for your model.
- Match the Wires: Take a look at the wires you labeled and disconnected from the old thermostat. Match each wire to its corresponding terminal on the new thermostat. The terminals will be labeled with letters or color-coded for easy identification.
- Connect the Wires: Strip about 1/4 inch of insulation from the end of each wire using wire strippers if necessary. Insert the bare end of each wire into the appropriate terminal and tighten the screw or secure the wire connector accordingly. Ensure that the connections are secure and snug.
- Double-Check the Connections: Once all the wires are connected to the new thermostat, double-check that each wire is properly seated in its respective terminal. Carefully tug on each wire to ensure it is securely fastened.
It’s important to note that not all thermostats will have the same wiring configuration. Follow the instructions provided by the manufacturer to ensure you connect the wires correctly. If you encounter any difficulties or are unsure about the wiring, consult a professional for assistance.
Now that the wires are successfully connected, it’s time to mount and set up the smart thermostat. Continue reading to learn how to complete this crucial step.
Mounting and Setting up the Smart Thermostat
Once the wires are connected, you’re ready to mount and set up your new smart thermostat. Follow these steps:
- Choose the Mounting Location: Select a suitable location for your thermostat on an interior wall, away from direct sunlight, drafts, and sources of heat. Ensure that the location allows for easy visibility and access.
- Mount the Thermostat Base: Position the thermostat base against the wall and use screws and a screwdriver to securely mount it. Make sure the thermostat is level and straight as you tighten the screws.
- Attach the Thermostat Faceplate: If your smart thermostat has a separate faceplate, align it with the mounted base and snap it into place. Follow the manufacturer’s instructions for proper attachment.
- Restore Power: Head back to your circuit breaker or fuse box and turn the circuit for your heating and cooling system back on. This will restore power to the thermostat and allow it to function.
- Follow the Setup Process: Once the power is restored, the smart thermostat will guide you through the setup process. This typically involves choosing your language, connecting to your home’s Wi-Fi network, and configuring initial settings. Follow the on-screen prompts and enter the necessary information when prompted.
- Set Up a Schedule: Take advantage of the smart features of your thermostat by setting up a heating and cooling schedule. This allows the thermostat to automatically adjust temperatures based on your preferences and occupancy patterns, maximizing energy efficiency.
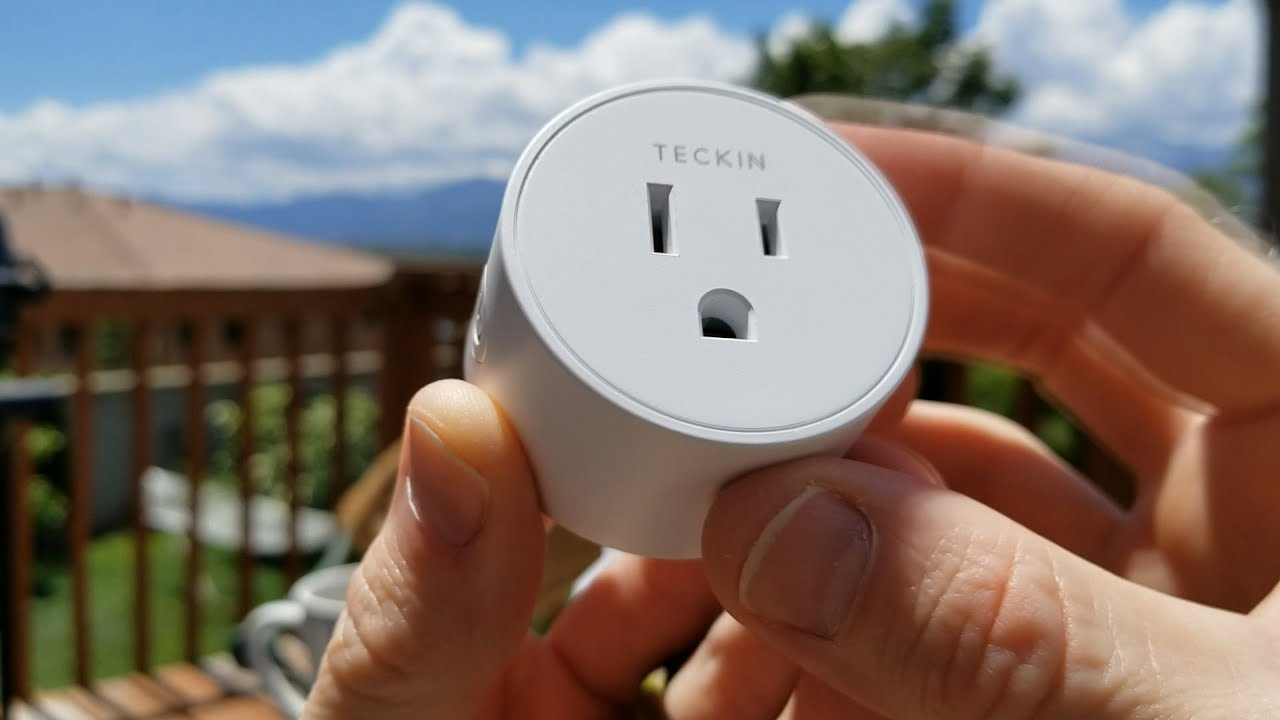
- Configure Additional Features: Explore the additional features offered by your smart thermostat, such as geofencing, voice controls, or integration with other smart home devices. Customize these settings according to your needs and preferences.
By following these steps, you’ll successfully mount and set up your smart thermostat. Be sure to refer to the manufacturer’s instructions for any specific guidelines related to your thermostat model. With the setup complete, it’s time to restore power and test your new thermostat, which we’ll cover in the next section.
Restoring Power and Testing the Thermostat
After mounting and setting up your smart thermostat, the next step is to restore power and test its functionality. Follow these steps:
- Turn On the Power: Go back to your circuit breaker or fuse box and flip the switch for your heating and cooling system back to the “On” position. This will restore power to the thermostat.
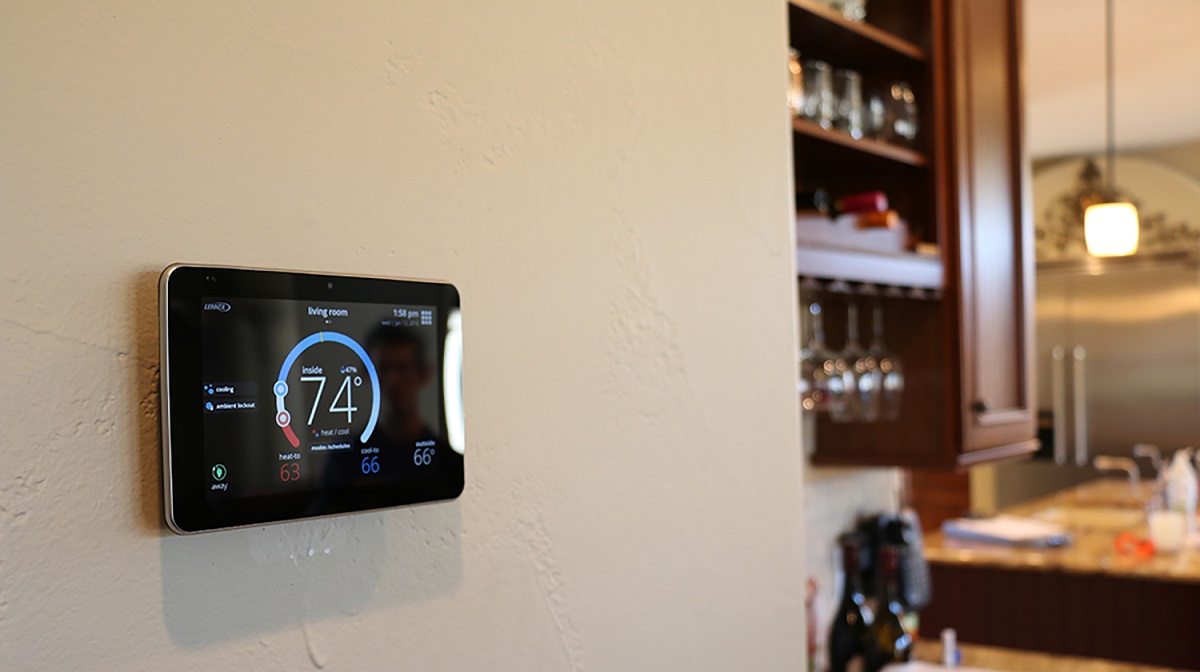
- Observe the Display: Check if the smart thermostat’s display turns on and shows the current temperature. Ensure that the display is clear and easy to read.
- Test the Temperature Control: Adjust the temperature using the controls on the thermostat and make sure the heating or cooling system responds accordingly. You should hear the system start up and feel the air change temperature as desired.
- Confirm the Fan Operation: Test the fan mode on your thermostat to ensure it functions properly. Switch the thermostat to the fan-only mode and verify that the fan starts to operate.
- Validate the System Switching: If you have both a heating and cooling system, test the system switching functionality. Adjust the temperature to trigger the switching between the heating and cooling modes. Verify that the correct system engages based on your temperature setpoint.
- Check for Any Error Messages: Monitor the thermostat display for any error messages or warnings. If you encounter any issues, consult the user manual or contact technical support for assistance.
By performing these tests, you can ensure that the smart thermostat is functioning correctly and effectively controlling your heating and cooling systems. If everything is working as expected, congratulations! Your smart thermostat installation is complete, and you can start enjoying the comfort and energy-saving features it offers.
However, if you encounter any issues or the thermostat doesn’t operate as intended, don’t hesitate to consult the troubleshooting section in the user manual or seek professional help if needed. Now that your thermostat is successfully installed and tested, let’s move on to connecting it to your Wi-Fi network.
Connecting the Smart Thermostat to Wi-Fi
Connecting your smart thermostat to your Wi-Fi network opens up a world of convenient features and remote control options. Follow these steps to connect your smart thermostat to Wi-Fi:
- Access the Settings: Use the thermostat’s interface to navigate to the settings menu. Depending on the model, this may be accessed by pressing a specific button or tapping on the touchscreen.
- Select Wi-Fi Connection: Look for the option to connect to a Wi-Fi network. It may be labeled as “Wi-Fi Setup” or something similar. Select this option to begin the Wi-Fi setup process.
- Choose Your Network: Your smart thermostat will present a list of available Wi-Fi networks. Select your home network from the list.
- Enter Network Password: If your Wi-Fi network is password-protected, enter the network password using the thermostat’s interface. Take care to enter it correctly, as it is case-sensitive.
- Connect to Wi-Fi: After entering the password, the smart thermostat will attempt to connect to your Wi-Fi network. This may take a few moments. Once the connection is established, you should see a confirmation message on the display.
- Test Connectivity: To ensure a successful connection, test the connectivity of your smart thermostat. You can do this by accessing any online features or checking if the thermostat can be controlled remotely from a connected device, such as a smartphone or tablet.
By connecting your smart thermostat to Wi-Fi, you’ll be able to control and monitor your thermostat remotely, receive regular software updates, and integrate it with other smart devices or voice assistants for a truly connected and smart home experience.
If you encounter any issues during the Wi-Fi setup process or have difficulty connecting your smart thermostat to your network, consult the user manual or reach out to tech support for troubleshooting assistance. Once your smart thermostat is successfully connected to Wi-Fi, you can proceed to configure the settings and scheduling to customize it according to your preferences.
Configuring the Settings and Scheduling
After successfully connecting your smart thermostat to Wi-Fi, it’s time to configure the settings and scheduling to tailor it to your preferences. Follow these steps to get started:
- Access the Settings Menu: Use the thermostat’s interface to navigate to the settings menu. Look for options such as “Preferences,” “Settings,” or “Configuration.”
- Set Temperature Units: Choose whether you prefer Fahrenheit or Celsius as the temperature unit for your thermostat.
- Adjust Display Settings: Customize the display settings, such as brightness and timeout duration, to suit your visibility and energy-saving preferences.
- Configure HVAC Settings: Depending on your smart thermostat model, you may have options to adjust advanced settings related to your heating and cooling system, such as minimum and maximum temperature thresholds.
- Create a Heating and Cooling Schedule: Take advantage of the smart scheduling features of your thermostat by creating a customized heating and cooling schedule. Set different temperature preferences for various times of the day and days of the week to optimize comfort and energy efficiency.
- Utilize Smart Features: Explore and enable any smart features offered by your thermostat, such as geofencing or occupancy sensors. These features can automatically adjust temperatures based on your location or detect when you’re away to save energy.
- Enable Home Automation Integration: If your smart thermostat integrates with other smart home devices or voice assistants, follow the instructions to connect and enable the integration. This allows you to control your thermostat through voice commands or automation routines.
By configuring the settings and scheduling according to your preferences, you can create a personalized and energy-efficient environment in your home. Take some time to experiment with different temperature settings and schedules to find the optimal balance between comfort and energy savings.
If you’re uncertain about any settings or need assistance with customizing your smart thermostat, refer to the user manual or contact the manufacturer’s support. With the settings and scheduling configured, you’re now ready to enjoy the full benefits of your smart thermostat.
Troubleshooting Common Issues
While smart thermostats are designed to be user-friendly and reliable, you may encounter some common issues during installation or operation. Here are a few troubleshooting tips to address these issues:
- No Power or Display: If your thermostat does not power on or the display remains blank, check if the thermostat is securely mounted and properly connected to the wiring. Verify that the circuit breaker is switched on and that there is power running to the thermostat wires.
- Inconsistent Temperature Control: If you notice inconsistent temperature control, check if the thermostat is placed in an optimal location away from heat sources or drafts. Ensure that the thermostat is not directly exposed to sunlight, as this can affect temperature readings. Calibrate the thermostat if necessary.
- Wi-Fi Connectivity Issues: If you’re experiencing Wi-Fi connectivity issues, first check if other devices in your home are connected to your Wi-Fi network. Ensure that your smart thermostat is within range of the Wi-Fi router and that there are no physical obstructions blocking the signal. Try resetting the Wi-Fi connection on the thermostat and re-entering the network password.
- Compatibility Problems: If you’re encountering compatibility issues with your heating and cooling system, consult the user manual or contact the thermostat manufacturer’s technical support. They may be able to provide guidance or suggest alternative solutions.
- Unresponsive Thermostat: If the thermostat becomes unresponsive or freezes, try resetting it by removing it from the mounting plate for a few seconds and then reattaching it. If the issue persists, check if the thermostat batteries need to be replaced or contact tech support for further assistance.
- Incorrect Temperature Readings: If the thermostat is providing incorrect temperature readings, verify that it is not placed near any heat-emitting sources. You can also try recalibrating the thermostat or adjusting its temperature offset settings if available.
- Software or Firmware Updates: Manufacturers periodically release software or firmware updates for their smart thermostats to improve performance and add new features. Make sure your thermostat is connected to Wi-Fi and set to receive automatic updates, or check the manufacturer’s website for any available updates to install manually.
If you are unable to resolve a specific issue or require further assistance, don’t hesitate to reach out to the manufacturer’s customer support. They have specialized knowledge and resources to help troubleshoot and resolve any problems you may encounter with your smart thermostat.
By troubleshooting common issues, you can ensure that your smart thermostat operates smoothly and effectively. Now that you’re equipped with troubleshooting tips, you can confidently address any challenges that may arise.
Conclusion
Upgrading to a smart thermostat can have a transformative impact on your home’s comfort, convenience, and energy efficiency. By following the step-by-step instructions provided in this guide, you can successfully replace your old thermostat with a new, smart thermostat and enjoy its multitude of benefits.
We started by discussing the importance of choosing the right smart thermostat that aligns with your heating and cooling system’s compatibility, desired features, design, brand reputation, and budget. Then, we moved on to gathering the necessary tools and materials and turning off the power to ensure safety during the installation process.
The guide then walked you through removing the old thermostat, connecting the wires to the smart thermostat, mounting and setting it up, and restoring power while testing its functionality. We also covered crucial steps, such as connecting the smart thermostat to your Wi-Fi network, configuring the settings and scheduling, and troubleshooting common issues that may arise.
By successfully installing and configuring a smart thermostat, you gain the convenience of remote control, energy-saving features, and integration with other home automation devices. The ability to adjust the temperature from anywhere, create customized schedules, and optimize energy usage can help you maximize comfort and reduce utility costs.
Remember to consult the user manual and manufacturer’s instructions specific to your smart thermostat model for any specific guidelines or procedures. If you encounter any difficulties or have questions during the installation process, don’t hesitate to seek professional assistance or reach out to the manufacturer’s support for guidance.
By embracing the technology and optimizing the settings of your smart thermostat, you take a step towards creating a more efficient and comfortable home environment. Enjoy the benefits of smart thermostat technology and the convenience it brings to your daily life.