Introduction
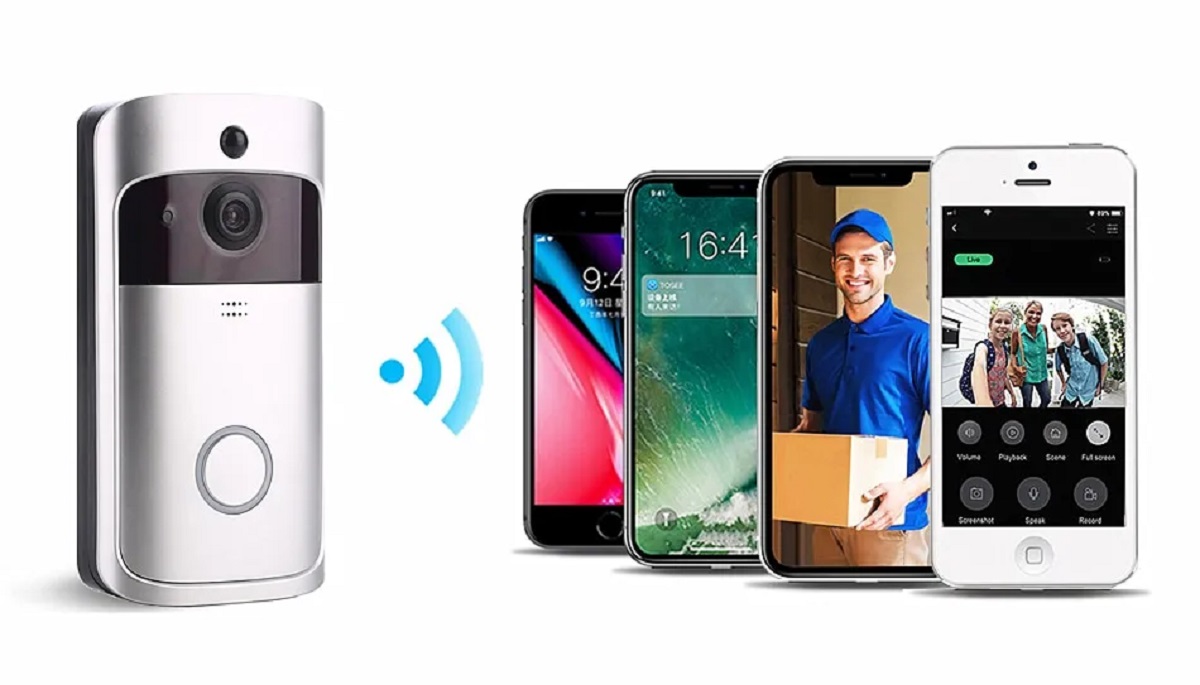
So, you've just purchased a new video doorbell and you're excited to set it up and start using it to enhance the security of your home. Connecting your video doorbell to the internet is a crucial step in this process, as it allows you to access live video feeds, receive notifications, and interact with visitors remotely. Whether you're a tech-savvy individual or someone who's new to smart home devices, this guide will walk you through the process of connecting your video doorbell to the internet in a few simple steps.
By following these instructions, you'll be able to seamlessly integrate your video doorbell into your home network, enabling you to monitor your front door from anywhere using your smartphone or other connected devices. Before diving into the setup process, it's important to ensure that you have a stable internet connection, the necessary app installed on your smartphone, and the video doorbell powered up and ready to be connected.
This guide will provide you with a clear understanding of each step, ensuring that you can complete the setup with confidence and without any technical hiccups. So, let's get started and transform your home security with the seamless connectivity of your video doorbell!
Step 1: Check Your Internet Connection
Before embarking on the process of connecting your video doorbell to the internet, it’s crucial to ensure that your home Wi-Fi network is functioning properly. A stable and reliable internet connection is essential for the seamless operation of your video doorbell, allowing you to receive real-time alerts and access live video feeds from the device.
Begin by confirming that your Wi-Fi router is operational and that other devices in your home are successfully connected to the network. This can be done by checking if other smart devices, such as smartphones, tablets, or computers, are able to access the internet without any issues.
If you encounter any connectivity issues with other devices, it’s advisable to troubleshoot your Wi-Fi network before proceeding with the setup of your video doorbell. This may involve restarting your router, checking for any firmware updates, or repositioning the router to improve signal strength in the vicinity of your front door.
Furthermore, it’s important to consider the proximity of your video doorbell to the Wi-Fi router. If the signal strength is weak in the location where you intend to install the doorbell, you may need to explore options to boost the Wi-Fi signal in that area, such as using a Wi-Fi range extender or mesh network system.
Once you have verified that your internet connection is stable and capable of supporting the video doorbell’s connectivity requirements, you can proceed to the next step with confidence, knowing that the foundation for a seamless setup has been established.
Step 2: Download the App
Before delving into the physical setup of your video doorbell, it’s essential to download the corresponding app that facilitates the device’s connectivity and functionality. Most video doorbells are accompanied by a dedicated mobile app that allows you to configure settings, receive notifications, and access the live video feed from the doorbell.
Start by visiting the app store on your smartphone, whether it’s the Apple App Store for iOS devices or the Google Play Store for Android devices. Once you’re in the app store, search for the specific app associated with your video doorbell brand and model. It’s important to ensure that you download the official app developed by the manufacturer to guarantee compatibility and access to the latest features and updates.
After locating the app, proceed to download and install it on your smartphone. Once the installation is complete, launch the app and create an account if required. This account will be used to manage and access the settings of your video doorbell, providing you with a personalized and secure experience.
Upon successfully setting up the app, you’ll be prompted to grant necessary permissions, such as access to your device’s camera and notifications. These permissions are crucial for the app to function seamlessly and provide you with a comprehensive user experience. It’s important to review and accept these permissions to ensure that the app can effectively communicate with your video doorbell and deliver alerts and video feeds to your smartphone.
By downloading the app and preparing it for use, you’re laying the groundwork for a streamlined setup process and ensuring that you can effortlessly configure and control your video doorbell from the convenience of your smartphone. With the app installed and ready to go, you’re now poised to move on to the next step of powering up your video doorbell in preparation for its connection to your home Wi-Fi network.
Step 3: Power Up the Video Doorbell
With the app downloaded and installed, it’s time to power up your video doorbell in preparation for its connection to your home Wi-Fi network. The power source for video doorbells can vary depending on the model and manufacturer. Some video doorbells are battery-powered, while others may require connection to existing doorbell wiring for continuous power.
If your video doorbell is battery-powered, begin by ensuring that the included rechargeable battery is fully charged. This may involve connecting the battery to a power source using the provided charging cable and allowing it to charge until the indicator confirms that it’s at full capacity. Once charged, insert the battery into the video doorbell following the manufacturer’s instructions, ensuring a secure fit to guarantee uninterrupted operation.
For video doorbells that require connection to existing doorbell wiring, it’s essential to turn off the power to the existing doorbell at the circuit breaker before proceeding. This precautionary measure ensures safety during the installation process and prevents any electrical mishaps. Once the power is turned off, carefully remove the old doorbell and proceed to connect the wiring to the designated terminals on your new video doorbell, following the provided instructions to ensure proper installation.
After the battery is inserted or the wiring is connected, it’s time to position and mount the video doorbell at your front door. Select an appropriate location that provides a clear view of the area you want to monitor, while also considering factors such as accessibility for maintenance and the device’s compatibility with varying weather conditions.
Once the video doorbell is securely mounted, proceed to power it up according to the manufacturer’s instructions. This may involve pressing a designated button or allowing the device to automatically power on. As the video doorbell boots up, you may observe indicator lights or hear audible cues that signify the device is ready for the next step of connecting to your home Wi-Fi network.
By successfully powering up your video doorbell, you’ve laid the groundwork for its connectivity and functionality, setting the stage for the upcoming step of establishing a secure connection to your home Wi-Fi network.
Step 4: Connect to Wi-Fi
Now that your video doorbell is powered up and ready, it’s time to establish a secure connection to your home Wi-Fi network. This step is crucial as it enables your video doorbell to communicate with your smartphone and other connected devices, allowing you to receive real-time notifications and access the live video feed from the doorbell.
Begin by launching the app you downloaded in the earlier step and following the on-screen instructions to initiate the setup process. This typically involves creating an account within the app or logging in if you’ve already created one. Once you’re logged in, the app will guide you through the process of adding a new device, in this case, your video doorbell.
During the setup process, the app will prompt you to select your home Wi-Fi network from a list of available networks. Choose your network and enter the corresponding password when prompted. It’s essential to ensure that the password is entered accurately to prevent connectivity issues and ensure a secure connection between your video doorbell and your home network.
As you proceed through the setup, the app will communicate with your video doorbell, transmitting the necessary network information to the device. This may involve the doorbell emitting visual or audible cues to indicate that it’s actively seeking and establishing a connection to your home Wi-Fi network. It’s important to be patient during this process, allowing the app and the video doorbell to complete the necessary steps to ensure a successful connection.
Once the connection is established, the app will typically confirm the successful pairing of your video doorbell with your home Wi-Fi network. At this point, you may be prompted to customize specific settings, such as the name of the device or the type of notifications you wish to receive. Take the time to review and adjust these settings according to your preferences, ensuring that the video doorbell is tailored to meet your specific needs.
By successfully connecting your video doorbell to your home Wi-Fi network, you’ve unlocked its full potential, enabling seamless communication between the device and your smartphone. With this vital step completed, you’re now ready to finalize the setup and configure the remaining settings to ensure a personalized and effective home security solution.
Step 5: Set Up the Device
With your video doorbell successfully connected to your home Wi-Fi network, it’s time to complete the setup process by configuring the device’s settings and customizing its features to suit your preferences. This step is crucial in ensuring that your video doorbell functions optimally and provides you with the desired level of security and convenience.
Begin by accessing the settings within the app to explore the various options available for your video doorbell. This may include adjusting motion detection sensitivity, setting up activity zones to focus on specific areas, and customizing the type and frequency of notifications you wish to receive on your smartphone.
Take the time to familiarize yourself with the app’s interface and the control it provides over your video doorbell. Depending on the model and manufacturer, you may have access to additional features such as two-way audio communication, night vision settings, and the ability to review recorded footage captured by the doorbell’s camera.
Consider integrating your video doorbell with other smart home devices or platforms, if applicable. Many video doorbells offer compatibility with popular smart home ecosystems, allowing you to enhance your overall home security and automation capabilities. This may involve linking your video doorbell to voice assistants, smart displays, or other security devices to create a comprehensive and interconnected home security system.
Test the functionality of your video doorbell by simulating various scenarios, such as triggering motion detection or initiating a test call to assess the audio and video quality. This hands-on approach allows you to fine-tune the settings and ensure that the device meets your expectations in real-world usage.
Lastly, consider exploring any additional features or subscription plans offered by the manufacturer to further enhance the capabilities of your video doorbell. This may include cloud storage for recorded footage, extended warranty options, or advanced security features that provide added peace of mind.
By thoroughly setting up your video doorbell and tailoring its features to align with your specific requirements, you’re maximizing the value and utility of this essential home security device. With the setup process complete, you can now enjoy the convenience and peace of mind that come with seamlessly integrating your video doorbell into your home security ecosystem.
Conclusion
Congratulations! You’ve successfully navigated the process of connecting your video doorbell to the internet, unlocking a new level of convenience and security for your home. By following the simple yet crucial steps outlined in this guide, you’ve empowered yourself to monitor your front door with ease and stay informed about any activity in your home’s vicinity, whether you’re at home or away.
Ensuring that your internet connection is stable and capable of supporting the video doorbell’s connectivity requirements sets the groundwork for a seamless setup process. By confirming the functionality of your home Wi-Fi network and addressing any potential connectivity issues, you’ve laid a solid foundation for the successful integration of your video doorbell.
Downloading the dedicated app for your video doorbell and preparing it for use on your smartphone is a pivotal step in streamlining the setup process. By familiarizing yourself with the app’s interface and features, you’ve gained the ability to control and customize your video doorbell to suit your specific security needs and preferences.
Powering up the video doorbell and connecting it to your home Wi-Fi network are essential steps that ensure the device is ready to provide you with real-time alerts and access to live video feeds. By carefully following the manufacturer’s instructions and ensuring a secure and stable connection, you’ve enabled seamless communication between the video doorbell and your smartphone, creating a robust home security solution.
Completing the setup process by configuring the device’s settings and exploring its features allows you to maximize the utility of your video doorbell. By customizing motion detection, adjusting notification settings, and exploring integration with other smart home devices, you’ve personalized your home security system to suit your unique requirements.
As you embark on this journey of enhancing your home security with a connected video doorbell, remember that ongoing maintenance and periodic checks are essential to ensure its continued functionality. Stay informed about firmware updates, review the device’s performance, and explore additional features offered by the manufacturer to further enhance your home security setup.
With your video doorbell seamlessly connected to the internet and tailored to meet your needs, you’re now equipped to enjoy the peace of mind and convenience that come with modern home security solutions. Embrace the power of connectivity and technology as you safeguard your home and create a secure environment for you and your loved ones.